- Welcome to the Kancolle Wiki!
- If you have any questions regarding site content, account registration, etc., please visit the KanColle Wiki Discord
Difference between revisions of "Spring 2025 Event/E-2"
Jigaraphale (talk | contribs) |
|||
| (21 intermediate revisions by 5 users not shown) | |||
| Line 23: | Line 23: | ||
|boss_easy= 600 TP + 2648 HP | |boss_easy= 600 TP + 2648 HP | ||
|boss_casual= 480 TP + 1584 HP | |boss_casual= 480 TP + 1584 HP | ||
| − | |phase_1_boss= {{EnemyLink|Ra- | + | |phase_1_boss= {{EnemyLink|Destroyer Ra-Class Initial Model}} |
|phase_2_boss= {{EnemyLink|Submarine Seerfish Water Demon}} | |phase_2_boss= {{EnemyLink|Submarine Seerfish Water Demon}} | ||
|rewards = E-2 | |rewards = E-2 | ||
| Line 37: | Line 37: | ||
|title = E-2 Branching Rules (Start Points) ▼/▲ | |title = E-2 Branching Rules (Start Points) ▼/▲ | ||
|id = 60-2a | |id = 60-2a | ||
| − | |0 -> 1 = * Single Fleet | + | |0 -> 1 = * Single Fleet / Striking Force Fleet |
| − | * [[File:Spring_2025_Event_Tag_2.png]] 1st Fleet (''' | + | * [[File:Spring_2025_Event_Tag_2.png]] 1st Fleet ('''Medium / Hard''' only) |
| − | |0 -> 2 = * | + | |0 -> 2 = * CTF / STF / TCF |
| − | * [[File:Spring_2025_Event_Tag_3.png]] 5th Fleet (''' | + | * [[File:Spring_2025_Event_Tag_3.png]] 5th Fleet ('''Medium / Hard''' only) |
}} | }} | ||
{{MapBranchingTable | {{MapBranchingTable | ||
| Line 54: | Line 54: | ||
|C/battle -> G/pink = * Does not meet the requirements to go to H | |C/battle -> G/pink = * Does not meet the requirements to go to H | ||
|C/battle -> H/battle = * Meet '''ALL''' of the following requirements: | |C/battle -> H/battle = * Meet '''ALL''' of the following requirements: | ||
| − | ** | + | ** Amount of CL ≥ 1 |
| − | ** | + | ** Amount of DD ≥ 2 |
|E/empty -> F/pink, F1/battle = Active Branching | |E/empty -> F/pink, F1/battle = Active Branching | ||
|F/pink -> F2/battle = * Fixed Route | |F/pink -> F2/battle = * Fixed Route | ||
|H/battle -> I/battle = * Fixed Route | |H/battle -> I/battle = * Fixed Route | ||
|I/battle -> J/empty = * Fail the LoS check | |I/battle -> J/empty = * Fail the LoS check | ||
| − | |I/battle -> K/battle = * Pass the LoS check | + | |I/battle -> K/battle = * Pass the LoS check (Cn2 = 41~45 '''Hard''') |
}} | }} | ||
{{MapBranchingTable | {{MapBranchingTable | ||
| Line 68: | Line 68: | ||
|2 -> H/battle = * Does not meet the requirements to go to L | |2 -> H/battle = * Does not meet the requirements to go to L | ||
|2 -> L/empty = * Meet '''ALL''' of the following requirements: | |2 -> L/empty = * Meet '''ALL''' of the following requirements: | ||
| − | ** [CTF/STF] Amount of CL ≥ 2 | + | ** [CTF/STF] Amount of CL + CT ≥ 2 |
** If Fast Fleet, then amount of DD + DE ≥ 3 | ** If Fast Fleet, then amount of DD + DE ≥ 3 | ||
** If Slow Fleet, then amount of DD + DE ≥ 4 | ** If Slow Fleet, then amount of DD + DE ≥ 4 | ||
| Line 74: | Line 74: | ||
|F/pink -> F2/battle = * Does not meet the requirements to go to R | |F/pink -> F2/battle = * Does not meet the requirements to go to R | ||
|F/pink -> R/battle = * Meet '''ALL''' of the following requirements: | |F/pink -> R/battle = * Meet '''ALL''' of the following requirements: | ||
| − | ** Amount of CA ≥ 2 | + | ** Amount of CV(B) = 0 |
| + | ** Amount of CA + Ootomari ≥ 2 | ||
** Amount of CL ≥ 2 | ** Amount of CL ≥ 2 | ||
| − | ** | + | ** Amount of DD ≥ 3 |
|H/battle -> L/empty = * Fast Fleet | |H/battle -> L/empty = * Fast Fleet | ||
* ??? | * ??? | ||
| Line 82: | Line 83: | ||
|M/battle -> D/battle = * Does not meet the requirements to go to N | |M/battle -> D/battle = * Does not meet the requirements to go to N | ||
|M/battle -> N/empty = * Meet '''ALL''' of the following requirements: | |M/battle -> N/empty = * Meet '''ALL''' of the following requirements: | ||
| − | ** If | + | ** If Slow fleet, then amount of (F)BB ≤ 1 |
| − | ** If Slow fleet, then amount of ( | + | ** If Slow fleet, then amount of CV(B) = 0 |
| − | ** Amount of CA ≥ 2 | + | ** Amount of CA + Ootomari ≥ 2 |
| − | ** Amount of CL ≥ 2 | + | ** Amount of CL + CT ≥ 2 |
** Amount of DD + DE ≥ 3 | ** Amount of DD + DE ≥ 3 | ||
|N/empty -> O/pink, P/battle = Active Branching | |N/empty -> O/pink, P/battle = Active Branching | ||
| Line 91: | Line 92: | ||
|P/battle -> R/battle = * Meet '''ALL''' of the following requirements: | |P/battle -> R/battle = * Meet '''ALL''' of the following requirements: | ||
** [CTF/STF] Fast Fleet | ** [CTF/STF] Fast Fleet | ||
| − | ** [CTF/STF] Amount of (F)BB | + | ** [CTF/STF] Amount of (F)BB + CV(B) = 0 |
** [TCF] Any fleet | ** [TCF] Any fleet | ||
|Q/battle -> S/battle = * Does not meet the requirements to go to V | |Q/battle -> S/battle = * Does not meet the requirements to go to V | ||
| Line 97: | Line 98: | ||
** If Slow Fleet, then amount of CL + CT ≥ 3 | ** If Slow Fleet, then amount of CL + CT ≥ 3 | ||
** Amount of CV(B) = 0 | ** Amount of CV(B) = 0 | ||
| − | *** If amount of historical 5th | + | *** If amount of historical 5th Fleet ships ≥ ?/?/?/6, then amount of CV(B) ≤ 1 * ('''Casual / Easy / Medium / Hard''') |
** Amount of CVL ≤ 1 | ** Amount of CVL ≤ 1 | ||
** Amount of DD + DE ≥ 6 | ** Amount of DD + DE ≥ 6 | ||
| − | ** If amount of DD + DE | + | ** If amount of DD + DE ≤ 5: |
| − | *** If amount of (F)BB(V) = 0, then amount of historical 5th | + | *** If amount of (F)BB(V) = 0, then amount of historical 5th Fleet ships ≥ 3/6?/6/7 ('''Casual / Easy / Medium / Hard''') |
| − | *** If amount of (F)BB(V) | + | *** If amount of (F)BB(V) ≥ 1, then amount of historical 5th Fleet ships ≥ ?/?/?/8 ('''Casual / Easy / Medium / Hard''') |
|V1/empty -> V2/empty = * Fail the LoS check | |V1/empty -> V2/empty = * Fail the LoS check | ||
|V1/empty -> W/battle = * Pass the LoS check | |V1/empty -> W/battle = * Pass the LoS check | ||
| Line 125: | Line 126: | ||
** [[File:{{ROOTPAGENAME}} Tag 3.png|40px]] '''5th Fleet''', Starting point 2 (reused in E-3) | ** [[File:{{ROOTPAGENAME}} Tag 3.png|40px]] '''5th Fleet''', Starting point 2 (reused in E-3) | ||
| − | The use of {{IconText|{{Aviation Personnel}}|AGDP}} {{EquipmentLink|Arctic Gear & Deck Personnel|text=AGDP}} on CV(B/L), {{Class|Ise|Kai Ni}}, [[Akitsu Maru Kai]], [[Kumano Maru]], and [[Yamashio Maru]], is required to sortie these ships on the map. | + | The use of {{IconText|{{Aviation Personnel}}|AGDP}} {{EquipmentLink|Arctic Gear & Deck Personnel|text=AGDP}} on CV(B/L), {{Class|Ise|Kai Ni}}, [[Akitsu Maru Kai]], [[Kumano Maru]], [[Shimane Maru]], and [[Yamashio Maru]], is required to sortie these ships on the map. |
* {{Balloon}} '''[[Barrage Balloon]]s''' can be deployed on node {{MapRoute|W|red}} | * {{Balloon}} '''[[Barrage Balloon]]s''' can be deployed on node {{MapRoute|W|red}} | ||
| Line 139: | Line 140: | ||
| Medium|| A+|| A+|| S x2 | | Medium|| A+|| A+|| S x2 | ||
|- | |- | ||
| − | | Easy|| | + | | Easy|| A+ x2|| A+ x2|| S x2 |
|- | |- | ||
| − | | Casual|| | + | | Casual|| A+|| A+|| S x2 |
|} | |} | ||
| Line 157: | Line 158: | ||
| Note = All relevant nodes are surface combat one. | | Note = All relevant nodes are surface combat one. | ||
*Bringing an [[AACI]] is recommended to pass the air nodes | *Bringing an [[AACI]] is recommended to pass the air nodes | ||
| − | | Range = Node {{ | + | | Range = Node {{MapNode|C|red}}: 7 ; Node {{MapNode|F1|red}}: 4 ; Node {{MapNode|F2|red}}: 3 |
| LBASS = 141 / 141 / 141 / 161 | | LBASS = 141 / 141 / 141 / 161 | ||
| LBASD = 158 / 209 / 230 / 281 | | LBASD = 158 / 209 / 230 / 281 | ||
| Line 175: | Line 176: | ||
| Easy|| A+ x3|| - | | Easy|| A+ x3|| - | ||
|- | |- | ||
| − | | Casual|| A+ | + | | Casual|| A+ x2|| - |
|} | |} | ||
| Line 187: | Line 188: | ||
| AS = 198 | | AS = 198 | ||
| Note = The node is surface combat. | | Note = The node is surface combat. | ||
| − | * | + | *Bringing [[AACI]] and some ASW is advised to reach the node. |
| − | | Range = Node {{ | + | | Range = Node {{MapNode|K|red}}: 6 ; Node {{MapNode|I|red}}: 7 |
| LBASS = 192 / 197 / 167 / 206 | | LBASS = 192 / 197 / 167 / 206 | ||
| LBASD = 158 / 209 / 230 / 281 | | LBASD = 158 / 209 / 230 / 281 | ||
| − | | NoteLBAS = Sending half LBAS node I and the other | + | | NoteLBAS = Sending half the LBAS to node I and the other to node K is advised to improve the passing rate |
}} | }} | ||
| − | ; | + | ;Node {{MapNode|F|pink}} |
| − | *Refer to [[#Gimmick 1 - Unlock]]'s fleets for composition and routing (node F2's path). | + | * AS requirement for Hard is 230 (other difficulties do not need to achieve AS here). |
| + | * Refer to [[#Gimmick 1 - Unlock]]'s fleets for composition and routing (node F2's path). | ||
==Phase 1 - TP== | ==Phase 1 - TP== | ||
Phase 1 is a new kind of [[Transport Operation]], where "tanks" do work better: | Phase 1 is a new kind of [[Transport Operation]], where "tanks" do work better: | ||
| + | |||
| + | [[File:Landing Operation.png|thumb|right|Landing Operation success screen]][[File:Landing Operation 2.png|thumb|right|150px|Landing Operation tank counter]] | ||
| + | |||
| + | During "Landing Operation", the TP drain formula is altered, with regular modifiers being nerfed, and tanks gaining additional bonuses: | ||
| + | |||
| + | *<math>\text{Mod}_\text{map}</math>, a map-dependent nerf mod, is applied, reducing the value of regular TP sources. | ||
| + | *During [[Spring 2025 Event]] it was: | ||
| + | **'''0.65''' for E-2, | ||
| + | **'''0.8''' for E-5. | ||
| + | |||
| + | ====Tank TP==== | ||
| + | The additional "tank bonus" given by equipment Landing Operations is as follows: | ||
| + | *The values are from the [[Spring 2025 Event]]. | ||
{|class="wikitable mw-collapsible mw-collapsed sortable" | {|class="wikitable mw-collapsible mw-collapsed sortable" | ||
| − | !colspan=4|Landing Operation - | + | !colspan=4|Landing Operation - Tanks [https://x.com/not_Ikakusai/status/1901609238889484516] [https://x.com/TypeAsyura/status/1906308723175465077] |
|- | |- | ||
| − | ! Type!!Equipment!! | + | !rowspan=2|Type!!rowspan=2|Equipment!!colspan=2|<math>\text{TP}_\text{tank}</math> |
|- | |- | ||
| − | ! | + | !E-2 |
| − | + | !E-5 | |
| − | |||
|- | |- | ||
| − | |{{EquipmentLink|Daihatsu Landing Craft | + | !rowspan=13|{{Landing Craft}} |
| + | |{{EquipmentLink|Daihatsu Landing Craft}}|| 0|| 0 | ||
|- | |- | ||
| − | |{{EquipmentLink|Daihatsu Landing Craft ( | + | |{{EquipmentLink|Daihatsu Landing Craft (Type 89 Medium Tank & Landing Force)|text=DLC + T89 Tank}}|| 9|| 6 |
|- | |- | ||
| − | |{{EquipmentLink|Toku Daihatsu Landing Craft | + | |{{EquipmentLink|Toku Daihatsu Landing Craft}}|| 0|| 0 |
|- | |- | ||
| − | |{{EquipmentLink|Toku Daihatsu Landing Craft + 11th Tank Regiment|text=Toku DLC + 11th Reg}}|| | + | |{{EquipmentLink|Toku Daihatsu Landing Craft + 11th Tank Regiment|text=Toku DLC + 11th Reg}}|| 41|| 12 |
|- | |- | ||
| − | |{{EquipmentLink|M4A1 DD}}|| | + | |{{EquipmentLink|M4A1 DD}}|| 19|| 14 |
|- | |- | ||
| − | |{{EquipmentLink| | + | |{{EquipmentLink|Armed Daihatsu}}|| 0|| 0 |
|- | |- | ||
| − | |{{EquipmentLink| | + | |{{EquipmentLink|Soukoutei (Armored Boat Class)|text=Soukoutei}}|| 0|| 0 |
|- | |- | ||
| − | |{{EquipmentLink| | + | |{{EquipmentLink|Daihatsu Landing Craft (Panzer II/North African Specification)|text=DLC + Panzer II}}|| 16|| 8 |
|- | |- | ||
| − | |{{EquipmentLink|Toku Daihatsu Landing Craft + | + | |{{EquipmentLink|Toku Daihatsu Landing Craft + Type 1 Gun Tank|text=Toku DLC + Ho-Ni Tank}}|| 35|| 22 |
|- | |- | ||
| − | + | |{{EquipmentLink|Toku Daihatsu Landing Craft + Panzer III (North African Specification)|text=Toku DLC + Panzer III}}|| 22|| 10 | |
| − | |{{EquipmentLink| | ||
|- | |- | ||
| − | |{{EquipmentLink| | + | |{{EquipmentLink|Toku Daihatsu Landing Craft + Chi-Ha|text=Toku DLC + Chi-Ha}}|| 16|| 11 |
|- | |- | ||
| − | |{{EquipmentLink| | + | |{{EquipmentLink|Toku Daihatsu Landing Craft + Chi-Ha Kai|text=Toku DLC + Chi-Ha Kai}}|| 23|| 13 |
|- | |- | ||
| − | + | |{{EquipmentLink|Toku Daihatsu Landing Craft + Panzer III Ausf J|text=Toku DLC + Panzer III J}}|| 37|| 15 | |
| − | | | ||
|- | |- | ||
| − | |{{EquipmentLink|Type | + | !rowspan=3|{{Amphibious Tank}} |
| + | |{{EquipmentLink|Special Type 2 Amphibious Tank|text=Ka-Mi tank}}|| 8|| 18 | ||
|- | |- | ||
| − | |{{EquipmentLink|Type | + | |{{EquipmentLink|Special Type 4 Amphibious Tank|text=Ka-Tsu tank}}|| 5|| 15 |
|- | |- | ||
| − | |{{EquipmentLink| | + | |{{EquipmentLink|Special Type 4 Amphibious Tank Kai|text=Ka-Tsu tank Kai}}|| 6|| 18 |
|- | |- | ||
| − | ! | + | !rowspan=4|{{Landing Force}} |
| − | + | |{{EquipmentLink|Army Infantry Corps}}|| 15|| 5 | |
| − | |||
| − | |||
| − | |{{EquipmentLink| | ||
| − | |||
| − | |||
| − | |||
| − | |||
| − | |||
| − | |||
| − | |||
| − | |||
| − | |||
| − | |||
| − | |||
| − | |||
| − | |||
| − | |||
| − | |||
| − | |||
| − | |||
| − | |||
| − | |||
| − | |||
| − | |||
| − | |||
| − | |||
| − | |||
| − | |||
| − | |||
| − | |||
| − | |||
| − | |||
| − | |||
| − | |||
| − | |||
| − | |||
| − | |||
| − | |||
| − | |||
| − | |||
| − | |||
| − | |||
| − | |||
| − | |||
| − | |||
| − | |||
| − | |||
| − | |||
| − | |||
| − | |||
| − | |||
| − | |||
| − | |||
| − | |||
|- | |- | ||
| − | + | |{{EquipmentLink|Type 97 Medium Tank (Chi-Ha)|text=Chi-Ha}}|| 17|| 8 | |
| − | | | ||
|- | |- | ||
| − | + | |{{EquipmentLink|Type 97 Medium Tank New Turret (Chi-Ha Kai)|text=Chi-Ha Kai}}|| 23|| 10 | |
| − | | | ||
|- | |- | ||
| − | + | |{{EquipmentLink|Army Infantry Corps + Chi-Ha Kai|text=Infantry + Chi-Ha Kai}}|| 38|| 13 | |
| − | | | ||
|- | |- | ||
| − | ! | + | !{{Drum}} |
| − | | | + | |{{EquipmentLink|Drum Canister (Transport Use)|text=Drum Canisters}}|| 0|| 0 |
|- | |- | ||
| − | ! | + | !{{Rations}} |
| − | | | + | |{{EquipmentLink|Combat Ration|Combat Ration (Special Onigiri)|Canned Saury|text=Rations}}|| 0|| 0 |
|} | |} | ||
| − | |||
| − | |||
{{FleetGuide | {{FleetGuide | ||
| Line 330: | Line 285: | ||
| Note = Bringing an [[AACI]] and some ASW is advised to reach the boss. | | Note = Bringing an [[AACI]] and some ASW is advised to reach the boss. | ||
Having 1 or 2 good night cut-ins is recommended to farm for S rank. | Having 1 or 2 good night cut-ins is recommended to farm for S rank. | ||
| − | | Range = Node {{ | + | | Range = Node {{MapNode|U|red}}: 3 |
| LBASS = 0 / 0 / 0 / 0 | | LBASS = 0 / 0 / 0 / 0 | ||
| LBASD = 158 / 209 / 230 / 281 | | LBASD = 158 / 209 / 230 / 281 | ||
| Line 344: | Line 299: | ||
| Escort = '''0-1 CA, 1 CL, 4-5 DD [[File:{{ROOTPAGENAME}} Tag 3.png|30px]] | | Escort = '''0-1 CA, 1 CL, 4-5 DD [[File:{{ROOTPAGENAME}} Tag 3.png|30px]] | ||
| Route = {{MapRoute|2||L|blue|M|red|N|blue|O|pink|Q|red|V|red|V1|blue|W|red}} | | Route = {{MapRoute|2||L|blue|M|red|N|blue|O|pink|Q|red|V|red|V1|blue|W|red}} | ||
| − | | LOS = Cn3: 70 / 55 / 75 / | + | | LOS = Cn3: 70 / 55 / 75 / 105 (C/E/M/H) |
| ASC = 0 | | ASC = 0 | ||
| ASE = 0 | | ASE = 0 | ||
| Line 351: | Line 306: | ||
| Note = The boss is a submarine, it is required to bring very strong ASW and [[OASW]] to kill it. | | Note = The boss is a submarine, it is required to bring very strong ASW and [[OASW]] to kill it. | ||
*Only sniping the boss is the recommended way to clear the map. | *Only sniping the boss is the recommended way to clear the map. | ||
| − | | Range = Node {{ | + | | Range = Node {{MapNode|W|red}} : 5, Node {{MapNode|V|red}} : 4 |
| LBASS = 0 / 0 / 0 / 180 | | LBASS = 0 / 0 / 0 / 180 | ||
| LBASD = 158 / 209 / 230 / 281 | | LBASD = 158 / 209 / 230 / 281 | ||
| Line 357: | Line 312: | ||
}} | }} | ||
| − | *{{Smoke}} Smokes are highly recommended for {{ | + | *{{Smoke}} Smokes are highly recommended for {{MapNode|V|red}} to avoid taking damage. |
*Using the {{IconText|{{CommandFacility}}|FCF}} {{Equipment/Link|Fleet Command Facility|text=FCF}} can help increase the reach rate. | *Using the {{IconText|{{CommandFacility}}|FCF}} {{Equipment/Link|Fleet Command Facility|text=FCF}} can help increase the reach rate. | ||
Latest revision as of 18:00, 3 November 2025
 
| |||||||||
|---|---|---|---|---|---|---|---|---|---|
 
Time until the end of the event:
| |||||||||
音威子府防衛線
![]()
![]()


| Information | ||||
|---|---|---|---|---|
| Event Tag | ||||
| Boss Gauges | Hard (甲): 960 TP + 3234 HP | |||
| Medium (乙): 680 TP + 2648 HP | ||||
| Easy (丙): 600 TP + 2648 HP | ||||
| Casual (丁): 480 TP + 1584 HP | ||||
| Map Bosses | Destroyer Ra-Class Initial Model
| |||
Submarine Seerfish Water Demon
| ||||
| Rewards[edit] | ||||
|---|---|---|---|---|
| Ship |  Wahoo | |||
| Choice | 丁 Casual |
丙 Easy |
乙 Medium |
甲 Hard |
Equipment Slots |
3 | 4 | 5 | |
| OR | ||||
Improvement Material |
3 | 4 | 5 | |
| Reward | 丁 Casual |
丙 Easy |
乙 Medium |
甲 Hard |
|---|---|---|---|---|
Food Supply Ship Mamiya |
1 | 2 | 3 | |
Reinforcement Expansion |
1 | 1 | 1 | |
Remodel Blueprint |
1 | 1 | ||
Medal |
2 | |||
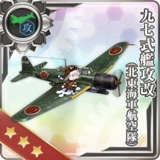
 Type 97 Torpedo Bomber Kai (Northeastern Air Group) |
1 (★2) | 1 (★4) | 1 (★8) | |
 21inch 6-tube Bow Torpedo Launcher (Late Model) |
1 (★2) |

The event guides are to be constructed through the respective Event map page guide sandbox and reviewed by editors before being approved here.
- Do not update the guides through this page unless it is a minor fix. Please only update guides through their respective sandbox pages.
Branching Table
| E-2 Branching Rules (Start Points) ▼/▲ | ||
|---|---|---|
| Nodes | Rules | |
| Start | 1 |
|
2 |
| |
| E-2 Branching Rules (Start Point 1) ▼/▲ | ||
|---|---|---|
| Nodes | Rules | |
A |
A1 |
|
A2 |
| |
B |
C |
Active Branching |
D | ||
C |
G |
|
H |
| |
E |
F |
Active Branching |
F1 | ||
F |
F2 |
|
H |
I |
|
I |
J |
|
K |
| |
| E-2 Branching Rules (Start Point 2) ▼/▲ | ||
|---|---|---|
| Nodes | Rules | |
2 |
H |
|
L |
| |
E |
F |
Active Branching |
F1 | ||
F |
F2 |
|
R |
| |
H |
L |
|
M |
| |
M |
D |
|
N |
| |
N |
O |
Active Branching |
P | ||
P |
F |
|
R |
| |
Q |
S |
|
V |
| |
V1 |
V2 |
|
W |
| |
* = Rule under review
? = Ship type/amount under review
Branching compositions are reported over the course of the event.
- Please refer to KCNav for up to date map content (fleets used, LoS/speed requirements/drops/LBAS ranges, ...)
Historical Bonuses
Do note that several of the 5th fleet members will have historical significance in the "2nd Stage Operations"!
| Ships [1] [Toggle Names] |
Map-wide | Gimmick NodesA1/C/D/F1/F2/H/I/K |
Node U |
Node V |
Node W | ||
|---|---|---|---|---|---|---|---|
| Damage | Damage | Damage | Damage | Damage | |||
| Coastal Defense Ships (DE) | 1.12x | - | |||||
| Destroyers (DD) | 1.03x | ||||||
| Light Cruisers (CL) NOT CLT |
1.04x | ||||||
| Seaplane Tenders (AV) | 1.08x | ||||||
| Submarine Tenders (AS) | 1.08x | ||||||
Souya Ootomari |
1.28x | - | - | ||||
| 5th Fleet | 1.16x | 5th Fleet | |||||
| CA | Ashigara Nachi |
1.12x | 1.06x | 1.16x | |||
| CL(T) | Abukuma Kiso Tama |
1.08x | 1.05x | 1.12x | |||
| DD | Akebono Kasumi Shiranui Hatsushimo Wakaba Ushio Hatsuharu Usugumo |
1.06x | 1.04x | 1.08x | |||
|
1.12x | - | |||||
|
- | 1.16x | |||||
| Equipment | Map-wide | ||
|---|---|---|---|
| Damage | Evasion | ||
 ★+7 7+ ★+7 7+ |
1.12x | Good [2] | |
|
1 | 1.18x | - |
| 2 | 1.28x | - | |
- The torpedo bomber bonus only works on a non-zero slot.
- LBAS


- The bonus is only applied once (does not stack)
Map Overview
E2 is a single and combined fleet, two-phase map consisting of one transport and one boss phase.
- 2 LBAS is available to sortie on this map
- This map uses 2 locks:
 1st Fleet, Starting point 1 (reused from E-1)
 5th Fleet, Starting point 2 (reused in E-3)
The use of ![]() AGDP AGDP
AGDP AGDP on CV(B/L), Ise-class Kai Ni, Akitsu Maru Kai, Kumano Maru, Shimane Maru, and Yamashio Maru, is required to sortie these ships on the map.
 Barrage Balloons can be deployed on node W
Gimmick 1 - Unlock
To unlock the next part of the map, the following steps have to be performed:
| F1 | F2 | C | |
|---|---|---|---|
| Hard | A+ x2 | A+ x2 | S x2 |
| Medium | A+ | A+ | S x2 |
| Easy | A+ x2 | A+ x2 | S x2 |
| Casual | A+ | A+ | S x2 |
| Nodes C, F1 & F2 | |||||||||||||||||||||||||||||||||||||||||||||
|---|---|---|---|---|---|---|---|---|---|---|---|---|---|---|---|---|---|---|---|---|---|---|---|---|---|---|---|---|---|---|---|---|---|---|---|---|---|---|---|---|---|---|---|---|---|
|
| ||||||||||||||||||||||||||||||||||||||||||||
| Fleet Notes | |||||||||||||||||||||||||||||||||||||||||||||
All relevant nodes are surface combat one.
| |||||||||||||||||||||||||||||||||||||||||||||
| LBAS Notes | |||||||||||||||||||||||||||||||||||||||||||||
| Sending all LBAS on the relevant nodes is advised. | |||||||||||||||||||||||||||||||||||||||||||||
Gimmick 2 - Unlock
To unlock the 1st phase, the following steps have to be performed:
| K | F | |
|---|---|---|
| Hard | A+ x3 | AS |
| Medium | A+ x3 | - |
| Easy | A+ x3 | - |
| Casual | A+ x2 | - |
| Node K | |||||||||||||||||||||||||||||||||||||||||||||
|---|---|---|---|---|---|---|---|---|---|---|---|---|---|---|---|---|---|---|---|---|---|---|---|---|---|---|---|---|---|---|---|---|---|---|---|---|---|---|---|---|---|---|---|---|---|
|
| ||||||||||||||||||||||||||||||||||||||||||||
| Fleet Notes | |||||||||||||||||||||||||||||||||||||||||||||
The node is surface combat.
| |||||||||||||||||||||||||||||||||||||||||||||
| LBAS Notes | |||||||||||||||||||||||||||||||||||||||||||||
| Sending half the LBAS to node I and the other to node K is advised to improve the passing rate | |||||||||||||||||||||||||||||||||||||||||||||
- Node F
- AS requirement for Hard is 230 (other difficulties do not need to achieve AS here).
- Refer to #Gimmick 1 - Unlock's fleets for composition and routing (node F2's path).
Phase 1 - TP
Phase 1 is a new kind of Transport Operation, where "tanks" do work better:


During "Landing Operation", the TP drain formula is altered, with regular modifiers being nerfed, and tanks gaining additional bonuses:
- [math]\displaystyle{ \text{Mod}_\text{map} }[/math], a map-dependent nerf mod, is applied, reducing the value of regular TP sources.
- During Spring 2025 Event it was:
- 0.65 for E-2,
- 0.8 for E-5.
Tank TP
The additional "tank bonus" given by equipment Landing Operations is as follows:
- The values are from the Spring 2025 Event.
| Landing Operation - Tanks [3] [4] | |||
|---|---|---|---|
| Type | Equipment | [math]\displaystyle{ \text{TP}_\text{tank} }[/math] | |
| E-2 | E-5 | ||
Daihatsu Landing Craft |
0 | 0 | |
DLC + T89 Tank |
9 | 6 | |
Toku Daihatsu Landing Craft |
0 | 0 | |
Toku DLC + 11th Reg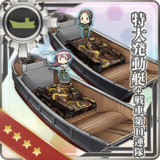 |
41 | 12 | |
M4A1 DD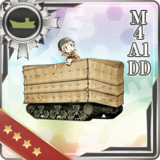 |
19 | 14 | |
Armed Daihatsu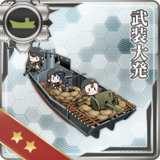 |
0 | 0 | |
Soukoutei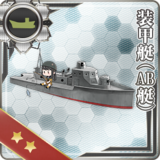 |
0 | 0 | |
DLC + Panzer II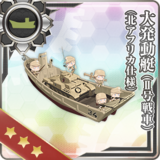 |
16 | 8 | |
Toku DLC + Ho-Ni Tank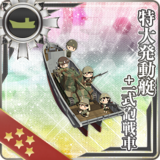 |
35 | 22 | |
Toku DLC + Panzer III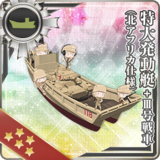 |
22 | 10 | |
Toku DLC + Chi-Ha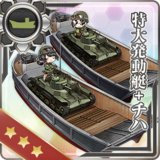 |
16 | 11 | |
Toku DLC + Chi-Ha Kai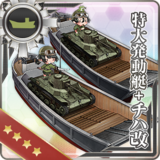 |
23 | 13 | |
Toku DLC + Panzer III J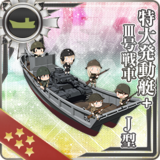 |
37 | 15 | |
Ka-Mi tank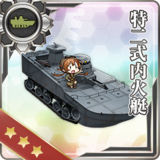 |
8 | 18 | |
Ka-Tsu tank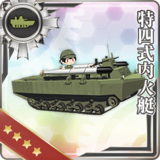 |
5 | 15 | |
Ka-Tsu tank Kai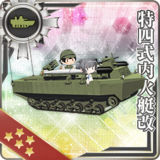 |
6 | 18 | |
Army Infantry Corps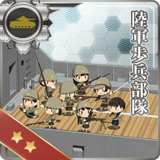 |
15 | 5 | |
Chi-Ha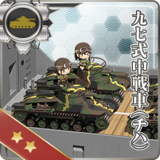 |
17 | 8 | |
Chi-Ha Kai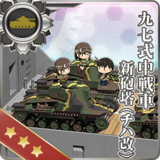 |
23 | 10 | |
Infantry + Chi-Ha Kai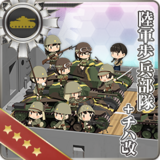 |
38 | 13 | |
Drum Canisters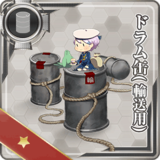 |
0 | 0 | |
Rations 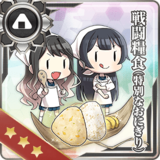 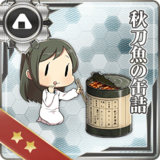 |
0 | 0 | |
| STF | |||||||||||||||||||||||||||||||||||||||||||||||||
|---|---|---|---|---|---|---|---|---|---|---|---|---|---|---|---|---|---|---|---|---|---|---|---|---|---|---|---|---|---|---|---|---|---|---|---|---|---|---|---|---|---|---|---|---|---|---|---|---|---|
|
| ||||||||||||||||||||||||||||||||||||||||||||||||
| Fleet Notes | |||||||||||||||||||||||||||||||||||||||||||||||||
| Bringing an AACI and some ASW is advised to reach the boss.
Having 1 or 2 good night cut-ins is recommended to farm for S rank. | |||||||||||||||||||||||||||||||||||||||||||||||||
| LBAS Notes | |||||||||||||||||||||||||||||||||||||||||||||||||
| All LBAS should be sent on the boss. | |||||||||||||||||||||||||||||||||||||||||||||||||
- It is recommended to field between 3-5 DD that can carry Landing Craft to drain the TP Gauge.
- Please refer to the Landing Craft table above for what Landing craft to use to maximize TP Drain per run.
Phase 2 - Boss
| STF | |||||||||||||||||||||||||||||||||||||||||||||||||
|---|---|---|---|---|---|---|---|---|---|---|---|---|---|---|---|---|---|---|---|---|---|---|---|---|---|---|---|---|---|---|---|---|---|---|---|---|---|---|---|---|---|---|---|---|---|---|---|---|---|
|
| ||||||||||||||||||||||||||||||||||||||||||||||||
| Fleet Notes | |||||||||||||||||||||||||||||||||||||||||||||||||
The boss is a submarine, it is required to bring very strong ASW and OASW to kill it.
| |||||||||||||||||||||||||||||||||||||||||||||||||
| LBAS Notes | |||||||||||||||||||||||||||||||||||||||||||||||||
| Toukai LBAS is recommended to help chip the boss. | |||||||||||||||||||||||||||||||||||||||||||||||||
 Smokes are highly recommended for V to avoid taking damage.
- Using the
 FCF FCF
 can help increase the reach rate.
Gimmick 3 - Debuff
Once LD has been reached, the following steps have to be performed to debuff the boss.
| F1 | F2 | K | U | LBAS | |
|---|---|---|---|---|---|
| Hard | A+ x2 | A+ x2 | A+ x2 | A+ x2 | AS x2 |
| Medium | - | A+ x2 | A+ x2 | A+ x2 | AS |
| Easy | - | A+ x2 | A+ x2 | A+ x2 | AS |
| Casual | - | A+ x2 | A+ x2 | A+ x2 | AS |
Refer to #Gimmick 1 - Unlock's fleets for composition and routing.
Refer to #Gimmick 2 - Unlock's fleet for composition and routing.
Refer to #Phase 1 - TP's fleet for composition and routing.
| LBAS | AS |
|---|---|
| Hard | 281 |
| Medium | 230 |
| Easy | 209 |
| Casual | 158 |
Once on LD, the CG will change to the following:
| Submarine Seerfish Water Demon |
|---|
|


Enemy Compositions

| Type | Ships |
|---|---|
| DE | |
| DD |
| Type | Ships |
|---|---|
| DE | |
| DD | |
| AO |
| Type | Ships |
|---|---|
| DE | |
| DD | |
| AO |
| Type | Ships |
|---|---|
| DE | |
| DD | |
| AO |
| Type | Ships |
|---|---|
| DE | |
| DD | |
| AO |
| Type | Ships |
|---|---|
| DE | |
| DD | |
| LHA | |
| AO |
| Type | Ships |
|---|---|
| DE | |
| DD |
| Type | Ships |
|---|---|
| DE | |
| DD | |
| AO |
| Type | Ships |
|---|---|
| DE | |
| DD | |
| AO |
| Type | Ships |
|---|---|
| DE | |
| DD | |
| LHA | |
| AO |
| Type | Ships |
|---|---|
| DE | |
| DD | |
| LHA | |
| AO |
| Type | Ships |
|---|---|
| DE | |
| DD | |
| CVL | |
| SS | |
| SSV | |
| LHA | |
| AO |
| # | Empty Node | ||
|---|---|---|---|
| A | 気のせいだった。 Must be my imagination. | ||
| # | Empty Node | ||
| # | Formation | Normal Battle Node | AD/AP AS/AS+ |
|---|---|---|---|
| A1 | Echelon Line Abreast |
0/0 0/0 | |
| Echelon Line Abreast |
0/0 0/0 | ||
| Echelon Line Abreast |
0/0 0/0 | ||
| # | Formation | Normal Battle Node | AD/AP AS/AS+ |
| # | Formation | Air Defense Node | AD/AP AS/AS+ |
|---|---|---|---|
| A2 | Diamond (HA) |
47/94 210/420 | |
| Diamond | 23/45 99/198 | ||
| Diamond | 27/54 120/240 | ||
| Diamond (HA) |
51/101 227/453 | ||
| # | Formation | Air Defense Node | AD/AP AS/AS+ |
| # | Selection Node | ||
|---|---|---|---|
| B | 艦隊の針路を選択できます。提督、どちらの針路をとられますか? You can decide the fleet's course. Admiral, which heading should we take? | ||
| # | Selection Node | ||
| # | Formation | Normal Battle Node | AD/AP AS/AS+ |
|---|---|---|---|
| C | Line Ahead Echelon Vanguard |
0/0 0/0 | |
| # | Formation | Normal Battle Node | AD/AP AS/AS+ |
| # | Formation | Normal Battle Node | AD/AP AS/AS+ |
|---|---|---|---|
| D | Line Ahead | 0/0 0/0 | |
| Line Ahead | 0/0 0/0 | ||
| Line Ahead | 0/0 0/0 | ||
| # | Formation | Normal Battle Node | AD/AP AS/AS+ |
| # | Selection Node | ||
|---|---|---|---|
| E | 艦隊の針路を選択できます。提督、どちらの針路をとられますか? You can decide the fleet's course. Admiral, which heading should we take? | ||
| # | Selection Node | ||
| # | Formation | Air Defense Node | AD/AP AS/AS+ |
|---|---|---|---|
| F | Diamond (HA) |
47/94 210/420 | |
| Diamond (HA) |
47/93 209/417 | ||
| Diamond (HA) |
52/103 230/459 | ||
| Diamond (HA) |
46/92 206/411 | ||
| Diamond (HA) |
46/92 206/411 | ||
| Diamond (HA) |
51/101 227/453 | ||
| # | Formation | Air Defense Node | AD/AP AS/AS+ |
| # | Formation | Normal Battle Node | AD/AP AS/AS+ |
|---|---|---|---|
| F1 | Line Ahead Double Line Diamond |
36/72 161/321 | |
| # | Formation | Normal Battle Node | AD/AP AS/AS+ |
| # | Formation | Normal Battle Node | AD/AP AS/AS+ |
|---|---|---|---|
| F2 | Line Ahead | 0/0 0/0 | |
| Line Ahead | 0/0 0/0 | ||
| Line Ahead | 0/0 0/0 | ||
| # | Formation | Normal Battle Node | AD/AP AS/AS+ |
| # | Formation | Air Defense Node | AD/AP AS/AS+ |
|---|---|---|---|
| G | Diamond (HA) |
47/94 210/420 | |
| Diamond | 23/45 99/198 | ||
| Diamond | 27/54 120/240 | ||
| Diamond (HA) |
51/101 227/453 | ||
| # | Formation | Air Defense Node | AD/AP AS/AS+ |
| # | Formation | Normal Battle Node | AD/AP AS/AS+ |
|---|---|---|---|
| H | Echelon Line Abreast |
0/0 0/0 | |
| Echelon Line Abreast |
0/0 0/0 | ||
| Echelon Line Abreast |
0/0 0/0 | ||
| # | Formation | Normal Battle Node | AD/AP AS/AS+ |
| # | Formation | Normal Battle Node | AD/AP AS/AS+ |
|---|---|---|---|
| I | Diamond | 45/89 198/396 | |
| Diamond | 45/89 198/396 | ||
| Diamond | 45/89 198/396 | ||
| # | Formation | Normal Battle Node | AD/AP AS/AS+ |
| # | Empty Node | ||
|---|---|---|---|
| J | 敵影を見ず。 No enemy spotted. | ||
| # | Empty Node | ||
| # | Formation | Normal Battle Node | AD/AP AS/AS+ |
|---|---|---|---|
| K | Line Ahead | 0/0 0/0 | |
| Line Ahead | 0/0 0/0 | ||
| Line Ahead | 0/0 0/0 | ||
| # | Formation | Normal Battle Node | AD/AP AS/AS+ |
| # | Empty Node | ||
|---|---|---|---|
| L | 気のせいだった。 Must be my imagination. | ||
| # | Empty Node | ||
| # | Formation | Normal Battle Node | AD/AP AS/AS+ |
|---|---|---|---|
| M | Diamond | 45/89 198/396 | |
| Diamond | 45/89 198/396 | ||
| Diamond | 45/89 198/396 | ||
| # | Formation | Normal Battle Node | AD/AP AS/AS+ |
| # | Selection Node | ||
|---|---|---|---|
| N | 艦隊の針路を選択できます。提督、どちらの針路をとられますか? You can decide the fleet's course. Admiral, which heading should we take? | ||
| # | Selection Node | ||
| # | Formation | Air Defense Node | AD/AP AS/AS+ |
|---|---|---|---|
| O | Diamond (HA) |
47/94 210/420 | |
| Diamond (HA) |
47/93 209/417 | ||
| Diamond (HA) |
52/103 230/459 | ||
| Diamond (HA) |
46/92 206/411 | ||
| Diamond (HA) |
46/92 206/411 | ||
| Diamond (HA) |
51/101 227/453 | ||
| # | Formation | Air Defense Node | AD/AP AS/AS+ |
| # | Formation | Normal Battle Node | AD/AP AS/AS+ |
|---|---|---|---|
| P | Echelon Line Abreast |
0/0 0/0 | |
| Echelon Line Abreast |
0/0 0/0 | ||
| Echelon Line Abreast |
0/0 0/0 | ||
| # | Formation | Normal Battle Node | AD/AP AS/AS+ |
| # | Formation | Normal Battle Node | AD/AP AS/AS+ |
|---|---|---|---|
| Q | Echelon Line Abreast |
0/0 0/0 | |
| Echelon Line Abreast |
0/0 0/0 | ||
| # | Formation | Normal Battle Node | AD/AP AS/AS+ |
| # | Formation | Normal Battle Node | AD/AP AS/AS+ |
|---|---|---|---|
| R | Line Ahead Double Line Vanguard |
0/0 0/0 | |
| # | Formation | Normal Battle Node | AD/AP AS/AS+ |
| # | Formation | Normal Battle Node | AD/AP AS/AS+ |
|---|---|---|---|
| S | Line Ahead Double Line Vanguard |
0/0 0/0 | |
| # | Formation | Normal Battle Node | AD/AP AS/AS+ |
| # | Landing Node | ||
|---|---|---|---|
| T | 輸送物資の揚陸地点に到達しました。本海域の輸送作戦は無事完了しています。 The landing point of the convoy has been reached. The transport operation here has already been completed successfully. | ||
| # | Landing Node | ||
| # | Formation | Boss Battle Node | AD/AP AS/AS+ |
|---|---|---|---|
| U | Line Ahead Double Line Echelon |
0/0 0/0 | |
| # | Formation | Boss Battle Node | AD/AP AS/AS+ |
| # | Formation | Normal Battle Node | AD/AP AS/AS+ |
|---|---|---|---|
| V | Line Ahead | 43/85 189/378 | |
| Line Ahead | 43/85 189/378 | ||
| Line Ahead | 45/89 198/396 | ||
| # | Formation | Normal Battle Node | AD/AP AS/AS+ |
| # | Empty Node | ||
|---|---|---|---|
| V1 | 気のせいだった。 Must be my imagination. | ||
| # | Empty Node | ||
| # | Empty Node | ||
|---|---|---|---|
| V2 | 敵影を見ず。 No enemy spotted. | ||
| # | Empty Node | ||
| # | Formation | Boss Battle Node | AD/AP AS/AS+ |
|---|---|---|---|
| W | Cruising Formation 1 | 0/0 0/0 | |
| Cruising Formation 1 (Final)
|
38/75 167/333 | ||
| # | Formation | Boss Battle Node | AD/AP AS/AS+ |
| Type | Ships |
|---|---|
| DE |
| Type | Ships |
|---|---|
| DE | |
| DD |
| Type | Ships |
|---|---|
| DE | |
| DD | |
| AO |
| Type | Ships |
|---|---|
| DE | |
| DD | |
| AO |
| Type | Ships |
|---|---|
| DE | |
| DD | |
| AO |
| Type | Ships |
|---|---|
| DE | |
| DD | |
| LHA | |
| AO |
| Type | Ships |
|---|---|
| DE | |
| DD |
| Type | Ships |
|---|---|
| DE | |
| DD | |
| AO |
| Type | Ships |
|---|---|
| DE | |
| DD | |
| AO |
| Type | Ships |
|---|---|
| DE | |
| DD | |
| LHA | |
| AO |
| Type | Ships |
|---|---|
| DE | |
| DD | |
| LHA | |
| AO |
| Type | Ships |
|---|---|
| DE | |
| DD | |
| CVL | |
| SS | |
| SSV | |
| LHA | |
| AS | |
| AO |
| # | Empty Node | ||
|---|---|---|---|
| A | 気のせいだった。 Must be my imagination. | ||
| # | Empty Node | ||
| # | Formation | Normal Battle Node | AD/AP AS/AS+ |
|---|---|---|---|
| A1 | Echelon Line Abreast |
0/0 0/0 | |
| Echelon Line Abreast |
0/0 0/0 | ||
| Echelon Line Abreast |
0/0 0/0 | ||
| # | Formation | Normal Battle Node | AD/AP AS/AS+ |
| # | Formation | Air Defense Node | AD/AP AS/AS+ |
|---|---|---|---|
| A2 | Diamond | 17/33 72/144 | |
| Diamond (HA) |
36/71 158/315 | ||
| Diamond | 23/45 99/198 | ||
| Diamond | 27/54 120/240 | ||
| # | Formation | Air Defense Node | AD/AP AS/AS+ |
| # | Selection Node | ||
|---|---|---|---|
| B | 艦隊の針路を選択できます。提督、どちらの針路をとられますか? You can decide the fleet's course. Admiral, which heading should we take? | ||
| # | Selection Node | ||
| # | Formation | Normal Battle Node | AD/AP AS/AS+ |
|---|---|---|---|
| C | Line Ahead Echelon Vanguard |
0/0 0/0 | |
| # | Formation | Normal Battle Node | AD/AP AS/AS+ |
| # | Formation | Normal Battle Node | AD/AP AS/AS+ |
|---|---|---|---|
| D | Line Ahead | 0/0 0/0 | |
| Line Ahead | 0/0 0/0 | ||
| Line Ahead | 0/0 0/0 | ||
| # | Formation | Normal Battle Node | AD/AP AS/AS+ |
| # | Selection Node | ||
|---|---|---|---|
| E | 艦隊の針路を選択できます。提督、どちらの針路をとられますか? You can decide the fleet's course. Admiral, which heading should we take? | ||
| # | Selection Node | ||
| # | Formation | Air Defense Node | AD/AP AS/AS+ |
|---|---|---|---|
| F | Diamond (HA) |
36/71 158/315 | |
| Diamond (HA) |
47/94 210/420 | ||
| Diamond (HA) |
36/71 158/315 | ||
| Diamond (HA) |
47/93 209/417 | ||
| Diamond (HA) |
52/103 230/459 | ||
| Diamond (HA) |
35/69 155/309 | ||
| Diamond (HA) |
46/92 206/411 | ||
| # | Formation | Air Defense Node | AD/AP AS/AS+ |
| # | Formation | Normal Battle Node | AD/AP AS/AS+ |
|---|---|---|---|
| F1 | Line Ahead Double Line Diamond |
32/63 141/282 | |
| # | Formation | Normal Battle Node | AD/AP AS/AS+ |
| # | Formation | Normal Battle Node | AD/AP AS/AS+ |
|---|---|---|---|
| F2 | Line Ahead | 0/0 0/0 | |
| Line Ahead | 0/0 0/0 | ||
| Line Ahead | 0/0 0/0 | ||
| # | Formation | Normal Battle Node | AD/AP AS/AS+ |
| # | Formation | Air Defense Node | AD/AP AS/AS+ |
|---|---|---|---|
| G | Diamond | 17/33 72/144 | |
| Diamond | 23/45 99/198 | ||
| # | Formation | Air Defense Node | AD/AP AS/AS+ |
| # | Formation | Normal Battle Node | AD/AP AS/AS+ |
|---|---|---|---|
| H | Echelon Line Abreast |
0/0 0/0 | |
| Echelon Line Abreast |
0/0 0/0 | ||
| Echelon Line Abreast |
0/0 0/0 | ||
| # | Formation | Normal Battle Node | AD/AP AS/AS+ |
| # | Formation | Normal Battle Node | AD/AP AS/AS+ |
|---|---|---|---|
| I | Diamond | 36/71 159/318 | |
| Diamond | 36/71 159/318 | ||
| Diamond | 36/71 159/318 | ||
| # | Formation | Normal Battle Node | AD/AP AS/AS+ |
| # | Empty Node | ||
|---|---|---|---|
| J | 敵影を見ず。 No enemy spotted. | ||
| # | Empty Node | ||
| # | Formation | Normal Battle Node | AD/AP AS/AS+ |
|---|---|---|---|
| K | Line Ahead | 0/0 0/0 | |
| Line Ahead | 0/0 0/0 | ||
| Line Ahead | 0/0 0/0 | ||
| # | Formation | Normal Battle Node | AD/AP AS/AS+ |
| # | Empty Node | ||
|---|---|---|---|
| L | 気のせいだった。 Must be my imagination. | ||
| # | Empty Node | ||
| # | Formation | Normal Battle Node | AD/AP AS/AS+ |
|---|---|---|---|
| M | Diamond | 36/71 159/318 | |
| Diamond | 36/71 159/318 | ||
| Diamond | 36/71 159/318 | ||
| # | Formation | Normal Battle Node | AD/AP AS/AS+ |
| # | Selection Node | ||
|---|---|---|---|
| N | 艦隊の針路を選択できます。提督、どちらの針路をとられますか? You can decide the fleet's course. Admiral, which heading should we take? | ||
| # | Selection Node | ||
| # | Formation | Air Defense Node | AD/AP AS/AS+ |
|---|---|---|---|
| O | Diamond (HA) |
36/71 158/315 | |
| Diamond (HA) |
47/94 210/420 | ||
| Diamond (HA) |
36/71 158/315 | ||
| Diamond (HA) |
47/93 209/417 | ||
| Diamond (HA) |
52/103 230/459 | ||
| Diamond (HA) |
35/69 155/309 | ||
| Diamond (HA) |
46/92 206/411 | ||
| # | Formation | Air Defense Node | AD/AP AS/AS+ |
| # | Formation | Normal Battle Node | AD/AP AS/AS+ |
|---|---|---|---|
| P | Echelon Line Abreast |
0/0 0/0 | |
| Echelon Line Abreast |
0/0 0/0 | ||
| Echelon Line Abreast |
0/0 0/0 | ||
| # | Formation | Normal Battle Node | AD/AP AS/AS+ |
| # | Formation | Normal Battle Node | AD/AP AS/AS+ |
|---|---|---|---|
| Q | Echelon Line Abreast |
0/0 0/0 | |
| Echelon Line Abreast |
0/0 0/0 | ||
| # | Formation | Normal Battle Node | AD/AP AS/AS+ |
| # | Formation | Normal Battle Node | AD/AP AS/AS+ |
|---|---|---|---|
| R | Line Ahead Double Line Vanguard |
0/0 0/0 | |
| # | Formation | Normal Battle Node | AD/AP AS/AS+ |
| # | Formation | Normal Battle Node | AD/AP AS/AS+ |
|---|---|---|---|
| S | Line Ahead Double Line Vanguard |
0/0 0/0 | |
| # | Formation | Normal Battle Node | AD/AP AS/AS+ |
| # | Landing Node | ||
|---|---|---|---|
| T | 輸送物資の揚陸地点に到達しました。本海域の輸送作戦は無事完了しています。 The landing point of the convoy has been reached. The transport operation here has already been completed successfully. | ||
| # | Landing Node | ||
| # | Formation | Boss Battle Node | AD/AP AS/AS+ |
|---|---|---|---|
| U | Line Ahead Double Line Echelon |
0/0 0/0 | |
| # | Formation | Boss Battle Node | AD/AP AS/AS+ |
| # | Formation | Normal Battle Node | AD/AP AS/AS+ |
|---|---|---|---|
| V | Line Ahead | 37/73 162/324 | |
| Line Ahead | 34/67 150/300 | ||
| Line Ahead | 35/69 155/309 | ||
| # | Formation | Normal Battle Node | AD/AP AS/AS+ |
| # | Empty Node | ||
|---|---|---|---|
| V1 | 気のせいだった。 Must be my imagination. | ||
| # | Empty Node | ||
| # | Empty Node | ||
|---|---|---|---|
| V2 | 敵影を見ず。 No enemy spotted. | ||
| # | Empty Node | ||
| # | Formation | Boss Battle Node | AD/AP AS/AS+ |
|---|---|---|---|
| W | Cruising Formation 1 | 0/0 0/0 | |
| Cruising Formation 1 (Final)
|
0/0 0/0 | ||
| # | Formation | Boss Battle Node | AD/AP AS/AS+ |
| Type | Ships |
|---|---|
| DE | |
| DD |
| Type | Ships |
|---|---|
| DE | |
| DD | |
| AO |
| Type | Ships |
|---|---|
| DE | |
| DD | |
| AO |
| Type | Ships |
|---|---|
| DE | |
| DD | |
| AO |
| Type | Ships |
|---|---|
| DE | |
| DD | |
| LHA | |
| AO |
| Type | Ships |
|---|---|
| DE |
| Type | Ships |
|---|---|
| DE | |
| DD | |
| AO |
| Type | Ships |
|---|---|
| DE | |
| DD | |
| AO |
| Type | Ships |
|---|---|
| DE | |
| DD | |
| LHA | |
| AO |
| Type | Ships |
|---|---|
| DE | |
| DD | |
| LHA | |
| AO |
| Type | Ships |
|---|---|
| DE | |
| DD | |
| CVL | |
| SS | |
| SSV | |
| LHA | |
| AS | |
| AO |
| # | Empty Node | ||
|---|---|---|---|
| A | 気のせいだった。 Must be my imagination. | ||
| # | Empty Node | ||
| # | Formation | Normal Battle Node | AD/AP AS/AS+ |
|---|---|---|---|
| A1 | Echelon Line Abreast |
0/0 0/0 | |
| Echelon Line Abreast |
0/0 0/0 | ||
| Echelon Line Abreast |
0/0 0/0 | ||
| # | Formation | Normal Battle Node | AD/AP AS/AS+ |
| # | Formation | Air Defense Node | AD/AP AS/AS+ |
|---|---|---|---|
| A2 | Diamond | 12/23 51/102 | |
| Diamond | 17/33 72/144 | ||
| Diamond (HA) |
36/71 158/315 | ||
| Diamond | 11/22 48/96 | ||
| Diamond | 23/45 99/198 | ||
| # | Formation | Air Defense Node | AD/AP AS/AS+ |
| # | Selection Node | ||
|---|---|---|---|
| B | 艦隊の針路を選択できます。提督、どちらの針路をとられますか? You can decide the fleet's course. Admiral, which heading should we take? | ||
| # | Selection Node | ||
| # | Formation | Normal Battle Node | AD/AP AS/AS+ |
|---|---|---|---|
| C | Line Ahead Echelon Vanguard |
0/0 0/0 | |
| # | Formation | Normal Battle Node | AD/AP AS/AS+ |
| # | Formation | Normal Battle Node | AD/AP AS/AS+ |
|---|---|---|---|
| D | Line Ahead | 0/0 0/0 | |
| Line Ahead | 0/0 0/0 | ||
| Line Ahead | 0/0 0/0 | ||
| # | Formation | Normal Battle Node | AD/AP AS/AS+ |
| # | Selection Node | ||
|---|---|---|---|
| E | 艦隊の針路を選択できます。提督、どちらの針路をとられますか? You can decide the fleet's course. Admiral, which heading should we take? | ||
| # | Selection Node | ||
| # | Formation | Air Defense Node | AD/AP AS/AS+ |
|---|---|---|---|
| F | Diamond (HA) |
24/48 107/213 | |
| Diamond (HA) |
36/71 158/315 | ||
| Diamond (HA) |
47/94 210/420 | ||
| Diamond (HA) |
36/71 158/315 | ||
| Diamond (HA) |
47/93 209/417 | ||
| Diamond (HA) |
35/69 155/309 | ||
| Diamond (HA) |
46/92 206/411 | ||
| # | Formation | Air Defense Node | AD/AP AS/AS+ |
| # | Formation | Normal Battle Node | AD/AP AS/AS+ |
|---|---|---|---|
| F1 | Line Ahead Double Line Diamond |
32/63 141/282 | |
| # | Formation | Normal Battle Node | AD/AP AS/AS+ |
| # | Formation | Normal Battle Node | AD/AP AS/AS+ |
|---|---|---|---|
| F2 | Line Ahead | 0/0 0/0 | |
| Line Ahead | 0/0 0/0 | ||
| Line Ahead | 0/0 0/0 | ||
| # | Formation | Normal Battle Node | AD/AP AS/AS+ |
| # | Formation | Air Defense Node | AD/AP AS/AS+ |
|---|---|---|---|
| G | Diamond | 12/23 51/102 | |
| Diamond | 17/33 72/144 | ||
| Diamond (HA) |
36/71 158/315 | ||
| Diamond | 11/22 48/96 | ||
| Diamond | 23/45 99/198 | ||
| # | Formation | Air Defense Node | AD/AP AS/AS+ |
| # | Formation | Normal Battle Node | AD/AP AS/AS+ |
|---|---|---|---|
| H | Echelon Line Abreast |
0/0 0/0 | |
| Echelon Line Abreast |
0/0 0/0 | ||
| Echelon Line Abreast |
0/0 0/0 | ||
| # | Formation | Normal Battle Node | AD/AP AS/AS+ |
| # | Formation | Normal Battle Node | AD/AP AS/AS+ |
|---|---|---|---|
| I | Diamond | 43/85 189/378 | |
| Diamond | 43/85 189/378 | ||
| Diamond | 43/85 189/378 | ||
| # | Formation | Normal Battle Node | AD/AP AS/AS+ |
| # | Empty Node | ||
|---|---|---|---|
| J | 敵影を見ず。 No enemy spotted. | ||
| # | Empty Node | ||
| # | Formation | Normal Battle Node | AD/AP AS/AS+ |
|---|---|---|---|
| K | Line Ahead | 0/0 0/0 | |
| Line Ahead | 0/0 0/0 | ||
| Line Ahead | 0/0 0/0 | ||
| # | Formation | Normal Battle Node | AD/AP AS/AS+ |
| # | Empty Node | ||
|---|---|---|---|
| L | 気のせいだった。 Must be my imagination. | ||
| # | Empty Node | ||
| # | Formation | Normal Battle Node | AD/AP AS/AS+ |
|---|---|---|---|
| M | Diamond | 43/85 189/378 | |
| Diamond | 43/85 189/378 | ||
| Diamond | 43/85 189/378 | ||
| # | Formation | Normal Battle Node | AD/AP AS/AS+ |
| # | Selection Node | ||
|---|---|---|---|
| N | 艦隊の針路を選択できます。提督、どちらの針路をとられますか? You can decide the fleet's course. Admiral, which heading should we take? | ||
| # | Selection Node | ||
| # | Formation | Air Defense Node | AD/AP AS/AS+ |
|---|---|---|---|
| O | Diamond (HA) |
24/48 107/213 | |
| Diamond (HA) |
36/71 158/315 | ||
| Diamond (HA) |
47/94 210/420 | ||
| Diamond (HA) |
36/71 158/315 | ||
| Diamond (HA) |
47/93 209/417 | ||
| Diamond (HA) |
35/69 155/309 | ||
| Diamond (HA) |
46/92 206/411 | ||
| # | Formation | Air Defense Node | AD/AP AS/AS+ |
| # | Formation | Normal Battle Node | AD/AP AS/AS+ |
|---|---|---|---|
| P | Echelon Line Abreast |
0/0 0/0 | |
| Echelon Line Abreast |
0/0 0/0 | ||
| Echelon Line Abreast |
0/0 0/0 | ||
| # | Formation | Normal Battle Node | AD/AP AS/AS+ |
| # | Formation | Normal Battle Node | AD/AP AS/AS+ |
|---|---|---|---|
| Q | Echelon Line Abreast |
0/0 0/0 | |
| Echelon Line Abreast |
0/0 0/0 | ||
| # | Formation | Normal Battle Node | AD/AP AS/AS+ |
| # | Formation | Normal Battle Node | AD/AP AS/AS+ |
|---|---|---|---|
| R | Line Ahead Double Line Vanguard |
0/0 0/0 | |
| # | Formation | Normal Battle Node | AD/AP AS/AS+ |
| # | Formation | Normal Battle Node | AD/AP AS/AS+ |
|---|---|---|---|
| S | Line Ahead Double Line Vanguard |
0/0 0/0 | |
| # | Formation | Normal Battle Node | AD/AP AS/AS+ |
| # | Landing Node | ||
|---|---|---|---|
| T | 輸送物資の揚陸地点に到達しました。本海域の輸送作戦は無事完了しています。 The landing point of the convoy has been reached. The transport operation here has already been completed successfully. | ||
| # | Landing Node | ||
| # | Formation | Boss Battle Node | AD/AP AS/AS+ |
|---|---|---|---|
| U | Line Ahead Double Line Echelon |
0/0 0/0 | |
| # | Formation | Boss Battle Node | AD/AP AS/AS+ |
| # | Formation | Normal Battle Node | AD/AP AS/AS+ |
|---|---|---|---|
| V | Line Ahead | 35/69 155/309 | |
| Line Ahead | 10/19 42/84 | ||
| Line Ahead | 34/67 150/300 | ||
| # | Formation | Normal Battle Node | AD/AP AS/AS+ |
| # | Empty Node | ||
|---|---|---|---|
| V1 | 気のせいだった。 Must be my imagination. | ||
| # | Empty Node | ||
| # | Empty Node | ||
|---|---|---|---|
| V2 | 敵影を見ず。 No enemy spotted. | ||
| # | Empty Node | ||
| # | Formation | Boss Battle Node | AD/AP AS/AS+ |
|---|---|---|---|
| W | Cruising Formation 1 | 0/0 0/0 | |
| Cruising Formation 1 (Final)
|
0/0 0/0 | ||
| # | Formation | Boss Battle Node | AD/AP AS/AS+ |
| Type | Ships |
|---|---|
| DE | |
| AO |
| Type | Ships |
|---|---|
| DE | |
| DD | |
| AO |
| Type | Ships |
|---|---|
| DE | |
| DD | |
| AO |
| Type | Ships |
|---|---|
| DE | |
| DD | |
| AO |
| Type | Ships |
|---|---|
| DE | |
| DD | |
| AO |
| Type | Ships |
|---|---|
| DE | |
| DD | |
| AO |
| Type | Ships |
|---|---|
| DE | |
| DD | |
| LHA | |
| AO |
| Type | Ships |
|---|---|
| DE | |
| DD | |
| AO |
| Type | Ships |
|---|---|
| DE | |
| DD | |
| CVL | |
| SS | |
| SSV | |
| LHA | |
| AS | |
| AO |
| # | Empty Node | ||
|---|---|---|---|
| A | 気のせいだった。 Must be my imagination. | ||
| # | Empty Node | ||
| # | Formation | Normal Battle Node | AD/AP AS/AS+ |
|---|---|---|---|
| A1 | Echelon Line Abreast |
0/0 0/0 | |
| Echelon Line Abreast |
0/0 0/0 | ||
| # | Formation | Normal Battle Node | AD/AP AS/AS+ |
| # | Formation | Air Defense Node | AD/AP AS/AS+ |
|---|---|---|---|
| A2 | Diamond | 12/23 51/102 | |
| Diamond (HA) |
24/48 107/213 | ||
| Diamond | 11/22 48/96 | ||
| # | Formation | Air Defense Node | AD/AP AS/AS+ |
| # | Selection Node | ||
|---|---|---|---|
| B | 艦隊の針路を選択できます。提督、どちらの針路をとられますか? You can decide the fleet's course. Admiral, which heading should we take? | ||
| # | Selection Node | ||
| # | Formation | Normal Battle Node | AD/AP AS/AS+ |
|---|---|---|---|
| C | Line Ahead Echelon Vanguard |
0/0 0/0 | |
| # | Formation | Normal Battle Node | AD/AP AS/AS+ |
| # | Formation | Normal Battle Node | AD/AP AS/AS+ |
|---|---|---|---|
| D | Line Ahead | 0/0 0/0 | |
| Line Ahead | 0/0 0/0 | ||
| Line Ahead | 0/0 0/0 | ||
| # | Formation | Normal Battle Node | AD/AP AS/AS+ |
| # | Selection Node | ||
|---|---|---|---|
| E | 艦隊の針路を選択できます。提督、どちらの針路をとられますか? You can decide the fleet's course. Admiral, which heading should we take? | ||
| # | Selection Node | ||
| # | Formation | Air Defense Node | AD/AP AS/AS+ |
|---|---|---|---|
| F | Diamond (HA) |
24/48 107/213 | |
| Diamond (HA) |
36/71 158/315 | ||
| Diamond (HA) |
36/71 158/315 | ||
| Diamond (HA) |
35/69 155/309 | ||
| # | Formation | Air Defense Node | AD/AP AS/AS+ |
| # | Formation | Normal Battle Node | AD/AP AS/AS+ |
|---|---|---|---|
| F1 | Line Ahead Double Line Diamond |
32/63 141/282 | |
| # | Formation | Normal Battle Node | AD/AP AS/AS+ |
| # | Formation | Normal Battle Node | AD/AP AS/AS+ |
|---|---|---|---|
| F2 | Line Ahead | 0/0 0/0 | |
| Line Ahead | 0/0 0/0 | ||
| Line Ahead | 0/0 0/0 | ||
| Line Ahead | 0/0 0/0 | ||
| # | Formation | Normal Battle Node | AD/AP AS/AS+ |
| # | Formation | Air Defense Node | AD/AP AS/AS+ |
|---|---|---|---|
| G | Diamond | 12/23 51/102 | |
| Diamond (HA) |
24/48 107/213 | ||
| Diamond | 11/22 48/96 | ||
| # | Formation | Air Defense Node | AD/AP AS/AS+ |
| # | Formation | Normal Battle Node | AD/AP AS/AS+ |
|---|---|---|---|
| H | Echelon Line Abreast |
0/0 0/0 | |
| Echelon Line Abreast |
0/0 0/0 | ||
| # | Formation | Normal Battle Node | AD/AP AS/AS+ |
| # | Formation | Normal Battle Node | AD/AP AS/AS+ |
|---|---|---|---|
| I | Diamond | 3/6 12/24 | |
| Diamond | 9/17 36/72 | ||
| Diamond | 43/85 189/378 | ||
| # | Formation | Normal Battle Node | AD/AP AS/AS+ |
| # | Empty Node | ||
|---|---|---|---|
| J | 敵影を見ず。 No enemy spotted. | ||
| # | Empty Node | ||
| # | Formation | Normal Battle Node | AD/AP AS/AS+ |
|---|---|---|---|
| K | Line Ahead | 0/0 0/0 | |
| Line Ahead | 0/0 0/0 | ||
| Line Ahead | 0/0 0/0 | ||
| Line Ahead | 0/0 0/0 | ||
| # | Formation | Normal Battle Node | AD/AP AS/AS+ |
| # | Empty Node | ||
|---|---|---|---|
| L | 気のせいだった。 Must be my imagination. | ||
| # | Empty Node | ||
| # | Formation | Normal Battle Node | AD/AP AS/AS+ |
|---|---|---|---|
| M | Diamond | 3/6 12/24 | |
| Diamond | 9/17 36/72 | ||
| Diamond | 43/85 189/378 | ||
| # | Formation | Normal Battle Node | AD/AP AS/AS+ |
| # | Selection Node | ||
|---|---|---|---|
| N | 艦隊の針路を選択できます。提督、どちらの針路をとられますか? You can decide the fleet's course. Admiral, which heading should we take? | ||
| # | Selection Node | ||
| # | Formation | Air Defense Node | AD/AP AS/AS+ |
|---|---|---|---|
| O | Diamond (HA) |
24/48 107/213 | |
| Diamond (HA) |
36/71 158/315 | ||
| Diamond (HA) |
36/71 158/315 | ||
| Diamond (HA) |
35/69 155/309 | ||
| # | Formation | Air Defense Node | AD/AP AS/AS+ |
| # | Formation | Normal Battle Node | AD/AP AS/AS+ |
|---|---|---|---|
| P | Echelon Line Abreast |
0/0 0/0 | |
| Echelon Line Abreast |
0/0 0/0 | ||
| # | Formation | Normal Battle Node | AD/AP AS/AS+ |
| # | Formation | Normal Battle Node | AD/AP AS/AS+ |
|---|---|---|---|
| Q | Echelon Line Abreast |
0/0 0/0 | |
| Echelon Line Abreast |
0/0 0/0 | ||
| # | Formation | Normal Battle Node | AD/AP AS/AS+ |
| # | Formation | Normal Battle Node | AD/AP AS/AS+ |
|---|---|---|---|
| R | Line Ahead Double Line Vanguard |
0/0 0/0 | |
| # | Formation | Normal Battle Node | AD/AP AS/AS+ |
| # | Formation | Normal Battle Node | AD/AP AS/AS+ |
|---|---|---|---|
| S | Line Ahead Double Line Vanguard |
0/0 0/0 | |
| # | Formation | Normal Battle Node | AD/AP AS/AS+ |
| # | Landing Node | ||
|---|---|---|---|
| T | 輸送物資の揚陸地点に到達しました。本海域の輸送作戦は無事完了しています。 The landing point of the convoy has been reached. The transport operation here has already been completed successfully. | ||
| # | Landing Node | ||
| # | Formation | Boss Battle Node | AD/AP AS/AS+ |
|---|---|---|---|
| U | Line Ahead Double Line Echelon |
0/0 0/0 | |
| # | Formation | Boss Battle Node | AD/AP AS/AS+ |
| # | Formation | Normal Battle Node | AD/AP AS/AS+ |
|---|---|---|---|
| V | Line Ahead | 4/7 15/30 | |
| Line Ahead | 10/19 41/81 | ||
| Line Ahead | 10/19 42/84 | ||
| # | Formation | Normal Battle Node | AD/AP AS/AS+ |
| # | Empty Node | ||
|---|---|---|---|
| V1 | 気のせいだった。 Must be my imagination. | ||
| # | Empty Node | ||
| # | Empty Node | ||
|---|---|---|---|
| V2 | 敵影を見ず。 No enemy spotted. | ||
| # | Empty Node | ||
| # | Formation | Boss Battle Node | AD/AP AS/AS+ |
|---|---|---|---|
| W | Cruising Formation 1 | 0/0 0/0 | |
| Cruising Formation 1 (Final)
|
0/0 0/0 | ||
| # | Formation | Boss Battle Node | AD/AP AS/AS+ |
Ship Drops
| Ship drops | |||||||||||||||||||||||||||||||||||||||||||||||||||||||||||||||||||||||||||||||||||||||||||||||||||
|---|---|---|---|---|---|---|---|---|---|---|---|---|---|---|---|---|---|---|---|---|---|---|---|---|---|---|---|---|---|---|---|---|---|---|---|---|---|---|---|---|---|---|---|---|---|---|---|---|---|---|---|---|---|---|---|---|---|---|---|---|---|---|---|---|---|---|---|---|---|---|---|---|---|---|---|---|---|---|---|---|---|---|---|---|---|---|---|---|---|---|---|---|---|---|---|---|---|---|---|
| Type | Ship? | C | D | F1 | F2 | I | K | M | R | S | U | V | W | ||||||||||||||||||||||||||||||||||||||||||||||||||||||||||||||||||||||||||||||||||||||
| DE | Kaiboukan No.22 | Medium+ | Easy+ | Casual+ | Casual+ | Casual+ | Casual+ | Easy+ | Casual+ | Casual+ | Casual+ | Casual+ | Casual+ | ||||||||||||||||||||||||||||||||||||||||||||||||||||||||||||||||||||||||||||||||||||||
| DE | Kunashiri | Medium+ | Casual+ | Casual+ | Casual+ | Casual+ | Casual+ | Casual+ | Casual+ | Casual+ | Casual+ | ||||||||||||||||||||||||||||||||||||||||||||||||||||||||||||||||||||||||||||||||||||||||
| DE | Etorofu | Easy+ | Casual+ | Easy+ | Casual+ | Casual+ | Casual+ | Casual+ | Casual+ | Casual+ | Casual+ | ||||||||||||||||||||||||||||||||||||||||||||||||||||||||||||||||||||||||||||||||||||||||
| DD | Kaya | Easy+ | |||||||||||||||||||||||||||||||||||||||||||||||||||||||||||||||||||||||||||||||||||||||||||||||||
| DD | Ume | Hard+ | Easy+ | Easy+ | Casual+ | Casual+ | Casual+ | Medium+ | Casual+ | Casual+ | Casual+ | Casual+ | |||||||||||||||||||||||||||||||||||||||||||||||||||||||||||||||||||||||||||||||||||||||
| DD | Fuyutsuki | Medium+ | Casual+ | ||||||||||||||||||||||||||||||||||||||||||||||||||||||||||||||||||||||||||||||||||||||||||||||||
| DD | Shirakumo | Easy+ | |||||||||||||||||||||||||||||||||||||||||||||||||||||||||||||||||||||||||||||||||||||||||||||||||
| DD | Uzuki | Casual+ | |||||||||||||||||||||||||||||||||||||||||||||||||||||||||||||||||||||||||||||||||||||||||||||||||
| DD | Usugumo | Casual+ | Casual+ | Casual+ | Casual+ | ||||||||||||||||||||||||||||||||||||||||||||||||||||||||||||||||||||||||||||||||||||||||||||||
| DD | Uranami | Easy+ | Easy+ | Casual+ | Hard+ | Hard+ | Casual+ | Casual+ | Casual+ | ||||||||||||||||||||||||||||||||||||||||||||||||||||||||||||||||||||||||||||||||||||||||||
| DD | Kishinami | Medium+ | Medium+ | Casual+ | Casual+ | Casual+ | |||||||||||||||||||||||||||||||||||||||||||||||||||||||||||||||||||||||||||||||||||||||||||||
| DD | Asashimo | Easy+ | Easy+ | Medium+ | Casual+ | Hard+ | Hard+ | Casual+ | Casual+ | Casual+ | |||||||||||||||||||||||||||||||||||||||||||||||||||||||||||||||||||||||||||||||||||||||||
| DD | Kiyoshimo | Casual+ | |||||||||||||||||||||||||||||||||||||||||||||||||||||||||||||||||||||||||||||||||||||||||||||||||
| DD | Take | Medium+ | Easy+ | Casual+ | Casual+ | Casual+ | Casual+ | Casual+ | Casual+ | Casual+ | |||||||||||||||||||||||||||||||||||||||||||||||||||||||||||||||||||||||||||||||||||||||||
| DD | Tashkent | Casual+ | |||||||||||||||||||||||||||||||||||||||||||||||||||||||||||||||||||||||||||||||||||||||||||||||||
| CVL | Langley | Casual+ | |||||||||||||||||||||||||||||||||||||||||||||||||||||||||||||||||||||||||||||||||||||||||||||||||
| SS | Scamp | Casual+ | |||||||||||||||||||||||||||||||||||||||||||||||||||||||||||||||||||||||||||||||||||||||||||||||||
| SSV | I-36 | Casual+ | |||||||||||||||||||||||||||||||||||||||||||||||||||||||||||||||||||||||||||||||||||||||||||||||||
| LHA | No.101 Transport Ship | Easy+ | Casual+ | Easy+ | Casual+ | ||||||||||||||||||||||||||||||||||||||||||||||||||||||||||||||||||||||||||||||||||||||||||||||
| AS | Taigei | Casual+ | |||||||||||||||||||||||||||||||||||||||||||||||||||||||||||||||||||||||||||||||||||||||||||||||||
| AO | Ootomari | Hard+ | Casual+ | Casual+ | Easy+ | Casual+ | Easy+ | Easy+ | Casual+ | Casual+ | Casual+ | ||||||||||||||||||||||||||||||||||||||||||||||||||||||||||||||||||||||||||||||||||||||||
| AO | Yamashio Maru | Hard+ | Casual+ | Casual+ | Casual+ | Casual+ | Casual+ | Casual+ | Casual+ | Casual+ | Casual+ | ||||||||||||||||||||||||||||||||||||||||||||||||||||||||||||||||||||||||||||||||||||||||
| AO | Souya | Casual+ | |||||||||||||||||||||||||||||||||||||||||||||||||||||||||||||||||||||||||||||||||||||||||||||||||
| CL | Kitakami | Medium+ | Casual+ | Hard+ | Casual+ | ||||||||||||||||||||||||||||||||||||||||||||||||||||||||||||||||||||||||||||||||||||||||||||||
| CL | Ooi | Hard+ | Casual+ | Easy+ | Easy+ | Casual+ | Casual+ | Casual+ | Casual+ | Casual+ | Casual+ | ||||||||||||||||||||||||||||||||||||||||||||||||||||||||||||||||||||||||||||||||||||||||
| CL | Kinu | Hard+ | Medium+ | Casual+ | Casual+ | Casual+ | Casual+ | ||||||||||||||||||||||||||||||||||||||||||||||||||||||||||||||||||||||||||||||||||||||||||||
| CL | Abukuma | Medium+ | Medium+ | Casual+ | Casual+ | Casual+ | Casual+ | ||||||||||||||||||||||||||||||||||||||||||||||||||||||||||||||||||||||||||||||||||||||||||||
| CL | Sendai | Easy+ | Easy+ | Medium+ | Casual+ | Medium+ | Medium+ | Casual+ | Casual+ | Casual+ | |||||||||||||||||||||||||||||||||||||||||||||||||||||||||||||||||||||||||||||||||||||||||
| CA | Kinugasa | Casual+ | |||||||||||||||||||||||||||||||||||||||||||||||||||||||||||||||||||||||||||||||||||||||||||||||||
| CA | Takao | Casual+ | |||||||||||||||||||||||||||||||||||||||||||||||||||||||||||||||||||||||||||||||||||||||||||||||||
| CA | Atago | Casual+ | |||||||||||||||||||||||||||||||||||||||||||||||||||||||||||||||||||||||||||||||||||||||||||||||||
| CA | Suzuya | Casual+ | |||||||||||||||||||||||||||||||||||||||||||||||||||||||||||||||||||||||||||||||||||||||||||||||||
| CA | Kumano | Casual+ | |||||||||||||||||||||||||||||||||||||||||||||||||||||||||||||||||||||||||||||||||||||||||||||||||
| CA | Tone | Casual+ | |||||||||||||||||||||||||||||||||||||||||||||||||||||||||||||||||||||||||||||||||||||||||||||||||
| CA | Chikuma | Casual+ | |||||||||||||||||||||||||||||||||||||||||||||||||||||||||||||||||||||||||||||||||||||||||||||||||
| CVL | Zuihou | Casual+ | |||||||||||||||||||||||||||||||||||||||||||||||||||||||||||||||||||||||||||||||||||||||||||||||||
| FBB | Kongou | Casual+ | |||||||||||||||||||||||||||||||||||||||||||||||||||||||||||||||||||||||||||||||||||||||||||||||||
| FBB | Hiei | Casual+ | |||||||||||||||||||||||||||||||||||||||||||||||||||||||||||||||||||||||||||||||||||||||||||||||||
| FBB | Haruna | Casual+ | |||||||||||||||||||||||||||||||||||||||||||||||||||||||||||||||||||||||||||||||||||||||||||||||||
| FBB | Kirishima | Casual+ | |||||||||||||||||||||||||||||||||||||||||||||||||||||||||||||||||||||||||||||||||||||||||||||||||
| BB | Ise | Casual+ | |||||||||||||||||||||||||||||||||||||||||||||||||||||||||||||||||||||||||||||||||||||||||||||||||
| BB | Hyuuga | Casual+ | |||||||||||||||||||||||||||||||||||||||||||||||||||||||||||||||||||||||||||||||||||||||||||||||||
| SS | I-8 | Casual+ | |||||||||||||||||||||||||||||||||||||||||||||||||||||||||||||||||||||||||||||||||||||||||||||||||
| SS | I-19 | Casual+ | |||||||||||||||||||||||||||||||||||||||||||||||||||||||||||||||||||||||||||||||||||||||||||||||||
Trivia
- The Transport Phase and the TP bar are historical references to the tanks that played a role in the planned Hokkaido Defense Operation. The Type 97 Shinhōtō Chi-Ha (colloquially named Type 97 Kai or Chi-Ha Kai), Type 1 Ho-Ni I, and the Imperial Japanese Army 11th Tank Regiment units all were key players in the planned Hokkaido Defense should the Soviet Union have implemented their northern invasion operation. This is why these 3 units give the most TP points on this map.
- The plan of Japanese Military was to reserve their best units in the defense of the mainland and they did have a number of both these armored vehicles and they were to supplement other more advanced weaponry that were still being produced such as the Type 3 Chi-Nu, Type 1 Chi-He, Type 4 Chi-To, Type 1 Ho-Ni II, and the Type 3 Ho-Ni III.
- The 11th Tank Regiment did engage the Soviets in the Kuriles, and they proved that they were a match with their Type 97 Shinhōtō Chi-Ha's against the Soviet T-34 tanks. This was also the case in Manchuria, where the Soviets thought they would face an inferior force but were met with heavy resistance from the Type 97 Shinhōtō Chi-Ha and Type 1 Ho-Ni I. All of which were already proven against American tanks in the engagements in the Philippines, Iwo Jima, and Okinawa, albeit they were ultimately defeated and captured due to smaller numbers.
- The Air Base we are using is still Misawa Airbase same as E-1
- Node W is at Cape Soya, this is also the final known location for USS Wahoo and where her wreck was found in 2006. There was a video released in 2024 from the Russian Geographical Society on the wreck. They installed a memorial plaque and a wreathe with the inscription "Russians Remember".
|
| |||||||||
|---|---|---|---|---|---|---|---|---|---|
|
Time until the end of the event:
| |||||||||