World 4/4-3
World 4-3: リランカ島 - Ri-Lanka Island

| Strategy Name | リランカ島空襲 Ri Lanka Air Raid |
|---|---|
| Difficulty | ☆ ☆ ☆ ☆ ☆ ☆ |
| Item | |
| Strategy Content | 空母を伴った艦隊を編成し、リランカ島の敵母港に展開する敵艦隊への攻撃を行う。艦隊、出撃! Organize a fleet being attended by aircraft carriers and attack an enemy fleet deploying on its home port in Ri-Lanka Island. Fleet, sortie! |
| Boss Air Control | |||
|---|---|---|---|
| AD | AP | AS | AS+ |
| 46 | 69 | 155 | 310 |
| Boss Route Air Control | |||
| AD | AP | AS | AS+ |
| 24 | 35 | 78 | 156 |
| 4-3 Unlocking & Progression | ||||
|---|---|---|---|---|
| Unlock conditions | 4-3 is unlocked after clearing 4-2 | |||
| Clear conditions | To clear the map: the boss's flagship must be sunk once | |||
Stage Guide
| 4-3 Branching Rules | ||
|---|---|---|
| Nodes | Rules | |
| Start | A |
|
C | ||
D | ||
A |
B |
|
D | ||
B |
E |
|
G | ||
C |
D |
|
F | ||
F |
H |
|
K | ||
G |
H |
|
I | ||
J | ||
H |
I |
|
N | ||
K |
L |
|
N | ||
L |
M |
|
N | ||
Tips
This map will serve as a first introduction to Installation type Abyssal, which is different from all other abyssal types as they tend to have higher armor, stronger attack power and, can't be hit by torpedoes.
- Killing the installation is optional for clearing the map. However, having a fleet that is capable of killing an installation is encouraged especially for first-time users of anti-installation gear to get a feel for fighting these kinds of bosses.
- As such, the following equipment should be considered to fight the Harbor Princess, the following gear are effective at penetrating the Soft-Skinned Installation's armor:
For beginners: ![]() AA Shells (for BB/CA).
AA Shells (for BB/CA).
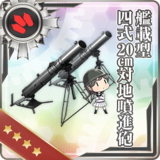
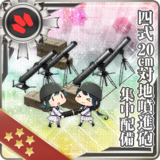
For more advanced players: ![]() Anti-ground Rocket Launchers
Anti-ground Rocket Launchers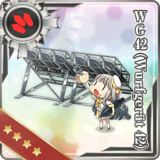
 and
and ![]() "Landing tanks".
Aircraft carriers CANNOT attack installations if they have a
"Landing tanks".
Aircraft carriers CANNOT attack installations if they have a ![]() equipped UNLESS its one of the dive-bombers from the following list:
equipped UNLESS its one of the dive-bombers from the following list:
| This is a segment from a bigger article. See Combat/Anti-Installation for details on Installation mechanics.
Carriers will only attack installations in the shelling phase if equipped with Torpedo Bombers or Anti-Installation Dive Bombers.
|
 Ju 87C Kai  Prototype Nanzan  F4U-1D  FM-2  Ju 87C Kai Ni (w/ KMX)  Ju 87C Kai Ni (w/ KMX/Skilled)  Suisei Model 12 (634 Air Group w/ Type 3 Cluster Bombs)  Suisei Model 12 (w/ Type 31 Photoelectric Fuze Bombs)  Type 99 Dive Bomber Model 22  Type 99 Dive Bomber Model 22 (Skilled)  SB2C-3  SB2C-5  F4U-4  SBD (Yellow Wings)  SBD VB-2 (Bomber Squadron)  Prototype Myoujou (Additional Trial Model)  Myoujou Kai  Type 99 Training Bomber Model 22 Kai (Experimental w/ Night Equipment) |
- Node notes
- Node C only contains submarines but is treated as a surface node for
 /
/ consumption.
 - Node A contains a mix of submarines and surface ships.
- Most fleets have a chance to off-route from H to I.
Recommended Fleets
| Medium Fleet | |||||||||||||||||||||||||||||||||
|---|---|---|---|---|---|---|---|---|---|---|---|---|---|---|---|---|---|---|---|---|---|---|---|---|---|---|---|---|---|---|---|---|---|
|
| ||||||||||||||||||||||||||||||||
| Fleet Notes | |||||||||||||||||||||||||||||||||
| A strong composition, but that will fight more pre-boss battles.
Dealing with Harbor Princess is slightly easier as CA(V) can carry AA Shells to damage her. | |||||||||||||||||||||||||||||||||
| "Backdoor" Heavy Fleet | |||||||||||||||||||||||||||||||||||||
|---|---|---|---|---|---|---|---|---|---|---|---|---|---|---|---|---|---|---|---|---|---|---|---|---|---|---|---|---|---|---|---|---|---|---|---|---|---|
|
| ||||||||||||||||||||||||||||||||||||
| Fleet Notes | |||||||||||||||||||||||||||||||||||||
| Node L has 100% routing to boss, while H has 90%.
Dealing with Harbor Princess is slightly easier as CA(V) can carry AA Shells to damage her. | |||||||||||||||||||||||||||||||||||||
| Lightest Fleet | |||||||||||||||||||||||||||||||||
|---|---|---|---|---|---|---|---|---|---|---|---|---|---|---|---|---|---|---|---|---|---|---|---|---|---|---|---|---|---|---|---|---|---|
|
| ||||||||||||||||||||||||||||||||
| Fleet Notes | |||||||||||||||||||||||||||||||||
A light fleet composition which takes the shortest path to the boss. Since it is limited to light ships, Nuke set-ups are recommended to effectively fight the installation boss. CVLs equipped with anti-installation bombers can also be used for additional assistance taking out the installation.
| |||||||||||||||||||||||||||||||||
| Light Fleet | |||||||||||||||||||||||||||||||||
|---|---|---|---|---|---|---|---|---|---|---|---|---|---|---|---|---|---|---|---|---|---|---|---|---|---|---|---|---|---|---|---|---|---|
|
| ||||||||||||||||||||||||||||||||
| Fleet Notes | |||||||||||||||||||||||||||||||||
| Goes through the resource node that yields fuel, but there is a chance of off-routing to Node I instead of going to H. | |||||||||||||||||||||||||||||||||
| Heaviest Fleet | |||||||||||||||||||||||||||||||||
|---|---|---|---|---|---|---|---|---|---|---|---|---|---|---|---|---|---|---|---|---|---|---|---|---|---|---|---|---|---|---|---|---|---|
|
| ||||||||||||||||||||||||||||||||
| Fleet Notes | |||||||||||||||||||||||||||||||||
| Heaviest possible fleet, but has random routing across the map (always start at Node C). | |||||||||||||||||||||||||||||||||
Resource Nodes
B J are "Normal Resource Nodes" rewarding respectively fuel ![]() , and bauxite
, and bauxite ![]() .
.
- See here for more details.
It is possible to use this map to farm both fuel and bauxite. This requires the use of either an AV/AO and will go through 2 combat nodes:
| Fuel & Bauxite Farming | |||||||||||||||||||||||||||||||||
|---|---|---|---|---|---|---|---|---|---|---|---|---|---|---|---|---|---|---|---|---|---|---|---|---|---|---|---|---|---|---|---|---|---|
|
| ||||||||||||||||||||||||||||||||
| Fleet Notes | |||||||||||||||||||||||||||||||||
Node A should not present much difficulty, however, node G may present some challenge to pass.
Slow AV/AO needs to be Fast (see Improving Ship Speed). Due to the danger this path has, bringing | |||||||||||||||||||||||||||||||||
Enemy Compositions

| # | Enemy Form. |
Base EXP | Normal Battle Node | AD/AP AS/AS+ |
|---|---|---|---|---|
| A | Echelon Line Abreast |
150 | 0/0 0/0 | |
| Echelon Line Abreast |
170 | 0/0 0/0 | ||
| Echelon Line Abreast |
190 | 0/0 0/0 | ||
| # | Enemy Form. |
Base EXP | Normal Battle Node | AD/AP AS/AS+ |
| # | Resource Node | ||
|---|---|---|---|
| B | Gained 30~90 | ||
| # | Resource Node | ||
| # | Enemy Form. |
Base EXP | Normal Battle Node | AD/AP AS/AS+ |
|---|---|---|---|---|
| C | Echelon Line Abreast |
160 | 0/0 0/0 | |
| Echelon Line Abreast |
180 | 0/0 0/0 | ||
| Echelon Line Abreast |
200 | 0/0 0/0 | ||
| # | Enemy Form. |
Base EXP | Normal Battle Node | AD/AP AS/AS+ |
| # | Enemy Form. |
Base EXP | Normal Battle Node | AD/AP AS/AS+ |
|---|---|---|---|---|
| D | Line Ahead Double Line |
160 | 0/0 0/0 | |
| Line Ahead Double Line |
180 | 0/0 0/0 | ||
| Line Ahead Double Line |
180 | 0/0 0/0 | ||
| # | Enemy Form. |
Base EXP | Normal Battle Node | AD/AP AS/AS+ |
| # | Maelstrom Node | ||
|---|---|---|---|
| E | Lost Normal | ||
| # | Maelstrom Node | ||
| # | Enemy Form. |
Base EXP | Normal Battle Node | AD/AP AS/AS+ |
|---|---|---|---|---|
| F | Diamond | 260 | 16/32 71/141 | |
| Diamond | 280 | 18/35 78/156 | ||
| Diamond | 300 | 18/35 78/156 | ||
| Diamond | 310 | 18/35 77/153 | ||
| # | Enemy Form. |
Base EXP | Normal Battle Node | AD/AP AS/AS+ |
| # | Enemy Form. |
Base EXP | Normal Battle Node | AD/AP AS/AS+ |
|---|---|---|---|---|
| G | Line Ahead Double Line |
170 | 0/0 0/0 | |
| Line Ahead Double Line |
190 | 0/0 0/0 | ||
| Line Ahead Double Line |
210 | 0/0 0/0 | ||
| # | Enemy Form. |
Base EXP | Normal Battle Node | AD/AP AS/AS+ |
| # | Enemy Form. |
Base EXP | Normal Battle Node | AD/AP AS/AS+ |
|---|---|---|---|---|
| H | Diamond | 260 | 9/17 36/72 | |
| Diamond | 270 | 8/16 35/69 | ||
| Diamond | 280 | 8/16 35/69 | ||
| Diamond | 290 | 8/16 35/69 | ||
| Diamond | 300 | 8/16 35/69 | ||
| # | Enemy Form. |
Base EXP | Normal Battle Node | AD/AP AS/AS+ |
| # | Enemy Form. |
Base EXP | Normal Battle Node | AD/AP AS/AS+ |
|---|---|---|---|---|
| I | Double Line | 330 | 9/17 36/72 | |
| Line Ahead | 340 | 9/17 36/72 | ||
| Line Ahead | 350 | 8/16 35/69 | ||
| Line Ahead | 360 | 8/16 35/69 | ||
| # | Enemy Form. |
Base EXP | Normal Battle Node | AD/AP AS/AS+ |
| # | Resource Node | ||
|---|---|---|---|
| J | Gained 50~100 | ||
| # | Resource Node | ||
| # | Maelstrom Node | ||
|---|---|---|---|
| K | Lost Normal | ||
| # | Maelstrom Node | ||
| # | Enemy Form. |
Base EXP | Normal Battle Node | AD/AP AS/AS+ |
|---|---|---|---|---|
| L | Line Ahead Double Line |
150 | 0/0 0/0 | |
| Line Ahead Double Line |
170 | 0/0 0/0 | ||
| Line Ahead Double Line |
180 | 0/0 0/0 | ||
| # | Enemy Form. |
Base EXP | Normal Battle Node | AD/AP AS/AS+ |
| # | Empty Node | ||
|---|---|---|---|
| M | 気のせいだった。/敵影を見ず。/穏やかな海です。/穏やかな海峡です。/警戒が必要です。/静かな海です。 Must be my imagination./No enemy spotted./Calm seas./Calm straits./Be alert./Peaceful seas. | ||
| # | Empty Node | ||
| # | Enemy Form. |
Base EXP | Boss Battle Node | AD/AP AS/AS+ |
|---|---|---|---|---|
| N | Diamond | 350 | 27/54 120/240 | |
| Diamond | 360 | 27/54 120/240 | ||
| Diamond | 370 | 27/54 120/240 | ||
| Diamond | 380 | 27/54 120/240 | ||
| Diamond | 390 | 27/54 120/240 | ||
| Diamond | 400 | 35/69 155/309 | ||
| # | Enemy Form. |
Base EXP | Boss Battle Node | AD/AP AS/AS+ |
Ship Drops
| Ship drops | |||||||||||||||||||||||||||||||||||||||||||||||||||||||||||||||||||||||||||||||||||||||||||||||||||
|---|---|---|---|---|---|---|---|---|---|---|---|---|---|---|---|---|---|---|---|---|---|---|---|---|---|---|---|---|---|---|---|---|---|---|---|---|---|---|---|---|---|---|---|---|---|---|---|---|---|---|---|---|---|---|---|---|---|---|---|---|---|---|---|---|---|---|---|---|---|---|---|---|---|---|---|---|---|---|---|---|---|---|---|---|---|---|---|---|---|---|---|---|---|---|---|---|---|---|---|
| Type | Ship? | A | D | F | G | H | I | L | N | ||||||||||||||||||||||||||||||||||||||||||||||||||||||||||||||||||||||||||||||||||||||||||
| CA | Mikuma | ✔️ | |||||||||||||||||||||||||||||||||||||||||||||||||||||||||||||||||||||||||||||||||||||||||||||||||
| DD | Makigumo | ✔️ | |||||||||||||||||||||||||||||||||||||||||||||||||||||||||||||||||||||||||||||||||||||||||||||||||
| DD | Shimakaze | ✔️ | |||||||||||||||||||||||||||||||||||||||||||||||||||||||||||||||||||||||||||||||||||||||||||||||||
| CL | Kitakami | ✔️ | ✔️ | ✔️ | ✔️ | ✔️ | ✔️ | ✔️ | ✔️ | ||||||||||||||||||||||||||||||||||||||||||||||||||||||||||||||||||||||||||||||||||||||||||
| CL | Nagara | ✔️ | |||||||||||||||||||||||||||||||||||||||||||||||||||||||||||||||||||||||||||||||||||||||||||||||||
| CL | Kinu | ✔️ | |||||||||||||||||||||||||||||||||||||||||||||||||||||||||||||||||||||||||||||||||||||||||||||||||
| CL | Abukuma | ✔️ | |||||||||||||||||||||||||||||||||||||||||||||||||||||||||||||||||||||||||||||||||||||||||||||||||
| CL | Sendai | ✔️ | ✔️ | ✔️ | ✔️ | ✔️ | ✔️ | ✔️ | |||||||||||||||||||||||||||||||||||||||||||||||||||||||||||||||||||||||||||||||||||||||||||
| CL | Yuubari | ✔️ | |||||||||||||||||||||||||||||||||||||||||||||||||||||||||||||||||||||||||||||||||||||||||||||||||
| CA | Kinugasa | ✔️ | |||||||||||||||||||||||||||||||||||||||||||||||||||||||||||||||||||||||||||||||||||||||||||||||||
| CA | Myoukou | ✔️ | ✔️ | ✔️ | ✔️ | ✔️ | ✔️ | ✔️ | ✔️ | ||||||||||||||||||||||||||||||||||||||||||||||||||||||||||||||||||||||||||||||||||||||||||
| CA | Takao | ✔️ | ✔️ | ✔️ | ✔️ | ✔️ | |||||||||||||||||||||||||||||||||||||||||||||||||||||||||||||||||||||||||||||||||||||||||||||
| CA | Atago | ✔️ | ✔️ | ✔️ | ✔️ | ✔️ | |||||||||||||||||||||||||||||||||||||||||||||||||||||||||||||||||||||||||||||||||||||||||||||
| CA | Mogami | ✔️ | ✔️ | ✔️ | ✔️ | ✔️ | |||||||||||||||||||||||||||||||||||||||||||||||||||||||||||||||||||||||||||||||||||||||||||||
| CA | Tone | ✔️ | ✔️ | ✔️ | ✔️ | ✔️ | ✔️ | ✔️ | |||||||||||||||||||||||||||||||||||||||||||||||||||||||||||||||||||||||||||||||||||||||||||
| CA | Chikuma | ✔️ | ✔️ | ✔️ | ✔️ | ✔️ | ✔️ | ✔️ | ✔️ | ||||||||||||||||||||||||||||||||||||||||||||||||||||||||||||||||||||||||||||||||||||||||||
| CVL | Ryuujou | ✔️ | ✔️ | ✔️ | ✔️ | ✔️ | ✔️ | ✔️ | ✔️ | ||||||||||||||||||||||||||||||||||||||||||||||||||||||||||||||||||||||||||||||||||||||||||
| CVL | Shouhou | ✔️ | ✔️ | ✔️ | ✔️ | ✔️ | ✔️ | ✔️ | ✔️ | ||||||||||||||||||||||||||||||||||||||||||||||||||||||||||||||||||||||||||||||||||||||||||
| CVL | Zuihou | ✔️ | |||||||||||||||||||||||||||||||||||||||||||||||||||||||||||||||||||||||||||||||||||||||||||||||||
| CVL | Hiyou | ✔️ | ✔️ | ✔️ | ✔️ | ✔️ | ✔️ | ✔️ | ✔️ | ||||||||||||||||||||||||||||||||||||||||||||||||||||||||||||||||||||||||||||||||||||||||||
| CVL | Junyou | ✔️ | ✔️ | ✔️ | ✔️ | ✔️ | ✔️ | ✔️ | ✔️ | ||||||||||||||||||||||||||||||||||||||||||||||||||||||||||||||||||||||||||||||||||||||||||
| FBB | Kongou | ✔️ | ✔️ | ||||||||||||||||||||||||||||||||||||||||||||||||||||||||||||||||||||||||||||||||||||||||||||||||
| FBB | Hiei | ✔️ | ✔️ | ✔️ | |||||||||||||||||||||||||||||||||||||||||||||||||||||||||||||||||||||||||||||||||||||||||||||||
| FBB | Haruna | ✔️ | ✔️ | ✔️ | ✔️ | ||||||||||||||||||||||||||||||||||||||||||||||||||||||||||||||||||||||||||||||||||||||||||||||
| FBB | Kirishima | ✔️ | ✔️ | ✔️ | ✔️ | ||||||||||||||||||||||||||||||||||||||||||||||||||||||||||||||||||||||||||||||||||||||||||||||
| BB | Fusou | ✔️ | ✔️ | ✔️ | ✔️ | ||||||||||||||||||||||||||||||||||||||||||||||||||||||||||||||||||||||||||||||||||||||||||||||
| BB | Yamashiro | ✔️ | ✔️ | ✔️ | ✔️ | ||||||||||||||||||||||||||||||||||||||||||||||||||||||||||||||||||||||||||||||||||||||||||||||
| BB | Ise | ✔️ | ✔️ | ✔️ | ✔️ | ||||||||||||||||||||||||||||||||||||||||||||||||||||||||||||||||||||||||||||||||||||||||||||||
| BB | Hyuuga | ✔️ | ✔️ | ✔️ | ✔️ | ||||||||||||||||||||||||||||||||||||||||||||||||||||||||||||||||||||||||||||||||||||||||||||||
| BB | Mutsu | ✔️ | |||||||||||||||||||||||||||||||||||||||||||||||||||||||||||||||||||||||||||||||||||||||||||||||||
| CV | Akagi | ✔️ | |||||||||||||||||||||||||||||||||||||||||||||||||||||||||||||||||||||||||||||||||||||||||||||||||
| CV | Kaga | ✔️ | |||||||||||||||||||||||||||||||||||||||||||||||||||||||||||||||||||||||||||||||||||||||||||||||||
| CV | Souryuu | ✔️ | ✔️ | ||||||||||||||||||||||||||||||||||||||||||||||||||||||||||||||||||||||||||||||||||||||||||||||||
| DD | Ayanami | ✔️ | ✔️ | ✔️ | ✔️ | ✔️ | ✔️ | ✔️ | |||||||||||||||||||||||||||||||||||||||||||||||||||||||||||||||||||||||||||||||||||||||||||
| DD | Shikinami | ✔️ | ✔️ | ✔️ | ✔️ | ✔️ | ✔️ | ✔️ | |||||||||||||||||||||||||||||||||||||||||||||||||||||||||||||||||||||||||||||||||||||||||||
| DD | Akatsuki | ✔️ | ✔️ | ✔️ | ✔️ | ✔️ | ✔️ | ✔️ | |||||||||||||||||||||||||||||||||||||||||||||||||||||||||||||||||||||||||||||||||||||||||||
| DD | Hibiki | ✔️ | ✔️ | ✔️ | ✔️ | ✔️ | ✔️ | ✔️ | |||||||||||||||||||||||||||||||||||||||||||||||||||||||||||||||||||||||||||||||||||||||||||
| DD | Ikazuchi | ✔️ | ✔️ | ✔️ | ✔️ | ✔️ | ✔️ | ||||||||||||||||||||||||||||||||||||||||||||||||||||||||||||||||||||||||||||||||||||||||||||
| DD | Inazuma | ✔️ | ✔️ | ✔️ | ✔️ | ✔️ | ✔️ | ||||||||||||||||||||||||||||||||||||||||||||||||||||||||||||||||||||||||||||||||||||||||||||
| DD | Shiratsuyu | ✔️ | ✔️ | ✔️ | ✔️ | ✔️ | ✔️ | ✔️ | |||||||||||||||||||||||||||||||||||||||||||||||||||||||||||||||||||||||||||||||||||||||||||
| DD | Shigure | ✔️ | ✔️ | ✔️ | ✔️ | ✔️ | ✔️ | ✔️ | |||||||||||||||||||||||||||||||||||||||||||||||||||||||||||||||||||||||||||||||||||||||||||
| DD | Murasame | ✔️ | ✔️ | ✔️ | ✔️ | ✔️ | ✔️ | ✔️ | |||||||||||||||||||||||||||||||||||||||||||||||||||||||||||||||||||||||||||||||||||||||||||
| DD | Yuudachi | ✔️ | ✔️ | ✔️ | ✔️ | ✔️ | ✔️ | ✔️ | |||||||||||||||||||||||||||||||||||||||||||||||||||||||||||||||||||||||||||||||||||||||||||
| DD | Kagerou | ✔️ | ✔️ | ✔️ | ✔️ | ✔️ | ✔️ | ✔️ | |||||||||||||||||||||||||||||||||||||||||||||||||||||||||||||||||||||||||||||||||||||||||||
| DD | Shiranui | ✔️ | ✔️ | ✔️ | ✔️ | ✔️ | ✔️ | ✔️ | |||||||||||||||||||||||||||||||||||||||||||||||||||||||||||||||||||||||||||||||||||||||||||
| DD | Kuroshio | ✔️ | ✔️ | ✔️ | ✔️ | ✔️ | ✔️ | ✔️ | |||||||||||||||||||||||||||||||||||||||||||||||||||||||||||||||||||||||||||||||||||||||||||
| CL | Tenryuu | ✔️ | ✔️ | ✔️ | ✔️ | ✔️ | ✔️ | ✔️ | ✔️ | ||||||||||||||||||||||||||||||||||||||||||||||||||||||||||||||||||||||||||||||||||||||||||
| CL | Tatsuta | ✔️ | ✔️ | ✔️ | ✔️ | ✔️ | ✔️ | ✔️ | ✔️ | ||||||||||||||||||||||||||||||||||||||||||||||||||||||||||||||||||||||||||||||||||||||||||
| CL | Kuma | ✔️ | |||||||||||||||||||||||||||||||||||||||||||||||||||||||||||||||||||||||||||||||||||||||||||||||||
| CL | Tama | ✔️ | ✔️ | ✔️ | ✔️ | ✔️ | ✔️ | ✔️ | |||||||||||||||||||||||||||||||||||||||||||||||||||||||||||||||||||||||||||||||||||||||||||
| CL | Kiso | ✔️ | ✔️ | ✔️ | ✔️ | ✔️ | ✔️ | ✔️ | |||||||||||||||||||||||||||||||||||||||||||||||||||||||||||||||||||||||||||||||||||||||||||
| CL | Isuzu | ✔️ | ✔️ | ✔️ | ✔️ | ✔️ | ✔️ | ✔️ | |||||||||||||||||||||||||||||||||||||||||||||||||||||||||||||||||||||||||||||||||||||||||||
| CL | Natori | ✔️ | ✔️ | ✔️ | ✔️ | ✔️ | ✔️ | ✔️ | |||||||||||||||||||||||||||||||||||||||||||||||||||||||||||||||||||||||||||||||||||||||||||
| CL | Yura | ✔️ | ✔️ | ✔️ | ✔️ | ✔️ | ✔️ | ✔️ | |||||||||||||||||||||||||||||||||||||||||||||||||||||||||||||||||||||||||||||||||||||||||||
| CL | Jintsuu | ✔️ | ✔️ | ✔️ | ✔️ | ✔️ | ✔️ | ✔️ | |||||||||||||||||||||||||||||||||||||||||||||||||||||||||||||||||||||||||||||||||||||||||||
| CL | Naka | ✔️ | ✔️ | ✔️ | ✔️ | ✔️ | ✔️ | ✔️ | |||||||||||||||||||||||||||||||||||||||||||||||||||||||||||||||||||||||||||||||||||||||||||
| CA | Furutaka | ✔️ | ✔️ | ✔️ | ✔️ | ✔️ | ✔️ | ✔️ | |||||||||||||||||||||||||||||||||||||||||||||||||||||||||||||||||||||||||||||||||||||||||||
| CA | Kako | ✔️ | ✔️ | ✔️ | ✔️ | ✔️ | ✔️ | ✔️ | |||||||||||||||||||||||||||||||||||||||||||||||||||||||||||||||||||||||||||||||||||||||||||
| CA | Aoba | ✔️ | ✔️ | ✔️ | ✔️ | ✔️ | ✔️ | ✔️ | |||||||||||||||||||||||||||||||||||||||||||||||||||||||||||||||||||||||||||||||||||||||||||
| CA | Nachi | ✔️ | ✔️ | ✔️ | ✔️ | ✔️ | ✔️ | ✔️ | ✔️ | ||||||||||||||||||||||||||||||||||||||||||||||||||||||||||||||||||||||||||||||||||||||||||
| CA | Ashigara | ✔️ | ✔️ | ✔️ | ✔️ | ✔️ | ✔️ | ✔️ | ✔️ | ||||||||||||||||||||||||||||||||||||||||||||||||||||||||||||||||||||||||||||||||||||||||||
| CA | Haguro | ✔️ | ✔️ | ✔️ | ✔️ | ✔️ | ✔️ | ✔️ | ✔️ | ||||||||||||||||||||||||||||||||||||||||||||||||||||||||||||||||||||||||||||||||||||||||||
| CA | Maya | ✔️ | ✔️ | ✔️ | ✔️ | ✔️ | ✔️ | ✔️ | ✔️ | ||||||||||||||||||||||||||||||||||||||||||||||||||||||||||||||||||||||||||||||||||||||||||
| CA | Choukai | ✔️ | ✔️ | ✔️ | ✔️ | ✔️ | ✔️ | ✔️ | ✔️ | ||||||||||||||||||||||||||||||||||||||||||||||||||||||||||||||||||||||||||||||||||||||||||
| CVL | Houshou | ✔️ | ✔️ | ✔️ | ✔️ | ✔️ | ✔️ | ✔️ | |||||||||||||||||||||||||||||||||||||||||||||||||||||||||||||||||||||||||||||||||||||||||||
| AV | Chitose | ✔️ | ✔️ | ✔️ | ✔️ | ✔️ | ✔️ | ✔️ | ✔️ | ||||||||||||||||||||||||||||||||||||||||||||||||||||||||||||||||||||||||||||||||||||||||||
| AV | Chiyoda | ✔️ | ✔️ | ✔️ | ✔️ | ✔️ | ✔️ | ✔️ | ✔️ | ||||||||||||||||||||||||||||||||||||||||||||||||||||||||||||||||||||||||||||||||||||||||||