- Welcome to the Kancolle Wiki!
- If you have any questions regarding site content, account registration, etc., please visit the KanColle Wiki Discord
Difference between revisions of "Early Spring 2023 Event/E-5"
Jigaraphale (talk | contribs) |
|||
| (17 intermediate revisions by 11 users not shown) | |||
| Line 25: | Line 25: | ||
|map_8_text=LBAS 2 | |map_8_text=LBAS 2 | ||
|boss_hard= 1950 HP + 880 TP + 5640 HP | |boss_hard= 1950 HP + 880 TP + 5640 HP | ||
| − | |boss_medium= | + | |boss_medium= 1850 HP + 660 TP + 5040 HP |
| − | |boss_easy= | + | |boss_easy= 1750 HP + 495 TP + 4440 HP |
| − | |boss_casual= | + | |boss_casual= 1750 HP + 440 TP + 4440 HP |
|reward_all= | |reward_all= | ||
|phase_1_boss= {{EnemyLink|Heavy Cruiser Princess}} | |phase_1_boss= {{EnemyLink|Heavy Cruiser Princess}} | ||
| Line 47: | Line 47: | ||
|id = 56-5a | |id = 56-5a | ||
|0 -> 1 = * Single / Striking Force fleet | |0 -> 1 = * Single / Striking Force fleet | ||
| − | * Tag requirements: (''' | + | * Tag requirements: ('''Medium / Hard''') |
** 2nd Torpedo Squadron [[File:{{ROOTPAGENAME}} Tag 2.png|30px]] | ** 2nd Torpedo Squadron [[File:{{ROOTPAGENAME}} Tag 2.png|30px]] | ||
** Operation I-go Fleet [[File:{{ROOTPAGENAME}} Tag 6.png|30px]] | ** Operation I-go Fleet [[File:{{ROOTPAGENAME}} Tag 6.png|30px]] | ||
|0 -> 2 = * Phase 2: Combined Fleet | |0 -> 2 = * Phase 2: Combined Fleet | ||
* Phase 3: TCF | * Phase 3: TCF | ||
| − | * Tag requirements: (''' | + | * Tag requirements: ('''Medium / Hard''') |
** Operation I-go Fleet [[File:{{ROOTPAGENAME}} Tag 6.png|30px]] | ** Operation I-go Fleet [[File:{{ROOTPAGENAME}} Tag 6.png|30px]] | ||
** Carrier Task Force [[File:{{ROOTPAGENAME}} Tag 5.png|30px]] | ** Carrier Task Force [[File:{{ROOTPAGENAME}} Tag 5.png|30px]] | ||
|0 -> 3 = * Phase 3: CTF / STF | |0 -> 3 = * Phase 3: CTF / STF | ||
| − | * Carrier Task Force [[File:{{ROOTPAGENAME}} Tag 5.png|30px]] tag only (''' | + | * Carrier Task Force [[File:{{ROOTPAGENAME}} Tag 5.png|30px]] tag only ('''Medium / Hard''') |
}} | }} | ||
| Line 145: | Line 145: | ||
|H/red/darkorange -> J = Fixed Route | |H/red/darkorange -> J = Fixed Route | ||
|J -> P/red/darkorange = Fixed Route | |J -> P/red/darkorange = Fixed Route | ||
| − | |N1/red/darkorange -> N = * | + | |N1/red/darkorange -> N = * CTF? |
| − | |N1/red/darkorange -> N2/pink = * | + | |N1/red/darkorange -> N2/pink = * STF? |
|N2/pink -> N = * Start from Point 2 | |N2/pink -> N = * Start from Point 2 | ||
|N2/pink -> P/red/darkorange = * Start from Point 3 | |N2/pink -> P/red/darkorange = * Start from Point 3 | ||
| Line 152: | Line 152: | ||
|O -> J = * Meet '''ALL''' of the following requirements: | |O -> J = * Meet '''ALL''' of the following requirements: | ||
** CTF / STF: Amount of DD ≥ 4 | ** CTF / STF: Amount of DD ≥ 4 | ||
| − | *** CTF / STF: If fleet contains CAV or CLT, amount of DD ≥ 5 | + | *** CTF / STF: If fleet contains CAV, AV, or CLT, amount of DD ≥ 5 |
** CTF / STF: Does not meet the requirements to go to N2 | ** CTF / STF: Does not meet the requirements to go to N2 | ||
** TCF: Does not meet the requirements to go to P | ** TCF: Does not meet the requirements to go to P | ||
| Line 158: | Line 158: | ||
** CTF / STF | ** CTF / STF | ||
** Fast fleet | ** Fast fleet | ||
| − | ** Amount of (F)BB(V) + CV(B/L) + CAV + CLT + SS(V) ≤ 5 | + | ** Amount of (F)BB(V) + CV(B/L) + CAV + CLT + SS(V) + AV ≤ 5 |
** Amount of CL ≥ 2 | ** Amount of CL ≥ 2 | ||
** Amount of DD ≥ 4 | ** Amount of DD ≥ 4 | ||
| Line 210: | Line 210: | ||
|Hard || S || S || Sx2 | |Hard || S || S || Sx2 | ||
|- | |- | ||
| − | |Medium|| S || | + | |Medium|| S || A+ || Sx2 |
|- | |- | ||
| − | |Easy || | + | |Easy || S|| A+|| S |
|- | |- | ||
| − | |Casual|| | + | |Casual|| S|| A+|| S |
|} | |} | ||
| Line 227: | Line 227: | ||
|-|Node E2= | |-|Node E2= | ||
* Striking Force: '''"0-1CVL, 0-1CAV/CLT, 1CL, 4-5DD"''' [[File:{{ROOTPAGENAME}} Tag 2.png|30px]][[File:{{ROOTPAGENAME}} Tag 6.png|30px]] | * Striking Force: '''"0-1CVL, 0-1CAV/CLT, 1CL, 4-5DD"''' [[File:{{ROOTPAGENAME}} Tag 2.png|30px]][[File:{{ROOTPAGENAME}} Tag 6.png|30px]] | ||
| − | * Route: {{MapRoute|1||A|blue|D|blue|E|darkorange|E2|red}} | + | * Route: {{MapRoute|1||A|blue|D|blue|E|darkorange|E1|red|E2|red}} |
** Bringing an [[AACI]] capable ship is recommended to pass through the ASS node. | ** Bringing an [[AACI]] capable ship is recommended to pass through the ASS node. | ||
** LoS check: ??~?? Cn? (Hard) | ** LoS check: ??~?? Cn? (Hard) | ||
| Line 259: | Line 259: | ||
* Bringing an [[AACI]] capable ship is recommended to pass through the "Airstrike Supported Battle" and Air nodes. | * Bringing an [[AACI]] capable ship is recommended to pass through the "Airstrike Supported Battle" and Air nodes. | ||
| − | * Bringing some [[ASW]] capacity is | + | * Bringing some [[ASW]] capacity is recommended. |
** LoS check: 61 Cn3 (Hard) | ** LoS check: 61 Cn3 (Hard) | ||
** AP/AS: '''0/0''' (Hard) | ** AP/AS: '''0/0''' (Hard) | ||
| Line 265: | Line 265: | ||
==Phase 1.5 - Gimmick 2== | ==Phase 1.5 - Gimmick 2== | ||
| − | The following steps have to be performed to unlock the | + | The following steps have to be performed to unlock the 2nd boss: |
{|class="wikitable" | {|class="wikitable" | ||
! !! R | ! !! R | ||
| Line 275: | Line 275: | ||
|Easy || Sx2 | |Easy || Sx2 | ||
|- | |- | ||
| − | |Casual|| ? | + | |Casual|| ?x2 |
|} | |} | ||
| Line 284: | Line 284: | ||
Phase 2 is a '''"[[Transport Operation]]"''': | Phase 2 is a '''"[[Transport Operation]]"''': | ||
| − | * TCF: '''"0-1LHA/CVE/CAV, 1AV, 4-5DD + 1-2CAV, 1-2CL, 3-4DD "''' | + | * TCF: '''"0-1LHA/CVE/CAV, 1AV, 4-5DD + 1-2CAV, 1-2CL, 3-4DD"''' [[File:{{ROOTPAGENAME}} Tag 5.png|30px]][[File:{{ROOTPAGENAME}} Tag 6.png|30px]] |
* Route: {{MapRoute|2||N|red|O|red|P|darkorange|R|red|S|green|U|red}} | * Route: {{MapRoute|2||N|red|O|red|P|darkorange|R|red|S|green|U|red}} | ||
** Going too heavy might lead to an offroute to {{MapRoute|Q|pink}} | ** Going too heavy might lead to an offroute to {{MapRoute|Q|pink}} | ||
| Line 297: | Line 297: | ||
<tabber> | <tabber> | ||
|-|BB CTF= | |-|BB CTF= | ||
| − | * CTF: '''"2(F)BB, 3CV, 1CL + 1CL, | + | * CTF: '''"2(F)BB, 3CV, 1CL + 1CL, 1CA/DD, 4DD"''' (Fast) [[File:{{ROOTPAGENAME}} Tag 5.png|30px]] |
* Route: {{MapRoute|3||W|pink|O|red|N2|pink|P|darkorange|X|purple|Z|red}} | * Route: {{MapRoute|3||W|pink|O|red|N2|pink|P|darkorange|X|purple|Z|red}} | ||
** Provides a good balance between air power and surface power. | ** Provides a good balance between air power and surface power. | ||
| Line 320: | Line 320: | ||
* Bringing an [[AACI]] capable ship is recommended to pass through the airstrikes and {{MapRoute|P|darkorange}} | * Bringing an [[AACI]] capable ship is recommended to pass through the airstrikes and {{MapRoute|P|darkorange}} | ||
* Those fleets should utilize a [[Special Attack]]. | * Those fleets should utilize a [[Special Attack]]. | ||
| − | * LoS check: | + | * LoS check: Cn3 Casual/Easy/Medium/Hard: ??/90/110/123 |
* AD/AP: '''211/421''' (Hard) | * AD/AP: '''211/421''' (Hard) | ||
* LBAS range: '''2''' | * LBAS range: '''2''' | ||
| Line 341: | Line 341: | ||
<tabber> | <tabber> | ||
|-|Node E2= | |-|Node E2= | ||
| − | * refer to [[#Phase 0.5 - Gimmick]] | + | * refer to [[#Phase 0.5 - Gimmick 1]] |
|-|Node G2= | |-|Node G2= | ||
| Line 352: | Line 352: | ||
|-|Node Q= | |-|Node Q= | ||
| − | * TCF: '''"1AV, 1CVL/LHA, 4DD + 1CL, 1CA, 1CAV, 3DD"''' [[File:{{ROOTPAGENAME}} Tag 6.png|30px]] | + | * TCF: '''"1AV, 1CVL/LHA, 4DD + 1CL, 1CA, 1CAV, 3DD"''' [[File:{{ROOTPAGENAME}} Tag 5.png|30px]][[File:{{ROOTPAGENAME}} Tag 6.png|30px]] |
* Route {{MapRoute|2||N|red|O|red|P|darkorange|Q|pink}} | * Route {{MapRoute|2||N|red|O|red|P|darkorange|Q|pink}} | ||
* AS: 455 (Hard) | * AS: 455 (Hard) | ||
| + | * LHA can't be [[Shinshuu Maru]] | ||
|-|Node U= | |-|Node U= | ||
Latest revision as of 17:43, 18 March 2025
 
| ||||||||
|---|---|---|---|---|---|---|---|---|
|
Time remaining until Event ends [1]:
| ||||||||
| ||||||||
出撃!八幡部隊
![]()
![]()


| Information | ||||
|---|---|---|---|---|
| Event Tag | ||||
| Boss Gauges | Hard (甲): 1950 HP + 880 TP + 5640 HP | |||
| Medium (乙): 1850 HP + 660 TP + 5040 HP | ||||
| Easy (丙): 1750 HP + 495 TP + 4440 HP | ||||
| Casual (丁): 1750 HP + 440 TP + 4440 HP | ||||
| Map Bosses | Heavy Cruiser Princess
| |||
Aircraft Carrier Princess B
| ||||
Abyssal Heavy Cruiser Water Princess
| ||||
| Rewards[edit] | ||||
|---|---|---|---|---|
| Ship |  Tuscaloosa | |||
| Choice | 丁 Casual |
丙 Easy |
乙 Medium |
甲 Hard |
 Skilled Deck Personnel |
1 | |||
| OR | ||||
Bauxite |
4000 | |||
| Reward | 丁 Casual |
丙 Easy |
乙 Medium |
甲 Hard |
|---|---|---|---|---|
Medal |
1 | 1 | 1 | |
Improvement Material |
8 | 8 | ||
Reinforcement Expansion |
1 | 2 | ||
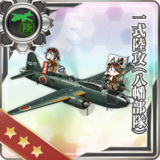
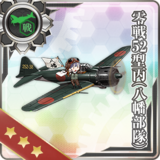
 Zero Fighter Model 52C (Hachiman Force) |
1 | 1 (★2) | 1 (★4) | |
 Daihatsu Landing Craft (Type 89 Medium Tank & Landing Force) |
1 | |||
 Army Infantry Corps |
1 | 1 | ||
 Toku Daihatsu Landing Craft + Chi-Ha |
1 | |||
 Toku Daihatsu Landing Craft + Chi-Ha Kai |
1 |

The event guides are to be constructed through the respective Event map page guide sandbox and reviewed by editors before being approved here.
- Do not update the guides through this page unless it is a minor fix. Please only update guides through their respective sandbox pages.
Branching Table
| E-5 Branching Rules (Start Points) | ||
|---|---|---|
| Nodes | Rules | |
| Start | 1 |
|
2 |
| |
3 |
| |
| E-5 Branching Rules (Single / Striking Force) | ||
|---|---|---|
| Nodes | Rules | |
A |
B |
Active Branching |
D | ||
B |
B1 |
Does not meet the requirements to go to C |
C |
| |
B1 |
B2 |
|
C |
| |
C |
C1 |
|
C2 |
| |
C1 |
C2 |
|
C3 |
| |
E1 |
| |
D |
E |
Active Branching |
F | ||
E |
C1 |
|
E1 |
| |
E1 |
E2 |
|
E3 |
| |
G |
G1 |
|
H |
| |
G1 |
G2 |
|
H |
| |
H |
I |
|
J |
| |
K |
| |
K |
L |
|
M |
| |
| E-5 Branching Rules (Combined Fleet) | ||
|---|---|---|
| Nodes | Rules | |
2 |
N |
|
N1 |
| |
3 |
V |
|
W |
| |
H |
J |
Fixed Route |
J |
P |
Fixed Route |
N1 |
N |
|
N2 |
| |
N2 |
N |
|
P |
| |
O |
H |
Does not meet the requirements to go to J |
J |
| |
N2 |
| |
P |
| |
P |
Q |
|
R |
| |
X |
| |
S |
T |
|
U |
| |
X |
Y |
|
Z |
| |
Branching compositions were reported over the course of the event. (NGA and KCNav)
Historical Bonuses
DISCLAIMER: This information is based on user-submitted data and is subject to revisions as more data is gathered. Any version of the ship receives the bonus regardless of remodel.
Ship Bonuses
| Ships | DamageClass bonuses stack with named ships | Acc/EvaDoes not stack | ||
|---|---|---|---|---|
| Mapwide | Node ZStacks with Mapwide | Acc | Eva | |
| All DD | 1.04x | 1.09x 1.05 x Mapwide Bonus | 1.04x | 1.1x |
| All CL, CLT, CT | 1.03x | 1.07x 1.04 x Mapwide Bonus | ||
| All CA, CAV | 1.02x | 1.05x 1.03 x Mapwide Bonus | ||
| All AV | - | - | - | 1.35x (?) |
| All AS | 1.15x | - | - | - |
| 1.07x1.03 x DD Bonus | 1.125x1.03 x DD Bonuses | 1.1x | ||
| 1.12x1.08 x DD Bonus | 1.18x1.08 x DD Bonuses | |||
| 1.13x | - | 1.2x | 1.1x | |
| 1.16x1.13 x CL(T) Bonus | 1.21x1.13 x CL(T) Bonuses | |||
| 1.175x1.13 x DD Bonus | 1.234x1.13 x DD Bonuses | |||
| 1.11x | - | 1.1x | ||
| 1.13x 1.11 x CA(V) Bonus | 1.166x 1.11 x CA(V) Bonuses | 1.04x | 1.1x | |
| 1.15x 1.11 x DD Bonus | 1.21x 1.11 x DD Bonuses | 1.1x | ||
| 2.85x | - | |||
- Notes
- Damage bonuses given by types stack with named ships.
- Accuracy or Evasion bonuses given by types do not stack with named ships.
- Evasion bonus is only roughly checked as it is hard to estimate. The info will be updated if an inconsistency is found (@Divinity_123).
Equipment Bonuses
| Equipment | LBAS (Map-wide) |
|---|---|
|
1.05x each |
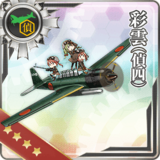
 · 701st · 701st · 407th · 407th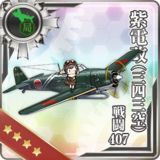
| |
 · Hien (244th) · Hien (244th)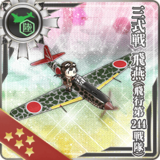
| |

| |
| |
 · (Sk) · (Sk)
|
1.11x each |
 · Ginga (Egusa) · Ginga (Egusa) · Hiryuu (Sk) · Hiryuu (Sk)
| |
 · Ki-102 + Missile · Ki-102 + Missile
| |
|
1.175x each |
| |
Those bonuses only apply to planes in LBAS.
- All 4 planes in the base will gain the bonus provided by any bonus plane within their base
- Bonuses will stack with each other (within the same base)
Debuff
| Ships | Node X |
|---|---|
| -38 | |
| -16 |
Map Overview
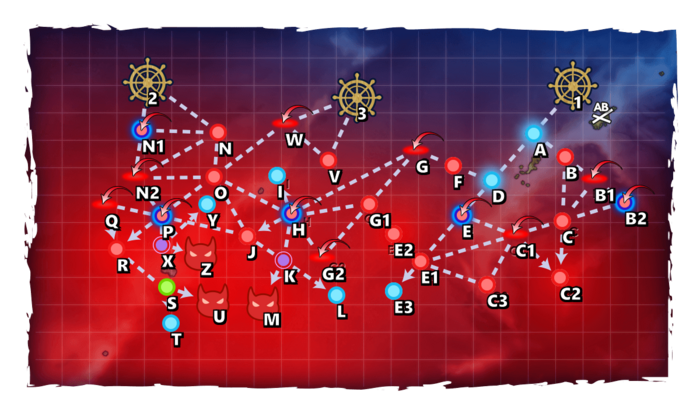
E-5 consists of 5 main phases and requires the use of Single Fleets, Striking Forces, and Combined Fleets.
- This map uses 3 locks:
 2nd Torpedo Squadron (from E-2 & E-3),
 Operation I-go Fleet (from E-4),
- This tag gets applied to ships at the 1st and 2nd starting point
 Carrier Task Force (from E-3),
- This tag gets applied to ships at the 3rd starting point
- Tags can be mixed in all difficulties , see here.
- 3 LBAS are available on this map:
- Only 2 can be set on Sortie, the other being limited to Defense.
- After phase 2, the LBAS is relocated closer to the final boss and 3 bases can be set on Sortie.
- "Airstrike Supported Battle" node is present on B2 E H N1
- "Night Battle" nodes are present on K X
Phase 0.5 - Gimmick 1
The following steps have to be performed to unlock the 1st boss:
| C2 | E2 | J | |
|---|---|---|---|
| Hard | S | S | Sx2 |
| Medium | S | A+ | Sx2 |
| Easy | S | A+ | S |
| Casual | S | A+ | S |
- Striking Force: "0-1CVL, 0-1CAV/CLT, 1CL, 4-5DD" (Fast)


- Route: 1 A B C C2
- It is recommended to only used already locked ships.
- AP/AS: 112/251 (Hard)
- LBAS range: 3, then 8 after phase 2
- Striking Force: "0-1CVL, 0-1CAV/CLT, 1CL, 4-5DD"
- Route: 1 A D E E1 E2
- Bringing an AACI capable ship is recommended to pass through the ASS node.
- LoS check: ??~?? Cn? (Hard)
- AP/AS: 89/198 (Hard)
- LBAS range: 4, then 5 after phase 2
- Striking Force: "0-1CVL, 0-1CAV/CLT, 1CL, 4-5DD"
- Route: 1 A D F G H J
- Bringing an AACI capable ship is recommended to pass through the ASS node.
- LoS check: ??~?? Cn? (Hard)
- AP/AS: 203/455 (Hard)
- LBAS range: 6, then 3 after phase 2
Phase 1
- Striking Force: "0-1CVL, 1-2CAV/CLT, 1CL, 4DD" (Fast)
- Route: 1 A D F G H K M
- A lighter fleet introducing no new lock.
- Striking Force: "2FBB, 1CAV, 1CL, 3DD" (Fast)
- Route: 1 A D F G H K M
- An heavier fleet introducing new locks.
- This fleet can utilize a Kongou-class Touch.
- Bringing an AACI capable ship is recommended to pass through the "Airstrike Supported Battle" and Air nodes.
- Bringing some ASW capacity is recommended.
- LoS check: 61 Cn3 (Hard)
- AP/AS: 0/0 (Hard)
- LBAS range: 7, then 3 after phase 2
Phase 1.5 - Gimmick 2
The following steps have to be performed to unlock the 2nd boss:
| R | |
|---|---|
| Hard | Sx3 |
| Medium | Sx2 |
| Easy | Sx2 |
| Casual | ?x2 |
- Node R
- Use #Phase 2's fleet
Phase 2
Phase 2 is a "Transport Operation":
- TCF: "0-1LHA/CVE/CAV, 1AV, 4-5DD + 1-2CAV, 1-2CL, 3-4DD"

- Route: 2 N O P R S U
- Going too heavy might lead to an offroute to Q
- OASW and AACI are recommended for P
- LoS check: 40 Cn2 (Hard)
- AD/AP: 123/245 (Hard)
- LBAS range: 7, then 2 after phase 2
- It is not recommended to try achieve S rank on the boss, and prioritize reach rate instead
- In this case, sending at least one LBAS on pre-boss nodes is recommended.
Phase 3
- CTF: "2(F)BB, 3CV, 1CL + 1CL, 1CA/DD, 4DD" (Fast)
- Route: 3 W O N2 P X Z
- Provides a good balance between air power and surface power.
- STF: "2-3(F)BB, 1CV, 1CL, 0-1CAV, 0-2DD + 0-2CAV/CLT, 1CL, 3-5DD" (Fast)
- Route: 3 W O N2 P X Z
- CTF: "4CV, 1CL, 1DD + 1FBB, 1CL, 4DD" (Fast)
- Route: 3 W O N2 P X Z
- A fleet with a higher Night Battle Focus.
- CTF: "2(F)BB, 1CV, 1CL, 2DD + 1CL, 3DD, 2SS" (Fast)
- Route: 3 W O N2 P X Z
- A fleet with a higher Night Battle Focus.
- The I-201-class

 have outstanding historical bonuses in this situation.
- Note that they are also important for E-6 P4, which uses a different tag
- Bringing an AACI capable ship is recommended to pass through the airstrikes and P
- Those fleets should utilize a Special Attack.
- LoS check: Cn3 Casual/Easy/Medium/Hard: ??/90/110/123
- AD/AP: 211/421 (Hard)
- LBAS range: 2
Debuff
Once LD has been reached, the following steps have to be performed to debuff the boss
| E2 | G2 | M | Q | U | W | LBAS | |
|---|---|---|---|---|---|---|---|
| Hard | S | AS | S | AS | A+ | AS | AS x2 |
| Medium | - | - | S | AS | A | AS | AS x2 |
| Easy | - | - | S | AS | A | - | AS |
| Casual | - | - | ?? | ?? | ?? | - | ?? |
- refer to #Phase 0.5 - Gimmick 1
- Striking Force: "3CV, 1CVL, 0-1CL, 2-3DD" (Fast)
- Route: 1 A D F G G1 G2
- AS: 455 (Hard)
- refer to #Phase 1
- TCF: "1AV, 1CVL/LHA, 4DD + 1CL, 1CA, 1CAV, 3DD"
- Route 2 N O P Q
- AS: 455 (Hard)
- LHA can't be Shinshuu Maru
- refer to #Phase 2
- refer to #Phase 3
- AS: 753 (Hard)
- This can be done passively as fulfilling the other debuff requirements if strong enough Interceptors are present
- Alternatively, sending one SS is also an option.
| AP | AS | |
|---|---|---|
| Hard | 325 | 729 |
| Medium | 299 | 671 |
| Easy | 226 | 507 |
| Casual | 193 | 432 |
Once Debuff is complete the CG will change to the following:
| Abyssal Heavy Cruiser Water Princess |
|---|
|


Enemy Compositions
| Type | Ships |
|---|---|
| DD |
| Type | Ships |
|---|---|
| DD |
| Type | Ships |
|---|---|
| DD |
| Type | Ships |
|---|---|
| DD |
| Type | Ships |
|---|---|
| DD |
| Type | Ships |
|---|---|
| DE | |
| DD | |
| CL |
| Type | Ships |
|---|---|
| DD |
| Type | Ships |
|---|---|
| DD |
| Type | Ships |
|---|---|
| DD |
| Type | Ships |
|---|---|
| DD |
| Type | Ships |
|---|---|
| DD | |
| CL | |
| CA | |
| CVL | |
| CV | |
| LHA |
| # | Formation | Air Raids | AD/AP AS/AS+ |
|---|---|---|---|
| AB | Diamond | 91/181 407/813 | |
| Diamond | 120/239 536/1071 | ||
| Diamond | 164/328 737/1473 | ||
| # | Formation | Air Raids | AD/AP AS/AS+ |
| # | Selection Node | ||
|---|---|---|---|
| A | 艦隊の針路を選択できます。提督、どちらの針路をとられますか? You can decide the fleet's course. Admiral, which heading should we take? | ||
| # | Selection Node | ||
| # | Formation | Normal Battle Node | AD/AP AS/AS+ |
|---|---|---|---|
| B | Echelon Line Abreast Phases: 1, 3 |
0/0 0/0 | |
| Echelon Line Abreast Phases: 1, 3 |
0/0 0/0 | ||
| Echelon Line Abreast Phases: 1, 3 |
0/0 0/0 | ||
| # | Formation | Normal Battle Node | AD/AP AS/AS+ |
| # | Formation | Air Defense Node | AD/AP AS/AS+ |
|---|---|---|---|
| B1 | Diamond | 57/113 252/504 | |
| Diamond Phases: 3 |
97/193 432/864 | ||
| Diamond | 102/203 456/912 | ||
| # | Formation | Air Defense Node | AD/AP AS/AS+ |
| # | Formation | Normal Battle Node | AD/AP AS/AS+ |
|---|---|---|---|
| C | Line Ahead Vanguard Phases: 1, 3 |
0/0 0/0 | |
| Line Ahead Phases: 1, 3 |
0/0 0/0 | ||
| # | Formation | Normal Battle Node | AD/AP AS/AS+ |
| # | Formation | Air Defense Node | AD/AP AS/AS+ |
|---|---|---|---|
| C1 | Diamond | 57/113 252/504 | |
| Diamond | 102/203 456/912 | ||
| # | Formation | Air Defense Node | AD/AP AS/AS+ |
| # | Formation | Normal Battle Node | AD/AP AS/AS+ |
|---|---|---|---|
| C2 | Diamond Phases: 1, 3 |
57/113 252/504 | |
| # | Formation | Normal Battle Node | AD/AP AS/AS+ |
| # | Formation | Normal Battle Node | AD/AP AS/AS+ |
|---|---|---|---|
| C3 | Echelon | 0/0 0/0 | |
| # | Formation | Normal Battle Node | AD/AP AS/AS+ |
| # | Selection Node | ||
|---|---|---|---|
| D | 艦隊の針路を選択できます。提督、どちらの針路をとられますか? You can decide the fleet's course. Admiral, which heading should we take? | ||
| # | Selection Node | ||
| # | Formation | Supported Battle Node | AD/AP AS/AS+ |
|---|---|---|---|
| E | Echelon Line Abreast Phases: 1 |
46/91 204/408 | |
| Echelon Line Abreast Phases: 1, 3 |
50/100 224/447 | ||
| Echelon Line Abreast Phases: 1, 3 |
57/113 252/504 | ||
| # | Formation | Supported Battle Node | AD/AP AS/AS+ |
| # | Formation | Normal Battle Node | AD/AP AS/AS+ |
|---|---|---|---|
| E1 | Line Ahead Double Line Vanguard Phases: 1, 3 |
0/0 0/0 | |
| # | Formation | Normal Battle Node | AD/AP AS/AS+ |
| # | Formation | Normal Battle Node | AD/AP AS/AS+ |
|---|---|---|---|
| E2 | Diamond Phases: 1, 3 |
45/89 198/396 | |
| Diamond Phases: 1, 3 |
45/89 198/396 | ||
| Diamond Phases: 1, 3 |
45/89 198/396 | ||
| # | Formation | Normal Battle Node | AD/AP AS/AS+ |
| # | Empty Node | ||
|---|---|---|---|
| E3 | 敵影を見ず。 No enemy spotted. | ||
| # | Empty Node | ||
| # | Formation | Normal Battle Node | AD/AP AS/AS+ |
|---|---|---|---|
| F | Echelon Line Abreast Phases: 1 |
0/0 0/0 | |
| Echelon Line Abreast Phases: 1, 3 |
0/0 0/0 | ||
| Echelon Line Abreast Phases: 1, 3 |
0/0 0/0 | ||
| # | Formation | Normal Battle Node | AD/AP AS/AS+ |
| # | Formation | Air Defense Node | AD/AP AS/AS+ |
|---|---|---|---|
| G | Diamond Phases: 1, 3 |
57/113 252/504 | |
| Diamond Phases: 1, 3 |
97/193 432/864 | ||
| Diamond Phases: 1, 3 |
102/203 456/912 | ||
| # | Formation | Air Defense Node | AD/AP AS/AS+ |
| # | Formation | Normal Battle Node | AD/AP AS/AS+ |
|---|---|---|---|
| G1 | Line Ahead Double Line Vanguard Phases: 1, 3 |
0/0 0/0 | |
| # | Formation | Normal Battle Node | AD/AP AS/AS+ |
| # | Formation | Air Defense Node | AD/AP AS/AS+ |
|---|---|---|---|
| G2 | Diamond Phases: 3 |
57/113 252/504 | |
| Diamond Phases: 3 |
97/193 432/864 | ||
| Diamond Phases: 3 |
102/203 456/912 | ||
| # | Formation | Air Defense Node | AD/AP AS/AS+ |
| # | Formation | Supported Battle Node | AD/AP AS/AS+ |
|---|---|---|---|
| H | Echelon Line Abreast Phases: 1 |
46/91 204/408 | |
| Echelon Line Abreast Phases: 1, 3 |
50/100 224/447 | ||
| Echelon Line Abreast Phases: 1, 3 |
57/113 252/504 | ||
| # | Formation | Supported Battle Node | AD/AP AS/AS+ |
| # | Empty Node | ||
|---|---|---|---|
| I | 敵影を見ず。 No enemy spotted. | ||
| # | Empty Node | ||
| # | Formation | Normal Battle Node | AD/AP AS/AS+ |
|---|---|---|---|
| J | Diamond Phases: 1, 3 |
57/113 252/504 | |
| Diamond Phases: 1, 3 |
97/193 432/864 | ||
| Diamond Phases: 1, 3 |
102/203 456/912 | ||
| # | Formation | Normal Battle Node | AD/AP AS/AS+ |
| # | Formation | Night Battle Node | AD/AP AS/AS+ |
|---|---|---|---|
| K | Line Ahead Echelon Vanguard Phases: 1, 3 |
0/0 0/0 | |
| # | Formation | Night Battle Node | AD/AP AS/AS+ |
| # | Empty Node | ||
|---|---|---|---|
| L | 敵影を見ず。 No enemy spotted. | ||
| # | Empty Node | ||
| # | Formation | Boss Battle Node | AD/AP AS/AS+ |
|---|---|---|---|
| M | Line Ahead Phases: 1, 3 |
0/0 0/0 | |
| Line Ahead Phases: 1, 3 |
0/0 0/0 | ||
| Line Ahead Phases: 1 (Final)
|
0/0 0/0 | ||
| # | Formation | Boss Battle Node | AD/AP AS/AS+ |
| # | Formation | Normal Battle Node | AD/AP AS/AS+ |
|---|---|---|---|
| N | Echelon Line Abreast Phases: 3 |
0/0 0/0 | |
| Echelon Line Abreast Phases: 2, 3 |
0/0 0/0 | ||
| Echelon Line Abreast Phases: 2, 3 |
0/0 0/0 | ||
| # | Formation | Normal Battle Node | AD/AP AS/AS+ |
| # | Formation | Supported Battle Node | AD/AP AS/AS+ |
|---|---|---|---|
| N1 | Echelon Line Abreast |
91/182 408/816 | |
| # | Formation | Supported Battle Node | AD/AP AS/AS+ |
| # | Formation | Air Defense Node | AD/AP AS/AS+ |
|---|---|---|---|
| N2 | Diamond Phases: 3 |
97/193 432/864 | |
| Diamond Phases: 3 |
97/193 432/864 | ||
| Diamond Phases: 3 |
102/203 456/912 | ||
| # | Formation | Air Defense Node | AD/AP AS/AS+ |
| # | Formation | Normal Battle Node | AD/AP AS/AS+ |
|---|---|---|---|
| O | Line Ahead Echelon Phases: 2, 3 |
0/0 0/0 | |
| Line Ahead Phases: 3 |
0/0 0/0 | ||
| # | Formation | Normal Battle Node | AD/AP AS/AS+ |
| # | Formation | Supported Battle Node | AD/AP AS/AS+ |
|---|---|---|---|
| P | Echelon Line Abreast Phases: 2, 3 |
46/91 204/408 | |
| Echelon Line Abreast Phases: 2, 3 |
50/100 224/447 | ||
| Echelon Line Abreast Phases: 2, 3 |
91/182 408/816 | ||
| # | Formation | Supported Battle Node | AD/AP AS/AS+ |
| # | Formation | Air Defense Node | AD/AP AS/AS+ |
|---|---|---|---|
| Q | Diamond Phases: 3 |
97/193 432/864 | |
| Diamond Phases: 3 |
97/193 432/864 | ||
| Diamond Phases: 3 |
102/203 456/912 | ||
| # | Formation | Air Defense Node | AD/AP AS/AS+ |
| # | Formation | Normal Battle Node | AD/AP AS/AS+ |
|---|---|---|---|
| R | Diamond Phases: 2, 3 |
97/193 432/864 | |
| Diamond Phases: 2, 3 |
97/193 432/864 | ||
| Diamond Phases: 2, 3 |
102/203 456/912 | ||
| # | Formation | Normal Battle Node | AD/AP AS/AS+ |
| # | Landing Node | ||
|---|---|---|---|
| S | 輸送物資の揚陸地点に到達しました。本海域の輸送作戦は無事完了しています。 The landing point of the convoy has been reached. The transport operation here has already been completed successfully. | ||
| # | Landing Node | ||
| # | Empty Node | ||
|---|---|---|---|
| T | 敵影を見ず。 No enemy spotted. | ||
| # | Empty Node | ||
| # | Formation | Boss Battle Node | AD/AP AS/AS+ |
|---|---|---|---|
| U | Cruising Formation 3 Phases: 2, 3 |
77/154 345/690 | |
| Cruising Formation 3 Phases: 2, 3 (Final)
|
123/245 549/1098 | ||
| # | Formation | Boss Battle Node | AD/AP AS/AS+ |
| # | Formation | Normal Battle Node | AD/AP AS/AS+ |
|---|---|---|---|
| V | Echelon Line Abreast Phases: 3 |
0/0 0/0 | |
| Echelon Line Abreast Phases: 3 |
0/0 0/0 | ||
| Echelon Line Abreast Phases: 3 |
0/0 0/0 | ||
| # | Formation | Normal Battle Node | AD/AP AS/AS+ |
| # | Formation | Air Defense Node | AD/AP AS/AS+ |
|---|---|---|---|
| W | Diamond Phases: 3 |
117/234 525/1050 | |
| Diamond Phases: 3 |
163/325 729/1458 | ||
| Diamond Phases: 3 |
168/335 753/1506 | ||
| # | Formation | Air Defense Node | AD/AP AS/AS+ |
| # | Formation | Night Battle Node | AD/AP AS/AS+ |
|---|---|---|---|
| X | Line Ahead Echelon Phases: 3 |
0/0 0/0 | |
| Line Ahead Phases: 3 |
0/0 0/0 | ||
| # | Formation | Night Battle Node | AD/AP AS/AS+ |
| # | Empty Node | ||
|---|---|---|---|
| Y | 敵影を見ず。 No enemy spotted. | ||
| # | Empty Node | ||
| # | Formation | Boss Battle Node | AD/AP AS/AS+ |
|---|---|---|---|
| Z | Cruising Formation 3 Phases: 3 |
198/396 890/1779 | |
| Cruising Formation 3 Phases: 3 (Final)
|
212/423 950/1899 | ||
| # | Formation | Boss Battle Node | AD/AP AS/AS+ |
| Type | Ships |
|---|---|
| DD |
| Type | Ships |
|---|---|
| DD |
| Type | Ships |
|---|---|
| DD |
| Type | Ships |
|---|---|
| DD |
| Type | Ships |
|---|---|
| DD |
| Type | Ships |
|---|---|
| DE | |
| DD | |
| CL |
| Type | Ships |
|---|---|
| DD |
| Type | Ships |
|---|---|
| DD |
| Type | Ships |
|---|---|
| DD | |
| LHA |
| Type | Ships |
|---|---|
| DD |
| Type | Ships |
|---|---|
| DD | |
| CA | |
| CV |
| # | Formation | Air Raids | AD/AP AS/AS+ |
|---|---|---|---|
| AB | Diamond | 84/167 374/747 | |
| Diamond | 107/213 477/954 | ||
| Diamond | 150/300 674/1347 | ||
| # | Formation | Air Raids | AD/AP AS/AS+ |
| # | Selection Node | ||
|---|---|---|---|
| A | 艦隊の針路を選択できます。提督、どちらの針路をとられますか? You can decide the fleet's course. Admiral, which heading should we take? | ||
| # | Selection Node | ||
| # | Formation | Normal Battle Node | AD/AP AS/AS+ |
|---|---|---|---|
| B | Echelon Line Abreast Phases: 1 |
0/0 0/0 | |
| Echelon Line Abreast Phases: 1 |
0/0 0/0 | ||
| Echelon Line Abreast Phases: 1, 3 |
0/0 0/0 | ||
| # | Formation | Normal Battle Node | AD/AP AS/AS+ |
| # | Formation | Air Defense Node | AD/AP AS/AS+ |
|---|---|---|---|
| B1 | Diamond Phases: 1 |
50/100 224/447 | |
| Diamond Phases: 3 |
58/116 260/519 | ||
| # | Formation | Air Defense Node | AD/AP AS/AS+ |
| # | Formation | Normal Battle Node | AD/AP AS/AS+ |
|---|---|---|---|
| C | Line Ahead Vanguard Phases: 1 |
0/0 0/0 | |
| Line Ahead Phases: 1 |
0/0 0/0 | ||
| # | Formation | Normal Battle Node | AD/AP AS/AS+ |
| # | Formation | Air Defense Node | AD/AP AS/AS+ |
|---|---|---|---|
| C1 | Diamond Phases: 1 |
90/180 404/807 | |
| # | Formation | Air Defense Node | AD/AP AS/AS+ |
| # | Formation | Normal Battle Node | AD/AP AS/AS+ |
|---|---|---|---|
| C2 | Diamond Phases: 1 |
50/100 224/447 | |
| # | Formation | Normal Battle Node | AD/AP AS/AS+ |
| # | Formation | Normal Battle Node | AD/AP AS/AS+ |
|---|---|---|---|
| # | Formation | Normal Battle Node | AD/AP AS/AS+ |
| # | Selection Node | ||
|---|---|---|---|
| D | 艦隊の針路を選択できます。提督、どちらの針路をとられますか? You can decide the fleet's course. Admiral, which heading should we take? | ||
| # | Selection Node | ||
| # | Formation | Supported Battle Node | AD/AP AS/AS+ |
|---|---|---|---|
| E | Echelon Line Abreast Phases: 1 |
41/81 180/360 | |
| Echelon Line Abreast Phases: 1 |
46/91 204/408 | ||
| Line Abreast Phases: 1, 3 |
46/91 204/408 | ||
| # | Formation | Supported Battle Node | AD/AP AS/AS+ |
| # | Formation | Normal Battle Node | AD/AP AS/AS+ |
|---|---|---|---|
| E1 | Line Ahead Double Line Vanguard Phases: 1, 3 |
0/0 0/0 | |
| # | Formation | Normal Battle Node | AD/AP AS/AS+ |
| # | Formation | Normal Battle Node | AD/AP AS/AS+ |
|---|---|---|---|
| E2 | Diamond Phases: 1 |
43/85 189/378 | |
| Diamond Phases: 1 |
43/85 189/378 | ||
| Diamond Phases: 1, 3 |
43/85 189/378 | ||
| # | Formation | Normal Battle Node | AD/AP AS/AS+ |
| # | Empty Node | ||
|---|---|---|---|
| E3 | 敵影を見ず。 No enemy spotted. | ||
| # | Empty Node | ||
| # | Formation | Normal Battle Node | AD/AP AS/AS+ |
|---|---|---|---|
| F | Echelon Line Abreast Phases: 1 |
0/0 0/0 | |
| Echelon Line Abreast Phases: 1 |
0/0 0/0 | ||
| Echelon Line Abreast Phases: 1, 3 |
0/0 0/0 | ||
| # | Formation | Normal Battle Node | AD/AP AS/AS+ |
| # | Formation | Air Defense Node | AD/AP AS/AS+ |
|---|---|---|---|
| G | Diamond Phases: 1, 3 |
50/100 224/447 | |
| Diamond Phases: 1, 3 |
58/116 260/519 | ||
| Diamond Phases: 1, 3 |
90/180 404/807 | ||
| # | Formation | Air Defense Node | AD/AP AS/AS+ |
| # | Formation | Normal Battle Node | AD/AP AS/AS+ |
|---|---|---|---|
| G1 | Line Ahead Phases: 1, 3 |
0/0 0/0 | |
| # | Formation | Normal Battle Node | AD/AP AS/AS+ |
| # | Formation | Air Defense Node | AD/AP AS/AS+ |
|---|---|---|---|
| # | Formation | Air Defense Node | AD/AP AS/AS+ |
| # | Formation | Supported Battle Node | AD/AP AS/AS+ |
|---|---|---|---|
| H | Echelon Line Abreast Phases: 1, 3 |
41/81 180/360 | |
| Echelon Line Abreast Phases: 1, 3 |
46/91 204/408 | ||
| Echelon Line Abreast Phases: 1, 3 |
46/91 204/408 | ||
| # | Formation | Supported Battle Node | AD/AP AS/AS+ |
| # | Empty Node | ||
|---|---|---|---|
| I | 敵影を見ず。 No enemy spotted. | ||
| # | Empty Node | ||
| # | Formation | Normal Battle Node | AD/AP AS/AS+ |
|---|---|---|---|
| J | Diamond Phases: 1 |
50/100 224/447 | |
| Diamond Phases: 1, 3 |
58/116 260/519 | ||
| Diamond Phases: 1, 3 |
90/180 404/807 | ||
| # | Formation | Normal Battle Node | AD/AP AS/AS+ |
| # | Formation | Night Battle Node | AD/AP AS/AS+ |
|---|---|---|---|
| K | Line Ahead Echelon Vanguard Phases: 1, 3 |
0/0 0/0 | |
| # | Formation | Night Battle Node | AD/AP AS/AS+ |
| # | Empty Node | ||
|---|---|---|---|
| L | 敵影を見ず。 No enemy spotted. | ||
| # | Empty Node | ||
| # | Formation | Boss Battle Node | AD/AP AS/AS+ |
|---|---|---|---|
| M | Line Ahead Phases: 1 |
0/0 0/0 | |
| Line Ahead Phases: 1, 3 |
0/0 0/0 | ||
| Line Ahead Phases: 1 (Final)
|
0/0 0/0 | ||
| # | Formation | Boss Battle Node | AD/AP AS/AS+ |
| # | Formation | Normal Battle Node | AD/AP AS/AS+ |
|---|---|---|---|
| N | Echelon Line Abreast Phases: 2 |
0/0 0/0 | |
| # | Formation | Normal Battle Node | AD/AP AS/AS+ |
| # | Formation | Supported Battle Node | AD/AP AS/AS+ |
|---|---|---|---|
| # | Formation | Supported Battle Node | AD/AP AS/AS+ |
| # | Formation | Air Defense Node | AD/AP AS/AS+ |
|---|---|---|---|
| N2 | Diamond Phases: 3 |
53/105 236/471 | |
| Diamond Phases: 3 |
58/116 260/519 | ||
| Diamond Phases: 3 |
90/180 404/807 | ||
| # | Formation | Air Defense Node | AD/AP AS/AS+ |
| # | Formation | Normal Battle Node | AD/AP AS/AS+ |
|---|---|---|---|
| O | Line Ahead Echelon Phases: 2, 3 |
0/0 0/0 | |
| Line Ahead Phases: 3 |
0/0 0/0 | ||
| # | Formation | Normal Battle Node | AD/AP AS/AS+ |
| # | Formation | Supported Battle Node | AD/AP AS/AS+ |
|---|---|---|---|
| P | Echelon Line Abreast Phases: 2, 3 |
41/81 180/360 | |
| Echelon Line Abreast Phases: 2, 3 |
41/81 180/360 | ||
| Echelon Line Abreast Phases: 2, 3 |
46/91 204/408 | ||
| # | Formation | Supported Battle Node | AD/AP AS/AS+ |
| # | Formation | Air Defense Node | AD/AP AS/AS+ |
|---|---|---|---|
| # | Formation | Air Defense Node | AD/AP AS/AS+ |
| # | Formation | Normal Battle Node | AD/AP AS/AS+ |
|---|---|---|---|
| R | Diamond Phases: 2 |
53/105 236/471 | |
| Diamond Phases: 2, 3 |
58/116 260/519 | ||
| Diamond Phases: 2 |
90/180 404/807 | ||
| # | Formation | Normal Battle Node | AD/AP AS/AS+ |
| # | Landing Node | ||
|---|---|---|---|
| S | 輸送物資の揚陸地点に到達しました。本海域の輸送作戦は無事完了しています。 The landing point of the convoy has been reached. The transport operation here has already been completed successfully. | ||
| # | Landing Node | ||
| # | Empty Node | ||
|---|---|---|---|
| T | 敵影を見ず。 No enemy spotted. | ||
| # | Empty Node | ||
| # | Formation | Boss Battle Node | AD/AP AS/AS+ |
|---|---|---|---|
| U | Cruising Formation 3 Phases: 2 |
65/130 291/582 | |
| Cruising Formation 3 Phases: 2, 3 (Final)
|
69/138 309/618 | ||
| # | Formation | Boss Battle Node | AD/AP AS/AS+ |
| # | Formation | Normal Battle Node | AD/AP AS/AS+ |
|---|---|---|---|
| V | Echelon Phases: 3 |
0/0 0/0 | |
| # | Formation | Normal Battle Node | AD/AP AS/AS+ |
| # | Formation | Air Defense Node | AD/AP AS/AS+ |
|---|---|---|---|
| W | Diamond Phases: 3 |
105/210 471/942 | |
| Diamond Phases: 3 |
149/298 669/1338 | ||
| Diamond Phases: 3 |
155/309 693/1386 | ||
| # | Formation | Air Defense Node | AD/AP AS/AS+ |
| # | Formation | Night Battle Node | AD/AP AS/AS+ |
|---|---|---|---|
| X | Line Ahead Echelon Phases: 3 |
0/0 0/0 | |
| Line Ahead Phases: 3 |
0/0 0/0 | ||
| # | Formation | Night Battle Node | AD/AP AS/AS+ |
| # | Empty Node | ||
|---|---|---|---|
| Y | 敵影を見ず。 No enemy spotted. | ||
| # | Empty Node | ||
| # | Formation | Boss Battle Node | AD/AP AS/AS+ |
|---|---|---|---|
| Z | Cruising Formation 3 Phases: 3 |
163/326 732/1464 | |
| Cruising Formation 3 Phases: 3 (Final)
|
176/351 789/1578 | ||
| # | Formation | Boss Battle Node | AD/AP AS/AS+ |
| Type | Ships |
|---|---|
| DD |
| Type | Ships |
|---|---|
| DD |
| Type | Ships |
|---|---|
| DD |
| Type | Ships |
|---|---|
| DD |
| Type | Ships |
|---|---|
| DD |
| Type | Ships |
|---|---|
| DE | |
| DD | |
| CL | |
| BB |
| Type | Ships |
|---|---|
| DD |
| Type | Ships |
|---|---|
| DD |
| Type | Ships |
|---|---|
| DE | |
| DD |
| Type | Ships |
|---|---|
| DD |
| Type | Ships |
|---|---|
| DD | |
| CL | |
| CA | |
| CVL | |
| CV | |
| LHA |
| # | Formation | Air Raids | AD/AP AS/AS+ |
|---|---|---|---|
| AB | Diamond | 78/155 347/693 | |
| Diamond | 98/195 437/873 | ||
| Diamond | 114/227 510/1020 | ||
| # | Formation | Air Raids | AD/AP AS/AS+ |
| # | Selection Node | ||
|---|---|---|---|
| A | 艦隊の針路を選択できます。提督、どちらの針路をとられますか? You can decide the fleet's course. Admiral, which heading should we take? | ||
| # | Selection Node | ||
| # | Formation | Normal Battle Node | AD/AP AS/AS+ |
|---|---|---|---|
| B | Echelon Line Abreast Phases: 1 |
0/0 0/0 | |
| Echelon Line Abreast Phases: 1 |
0/0 0/0 | ||
| Echelon Line Abreast Phases: 1 |
0/0 0/0 | ||
| # | Formation | Normal Battle Node | AD/AP AS/AS+ |
| # | Formation | Air Defense Node | AD/AP AS/AS+ |
|---|---|---|---|
| B1 | Diamond | 49/97 216/432 | |
| # | Formation | Air Defense Node | AD/AP AS/AS+ |
| # | Formation | Normal Battle Node | AD/AP AS/AS+ |
|---|---|---|---|
| C | Line Ahead Vanguard Phases: 1 |
0/0 0/0 | |
| Line Ahead Phases: 1 |
0/0 0/0 | ||
| # | Formation | Normal Battle Node | AD/AP AS/AS+ |
| # | Formation | Air Defense Node | AD/AP AS/AS+ |
|---|---|---|---|
| C1 | Diamond Phases: 1 |
49/97 216/432 | |
| Diamond | 86/171 384/768 | ||
| # | Formation | Air Defense Node | AD/AP AS/AS+ |
| # | Formation | Normal Battle Node | AD/AP AS/AS+ |
|---|---|---|---|
| C2 | Diamond Phases: 1 |
46/91 204/408 | |
| # | Formation | Normal Battle Node | AD/AP AS/AS+ |
| # | Formation | Normal Battle Node | AD/AP AS/AS+ |
|---|---|---|---|
| # | Formation | Normal Battle Node | AD/AP AS/AS+ |
| # | Selection Node | ||
|---|---|---|---|
| D | 艦隊の針路を選択できます。提督、どちらの針路をとられますか? You can decide the fleet's course. Admiral, which heading should we take? | ||
| # | Selection Node | ||
| # | Formation | Supported Battle Node | AD/AP AS/AS+ |
|---|---|---|---|
| E | Echelon Line Abreast Phases: 1 |
3/6 12/24 | |
| Echelon Line Abreast Phases: 1 |
41/81 180/360 | ||
| Echelon Line Abreast Phases: 1 |
46/91 204/408 | ||
| # | Formation | Supported Battle Node | AD/AP AS/AS+ |
| # | Formation | Normal Battle Node | AD/AP AS/AS+ |
|---|---|---|---|
| E1 | Line Ahead Double Line Vanguard Phases: 1 |
0/0 0/0 | |
| # | Formation | Normal Battle Node | AD/AP AS/AS+ |
| # | Formation | Normal Battle Node | AD/AP AS/AS+ |
|---|---|---|---|
| E2 | Diamond Phases: 1 |
37/73 162/324 | |
| Diamond Phases: 1 |
37/73 162/324 | ||
| Diamond Phases: 1 |
37/73 162/324 | ||
| # | Formation | Normal Battle Node | AD/AP AS/AS+ |
| # | Empty Node | ||
|---|---|---|---|
| E3 | 敵影を見ず。 No enemy spotted. | ||
| # | Empty Node | ||
| # | Formation | Normal Battle Node | AD/AP AS/AS+ |
|---|---|---|---|
| F | Echelon Line Abreast Phases: 1 |
0/0 0/0 | |
| Echelon Line Abreast Phases: 1 |
0/0 0/0 | ||
| Echelon Line Abreast Phases: 1 |
0/0 0/0 | ||
| # | Formation | Normal Battle Node | AD/AP AS/AS+ |
| # | Formation | Air Defense Node | AD/AP AS/AS+ |
|---|---|---|---|
| G | Diamond Phases: 1 |
46/91 204/408 | |
| Diamond Phases: 1 |
54/107 240/480 | ||
| Diamond Phases: 1 |
86/171 384/768 | ||
| # | Formation | Air Defense Node | AD/AP AS/AS+ |
| # | Formation | Normal Battle Node | AD/AP AS/AS+ |
|---|---|---|---|
| G1 | Line Ahead Double Line Vanguard |
0/0 0/0 | |
| # | Formation | Normal Battle Node | AD/AP AS/AS+ |
| # | Formation | Air Defense Node | AD/AP AS/AS+ |
|---|---|---|---|
| # | Formation | Air Defense Node | AD/AP AS/AS+ |
| # | Formation | Supported Battle Node | AD/AP AS/AS+ |
|---|---|---|---|
| H | Echelon Line Abreast Phases: 1 |
3/6 12/24 | |
| Echelon Line Abreast Phases: 1 |
41/81 180/360 | ||
| Echelon Line Abreast Phases: 1, 3 |
46/91 204/408 | ||
| # | Formation | Supported Battle Node | AD/AP AS/AS+ |
| # | Empty Node | ||
|---|---|---|---|
| I | 敵影を見ず。 No enemy spotted. | ||
| # | Empty Node | ||
| # | Formation | Normal Battle Node | AD/AP AS/AS+ |
|---|---|---|---|
| J | Diamond Phases: 1, 3 |
46/91 204/408 | |
| Diamond Phases: 1 |
54/107 240/480 | ||
| Diamond Phases: 1, 3 |
86/171 384/768 | ||
| # | Formation | Normal Battle Node | AD/AP AS/AS+ |
| # | Formation | Night Battle Node | AD/AP AS/AS+ |
|---|---|---|---|
| K | Line Ahead Echelon Vanguard Phases: 1 |
0/0 0/0 | |
| # | Formation | Night Battle Node | AD/AP AS/AS+ |
| # | Empty Node | ||
|---|---|---|---|
| L | 敵影を見ず。 No enemy spotted. | ||
| # | Empty Node | ||
| # | Formation | Boss Battle Node | AD/AP AS/AS+ |
|---|---|---|---|
| M | Line Ahead Phases: 1 |
0/0 0/0 | |
| Line Ahead Phases: 1 |
0/0 0/0 | ||
| Line Ahead Phases: 1 (Final)
|
0/0 0/0 | ||
| # | Formation | Boss Battle Node | AD/AP AS/AS+ |
| # | Formation | Normal Battle Node | AD/AP AS/AS+ |
|---|---|---|---|
| N | Echelon Line Abreast Phases: 2 |
0/0 0/0 | |
| # | Formation | Normal Battle Node | AD/AP AS/AS+ |
| # | Formation | Supported Battle Node | AD/AP AS/AS+ |
|---|---|---|---|
| # | Formation | Supported Battle Node | AD/AP AS/AS+ |
| # | Formation | Air Defense Node | AD/AP AS/AS+ |
|---|---|---|---|
| N2 | Diamond Phases: 3 |
49/97 216/432 | |
| Diamond Phases: 3 |
54/107 240/480 | ||
| Diamond Phases: 3 |
86/171 384/768 | ||
| # | Formation | Air Defense Node | AD/AP AS/AS+ |
| # | Formation | Normal Battle Node | AD/AP AS/AS+ |
|---|---|---|---|
| O | Line Ahead Echelon Phases: 2, 3 |
0/0 0/0 | |
| Line Ahead Phases: 3 |
0/0 0/0 | ||
| # | Formation | Normal Battle Node | AD/AP AS/AS+ |
| # | Formation | Supported Battle Node | AD/AP AS/AS+ |
|---|---|---|---|
| P | Echelon Line Abreast Phases: 2, 3 |
0/0 0/0 | |
| Echelon Line Abreast Phases: 2, 3 |
41/81 180/360 | ||
| Echelon Line Abreast Phases: 2, 3 |
41/81 180/360 | ||
| # | Formation | Supported Battle Node | AD/AP AS/AS+ |
| # | Formation | Air Defense Node | AD/AP AS/AS+ |
|---|---|---|---|
| # | Formation | Air Defense Node | AD/AP AS/AS+ |
| # | Formation | Normal Battle Node | AD/AP AS/AS+ |
|---|---|---|---|
| R | Diamond Phases: 2 |
49/97 216/432 | |
| Diamond Phases: 2 |
54/107 240/480 | ||
| Diamond Phases: 2 |
86/171 384/768 | ||
| # | Formation | Normal Battle Node | AD/AP AS/AS+ |
| # | Landing Node | ||
|---|---|---|---|
| S | 輸送物資の揚陸地点に到達しました。本海域の輸送作戦は無事完了しています。 The landing point of the convoy has been reached. The transport operation here has already been completed successfully. | ||
| # | Landing Node | ||
| # | Empty Node | ||
|---|---|---|---|
| T | 敵影を見ず。 No enemy spotted. | ||
| # | Empty Node | ||
| # | Formation | Boss Battle Node | AD/AP AS/AS+ |
|---|---|---|---|
| U | Cruising Formation 3 Phases: 2 |
57/113 252/504 | |
| Cruising Formation 3 Phases: 2 (Final)
|
65/130 291/582 | ||
| # | Formation | Boss Battle Node | AD/AP AS/AS+ |
| # | Formation | Normal Battle Node | AD/AP AS/AS+ |
|---|---|---|---|
| V | Echelon Phases: 3 |
0/0 0/0 | |
| Echelon Line Abreast |
0/0 0/0 | ||
| Line Abreast | 0/0 0/0 | ||
| # | Formation | Normal Battle Node | AD/AP AS/AS+ |
| # | Formation | Air Defense Node | AD/AP AS/AS+ |
|---|---|---|---|
| W | Diamond Phases: 3 |
97/193 432/864 | |
| Diamond Phases: 3 |
113/226 507/1014 | ||
| Diamond Phases: 3 |
145/290 651/1302 | ||
| # | Formation | Air Defense Node | AD/AP AS/AS+ |
| # | Formation | Night Battle Node | AD/AP AS/AS+ |
|---|---|---|---|
| X | Line Ahead Echelon Phases: 3 |
0/0 0/0 | |
| Line Ahead Phases: 3 |
0/0 0/0 | ||
| # | Formation | Night Battle Node | AD/AP AS/AS+ |
| # | Empty Node | ||
|---|---|---|---|
| Y | 敵影を見ず。 No enemy spotted. | ||
| # | Empty Node | ||
| # | Formation | Boss Battle Node | AD/AP AS/AS+ |
|---|---|---|---|
| Z | Cruising Formation 3 Phases: 3 |
112/224 503/1005 | |
| Cruising Formation 3 Phases: 3 (Final)
|
155/309 693/1386 | ||
| # | Formation | Boss Battle Node | AD/AP AS/AS+ |
| Type | Ships |
|---|---|
| DD |
| Type | Ships |
|---|---|
| DD |
| Type | Ships |
|---|---|
| DD |
| Type | Ships |
|---|---|
| DD | |
| CL |
| Type | Ships |
|---|---|
| DD |
| Type | Ships |
|---|---|
| DD |
| Type | Ships |
|---|---|
| DD |
| Type | Ships |
|---|---|
| DD |
| Type | Ships |
|---|---|
| DD | |
| CL | |
| CA | |
| CVL | |
| CV | |
| LHA |
| # | Formation | Air Raids | AD/AP AS/AS+ |
|---|---|---|---|
| AB | Diamond | 40/79 177/354 | |
| Diamond | 60/120 269/537 | ||
| Diamond | 98/195 437/873 | ||
| # | Formation | Air Raids | AD/AP AS/AS+ |
| # | Selection Node | ||
|---|---|---|---|
| A | 艦隊の針路を選択できます。提督、どちらの針路をとられますか? You can decide the fleet's course. Admiral, which heading should we take? | ||
| # | Selection Node | ||
| # | Formation | Normal Battle Node | AD/AP AS/AS+ |
|---|---|---|---|
| B | Echelon Line Abreast Phases: 1 |
0/0 0/0 | |
| Echelon Line Abreast Phases: 1 |
0/0 0/0 | ||
| # | Formation | Normal Battle Node | AD/AP AS/AS+ |
| # | Formation | Air Defense Node | AD/AP AS/AS+ |
|---|---|---|---|
| # | Formation | Air Defense Node | AD/AP AS/AS+ |
| # | Formation | Normal Battle Node | AD/AP AS/AS+ |
|---|---|---|---|
| C | Line Ahead Vanguard Phases: 1 |
0/0 0/0 | |
| Line Ahead Phases: 1 |
0/0 0/0 | ||
| # | Formation | Normal Battle Node | AD/AP AS/AS+ |
| # | Formation | Air Defense Node | AD/AP AS/AS+ |
|---|---|---|---|
| # | Formation | Air Defense Node | AD/AP AS/AS+ |
| # | Formation | Normal Battle Node | AD/AP AS/AS+ |
|---|---|---|---|
| C2 | Diamond Phases: 1 |
41/81 180/360 | |
| # | Formation | Normal Battle Node | AD/AP AS/AS+ |
| # | Formation | Normal Battle Node | AD/AP AS/AS+ |
|---|---|---|---|
| # | Formation | Normal Battle Node | AD/AP AS/AS+ |
| # | Selection Node | ||
|---|---|---|---|
| D | 艦隊の針路を選択できます。提督、どちらの針路をとられますか? You can decide the fleet's course. Admiral, which heading should we take? | ||
| # | Selection Node | ||
| # | Formation | Supported Battle Node | AD/AP AS/AS+ |
|---|---|---|---|
| E | Echelon Line Abreast Phases: 1 |
3/6 12/24 | |
| Echelon Phases: 1 |
41/81 180/360 | ||
| # | Formation | Supported Battle Node | AD/AP AS/AS+ |
| # | Formation | Normal Battle Node | AD/AP AS/AS+ |
|---|---|---|---|
| E1 | Line Ahead Double Line Phases: 1 |
0/0 0/0 | |
| Line Ahead Phases: 1 |
0/0 0/0 | ||
| # | Formation | Normal Battle Node | AD/AP AS/AS+ |
| # | Formation | Normal Battle Node | AD/AP AS/AS+ |
|---|---|---|---|
| E2 | Diamond Phases: 1 |
37/73 162/324 | |
| Diamond Phases: 1 |
37/73 162/324 | ||
| Diamond Phases: 1 |
37/73 162/324 | ||
| # | Formation | Normal Battle Node | AD/AP AS/AS+ |
| # | Empty Node | ||
|---|---|---|---|
| E3 | 敵影を見ず。 No enemy spotted. | ||
| # | Empty Node | ||
| # | Formation | Normal Battle Node | AD/AP AS/AS+ |
|---|---|---|---|
| F | Echelon Line Abreast Phases: 1 |
0/0 0/0 | |
| Echelon Line Abreast Phases: 1 |
0/0 0/0 | ||
| # | Formation | Normal Battle Node | AD/AP AS/AS+ |
| # | Formation | Air Defense Node | AD/AP AS/AS+ |
|---|---|---|---|
| G | Diamond Phases: 1 |
9/17 36/72 | |
| Diamond Phases: 1 |
41/81 180/360 | ||
| Diamond Phases: 1 |
43/86 192/384 | ||
| # | Formation | Air Defense Node | AD/AP AS/AS+ |
| # | Formation | Normal Battle Node | AD/AP AS/AS+ |
|---|---|---|---|
| # | Formation | Normal Battle Node | AD/AP AS/AS+ |
| # | Formation | Air Defense Node | AD/AP AS/AS+ |
|---|---|---|---|
| # | Formation | Air Defense Node | AD/AP AS/AS+ |
| # | Formation | Supported Battle Node | AD/AP AS/AS+ |
|---|---|---|---|
| H | Echelon Line Abreast Phases: 1 |
3/6 12/24 | |
| Echelon Line Abreast Phases: 1 |
41/81 180/360 | ||
| # | Formation | Supported Battle Node | AD/AP AS/AS+ |
| # | Empty Node | ||
|---|---|---|---|
| I | 敵影を見ず。 No enemy spotted. | ||
| # | Empty Node | ||
| # | Formation | Normal Battle Node | AD/AP AS/AS+ |
|---|---|---|---|
| J | Diamond Phases: 1, 3 |
9/17 36/72 | |
| Diamond Phases: 1 |
41/81 180/360 | ||
| Diamond Phases: 1 |
43/86 192/384 | ||
| # | Formation | Normal Battle Node | AD/AP AS/AS+ |
| # | Formation | Night Battle Node | AD/AP AS/AS+ |
|---|---|---|---|
| K | Line Ahead Phases: 1 |
0/0 0/0 | |
| Line Ahead Echelon Phases: 1 |
0/0 0/0 | ||
| # | Formation | Night Battle Node | AD/AP AS/AS+ |
| # | Empty Node | ||
|---|---|---|---|
| L | 敵影を見ず。 No enemy spotted. | ||
| # | Empty Node | ||
| # | Formation | Boss Battle Node | AD/AP AS/AS+ |
|---|---|---|---|
| M | Line Ahead Phases: 1 |
0/0 0/0 | |
| Line Ahead Phases: 1 |
0/0 0/0 | ||
| Line Ahead Phases: 1 (Final)
|
0/0 0/0 | ||
| # | Formation | Boss Battle Node | AD/AP AS/AS+ |
| # | Formation | Normal Battle Node | AD/AP AS/AS+ |
|---|---|---|---|
| N | Echelon Line Abreast Phases: 2 |
0/0 0/0 | |
| Echelon Line Abreast Phases: 2 |
0/0 0/0 | ||
| # | Formation | Normal Battle Node | AD/AP AS/AS+ |
| # | Formation | Supported Battle Node | AD/AP AS/AS+ |
|---|---|---|---|
| # | Formation | Supported Battle Node | AD/AP AS/AS+ |
| # | Formation | Air Defense Node | AD/AP AS/AS+ |
|---|---|---|---|
| N2 | Diamond Phases: 3 |
41/81 180/360 | |
| Diamond Phases: 3 |
43/86 192/384 | ||
| Diamond Phases: 3 |
49/97 216/432 | ||
| # | Formation | Air Defense Node | AD/AP AS/AS+ |
| # | Formation | Normal Battle Node | AD/AP AS/AS+ |
|---|---|---|---|
| O | Line Ahead Echelon Phases: 2, 3 |
0/0 0/0 | |
| Line Ahead Phases: 3 |
0/0 0/0 | ||
| # | Formation | Normal Battle Node | AD/AP AS/AS+ |
| # | Formation | Supported Battle Node | AD/AP AS/AS+ |
|---|---|---|---|
| P | Echelon Line Abreast Phases: 2, 3 |
0/0 0/0 | |
| Echelon Line Abreast Phases: 2, 3 |
41/81 180/360 | ||
| # | Formation | Supported Battle Node | AD/AP AS/AS+ |
| # | Formation | Air Defense Node | AD/AP AS/AS+ |
|---|---|---|---|
| Q | Diamond | 43/86 192/384 | |
| # | Formation | Air Defense Node | AD/AP AS/AS+ |
| # | Formation | Normal Battle Node | AD/AP AS/AS+ |
|---|---|---|---|
| R | Diamond Phases: 2 |
9/17 36/72 | |
| Diamond Phases: 2 |
43/86 192/384 | ||
| Diamond Phases: 2 |
49/97 216/432 | ||
| # | Formation | Normal Battle Node | AD/AP AS/AS+ |
| # | Landing Node | ||
|---|---|---|---|
| S | 輸送物資の揚陸地点に到達しました。本海域の輸送作戦は無事完了しています。 The landing point of the convoy has been reached. The transport operation here has already been completed successfully. | ||
| # | Landing Node | ||
| # | Empty Node | ||
|---|---|---|---|
| T | 敵影を見ず。 No enemy spotted. | ||
| # | Empty Node | ||
| # | Formation | Boss Battle Node | AD/AP AS/AS+ |
|---|---|---|---|
| U | Cruising Formation 3 Phases: 2 |
57/113 252/504 | |
| Cruising Formation 3 Phases: 2 (Final)
|
57/113 252/504 | ||
| # | Formation | Boss Battle Node | AD/AP AS/AS+ |
| # | Formation | Normal Battle Node | AD/AP AS/AS+ |
|---|---|---|---|
| # | Formation | Normal Battle Node | AD/AP AS/AS+ |
| # | Formation | Air Defense Node | AD/AP AS/AS+ |
|---|---|---|---|
| W | Diamond Phases: 3 |
59/118 264/528 | |
| Diamond Phases: 3 |
97/193 432/864 | ||
| Diamond Phases: 3 |
99/198 444/888 | ||
| # | Formation | Air Defense Node | AD/AP AS/AS+ |
| # | Formation | Night Battle Node | AD/AP AS/AS+ |
|---|---|---|---|
| X | Line Ahead Echelon Phases: 3 |
0/0 0/0 | |
| Line Ahead Phases: 3 |
0/0 0/0 | ||
| # | Formation | Night Battle Node | AD/AP AS/AS+ |
| # | Empty Node | ||
|---|---|---|---|
| Y | 敵影を見ず。 No enemy spotted. | ||
| # | Empty Node | ||
| # | Formation | Boss Battle Node | AD/AP AS/AS+ |
|---|---|---|---|
| Z | Cruising Formation 3 Phases: 3 |
59/117 263/525 | |
| Cruising Formation 3 Phases: 3 (Final)
|
108/215 482/963 | ||
| # | Formation | Boss Battle Node | AD/AP AS/AS+ |
Ship Drops
| Ship drops | |||||||||||||||||||||||||||||||||||||||||||||||||||||||||||||||||||||||||||||||||||||||||||||||||||
|---|---|---|---|---|---|---|---|---|---|---|---|---|---|---|---|---|---|---|---|---|---|---|---|---|---|---|---|---|---|---|---|---|---|---|---|---|---|---|---|---|---|---|---|---|---|---|---|---|---|---|---|---|---|---|---|---|---|---|---|---|---|---|---|---|---|---|---|---|---|---|---|---|---|---|---|---|---|---|---|---|---|---|---|---|---|---|---|---|---|---|---|---|---|---|---|---|---|---|---|
| Type | Ship? | C2 | E1 | E2 | J | K | M | O | R | U | X | Z | |||||||||||||||||||||||||||||||||||||||||||||||||||||||||||||||||||||||||||||||||||||||
| DE | Noumi | Casual+ | |||||||||||||||||||||||||||||||||||||||||||||||||||||||||||||||||||||||||||||||||||||||||||||||||
| DE | Kaiboukan No.4 | Easy+ | Easy+ | ||||||||||||||||||||||||||||||||||||||||||||||||||||||||||||||||||||||||||||||||||||||||||||||||
| DD | Ume | Casual+ | |||||||||||||||||||||||||||||||||||||||||||||||||||||||||||||||||||||||||||||||||||||||||||||||||
| DD | Yuugure | Hard+ | Easy+ | ||||||||||||||||||||||||||||||||||||||||||||||||||||||||||||||||||||||||||||||||||||||||||||||||
| DD | Uzuki | Hard+ | Hard+ | Easy+ | Easy+ | Easy+ | Hard+ | ||||||||||||||||||||||||||||||||||||||||||||||||||||||||||||||||||||||||||||||||||||||||||||
| DD | Usugumo | Casual+ | Medium+ | Hard+ | |||||||||||||||||||||||||||||||||||||||||||||||||||||||||||||||||||||||||||||||||||||||||||||||
| DD | Uranami | Hard+ | Hard+ | Hard+ | Easy+ | Casual+ | Medium+ | Casual+ | Easy+ | Casual+ | |||||||||||||||||||||||||||||||||||||||||||||||||||||||||||||||||||||||||||||||||||||||||
| DD | Amagiri | Easy+ | Hard+ | ||||||||||||||||||||||||||||||||||||||||||||||||||||||||||||||||||||||||||||||||||||||||||||||||
| DD | Sagiri | Medium+ | Easy+ | Easy+ | Easy+ | Hard+ | |||||||||||||||||||||||||||||||||||||||||||||||||||||||||||||||||||||||||||||||||||||||||||||
| DD | Harusame | Easy+ | Easy+ | Medium+ | Easy+ | Casual+ | Casual+ | Easy+ | Casual+ | Casual+ | |||||||||||||||||||||||||||||||||||||||||||||||||||||||||||||||||||||||||||||||||||||||||
| DD | Yamakaze | Casual+ | |||||||||||||||||||||||||||||||||||||||||||||||||||||||||||||||||||||||||||||||||||||||||||||||||
| DD | Kawakaze | Medium+ | Casual+ | Hard+ | Casual+ | Casual+ | Easy+ | Easy+ | Easy+ | Easy+ | Easy+ | ||||||||||||||||||||||||||||||||||||||||||||||||||||||||||||||||||||||||||||||||||||||||
| DD | Isokaze | Easy+ | Easy+ | Casual+ | Hard+ | Easy+ | Hard+ | Hard+ | |||||||||||||||||||||||||||||||||||||||||||||||||||||||||||||||||||||||||||||||||||||||||||
| DD | Tanikaze | Easy+ | Easy+ | Easy+ | Casual+ | Easy+ | Casual+ | Easy+ | Easy+ | Casual+ | |||||||||||||||||||||||||||||||||||||||||||||||||||||||||||||||||||||||||||||||||||||||||
| DD | Akizuki | Hard+ | Hard+ | Hard+ | Casual+ | Casual+ | Casual+ | Casual+ | Casual+ | ||||||||||||||||||||||||||||||||||||||||||||||||||||||||||||||||||||||||||||||||||||||||||
| DD | Hatsuzuki | Easy+ | Hard+ | Easy+ | Casual+ | Casual+ | Casual+ | Easy+ | Medium+ | Easy+ | |||||||||||||||||||||||||||||||||||||||||||||||||||||||||||||||||||||||||||||||||||||||||
| DD | Take | Casual+ | |||||||||||||||||||||||||||||||||||||||||||||||||||||||||||||||||||||||||||||||||||||||||||||||||
| CL | Noshiro | Casual+ | |||||||||||||||||||||||||||||||||||||||||||||||||||||||||||||||||||||||||||||||||||||||||||||||||
| CL | Sakawa | Casual+ | |||||||||||||||||||||||||||||||||||||||||||||||||||||||||||||||||||||||||||||||||||||||||||||||||
| CL | Helena | Casual+ | |||||||||||||||||||||||||||||||||||||||||||||||||||||||||||||||||||||||||||||||||||||||||||||||||
| CA | Mikuma | Casual+ | |||||||||||||||||||||||||||||||||||||||||||||||||||||||||||||||||||||||||||||||||||||||||||||||||
| CA | Houston | Casual+ | |||||||||||||||||||||||||||||||||||||||||||||||||||||||||||||||||||||||||||||||||||||||||||||||||
| CVL | Gambier Bay | Casual+ | |||||||||||||||||||||||||||||||||||||||||||||||||||||||||||||||||||||||||||||||||||||||||||||||||
| BB | Colorado | Easy+ | |||||||||||||||||||||||||||||||||||||||||||||||||||||||||||||||||||||||||||||||||||||||||||||||||
| CV | Saratoga | Casual+ | |||||||||||||||||||||||||||||||||||||||||||||||||||||||||||||||||||||||||||||||||||||||||||||||||
| CV | Intrepid | Easy+ | |||||||||||||||||||||||||||||||||||||||||||||||||||||||||||||||||||||||||||||||||||||||||||||||||
| CV | Hornet | Casual+ | |||||||||||||||||||||||||||||||||||||||||||||||||||||||||||||||||||||||||||||||||||||||||||||||||
| LHA | Shinshuu Maru | Medium+ | |||||||||||||||||||||||||||||||||||||||||||||||||||||||||||||||||||||||||||||||||||||||||||||||||
| LHA | Akitsu Maru | Casual+ | |||||||||||||||||||||||||||||||||||||||||||||||||||||||||||||||||||||||||||||||||||||||||||||||||
| DD | Yayoi | Hard+ | Casual+ | Hard+ | Casual+ | ||||||||||||||||||||||||||||||||||||||||||||||||||||||||||||||||||||||||||||||||||||||||||||||
| DD | Hamakaze | Easy+ | Medium+ | Casual+ | Casual+ | Easy+ | Casual+ | Easy+ | Easy+ | ||||||||||||||||||||||||||||||||||||||||||||||||||||||||||||||||||||||||||||||||||||||||||
| CL | Nagara | Easy+ | Hard+ | Easy+ | Casual+ | Casual+ | Casual+ | Easy+ | Easy+ | ||||||||||||||||||||||||||||||||||||||||||||||||||||||||||||||||||||||||||||||||||||||||||
| CL | Kinu | Casual+ | |||||||||||||||||||||||||||||||||||||||||||||||||||||||||||||||||||||||||||||||||||||||||||||||||
| CL | Abukuma | Easy+ | Hard+ | Easy+ | Medium+ | Casual+ | Easy+ | Casual+ | Casual+ | Easy+ | Casual+ | Casual+ | |||||||||||||||||||||||||||||||||||||||||||||||||||||||||||||||||||||||||||||||||||||||
| CL | Sendai | Easy+ | Easy+ | Hard+ | Easy+ | Casual+ | Casual+ | Casual+ | Casual+ | Casual+ | |||||||||||||||||||||||||||||||||||||||||||||||||||||||||||||||||||||||||||||||||||||||||
| CA | Kinugasa | Casual+ | |||||||||||||||||||||||||||||||||||||||||||||||||||||||||||||||||||||||||||||||||||||||||||||||||
| CA | Myoukou | Casual+ | |||||||||||||||||||||||||||||||||||||||||||||||||||||||||||||||||||||||||||||||||||||||||||||||||
| CA | Takao | Casual+ | |||||||||||||||||||||||||||||||||||||||||||||||||||||||||||||||||||||||||||||||||||||||||||||||||
| CA | Mogami | Casual+ | |||||||||||||||||||||||||||||||||||||||||||||||||||||||||||||||||||||||||||||||||||||||||||||||||
| CA | Tone | Casual+ | |||||||||||||||||||||||||||||||||||||||||||||||||||||||||||||||||||||||||||||||||||||||||||||||||
| CVL | Zuihou | Medium+ | Easy+ | Casual+ | |||||||||||||||||||||||||||||||||||||||||||||||||||||||||||||||||||||||||||||||||||||||||||||||
| FBB | Kongou | Casual+ | |||||||||||||||||||||||||||||||||||||||||||||||||||||||||||||||||||||||||||||||||||||||||||||||||
| FBB | Hiei | Casual+ | |||||||||||||||||||||||||||||||||||||||||||||||||||||||||||||||||||||||||||||||||||||||||||||||||
| FBB | Haruna | Casual+ | |||||||||||||||||||||||||||||||||||||||||||||||||||||||||||||||||||||||||||||||||||||||||||||||||
| FBB | Kirishima | Casual+ | |||||||||||||||||||||||||||||||||||||||||||||||||||||||||||||||||||||||||||||||||||||||||||||||||
| BB | Ise | Casual+ | |||||||||||||||||||||||||||||||||||||||||||||||||||||||||||||||||||||||||||||||||||||||||||||||||
| BB | Hyuuga | Casual+ | |||||||||||||||||||||||||||||||||||||||||||||||||||||||||||||||||||||||||||||||||||||||||||||||||
| BB | Nagato | Easy+ | Easy+ | Casual+ | |||||||||||||||||||||||||||||||||||||||||||||||||||||||||||||||||||||||||||||||||||||||||||||||
| CV | Shoukaku | Casual+ | |||||||||||||||||||||||||||||||||||||||||||||||||||||||||||||||||||||||||||||||||||||||||||||||||
| CV | Zuikaku | Casual+ | |||||||||||||||||||||||||||||||||||||||||||||||||||||||||||||||||||||||||||||||||||||||||||||||||
|
| ||||||||
|---|---|---|---|---|---|---|---|---|
|
Time remaining until Event ends [9]:
| ||||||||
KC anniversary maintenance has started, time remaining until maintenance ends [10]:
(~4h event pause)
| ||||||||
| ||||||||