- Welcome to the Kancolle Wiki!
- If you have any questions regarding site content, account registration, etc., please visit the KanColle Wiki Discord
Difference between revisions of "Spring 2025 Event/E-3"
m (→Gimmick 1 - Unlock: Yes, you can fail the LoS check at B2.) |
m (→Gimmick 4 - Repair Node: Update.) |
||
| (7 intermediate revisions by 2 users not shown) | |||
| Line 201: | Line 201: | ||
| Easy|| A+|| A+|| A+ | | Easy|| A+|| A+|| A+ | ||
|- | |- | ||
| − | | Casual|| A | + | | Casual|| A+|| A+|| A+ |
|} | |} | ||
| Line 207: | Line 207: | ||
| Map = Node B4 | | Map = Node B4 | ||
| Fleet = '''Striking: 0-1 FBB, 1-2 CA, 0-1 CLT, 1-2 CL, 4-5 DD [[File:{{ROOTPAGENAME}} Tag 3.png|30px]] | | Fleet = '''Striking: 0-1 FBB, 1-2 CA, 0-1 CLT, 1-2 CL, 4-5 DD [[File:{{ROOTPAGENAME}} Tag 3.png|30px]] | ||
| − | | LOS = Cn3: 30? / 40? / 40? / 53 | + | | LOS = Cn3: 30? / 40? / 40? / 53 (C/E/M/H) |
| Route = {{MapRoute|1||A|blue|B|red|B2|red|B4|red}} | | Route = {{MapRoute|1||A|blue|B|red|B2|red|B4|red}} | ||
| Speed = '''Fast | | Speed = '''Fast | ||
| Line 243: | Line 243: | ||
| Map = Node E2 | | Map = Node E2 | ||
| Fleet = '''Striking: 0-1 FBB, 1-2 CA, 0-1 CLT, 1 CL, 4 DD [[File:{{ROOTPAGENAME}} Tag 3.png|30px]] | | Fleet = '''Striking: 0-1 FBB, 1-2 CA, 0-1 CLT, 1 CL, 4 DD [[File:{{ROOTPAGENAME}} Tag 3.png|30px]] | ||
| + | | LOS = Cn3: 33? / 40? / 48? / 57 (C/E/M/H) | ||
| Route = {{MapRoute|1||A|blue|C|blue|E|red|E2|red}} | | Route = {{MapRoute|1||A|blue|C|blue|E|red|E2|red}} | ||
| ASC = 189 | | ASC = 189 | ||
| Line 258: | Line 259: | ||
{{FleetGuide | {{FleetGuide | ||
| Map = Light Fleet | | Map = Light Fleet | ||
| − | | Fleet = '''Striking: 0-1 (F)BB(V), 0-2 CA(V), 1 CL, 0-1 CLT, 4-5 DD [[File:{{ROOTPAGENAME}} Tag 3.png|30px]] | + | | Fleet = '''Striking: 0-1 (F)BB(V), 0-2 CA(V), 1 CL, 0-1 CLT, 4-5 DD''' [[File:{{ROOTPAGENAME}} Tag 3.png|30px]] |
| Route = {{MapRoute|1||A|blue|C|blue|E|red|F|red|F1|pink|G|red}} | | Route = {{MapRoute|1||A|blue|C|blue|E|red|F|red|F1|pink|G|red}} | ||
| − | | Speen = '''Fast | + | | Speen = '''Fast''' |
| − | | LOS = Cn3: ? / ? / ? / | + | | LOS = Cn3: 33? / 40? / 47? / 57 (C/E/M/H) |
| ASC = 81 | | ASC = 81 | ||
| ASE = 236 | | ASE = 236 | ||
| Line 278: | Line 279: | ||
{{FleetGuide | {{FleetGuide | ||
| Map = Heavy Fleet | | Map = Heavy Fleet | ||
| − | | Fleet = '''Striking: 1-2 FBB, 0-1 CA, 1 CL, 0-1 CLT, 3-4 DD [[File:{{ROOTPAGENAME}} Tag 3.png|30px]] | + | | Fleet = '''Striking: 1-2 FBB, 0-1 CA, 1 CL, 0-1 CLT, 3-4 DD''' [[File:{{ROOTPAGENAME}} Tag 3.png|30px]] |
| Route = {{MapRoute|1||A|blue|C|blue|E|red|F|red|F1|pink|F3|red|G|red}} | | Route = {{MapRoute|1||A|blue|C|blue|E|red|F|red|F1|pink|F3|red|G|red}} | ||
| − | | Speed = '''Fast | + | | Speed = '''Fast''' |
| − | | LOS = Cn3: ? / ? / ? / | + | | LOS = Cn3: 33? / 40? / 47? / 57 (C/E/M/H) |
| ASC = 81 | | ASC = 81 | ||
| ASE = 236 | | ASE = 236 | ||
| Line 290: | Line 291: | ||
* The fleet only needs to be fast when using 2 FBB, otherwise it can be slow. | * The fleet only needs to be fast when using 2 FBB, otherwise it can be slow. | ||
* Bringing ASW is recommended. | * Bringing ASW is recommended. | ||
| − | *Bringing an [[AACI]] is recommended. | + | * Bringing an [[AACI]] is recommended. |
| Range = Boss {{MapNode|G|red}}: 6 | | Range = Boss {{MapNode|G|red}}: 6 | ||
| LBASS = 83 / 237 / 237 / 312 | | LBASS = 83 / 237 / 237 / 312 | ||
| Line 328: | Line 329: | ||
| Easy|| S|| A+|| S|| A+|| S|| AS | | Easy|| S|| A+|| S|| A+|| S|| AS | ||
|- | |- | ||
| − | | Casual|| | + | | Casual|| S|| A+|| S|| -|| S|| AS |
|} | |} | ||
| Line 618: | Line 619: | ||
| Easy|| A+|| -|| A+|| A+|| AS x2? | | Easy|| A+|| -|| A+|| A+|| AS x2? | ||
|- | |- | ||
| − | | Casual|| A+ | + | | Casual|| A+|| -|| A+|| -|| AS? |
|} | |} | ||
| Line 652: | Line 653: | ||
| Hard|| A+ x2|| A+ x2|| A+ x2|| A+ x2|| A+ x2|| AS x2 | | Hard|| A+ x2|| A+ x2|| A+ x2|| A+ x2|| A+ x2|| AS x2 | ||
|- | |- | ||
| − | | Medium||A+ x2|| -||A+ x2|| A+ | + | | Medium||A+ x2|| -||A+ x2|| A+ x2|| A+ x2|| AS x 2 |
|- | |- | ||
| Easy|| ?|| -|| ?|| ?|| ?|| ? | | Easy|| ?|| -|| ?|| ?|| ?|| ? | ||
|- | |- | ||
| − | | Casual|| | + | | Casual|| -|| -|| A+ x2|| A+|| A+?|| AS? |
|} | |} | ||
Latest revision as of 20:42, 5 May 2025
 
| |||||||||
|---|---|---|---|---|---|---|---|---|---|
 
Time until the end of the event:
| |||||||||
留萌沖艦隊決戦
![]()
![]()
![]()


| Information | ||||
|---|---|---|---|---|
| Event Tag | ||||
| Boss Gauges | Hard (甲): 3850 HP + 2640 HP + 4560 HP | |||
| Medium (乙): 3850 HP + 1540 HP + 4320 HP | ||||
| Easy (丙): 3850 HP + 1540 HP + 4320 HP | ||||
| Casual (丁): 3850 HP + 1540 HP + 4080 HP | ||||
| Map Bosses | Northern Water Princess
| |||
Transport Ship Wa-Class B (Landing) Flagship
| ||||
Non-Treaty Cruiser Water Princess
| ||||
| Rewards[edit] | ||||
|---|---|---|---|---|
| Ship | 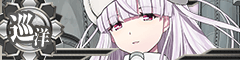 Kirov | |||
| Choice | 丁 Casual |
丙 Easy |
乙 Medium |
甲 Hard |
Prototype Flight Deck Catapult |
1 | |||
| OR | ||||
Development Material |
88 | |||
| THEN | ||||
 Communication Equipment & Personnel |
1 | 1 | ||
| OR | ||||
New Model Armament Material |
2 | 3 | ||
| THEN | ||||
 Smoke Generator Kai (Smoke Screen) |
1 | |||
| OR | ||||
Prototype Flight Deck Catapult |
1 | |||
| Reward | 丁 Casual |
丙 Easy |
乙 Medium |
甲 Hard |
|---|---|---|---|---|
Latest Overseas Warship Technology |
1 | 1 | 1 | 1 |
Medal |
1 | 2 | 3 | |
New Model Armament Material |
1 | |||
 18cm/57 Triple Main Gun Mount |
1 (★3) | 1 (★5) | 1 (★7) | |
Smoke Generator Kai (Smoke Screen) |
1 (★3) | |||
 10cm/56 Single High-angle Gun Mount (Concentrated Deployment) |
1 (★4) |

The event guides are to be constructed through the respective Event map page guide sandbox and reviewed by editors before being approved here.
- Do not update the guides through this page unless it is a minor fix. Please only update guides through their respective sandbox pages.
Branching Table
| E-3 Branching Rules (Start Points) ▼/▲ | ||
|---|---|---|
| Nodes | Rules | |
| Start | 1 |
|
2 |
| |
3 |
| |
| E-3 Branching Rules (Start Point 1) ▼/▲ | ||
|---|---|---|
| Nodes | Rules | |
A |
B |
Active Branching |
C | ||
B |
B1 |
|
B2 |
| |
B2 |
B3 |
|
B4 |
| |
C |
D |
Active Branching |
E | ||
D |
D1 |
|
D3 |
| |
D1 |
D2 |
|
D3 |
| |
E |
B |
|
E1 |
| |
E2 |
| |
F |
| |
F1 |
F2 |
|
F3 |
| |
G |
| |
F3 |
G |
|
| E-3 Branching Rules (Start Point 2) ▼/▲ | ||
|---|---|---|
| Nodes | Rules | |
H |
H1 |
Active Branching |
I | ||
H1 |
H2 |
|
H3 |
| |
I |
I1 |
|
I2 |
| |
J |
| |
K |
K1 |
|
K2 |
| |
| E-3 Branching Rules (Start Point 3) ▼/▲ | ||
|---|---|---|
| Nodes | Rules | |
K |
L |
|
L |
M |
|
N |
| |
M |
M1 |
Active Branching |
M2 | ||
M2 |
P |
|
Q |
| |
S |
| |
P |
O1 |
|
Q |
| |
Q |
O2 |
|
S |
| |
S |
S1 |
Active Branching |
S2 | ||
T |
F3 |
|
U |
| |
F3 |
U |
|
V |
S3 |
|
W |
| |
X |
| |
* = Rule under review
? = Ship type/amount under review
Branching compositions are reported over the course of the event.
- Please refer to KCNav for up to date map content (fleets used, LoS/speed requirements/drops/LBAS ranges, ...)
Historical Bonuses
Do note that several of the 5th fleet members will have historical significance in the "2nd Stage Operations"!
| Ships [1] [Toggle Names] |
Map-wide | Nodes E/F |
Node G |
Nodes R/U |
Node X | |||
|---|---|---|---|---|---|---|---|---|
| Damage | Damage | Damage | Damage | Damage | ||||
| Coastal Defense Ships (DE) | 1.12x | - | - | |||||
| Destroyers (DD) | 1.03x | 1.11x | 1.07x | |||||
| Light Cruisers (CL) NOT CLT |
1.04x | - | ||||||
| Seaplane Tenders (AV) | 1.08x | 1.11x | - | |||||
| Submarine Tenders (AS) | 1.08x | - | ||||||
| Amphibious Assault Ships (LHA) | - | 1.11x | - | |||||
| Fleet Oilers (AO) | - | 1.11x | - | |||||
Souya Ootomari |
1.28x | - | ||||||
| 5th Fleet | 1.16x | 5th Fleet | ||||||
| CA | Ashigara Nachi |
1.04x | 1.07x | - | 1.08x | |||
| CL(T) | Abukuma Kiso Tama |
1.06x | 1.06x | 1.08x | ||||
| DD | Akebono Kasumi Shiranui Hatsushimo Wakaba Ushio Hatsuharu Usugumo |
1.08x | 1.05x | 1.06x | ||||
|
1.13x | - | ||||||
| Equipment | Map-wide | ||
|---|---|---|---|
| Damage | Evasion | ||
 ★+7 7+ ★+7 7+ |
1.12x | Good [2] | |
|
1 | 1.18x | - |
| 2 | 1.28x | - | |
- The torpedo bomber bonus only works on a non-zero slot.
- LBAS


- The bonus is only applied once (does not stack)
Ships and equipment with special routing on the map:
| Ships [Toggle Names] | |||
|---|---|---|---|
Ootomari
| |||
| Equipment | |||

| |||
Map Overview
E3 is a single and combined fleet, three-phase map consisting of three boss phases.
- 3 LBAS are available on this map:
- Only 2 can be set on Sortie, the other being limited to Defense,
- This map uses 3 locks:
 5th Fleet, Starting point 1 (reused from E-2)
 104th Squadron, Starting point 2 (reused from E-1)
 Combined Fleet, Starting point 3
The use of ![]() AGDP AGDP
AGDP AGDP on CV(B/L), Ise-class Kai Ni, Akitsu Maru Kai, Kumano Maru, Shimane Maru, and Yamashio Maru, is required to sortie these ships on the map.
- An Emergency Anchorage Repair node is present on S2
 Barrage Balloons can be deployed on nodes R U
Gimmick 1 - Unlock
To unlock the 1st boss, the following steps have to be performed:
| B4 | D3 | E2 | |
|---|---|---|---|
| Hard | A+ x2 | A+ x2 | A+ x2 |
| Medium | A+ | A+ | A+ |
| Easy | A+ | A+ | A+ |
| Casual | A+ | A+ | A+ |
| Node B4 | |||||||||||||||||||||||||||||||||||||||||||||
|---|---|---|---|---|---|---|---|---|---|---|---|---|---|---|---|---|---|---|---|---|---|---|---|---|---|---|---|---|---|---|---|---|---|---|---|---|---|---|---|---|---|---|---|---|---|
|
| ||||||||||||||||||||||||||||||||||||||||||||
| Fleet Notes | |||||||||||||||||||||||||||||||||||||||||||||
The enemy is a surface fleet.
| |||||||||||||||||||||||||||||||||||||||||||||
| LBAS Notes | |||||||||||||||||||||||||||||||||||||||||||||
| All LBAS should be sent on the node. | |||||||||||||||||||||||||||||||||||||||||||||
| Node D3 | |||||||||||||||||||||||||||||||||||||||||||||
|---|---|---|---|---|---|---|---|---|---|---|---|---|---|---|---|---|---|---|---|---|---|---|---|---|---|---|---|---|---|---|---|---|---|---|---|---|---|---|---|---|---|---|---|---|---|
|
| ||||||||||||||||||||||||||||||||||||||||||||
| Fleet Notes | |||||||||||||||||||||||||||||||||||||||||||||
| Depending on difficulty, 0/3/4/6 "historical" ships are needed to avoid D1.
The enemy is a submarine node, it is therefore advised to bring ASW. | |||||||||||||||||||||||||||||||||||||||||||||
| LBAS Notes | |||||||||||||||||||||||||||||||||||||||||||||
| All LBAS can be sent on ASW duty on the node, or be mixed with node D. | |||||||||||||||||||||||||||||||||||||||||||||
| Node E2 | |||||||||||||||||||||||||||||||||||||||||||||
|---|---|---|---|---|---|---|---|---|---|---|---|---|---|---|---|---|---|---|---|---|---|---|---|---|---|---|---|---|---|---|---|---|---|---|---|---|---|---|---|---|---|---|---|---|---|
|
| ||||||||||||||||||||||||||||||||||||||||||||
| Fleet Notes | |||||||||||||||||||||||||||||||||||||||||||||
| The enemy is a strong surface fleet. | |||||||||||||||||||||||||||||||||||||||||||||
| LBAS Notes | |||||||||||||||||||||||||||||||||||||||||||||
| All LBAS should be sent on the node. | |||||||||||||||||||||||||||||||||||||||||||||
Phase 1 - Boss
| Light Fleet | |||||||||||||||||||||||||||||||||||||||||||||
|---|---|---|---|---|---|---|---|---|---|---|---|---|---|---|---|---|---|---|---|---|---|---|---|---|---|---|---|---|---|---|---|---|---|---|---|---|---|---|---|---|---|---|---|---|---|
|
| ||||||||||||||||||||||||||||||||||||||||||||
| Fleet Notes | |||||||||||||||||||||||||||||||||||||||||||||
The shortest route to the boss, but requires a relatively light fleet.
| |||||||||||||||||||||||||||||||||||||||||||||
| LBAS Notes | |||||||||||||||||||||||||||||||||||||||||||||
| All bases should be sent on the boss. | |||||||||||||||||||||||||||||||||||||||||||||
| Heavy Fleet | |||||||||||||||||||||||||||||||||||||||||||||
|---|---|---|---|---|---|---|---|---|---|---|---|---|---|---|---|---|---|---|---|---|---|---|---|---|---|---|---|---|---|---|---|---|---|---|---|---|---|---|---|---|---|---|---|---|---|
|
| ||||||||||||||||||||||||||||||||||||||||||||
| Fleet Notes | |||||||||||||||||||||||||||||||||||||||||||||
A stronger fleet that can utilize 2 FBB, but routes through extra node F3 which contains a sub loli.
| |||||||||||||||||||||||||||||||||||||||||||||
| LBAS Notes | |||||||||||||||||||||||||||||||||||||||||||||
| All bases should be sent on the boss. | |||||||||||||||||||||||||||||||||||||||||||||
To route E F, the ![]() Medium Arctic Camouflage (+ Arctic Equipment) must be equipped in the fleet:
Medium Arctic Camouflage (+ Arctic Equipment) must be equipped in the fleet:
- On 3+ ships in hard,
- On 1+ ships in medium,
- On 0+ ships in easy/casual.
Otherwise, the fleet with pass through extra node E2.
Using Boss support is recommended.
PT Imp Packs are on the route, it is therefore advised to bring some anti-PT setups.
| Northern Water Princess |
|---|
|


Gimmick 2 - Unlock
To unlock the 2nd boss, the following steps have to be performed:
| H3 | I1 | I3 | K2 | M1 | M2 | |
|---|---|---|---|---|---|---|
| Hard | S x2 | S x2 | S x2 | A+ x2 | S | AS |
| Medium | S | A+ | S | A+ | S | AS |
| Easy | S | A+ | S | A+ | S | AS |
| Casual | S | A+ | S | - | S | AS |
| Node H3 | |||||||||||||||||||||||||||||||||||||||||||||
|---|---|---|---|---|---|---|---|---|---|---|---|---|---|---|---|---|---|---|---|---|---|---|---|---|---|---|---|---|---|---|---|---|---|---|---|---|---|---|---|---|---|---|---|---|---|
|
| ||||||||||||||||||||||||||||||||||||||||||||
| Fleet Notes | |||||||||||||||||||||||||||||||||||||||||||||
The enemy is a small submarine fleet and requires proper ASW.
| |||||||||||||||||||||||||||||||||||||||||||||
| LBAS Notes | |||||||||||||||||||||||||||||||||||||||||||||
| ASW LBAS should only be necessary if the fleet cannot be equipped with sufficient ASW power. | |||||||||||||||||||||||||||||||||||||||||||||
| Node I1 | |||||||||||||||||||||||||||||||||||||||||||||
|---|---|---|---|---|---|---|---|---|---|---|---|---|---|---|---|---|---|---|---|---|---|---|---|---|---|---|---|---|---|---|---|---|---|---|---|---|---|---|---|---|---|---|---|---|---|
|
| ||||||||||||||||||||||||||||||||||||||||||||
| Fleet Notes | |||||||||||||||||||||||||||||||||||||||||||||
| The enemy is a submarine fleet and requires proper ASW. | |||||||||||||||||||||||||||||||||||||||||||||
| LBAS Notes | |||||||||||||||||||||||||||||||||||||||||||||
| All LBAS should be sent on the node. | |||||||||||||||||||||||||||||||||||||||||||||
| Node I3 | |||||||||||||||||||||||||||||||||||||||||||||
|---|---|---|---|---|---|---|---|---|---|---|---|---|---|---|---|---|---|---|---|---|---|---|---|---|---|---|---|---|---|---|---|---|---|---|---|---|---|---|---|---|---|---|---|---|---|
|
| ||||||||||||||||||||||||||||||||||||||||||||
| Fleet Notes | |||||||||||||||||||||||||||||||||||||||||||||
The enemy is a surface fleet. DON'T BRING . Bringing any number of will cause an offroute to node J.
| |||||||||||||||||||||||||||||||||||||||||||||
| LBAS Notes | |||||||||||||||||||||||||||||||||||||||||||||
| All LBAS should be sent on the node. | |||||||||||||||||||||||||||||||||||||||||||||
| Node K2 | |||||||||||||||||||||||||||||||||||||||||||||
|---|---|---|---|---|---|---|---|---|---|---|---|---|---|---|---|---|---|---|---|---|---|---|---|---|---|---|---|---|---|---|---|---|---|---|---|---|---|---|---|---|---|---|---|---|---|
|
| ||||||||||||||||||||||||||||||||||||||||||||
| Fleet Notes | |||||||||||||||||||||||||||||||||||||||||||||
In order to route to Node J, the fleet must either:
2 submarine nodes are on the route, so ASW is advised. | |||||||||||||||||||||||||||||||||||||||||||||
| LBAS Notes | |||||||||||||||||||||||||||||||||||||||||||||
| All LBAS should be sent on the node. | |||||||||||||||||||||||||||||||||||||||||||||
| Nodes M1 & M2 - STF | |||||||||||||||||||||||||||||||||||||||||||||||||
|---|---|---|---|---|---|---|---|---|---|---|---|---|---|---|---|---|---|---|---|---|---|---|---|---|---|---|---|---|---|---|---|---|---|---|---|---|---|---|---|---|---|---|---|---|---|---|---|---|---|
|
| ||||||||||||||||||||||||||||||||||||||||||||||||
| Fleet Notes | |||||||||||||||||||||||||||||||||||||||||||||||||
| Same comp as for the following boss phase. | |||||||||||||||||||||||||||||||||||||||||||||||||
| LBAS Notes | |||||||||||||||||||||||||||||||||||||||||||||||||
| All LBAS can be sent on node M1, but might not be needed for M2. | |||||||||||||||||||||||||||||||||||||||||||||||||
Phase 2 - Boss
| STF | |||||||||||||||||||||||||||||||||||||||||||||||||
|---|---|---|---|---|---|---|---|---|---|---|---|---|---|---|---|---|---|---|---|---|---|---|---|---|---|---|---|---|---|---|---|---|---|---|---|---|---|---|---|---|---|---|---|---|---|---|---|---|---|
|
| ||||||||||||||||||||||||||||||||||||||||||||||||
| Fleet Notes | |||||||||||||||||||||||||||||||||||||||||||||||||
A strong fleet that can notably utilize Special Attacks.
| |||||||||||||||||||||||||||||||||||||||||||||||||
| LBAS Notes | |||||||||||||||||||||||||||||||||||||||||||||||||
| All LBAS should be sent on the boss. | |||||||||||||||||||||||||||||||||||||||||||||||||
| TCF - Shortest Route | |||||||||||||||||||||||||||||||||||||||||||||||||
|---|---|---|---|---|---|---|---|---|---|---|---|---|---|---|---|---|---|---|---|---|---|---|---|---|---|---|---|---|---|---|---|---|---|---|---|---|---|---|---|---|---|---|---|---|---|---|---|---|---|
|
| ||||||||||||||||||||||||||||||||||||||||||||||||
| Fleet Notes | |||||||||||||||||||||||||||||||||||||||||||||||||
A very light fleet that only goes through 3 battle nodes to reach the boss.
| |||||||||||||||||||||||||||||||||||||||||||||||||
| LBAS Notes | |||||||||||||||||||||||||||||||||||||||||||||||||
| All LBAS should be sent on the boss. | |||||||||||||||||||||||||||||||||||||||||||||||||
The boss node has several Installations, notably a Supply Depot Princess D.
Boss fleet has of two Transport Ship Wa-Class B (Landing) Elite, which has high AA strength and is armed with a ![]() Barrage Balloon, to counter damage from carriers and LBAS.
Barrage Balloon, to counter damage from carriers and LBAS.
- Be advised that if a land base is sent to R, planes and rank loss will be significantly higher.
- It is therefore recommended to bring several Barrage Balloons in order to both mitigate these and buff allied aircraft damage.
- It is therefore recommended to bring several
As only the non-installation flagship needs to be killed, it is highly advised to use as much TCI as possible in the escort fleet, in order to focus on the surface ships and ignore the installation during the torpedo phases and night battle.
- Bringing no anti-installation power is viable to clear the boss.
- Using Boss support is recommended.
| Supply Depot Princess D |
|---|
|


Gimmick 3 - Unlock
To unlock the last boss, the following steps have to be performed:
| U | |
|---|---|
| Hard | A+ x2 |
| Medium | A+ x2 |
| Easy | A+ x2 |
| Casual | A+ x2 |
| Node U STF Fast | |||||||||||||||||||||||||||||||||||||||||||||||||
|---|---|---|---|---|---|---|---|---|---|---|---|---|---|---|---|---|---|---|---|---|---|---|---|---|---|---|---|---|---|---|---|---|---|---|---|---|---|---|---|---|---|---|---|---|---|---|---|---|---|
|
| ||||||||||||||||||||||||||||||||||||||||||||||||
| Fleet Notes | |||||||||||||||||||||||||||||||||||||||||||||||||
A fleet similar to the two other phases with this lock, that can notably utilize Special Attacks.
| |||||||||||||||||||||||||||||||||||||||||||||||||
| LBAS Notes | |||||||||||||||||||||||||||||||||||||||||||||||||
| All LBAS should be sent on the node. | |||||||||||||||||||||||||||||||||||||||||||||||||
| Node U STF Slow | |||||||||||||||||||||||||||||||||||||||||||||||||
|---|---|---|---|---|---|---|---|---|---|---|---|---|---|---|---|---|---|---|---|---|---|---|---|---|---|---|---|---|---|---|---|---|---|---|---|---|---|---|---|---|---|---|---|---|---|---|---|---|---|
|
| ||||||||||||||||||||||||||||||||||||||||||||||||
| Fleet Notes | |||||||||||||||||||||||||||||||||||||||||||||||||
A fleet similar to the two other phases with this lock, that can notably utilize Special Attacks.
| |||||||||||||||||||||||||||||||||||||||||||||||||
| LBAS Notes | |||||||||||||||||||||||||||||||||||||||||||||||||
| All LBAS should be sent on the node. | |||||||||||||||||||||||||||||||||||||||||||||||||
| Node U CTF | |||||||||||||||||||||||||||||||||||||||||||||||||
|---|---|---|---|---|---|---|---|---|---|---|---|---|---|---|---|---|---|---|---|---|---|---|---|---|---|---|---|---|---|---|---|---|---|---|---|---|---|---|---|---|---|---|---|---|---|---|---|---|---|
|
| ||||||||||||||||||||||||||||||||||||||||||||||||
| Fleet Notes | |||||||||||||||||||||||||||||||||||||||||||||||||
A fleet that can bring more air power and may utilize a Nelson-class Special Attack.
| |||||||||||||||||||||||||||||||||||||||||||||||||
| LBAS Notes | |||||||||||||||||||||||||||||||||||||||||||||||||
| All LBAS should be sent on the node. | |||||||||||||||||||||||||||||||||||||||||||||||||
The enemy is an Installation
To route T U, 2 ![]() Medium Arctic Camouflage (+ Arctic Equipment) must be equipped in the fleet, else, it will pass through extra node F3.
Medium Arctic Camouflage (+ Arctic Equipment) must be equipped in the fleet, else, it will pass through extra node F3.
The node has several Installations, notably a Supply Depot Princess D.
It also has a Transport Ship Wa-Class B (Landing) Elite, which has high AA strength and is armed with a ![]() Barrage Balloon, to counter damage from carriers and LBAS.
Barrage Balloon, to counter damage from carriers and LBAS.
- Be advised that if a land base is sent to U, planes and rank loss will be significantly higher.
- It is therefore recommended to bring several Barrage Balloons in order to both mitigate these and buff allied aircraft damage.
- It is therefore recommended to bring several
PT Imp Packs are on the node, it is therefore advised to bring some anti-PT setups.
Phase 3 - Boss
| STF | |||||||||||||||||||||||||||||||||||||||||||||||||
|---|---|---|---|---|---|---|---|---|---|---|---|---|---|---|---|---|---|---|---|---|---|---|---|---|---|---|---|---|---|---|---|---|---|---|---|---|---|---|---|---|---|---|---|---|---|---|---|---|---|
|
| ||||||||||||||||||||||||||||||||||||||||||||||||
| Fleet Notes | |||||||||||||||||||||||||||||||||||||||||||||||||
| Must be fast or have 3+ CL to avoid extra node Q. | |||||||||||||||||||||||||||||||||||||||||||||||||
| LBAS Notes | |||||||||||||||||||||||||||||||||||||||||||||||||
| All LBAS should be sent on the boss. | |||||||||||||||||||||||||||||||||||||||||||||||||
| CTF | |||||||||||||||||||||||||||||||||||||||||||||||||
|---|---|---|---|---|---|---|---|---|---|---|---|---|---|---|---|---|---|---|---|---|---|---|---|---|---|---|---|---|---|---|---|---|---|---|---|---|---|---|---|---|---|---|---|---|---|---|---|---|---|
|
| ||||||||||||||||||||||||||||||||||||||||||||||||
| Fleet Notes | |||||||||||||||||||||||||||||||||||||||||||||||||
| Must be fast or have 3+ CL to avoid extra node Q. | |||||||||||||||||||||||||||||||||||||||||||||||||
| LBAS Notes | |||||||||||||||||||||||||||||||||||||||||||||||||
| All LBAS should be sent on the boss. | |||||||||||||||||||||||||||||||||||||||||||||||||
Having strong AACI is recommended to reach and face the boss.
The use of a Special Attack is highly recommended, preferably a Colorado-class one.
On hard mode LD, node L has 2 Heavy Cruiser Ne-Class Kai.
 Smokes can help pass through it.
Using Boss and Node supports is highly recommended.
Gimmick 4 - Repair Node
To unlock the bonus Repair Node, the following steps have to be performed:
- This can be done at the same time as the debuff.
| G | K2 | R | U | LBAS | |
|---|---|---|---|---|---|
| Hard | A+ | A+ | A+ | A+ | AS x2 |
| Medium | A+ | A+? | A+ | A+ | AS x2? |
| Easy | A+ | - | A+ | A+ | AS x2? |
| Casual | A+ | - | A+ | - | AS? |
- Refer to #Phase 1 - Boss's fleet for composition and routing.
- Refer to #Gimmick 2 - Unlock's fleet for composition and routing.
- Refer to #Phase 2 - Boss's fleet for composition and routing.
- Refer to #Gimmick 3 - Unlock's fleet for composition and routing.
| LBAS | AS |
|---|---|
| Hard | 281 |
| Medium | 230 |
| Easy | 209 |
| Casual | 158 |
Gimmick 5 - Debuff
Once LD has been reached, the following steps have to be performed to debuff the boss.
| B4 | K2 | G | R | U | LBAS | |
|---|---|---|---|---|---|---|
| Hard | A+ x2 | A+ x2 | A+ x2 | A+ x2 | A+ x2 | AS x2 |
| Medium | A+ x2 | - | A+ x2 | A+ x2 | A+ x2 | AS x 2 |
| Easy | ? | - | ? | ? | ? | ? |
| Casual | - | - | A+ x2 | A+ | A+? | AS? |
- Refer to #Gimmick 1 - Unlock's fleet for composition and routing.
- Refer to #Phase 1 - Boss's fleet for composition and routing.
- Refer to #Gimmick 2 - Unlock's fleet for composition and routing.
- Refer to #Phase 2 - Boss's fleet for composition and routing.
- Refer to #Gimmick 3 - Unlock's fleet for composition and routing.
| LBAS | AS |
|---|---|
| Hard | 281 |
| Medium | 230 |
| Easy | 209 |
| Casual | 158 |
Once on LD, the CG will change to the following:
| Non-Treaty Cruiser Water Princess |
|---|
|


Enemy Compositions

| Type | Ships |
|---|---|
| DE | |
| DD | |
| AO |
| Type | Ships |
|---|---|
| DE | |
| DD | |
| AO |
| Type | Ships |
|---|---|
| DE | |
| DD | |
| AO |
| Type | Ships |
|---|---|
| DE | |
| DD | |
| AO |
| Type | Ships |
|---|---|
| DE | |
| DD | |
| SS | |
| AS | |
| AO |
| Type | Ships |
|---|---|
| DE | |
| DD | |
| AO |
| Type | Ships |
|---|---|
| DE | |
| DD | |
| AO |
| Type | Ships |
|---|---|
| DE | |
| DD | |
| AO |
| Type | Ships |
|---|---|
| DE | |
| DD | |
| AO |
| Type | Ships |
|---|---|
| DE | |
| DD | |
| AO |
| Type | Ships |
|---|---|
| DE | |
| DD | |
| AO |
| Type | Ships |
|---|---|
| DE | |
| DD | |
| AO |
| Type | Ships |
|---|---|
| DE | |
| DD | |
| CA | |
| CVL | |
| FBB | |
| SS | |
| LHA | |
| AR | |
| AS | |
| AO |
| # | Selection Node | ||
|---|---|---|---|
| A | 艦隊の針路を選択できます。提督、どちらの針路をとられますか? You can decide the fleet's course. Admiral, which heading should we take? | ||
| # | Selection Node | ||
| # | Formation | Normal Battle Node | AD/AP AS/AS+ |
|---|---|---|---|
| B | Echelon | 0/0 0/0 | |
| Echelon | 0/0 0/0 | ||
| Echelon | 0/0 0/0 | ||
| # | Formation | Normal Battle Node | AD/AP AS/AS+ |
| # | Formation | Air Defense Node | AD/AP AS/AS+ |
|---|---|---|---|
| B1 | Diamond (HA) |
47/94 210/420 | |
| Diamond (HA) |
47/93 209/417 | ||
| Diamond (HA) |
52/103 230/459 | ||
| Diamond (HA) |
46/92 206/411 | ||
| Diamond (HA) |
46/92 206/411 | ||
| Diamond (HA) |
51/101 227/453 | ||
| # | Formation | Air Defense Node | AD/AP AS/AS+ |
| # | Formation | Normal Battle Node | AD/AP AS/AS+ |
|---|---|---|---|
| B2 | Echelon Line Abreast |
0/0 0/0 | |
| Echelon Line Abreast |
0/0 0/0 | ||
| Echelon Line Abreast |
0/0 0/0 | ||
| # | Formation | Normal Battle Node | AD/AP AS/AS+ |
| # | Empty Node | ||
|---|---|---|---|
| B3 | 敵影を見ず。 No enemy spotted. | ||
| # | Empty Node | ||
| # | Formation | Normal Battle Node | AD/AP AS/AS+ |
|---|---|---|---|
| B4 | Line Ahead Double Line Vanguard |
0/0 0/0 | |
| # | Formation | Normal Battle Node | AD/AP AS/AS+ |
| # | Selection Node | ||
|---|---|---|---|
| C | 艦隊の針路を選択できます。提督、どちらの針路をとられますか? You can decide the fleet's course. Admiral, which heading should we take? | ||
| # | Selection Node | ||
| # | Formation | Normal Battle Node | AD/AP AS/AS+ |
|---|---|---|---|
| D | Line Ahead Double Line Vanguard |
0/0 0/0 | |
| # | Formation | Normal Battle Node | AD/AP AS/AS+ |
| # | Formation | Normal Battle Node | AD/AP AS/AS+ |
|---|---|---|---|
| D1 | Line Ahead Echelon Vanguard |
0/0 0/0 | |
| # | Formation | Normal Battle Node | AD/AP AS/AS+ |
| # | Empty Node | ||
|---|---|---|---|
| D2 | 敵影を見ず。 No enemy spotted. | ||
| # | Empty Node | ||
| # | Formation | Normal Battle Node | AD/AP AS/AS+ |
|---|---|---|---|
| D3 | Echelon Line Abreast |
0/0 0/0 | |
| Echelon Line Abreast |
0/0 0/0 | ||
| Echelon Line Abreast |
0/0 0/0 | ||
| # | Formation | Normal Battle Node | AD/AP AS/AS+ |
| # | Formation | Normal Battle Node | AD/AP AS/AS+ |
|---|---|---|---|
| E | Echelon | 0/0 0/0 | |
| Echelon | 0/0 0/0 | ||
| Echelon | 0/0 0/0 | ||
| # | Formation | Normal Battle Node | AD/AP AS/AS+ |
| # | Empty Node | ||
|---|---|---|---|
| E1 | 敵影を見ず。 No enemy spotted. | ||
| # | Empty Node | ||
| # | Formation | Normal Battle Node | AD/AP AS/AS+ |
|---|---|---|---|
| E2 | Line Ahead | 36/71 159/318 | |
| Line Ahead | 45/89 198/396 | ||
| Line Ahead | 45/89 198/396 | ||
| # | Formation | Normal Battle Node | AD/AP AS/AS+ |
| # | Formation | Normal Battle Node | AD/AP AS/AS+ |
|---|---|---|---|
| F | Line Ahead | 0/0 0/0 | |
| Line Ahead | 0/0 0/0 | ||
| Line Ahead | 0/0 0/0 | ||
| # | Formation | Normal Battle Node | AD/AP AS/AS+ |
| # | Formation | Air Defense Node | AD/AP AS/AS+ |
|---|---|---|---|
| F1 | Diamond (HA) |
47/94 210/420 | |
| Diamond (HA) |
47/93 209/417 | ||
| Diamond (HA) |
52/103 230/459 | ||
| Diamond (HA) |
46/92 206/411 | ||
| Diamond (HA) |
46/92 206/411 | ||
| Diamond (HA) |
51/101 227/453 | ||
| # | Formation | Air Defense Node | AD/AP AS/AS+ |
| # | Empty Node | ||
|---|---|---|---|
| F2 | 敵影を見ず。 No enemy spotted. | ||
| # | Empty Node | ||
| # | Formation | Normal Battle Node | AD/AP AS/AS+ |
|---|---|---|---|
| F3 | Echelon Line Abreast |
0/0 0/0 | |
| Echelon Line Abreast |
0/0 0/0 | ||
| # | Formation | Normal Battle Node | AD/AP AS/AS+ |
| # | Formation | Boss Battle Node | AD/AP AS/AS+ |
|---|---|---|---|
| G | Line Ahead Diamond |
22/43 96/192 | |
| Line Ahead (Final)
|
60/120 269/537 | ||
| # | Formation | Boss Battle Node | AD/AP AS/AS+ |
| # | Selection Node | ||
|---|---|---|---|
| H | 艦隊の針路を選択できます。提督、どちらの針路をとられますか? You can decide the fleet's course. Admiral, which heading should we take? | ||
| # | Selection Node | ||
| # | Formation | Air Defense Node | AD/AP AS/AS+ |
|---|---|---|---|
| H1 | Diamond (HA) |
47/94 210/420 | |
| Diamond (HA) |
47/93 209/417 | ||
| Diamond (HA) |
52/103 230/459 | ||
| Diamond (HA) |
46/92 206/411 | ||
| Diamond (HA) |
46/92 206/411 | ||
| Diamond (HA) |
51/101 227/453 | ||
| # | Formation | Air Defense Node | AD/AP AS/AS+ |
| # | Empty Node | ||
|---|---|---|---|
| H2 | 敵影を見ず。 No enemy spotted. | ||
| # | Empty Node | ||
| # | Formation | Normal Battle Node | AD/AP AS/AS+ |
|---|---|---|---|
| H3 | Echelon Line Abreast |
0/0 0/0 | |
| Echelon Line Abreast |
0/0 0/0 | ||
| Echelon Line Abreast |
0/0 0/0 | ||
| # | Formation | Normal Battle Node | AD/AP AS/AS+ |
| # | Formation | Normal Battle Node | AD/AP AS/AS+ |
|---|---|---|---|
| I | Line Ahead Echelon Vanguard |
0/0 0/0 | |
| # | Formation | Normal Battle Node | AD/AP AS/AS+ |
| # | Formation | Normal Battle Node | AD/AP AS/AS+ |
|---|---|---|---|
| I1 | Echelon Line Abreast |
0/0 0/0 | |
| Echelon Line Abreast |
0/0 0/0 | ||
| # | Formation | Normal Battle Node | AD/AP AS/AS+ |
| # | Formation | Air Defense Node | AD/AP AS/AS+ |
|---|---|---|---|
| I2 | Diamond (HA) |
47/94 210/420 | |
| Diamond (HA) |
47/93 209/417 | ||
| Diamond (HA) |
52/103 230/459 | ||
| Diamond (HA) |
46/92 206/411 | ||
| Diamond (HA) |
46/92 206/411 | ||
| Diamond (HA) |
51/101 227/453 | ||
| # | Formation | Air Defense Node | AD/AP AS/AS+ |
| # | Formation | Normal Battle Node | AD/AP AS/AS+ |
|---|---|---|---|
| I3 | Line Ahead Double Line Diamond |
45/89 198/396 | |
| # | Formation | Normal Battle Node | AD/AP AS/AS+ |
| # | Formation | Normal Battle Node | AD/AP AS/AS+ |
|---|---|---|---|
| J | Echelon Line Abreast |
0/0 0/0 | |
| Echelon Line Abreast |
0/0 0/0 | ||
| Echelon Line Abreast |
0/0 0/0 | ||
| # | Formation | Normal Battle Node | AD/AP AS/AS+ |
| # | Formation | Normal Battle Node | AD/AP AS/AS+ |
|---|---|---|---|
| K | Echelon Line Abreast |
0/0 0/0 | |
| Echelon Line Abreast |
0/0 0/0 | ||
| Echelon Line Abreast |
0/0 0/0 | ||
| # | Formation | Normal Battle Node | AD/AP AS/AS+ |
| # | Empty Node | ||
|---|---|---|---|
| K1 | 敵影を見ず。 No enemy spotted. | ||
| # | Empty Node | ||
| # | Formation | Normal Battle Node | AD/AP AS/AS+ |
|---|---|---|---|
| K2 | Line Ahead Double Line Vanguard |
0/0 0/0 | |
| # | Formation | Normal Battle Node | AD/AP AS/AS+ |
| # | Formation | Normal Battle Node | AD/AP AS/AS+ |
|---|---|---|---|
| L | Line Ahead Diamond |
51/101 225/450 | |
| Line Ahead | 51/101 225/450 | ||
| # | Formation | Normal Battle Node | AD/AP AS/AS+ |
| # | Selection Node | ||
|---|---|---|---|
| M | 艦隊の針路を選択できます。提督、どちらの針路をとられますか? You can decide the fleet's course. Admiral, which heading should we take? | ||
| # | Selection Node | ||
| # | Formation | Normal Battle Node | AD/AP AS/AS+ |
|---|---|---|---|
| M1 | Line Ahead Double Line |
0/0 0/0 | |
| Line Ahead | 0/0 0/0 | ||
| # | Formation | Normal Battle Node | AD/AP AS/AS+ |
| # | Formation | Air Defense Node | AD/AP AS/AS+ |
|---|---|---|---|
| M2 | Diamond | 23/45 99/198 | |
| Diamond | 33/65 144/288 | ||
| Diamond | 27/54 120/240 | ||
| Diamond | 34/67 150/300 | ||
| Diamond | 39/77 171/342 | ||
| Diamond | 43/86 192/384 | ||
| # | Formation | Air Defense Node | AD/AP AS/AS+ |
| # | Formation | Air Defense Node | AD/AP AS/AS+ |
|---|---|---|---|
| N | Diamond (HA) |
47/94 210/420 | |
| Diamond (HA) |
47/93 209/417 | ||
| Diamond (HA) |
52/103 230/459 | ||
| Diamond (HA) |
46/92 206/411 | ||
| Diamond (HA) |
51/101 227/453 | ||
| # | Formation | Air Defense Node | AD/AP AS/AS+ |
| # | Empty Node | ||
|---|---|---|---|
| O | 気のせいだった。 Must be my imagination. | ||
| # | Empty Node | ||
| # | Empty Node | ||
|---|---|---|---|
| O1 | 気のせいだった。 Must be my imagination. | ||
| # | Empty Node | ||
| # | Empty Node | ||
|---|---|---|---|
| O2 | 気のせいだった。 Must be my imagination. | ||
| # | Empty Node | ||
| # | Formation | Air Defense Node | AD/AP AS/AS+ |
|---|---|---|---|
| P | Diamond (HA) |
47/94 210/420 | |
| Diamond (HA) |
47/93 209/417 | ||
| Diamond (HA) |
52/103 230/459 | ||
| Diamond (HA) |
46/92 206/411 | ||
| Diamond (HA) |
46/92 206/411 | ||
| Diamond (HA) |
51/101 227/453 | ||
| # | Formation | Air Defense Node | AD/AP AS/AS+ |
| # | Formation | Normal Battle Node | AD/AP AS/AS+ |
|---|---|---|---|
| Q | Echelon Line Abreast |
0/0 0/0 | |
| Echelon Line Abreast |
0/0 0/0 | ||
| # | Formation | Normal Battle Node | AD/AP AS/AS+ |
| # | Formation | Boss Battle Node | AD/AP AS/AS+ |
|---|---|---|---|
| R | Cruising Formation 1 | 89/177 398/795 | |
| Cruising Formation 1 (Final)
|
66/132 296/591 | ||
| # | Formation | Boss Battle Node | AD/AP AS/AS+ |
| # | Selection Node | ||
|---|---|---|---|
| S | 艦隊の針路を選択できます。提督、どちらの針路をとられますか? You can decide the fleet's course. Admiral, which heading should we take? | ||
| # | Selection Node | ||
| # | Empty Node | ||
|---|---|---|---|
| S1 | 気のせいだった。 Must be my imagination. | ||
| # | Empty Node | ||
| # | Empty Node | ||
|---|---|---|---|
| S2 | 気のせいだった。 Must be my imagination. | ||
| # | Empty Node | ||
| # | Repair Node | ||
|---|---|---|---|
| # | Repair Node | ||
| # | Formation | Normal Battle Node | AD/AP AS/AS+ |
|---|---|---|---|
| T | Line Ahead Double Line Vanguard |
0/0 0/0 | |
| # | Formation | Normal Battle Node | AD/AP AS/AS+ |
| # | Formation | Normal Battle Node | AD/AP AS/AS+ |
|---|---|---|---|
| U | Cruising Formation 3 | 123/246 552/1104 | |
| Cruising Formation 3 | 101/201 450/900 | ||
| # | Formation | Normal Battle Node | AD/AP AS/AS+ |
| # | Formation | Normal Battle Node | AD/AP AS/AS+ |
|---|---|---|---|
| V | Line Ahead Diamond |
43/85 189/378 | |
| Line Ahead | 45/89 198/396 | ||
| # | Formation | Normal Battle Node | AD/AP AS/AS+ |
| # | Empty Node | ||
|---|---|---|---|
| W | 敵影を見ず。 No enemy spotted. | ||
| # | Empty Node | ||
| # | Formation | Boss Battle Node | AD/AP AS/AS+ |
|---|---|---|---|
| X | Cruising Formation 1 | 72/143 321/642 | |
| Cruising Formation 1 (Final)
|
113/225 504/1008 | ||
| # | Formation | Boss Battle Node | AD/AP AS/AS+ |
| Type | Ships |
|---|---|
| DE | |
| DD | |
| AO |
| Type | Ships |
|---|---|
| DE |
| Type | Ships |
|---|---|
| DE | |
| DD | |
| AO |
| Type | Ships |
|---|---|
| DE | |
| DD | |
| AO |
| Type | Ships |
|---|---|
| DE | |
| DD | |
| SS | |
| AS | |
| AO |
| Type | Ships |
|---|---|
| DE | |
| DD | |
| AO |
| Type | Ships |
|---|---|
| DE | |
| DD | |
| AO |
| Type | Ships |
|---|---|
| DE | |
| DD | |
| AO |
| Type | Ships |
|---|---|
| DE | |
| DD | |
| AO |
| Type | Ships |
|---|---|
| DD | |
| AO |
| Type | Ships |
|---|---|
| DE | |
| DD | |
| AO |
| Type | Ships |
|---|---|
| DE | |
| DD | |
| AO |
| Type | Ships |
|---|---|
| DE | |
| DD | |
| CA | |
| CVL | |
| FBB | |
| SS | |
| LHA | |
| AR | |
| AS | |
| AO |
| # | Selection Node | ||
|---|---|---|---|
| A | 艦隊の針路を選択できます。提督、どちらの針路をとられますか? You can decide the fleet's course. Admiral, which heading should we take? | ||
| # | Selection Node | ||
| # | Formation | Normal Battle Node | AD/AP AS/AS+ |
|---|---|---|---|
| B | Echelon | 0/0 0/0 | |
| Echelon | 0/0 0/0 | ||
| Echelon | 0/0 0/0 | ||
| # | Formation | Normal Battle Node | AD/AP AS/AS+ |
| # | Formation | Air Defense Node | AD/AP AS/AS+ |
|---|---|---|---|
| B1 | Diamond (HA) |
36/71 158/315 | |
| Diamond (HA) |
47/94 210/420 | ||
| Diamond (HA) |
36/71 158/315 | ||
| Diamond (HA) |
47/93 209/417 | ||
| Diamond (HA) |
52/103 230/459 | ||
| Diamond (HA) |
35/69 155/309 | ||
| Diamond (HA) |
46/92 206/411 | ||
| # | Formation | Air Defense Node | AD/AP AS/AS+ |
| # | Formation | Normal Battle Node | AD/AP AS/AS+ |
|---|---|---|---|
| B2 | Echelon Line Abreast |
0/0 0/0 | |
| Echelon Line Abreast |
0/0 0/0 | ||
| Echelon Line Abreast |
0/0 0/0 | ||
| # | Formation | Normal Battle Node | AD/AP AS/AS+ |
| # | Empty Node | ||
|---|---|---|---|
| B3 | 敵影を見ず。 No enemy spotted. | ||
| # | Empty Node | ||
| # | Formation | Normal Battle Node | AD/AP AS/AS+ |
|---|---|---|---|
| B4 | Line Ahead Double Line Vanguard |
0/0 0/0 | |
| # | Formation | Normal Battle Node | AD/AP AS/AS+ |
| # | Selection Node | ||
|---|---|---|---|
| C | 艦隊の針路を選択できます。提督、どちらの針路をとられますか? You can decide the fleet's course. Admiral, which heading should we take? | ||
| # | Selection Node | ||
| # | Formation | Normal Battle Node | AD/AP AS/AS+ |
|---|---|---|---|
| D | Line Ahead Double Line Vanguard |
0/0 0/0 | |
| # | Formation | Normal Battle Node | AD/AP AS/AS+ |
| # | Formation | Normal Battle Node | AD/AP AS/AS+ |
|---|---|---|---|
| D1 | Line Ahead Echelon Vanguard |
0/0 0/0 | |
| # | Formation | Normal Battle Node | AD/AP AS/AS+ |
| # | Empty Node | ||
|---|---|---|---|
| D2 | 敵影を見ず。 No enemy spotted. | ||
| # | Empty Node | ||
| # | Formation | Normal Battle Node | AD/AP AS/AS+ |
|---|---|---|---|
| D3 | Echelon Line Abreast |
0/0 0/0 | |
| Echelon Line Abreast |
0/0 0/0 | ||
| Echelon Line Abreast |
0/0 0/0 | ||
| # | Formation | Normal Battle Node | AD/AP AS/AS+ |
| # | Formation | Normal Battle Node | AD/AP AS/AS+ |
|---|---|---|---|
| E | Echelon | 0/0 0/0 | |
| Echelon | 0/0 0/0 | ||
| Echelon | 0/0 0/0 | ||
| # | Formation | Normal Battle Node | AD/AP AS/AS+ |
| # | Empty Node | ||
|---|---|---|---|
| E1 | 敵影を見ず。 No enemy spotted. | ||
| # | Empty Node | ||
| # | Formation | Normal Battle Node | AD/AP AS/AS+ |
|---|---|---|---|
| E2 | Line Ahead | 36/71 159/318 | |
| Line Ahead | 43/85 189/378 | ||
| Line Ahead | 43/85 189/378 | ||
| # | Formation | Normal Battle Node | AD/AP AS/AS+ |
| # | Formation | Normal Battle Node | AD/AP AS/AS+ |
|---|---|---|---|
| F | Line Ahead | 0/0 0/0 | |
| Line Ahead | 0/0 0/0 | ||
| Line Ahead | 0/0 0/0 | ||
| # | Formation | Normal Battle Node | AD/AP AS/AS+ |
| # | Formation | Air Defense Node | AD/AP AS/AS+ |
|---|---|---|---|
| F1 | Diamond (HA) |
36/71 158/315 | |
| Diamond (HA) |
47/94 210/420 | ||
| Diamond (HA) |
36/71 158/315 | ||
| Diamond (HA) |
47/93 209/417 | ||
| Diamond (HA) |
52/103 230/459 | ||
| Diamond (HA) |
35/69 155/309 | ||
| Diamond (HA) |
46/92 206/411 | ||
| # | Formation | Air Defense Node | AD/AP AS/AS+ |
| # | Empty Node | ||
|---|---|---|---|
| F2 | 敵影を見ず。 No enemy spotted. | ||
| # | Empty Node | ||
| # | Formation | Normal Battle Node | AD/AP AS/AS+ |
|---|---|---|---|
| F3 | Echelon Line Abreast |
0/0 0/0 | |
| Echelon Line Abreast |
0/0 0/0 | ||
| # | Formation | Normal Battle Node | AD/AP AS/AS+ |
| # | Formation | Boss Battle Node | AD/AP AS/AS+ |
|---|---|---|---|
| G | Line Ahead Diamond |
19/38 84/168 | |
| Line Ahead (Final)
|
53/105 236/471 | ||
| # | Formation | Boss Battle Node | AD/AP AS/AS+ |
| # | Selection Node | ||
|---|---|---|---|
| H | 艦隊の針路を選択できます。提督、どちらの針路をとられますか? You can decide the fleet's course. Admiral, which heading should we take? | ||
| # | Selection Node | ||
| # | Formation | Air Defense Node | AD/AP AS/AS+ |
|---|---|---|---|
| H1 | Diamond (HA) |
36/71 158/315 | |
| Diamond (HA) |
47/94 210/420 | ||
| Diamond (HA) |
36/71 158/315 | ||
| Diamond (HA) |
47/93 209/417 | ||
| Diamond (HA) |
52/103 230/459 | ||
| Diamond (HA) |
35/69 155/309 | ||
| Diamond (HA) |
46/92 206/411 | ||
| # | Formation | Air Defense Node | AD/AP AS/AS+ |
| # | Empty Node | ||
|---|---|---|---|
| H2 | 敵影を見ず。 No enemy spotted. | ||
| # | Empty Node | ||
| # | Formation | Normal Battle Node | AD/AP AS/AS+ |
|---|---|---|---|
| H3 | Echelon Line Abreast |
0/0 0/0 | |
| Echelon Line Abreast |
0/0 0/0 | ||
| Echelon Line Abreast |
0/0 0/0 | ||
| # | Formation | Normal Battle Node | AD/AP AS/AS+ |
| # | Formation | Normal Battle Node | AD/AP AS/AS+ |
|---|---|---|---|
| I | Line Ahead Echelon Vanguard |
0/0 0/0 | |
| # | Formation | Normal Battle Node | AD/AP AS/AS+ |
| # | Formation | Normal Battle Node | AD/AP AS/AS+ |
|---|---|---|---|
| I1 | Echelon Line Abreast |
0/0 0/0 | |
| Echelon Line Abreast |
0/0 0/0 | ||
| # | Formation | Normal Battle Node | AD/AP AS/AS+ |
| # | Formation | Air Defense Node | AD/AP AS/AS+ |
|---|---|---|---|
| I2 | Diamond (HA) |
36/71 158/315 | |
| Diamond (HA) |
47/94 210/420 | ||
| Diamond (HA) |
36/71 158/315 | ||
| Diamond (HA) |
47/93 209/417 | ||
| Diamond (HA) |
52/103 230/459 | ||
| Diamond (HA) |
35/69 155/309 | ||
| Diamond (HA) |
46/92 206/411 | ||
| # | Formation | Air Defense Node | AD/AP AS/AS+ |
| # | Formation | Normal Battle Node | AD/AP AS/AS+ |
|---|---|---|---|
| I3 | Line Ahead Double Line Diamond |
36/71 159/318 | |
| # | Formation | Normal Battle Node | AD/AP AS/AS+ |
| # | Formation | Normal Battle Node | AD/AP AS/AS+ |
|---|---|---|---|
| J | Echelon Line Abreast |
0/0 0/0 | |
| Echelon Line Abreast |
0/0 0/0 | ||
| Echelon Line Abreast |
0/0 0/0 | ||
| # | Formation | Normal Battle Node | AD/AP AS/AS+ |
| # | Formation | Normal Battle Node | AD/AP AS/AS+ |
|---|---|---|---|
| K | Echelon Line Abreast |
0/0 0/0 | |
| Echelon Line Abreast |
0/0 0/0 | ||
| Echelon Line Abreast |
0/0 0/0 | ||
| # | Formation | Normal Battle Node | AD/AP AS/AS+ |
| # | Empty Node | ||
|---|---|---|---|
| K1 | 敵影を見ず。 No enemy spotted. | ||
| # | Empty Node | ||
| # | Formation | Normal Battle Node | AD/AP AS/AS+ |
|---|---|---|---|
| K2 | Line Ahead Double Line Vanguard |
0/0 0/0 | |
| # | Formation | Normal Battle Node | AD/AP AS/AS+ |
| # | Formation | Normal Battle Node | AD/AP AS/AS+ |
|---|---|---|---|
| L | Line Ahead Diamond |
45/89 198/396 | |
| Line Ahead | 45/89 198/396 | ||
| # | Formation | Normal Battle Node | AD/AP AS/AS+ |
| # | Selection Node | ||
|---|---|---|---|
| M | 艦隊の針路を選択できます。提督、どちらの針路をとられますか? You can decide the fleet's course. Admiral, which heading should we take? | ||
| # | Selection Node | ||
| # | Formation | Normal Battle Node | AD/AP AS/AS+ |
|---|---|---|---|
| M1 | Line Ahead Double Line |
0/0 0/0 | |
| Line Ahead | 0/0 0/0 | ||
| # | Formation | Normal Battle Node | AD/AP AS/AS+ |
| # | Formation | Air Defense Node | AD/AP AS/AS+ |
|---|---|---|---|
| M2 | Diamond | 17/33 72/144 | |
| Diamond | 11/22 48/96 | ||
| Diamond | 23/46 102/204 | ||
| Diamond | 23/45 99/198 | ||
| Diamond | 33/65 144/288 | ||
| Diamond | 27/54 120/240 | ||
| Diamond | 34/67 150/300 | ||
| # | Formation | Air Defense Node | AD/AP AS/AS+ |
| # | Formation | Air Defense Node | AD/AP AS/AS+ |
|---|---|---|---|
| # | Formation | Air Defense Node | AD/AP AS/AS+ |
| # | Empty Node | ||
|---|---|---|---|
| O | 気のせいだった。 Must be my imagination. | ||
| # | Empty Node | ||
| # | Empty Node | ||
|---|---|---|---|
| O1 | 気のせいだった。 Must be my imagination. | ||
| # | Empty Node | ||
| # | Empty Node | ||
|---|---|---|---|
| O2 | 気のせいだった。 Must be my imagination. | ||
| # | Empty Node | ||
| # | Formation | Air Defense Node | AD/AP AS/AS+ |
|---|---|---|---|
| P | Diamond (HA) |
36/71 158/315 | |
| Diamond (HA) |
47/94 210/420 | ||
| Diamond (HA) |
36/71 158/315 | ||
| Diamond (HA) |
47/93 209/417 | ||
| Diamond (HA) |
52/103 230/459 | ||
| Diamond (HA) |
35/69 155/309 | ||
| Diamond (HA) |
46/92 206/411 | ||
| # | Formation | Air Defense Node | AD/AP AS/AS+ |
| # | Formation | Normal Battle Node | AD/AP AS/AS+ |
|---|---|---|---|
| Q | Echelon Line Abreast |
0/0 0/0 | |
| Echelon Line Abreast |
0/0 0/0 | ||
| # | Formation | Normal Battle Node | AD/AP AS/AS+ |
| # | Formation | Boss Battle Node | AD/AP AS/AS+ |
|---|---|---|---|
| R | Cruising Formation 1 | 83/166 372/744 | |
| Cruising Formation 1 (Final)
|
63/125 279/558 | ||
| # | Formation | Boss Battle Node | AD/AP AS/AS+ |
| # | Selection Node | ||
|---|---|---|---|
| S | 艦隊の針路を選択できます。提督、どちらの針路をとられますか? You can decide the fleet's course. Admiral, which heading should we take? | ||
| # | Selection Node | ||
| # | Empty Node | ||
|---|---|---|---|
| S1 | 気のせいだった。 Must be my imagination. | ||
| # | Empty Node | ||
| # | Empty Node | ||
|---|---|---|---|
| S2 | 気のせいだった。 Must be my imagination. | ||
| # | Empty Node | ||
| # | Repair Node | ||
|---|---|---|---|
| # | Repair Node | ||
| # | Formation | Normal Battle Node | AD/AP AS/AS+ |
|---|---|---|---|
| T | Line Ahead Double Line Vanguard |
0/0 0/0 | |
| # | Formation | Normal Battle Node | AD/AP AS/AS+ |
| # | Formation | Normal Battle Node | AD/AP AS/AS+ |
|---|---|---|---|
| U | Cruising Formation 3 | 109/218 489/978 | |
| Cruising Formation 3 | 89/177 396/792 | ||
| # | Formation | Normal Battle Node | AD/AP AS/AS+ |
| # | Formation | Normal Battle Node | AD/AP AS/AS+ |
|---|---|---|---|
| V | Line Ahead Diamond |
35/69 155/309 | |
| Line Ahead | 37/73 162/324 | ||
| # | Formation | Normal Battle Node | AD/AP AS/AS+ |
| # | Empty Node | ||
|---|---|---|---|
| W | 敵影を見ず。 No enemy spotted. | ||
| # | Empty Node | ||
| # | Formation | Boss Battle Node | AD/AP AS/AS+ |
|---|---|---|---|
| X | Cruising Formation 1 | 55/109 243/486 | |
| Cruising Formation 1 (Final)
|
111/221 495/990 | ||
| # | Formation | Boss Battle Node | AD/AP AS/AS+ |
| Type | Ships |
|---|---|
| DE | |
| DD | |
| AO |
| Type | Ships |
|---|---|
| DE |
| Type | Ships |
|---|---|
| DE | |
| DD | |
| AO |
| Type | Ships |
|---|---|
| DE | |
| DD | |
| AO |
| Type | Ships |
|---|---|
| DE | |
| DD | |
| SS | |
| AS | |
| AO |
| Type | Ships |
|---|---|
| DE | |
| DD | |
| AO |
| Type | Ships |
|---|---|
| DE | |
| DD | |
| AO |
| Type | Ships |
|---|---|
| DE | |
| DD | |
| AO |
| Type | Ships |
|---|---|
| DE | |
| DD | |
| AO |
| Type | Ships |
|---|---|
| DD | |
| AO |
| Type | Ships |
|---|---|
| DE | |
| DD | |
| AO |
| Type | Ships |
|---|---|
| DE | |
| DD | |
| AO |
| Type | Ships |
|---|---|
| DE | |
| DD | |
| CA | |
| CVL | |
| FBB | |
| SS | |
| LHA | |
| AR | |
| AS | |
| AO |
| # | Selection Node | ||
|---|---|---|---|
| A | 艦隊の針路を選択できます。提督、どちらの針路をとられますか? You can decide the fleet's course. Admiral, which heading should we take? | ||
| # | Selection Node | ||
| # | Formation | Normal Battle Node | AD/AP AS/AS+ |
|---|---|---|---|
| B | Echelon | 0/0 0/0 | |
| Echelon | 0/0 0/0 | ||
| Echelon | 0/0 0/0 | ||
| # | Formation | Normal Battle Node | AD/AP AS/AS+ |
| # | Formation | Air Defense Node | AD/AP AS/AS+ |
|---|---|---|---|
| B1 | Diamond (HA) |
24/48 107/213 | |
| Diamond (HA) |
36/71 158/315 | ||
| Diamond (HA) |
47/94 210/420 | ||
| Diamond (HA) |
36/71 158/315 | ||
| Diamond (HA) |
47/93 209/417 | ||
| Diamond (HA) |
35/69 155/309 | ||
| Diamond (HA) |
46/92 206/411 | ||
| # | Formation | Air Defense Node | AD/AP AS/AS+ |
| # | Formation | Normal Battle Node | AD/AP AS/AS+ |
|---|---|---|---|
| B2 | Echelon Line Abreast |
0/0 0/0 | |
| Echelon Line Abreast |
0/0 0/0 | ||
| Echelon Line Abreast |
0/0 0/0 | ||
| # | Formation | Normal Battle Node | AD/AP AS/AS+ |
| # | Empty Node | ||
|---|---|---|---|
| B3 | 敵影を見ず。 No enemy spotted. | ||
| # | Empty Node | ||
| # | Formation | Normal Battle Node | AD/AP AS/AS+ |
|---|---|---|---|
| B4 | Line Ahead Double Line Vanguard |
0/0 0/0 | |
| # | Formation | Normal Battle Node | AD/AP AS/AS+ |
| # | Selection Node | ||
|---|---|---|---|
| C | 艦隊の針路を選択できます。提督、どちらの針路をとられますか? You can decide the fleet's course. Admiral, which heading should we take? | ||
| # | Selection Node | ||
| # | Formation | Normal Battle Node | AD/AP AS/AS+ |
|---|---|---|---|
| D | Line Ahead Double Line Vanguard |
0/0 0/0 | |
| # | Formation | Normal Battle Node | AD/AP AS/AS+ |
| # | Formation | Normal Battle Node | AD/AP AS/AS+ |
|---|---|---|---|
| D1 | Line Ahead Echelon Vanguard |
0/0 0/0 | |
| # | Formation | Normal Battle Node | AD/AP AS/AS+ |
| # | Empty Node | ||
|---|---|---|---|
| D2 | 敵影を見ず。 No enemy spotted. | ||
| # | Empty Node | ||
| # | Formation | Normal Battle Node | AD/AP AS/AS+ |
|---|---|---|---|
| D3 | Echelon Line Abreast |
0/0 0/0 | |
| Echelon Line Abreast |
0/0 0/0 | ||
| Echelon Line Abreast |
0/0 0/0 | ||
| # | Formation | Normal Battle Node | AD/AP AS/AS+ |
| # | Formation | Normal Battle Node | AD/AP AS/AS+ |
|---|---|---|---|
| E | Echelon | 0/0 0/0 | |
| Echelon | 0/0 0/0 | ||
| Echelon | 0/0 0/0 | ||
| # | Formation | Normal Battle Node | AD/AP AS/AS+ |
| # | Empty Node | ||
|---|---|---|---|
| E1 | 敵影を見ず。 No enemy spotted. | ||
| # | Empty Node | ||
| # | Formation | Normal Battle Node | AD/AP AS/AS+ |
|---|---|---|---|
| E2 | Line Ahead | 43/85 189/378 | |
| Line Ahead | 43/85 189/378 | ||
| Line Ahead | 43/85 189/378 | ||
| # | Formation | Normal Battle Node | AD/AP AS/AS+ |
| # | Formation | Normal Battle Node | AD/AP AS/AS+ |
|---|---|---|---|
| F | Line Ahead | 0/0 0/0 | |
| Line Ahead | 0/0 0/0 | ||
| Line Ahead | 0/0 0/0 | ||
| # | Formation | Normal Battle Node | AD/AP AS/AS+ |
| # | Formation | Air Defense Node | AD/AP AS/AS+ |
|---|---|---|---|
| F1 | Diamond (HA) |
24/48 107/213 | |
| Diamond (HA) |
36/71 158/315 | ||
| Diamond (HA) |
47/94 210/420 | ||
| Diamond (HA) |
36/71 158/315 | ||
| Diamond (HA) |
47/93 209/417 | ||
| Diamond (HA) |
35/69 155/309 | ||
| Diamond (HA) |
46/92 206/411 | ||
| # | Formation | Air Defense Node | AD/AP AS/AS+ |
| # | Empty Node | ||
|---|---|---|---|
| F2 | 敵影を見ず。 No enemy spotted. | ||
| # | Empty Node | ||
| # | Formation | Normal Battle Node | AD/AP AS/AS+ |
|---|---|---|---|
| F3 | Echelon Line Abreast |
0/0 0/0 | |
| Echelon Line Abreast |
0/0 0/0 | ||
| # | Formation | Normal Battle Node | AD/AP AS/AS+ |
| # | Formation | Boss Battle Node | AD/AP AS/AS+ |
|---|---|---|---|
| G | Line Ahead Diamond |
19/38 84/168 | |
| Line Ahead (Final)
|
53/105 236/471 | ||
| # | Formation | Boss Battle Node | AD/AP AS/AS+ |
| # | Selection Node | ||
|---|---|---|---|
| H | 艦隊の針路を選択できます。提督、どちらの針路をとられますか? You can decide the fleet's course. Admiral, which heading should we take? | ||
| # | Selection Node | ||
| # | Formation | Air Defense Node | AD/AP AS/AS+ |
|---|---|---|---|
| H1 | Diamond (HA) |
24/48 107/213 | |
| Diamond (HA) |
36/71 158/315 | ||
| Diamond (HA) |
47/94 210/420 | ||
| Diamond (HA) |
36/71 158/315 | ||
| Diamond (HA) |
47/93 209/417 | ||
| Diamond (HA) |
35/69 155/309 | ||
| Diamond (HA) |
46/92 206/411 | ||
| # | Formation | Air Defense Node | AD/AP AS/AS+ |
| # | Empty Node | ||
|---|---|---|---|
| H2 | 敵影を見ず。 No enemy spotted. | ||
| # | Empty Node | ||
| # | Formation | Normal Battle Node | AD/AP AS/AS+ |
|---|---|---|---|
| H3 | Echelon Line Abreast |
0/0 0/0 | |
| Echelon Line Abreast |
0/0 0/0 | ||
| Echelon Line Abreast |
0/0 0/0 | ||
| # | Formation | Normal Battle Node | AD/AP AS/AS+ |
| # | Formation | Normal Battle Node | AD/AP AS/AS+ |
|---|---|---|---|
| I | Line Ahead Echelon Vanguard |
0/0 0/0 | |
| # | Formation | Normal Battle Node | AD/AP AS/AS+ |
| # | Formation | Normal Battle Node | AD/AP AS/AS+ |
|---|---|---|---|
| I1 | Echelon Line Abreast |
0/0 0/0 | |
| Echelon Line Abreast |
0/0 0/0 | ||
| # | Formation | Normal Battle Node | AD/AP AS/AS+ |
| # | Formation | Air Defense Node | AD/AP AS/AS+ |
|---|---|---|---|
| I2 | Diamond (HA) |
24/48 107/213 | |
| Diamond (HA) |
36/71 158/315 | ||
| Diamond (HA) |
47/94 210/420 | ||
| Diamond (HA) |
36/71 158/315 | ||
| Diamond (HA) |
47/93 209/417 | ||
| Diamond (HA) |
35/69 155/309 | ||
| Diamond (HA) |
46/92 206/411 | ||
| # | Formation | Air Defense Node | AD/AP AS/AS+ |
| # | Formation | Normal Battle Node | AD/AP AS/AS+ |
|---|---|---|---|
| I3 | Line Ahead Double Line Diamond |
43/85 189/378 | |
| # | Formation | Normal Battle Node | AD/AP AS/AS+ |
| # | Formation | Normal Battle Node | AD/AP AS/AS+ |
|---|---|---|---|
| J | Echelon Line Abreast |
0/0 0/0 | |
| Echelon Line Abreast |
0/0 0/0 | ||
| Echelon Line Abreast |
0/0 0/0 | ||
| # | Formation | Normal Battle Node | AD/AP AS/AS+ |
| # | Formation | Normal Battle Node | AD/AP AS/AS+ |
|---|---|---|---|
| K | Echelon Line Abreast |
0/0 0/0 | |
| Echelon Line Abreast |
0/0 0/0 | ||
| Echelon Line Abreast |
0/0 0/0 | ||
| # | Formation | Normal Battle Node | AD/AP AS/AS+ |
| # | Empty Node | ||
|---|---|---|---|
| K1 | 敵影を見ず。 No enemy spotted. | ||
| # | Empty Node | ||
| # | Formation | Normal Battle Node | AD/AP AS/AS+ |
|---|---|---|---|
| K2 | Line Ahead Double Line Vanguard |
0/0 0/0 | |
| # | Formation | Normal Battle Node | AD/AP AS/AS+ |
| # | Formation | Normal Battle Node | AD/AP AS/AS+ |
|---|---|---|---|
| L | Line Ahead Diamond |
36/72 161/321 | |
| Line Ahead | 36/72 161/321 | ||
| # | Formation | Normal Battle Node | AD/AP AS/AS+ |
| # | Selection Node | ||
|---|---|---|---|
| M | 艦隊の針路を選択できます。提督、どちらの針路をとられますか? You can decide the fleet's course. Admiral, which heading should we take? | ||
| # | Selection Node | ||
| # | Formation | Normal Battle Node | AD/AP AS/AS+ |
|---|---|---|---|
| M1 | Line Ahead Double Line |
0/0 0/0 | |
| Line Ahead | 0/0 0/0 | ||
| # | Formation | Normal Battle Node | AD/AP AS/AS+ |
| # | Formation | Air Defense Node | AD/AP AS/AS+ |
|---|---|---|---|
| M2 | Diamond | 12/23 51/102 | |
| Diamond | 17/33 72/144 | ||
| Diamond | 11/22 48/96 | ||
| Diamond | 23/46 102/204 | ||
| Diamond | 23/45 99/198 | ||
| Diamond | 33/65 144/288 | ||
| Diamond | 27/54 120/240 | ||
| # | Formation | Air Defense Node | AD/AP AS/AS+ |
| # | Formation | Air Defense Node | AD/AP AS/AS+ |
|---|---|---|---|
| N | Diamond (HA) |
24/48 107/213 | |
| Diamond (HA) |
36/71 158/315 | ||
| Diamond (HA) |
47/94 210/420 | ||
| Diamond (HA) |
36/71 158/315 | ||
| Diamond (HA) |
47/93 209/417 | ||
| Diamond (HA) |
35/69 155/309 | ||
| # | Formation | Air Defense Node | AD/AP AS/AS+ |
| # | Empty Node | ||
|---|---|---|---|
| O | 気のせいだった。 Must be my imagination. | ||
| # | Empty Node | ||
| # | Empty Node | ||
|---|---|---|---|
| O1 | 気のせいだった。 Must be my imagination. | ||
| # | Empty Node | ||
| # | Empty Node | ||
|---|---|---|---|
| O2 | 気のせいだった。 Must be my imagination. | ||
| # | Empty Node | ||
| # | Formation | Air Defense Node | AD/AP AS/AS+ |
|---|---|---|---|
| P | Diamond (HA) |
24/48 107/213 | |
| Diamond (HA) |
36/71 158/315 | ||
| Diamond (HA) |
47/94 210/420 | ||
| Diamond (HA) |
36/71 158/315 | ||
| Diamond (HA) |
47/93 209/417 | ||
| Diamond (HA) |
35/69 155/309 | ||
| Diamond (HA) |
46/92 206/411 | ||
| # | Formation | Air Defense Node | AD/AP AS/AS+ |
| # | Formation | Normal Battle Node | AD/AP AS/AS+ |
|---|---|---|---|
| Q | Echelon Line Abreast |
0/0 0/0 | |
| Echelon Line Abreast |
0/0 0/0 | ||
| # | Formation | Normal Battle Node | AD/AP AS/AS+ |
| # | Formation | Boss Battle Node | AD/AP AS/AS+ |
|---|---|---|---|
| R | Cruising Formation 1 | 62/124 278/555 | |
| Cruising Formation 1 (Final)
|
50/99 222/444 | ||
| # | Formation | Boss Battle Node | AD/AP AS/AS+ |
| # | Selection Node | ||
|---|---|---|---|
| S | 艦隊の針路を選択できます。提督、どちらの針路をとられますか? You can decide the fleet's course. Admiral, which heading should we take? | ||
| # | Selection Node | ||
| # | Empty Node | ||
|---|---|---|---|
| S1 | 気のせいだった。 Must be my imagination. | ||
| # | Empty Node | ||
| # | Empty Node | ||
|---|---|---|---|
| S2 | 気のせいだった。 Must be my imagination. | ||
| # | Empty Node | ||
| # | Repair Node | ||
|---|---|---|---|
| # | Repair Node | ||
| # | Formation | Normal Battle Node | AD/AP AS/AS+ |
|---|---|---|---|
| T | Line Ahead Double Line Vanguard |
0/0 0/0 | |
| # | Formation | Normal Battle Node | AD/AP AS/AS+ |
| # | Formation | Normal Battle Node | AD/AP AS/AS+ |
|---|---|---|---|
| U | Cruising Formation 3 | 84/168 377/753 | |
| Cruising Formation 3 | 72/143 321/642 | ||
| # | Formation | Normal Battle Node | AD/AP AS/AS+ |
| # | Formation | Normal Battle Node | AD/AP AS/AS+ |
|---|---|---|---|
| V | Line Ahead Diamond |
34/67 150/300 | |
| Line Ahead | 35/69 155/309 | ||
| # | Formation | Normal Battle Node | AD/AP AS/AS+ |
| # | Empty Node | ||
|---|---|---|---|
| W | 敵影を見ず。 No enemy spotted. | ||
| # | Empty Node | ||
| # | Formation | Boss Battle Node | AD/AP AS/AS+ |
|---|---|---|---|
| X | Cruising Formation 1 | 55/109 243/486 | |
| Cruising Formation 1 (Final)
|
60/120 269/537 | ||
| # | Formation | Boss Battle Node | AD/AP AS/AS+ |
| Type | Ships |
|---|---|
| DE | |
| DD | |
| AO |
| Type | Ships |
|---|---|
| DE | |
| DD | |
| AO |
| Type | Ships |
|---|---|
| DE | |
| DD | |
| AO |
| Type | Ships |
|---|---|
| DE | |
| DD | |
| AS | |
| AO |
| Type | Ships |
|---|---|
| DE | |
| DD | |
| AO |
| Type | Ships |
|---|---|
| DE | |
| DD | |
| AO |
| Type | Ships |
|---|---|
| DE | |
| DD | |
| AO |
| Type | Ships |
|---|---|
| DE | |
| DD | |
| AO |
| Type | Ships |
|---|---|
| DE | |
| DD | |
| AO |
| Type | Ships |
|---|---|
| DE | |
| DD | |
| AO |
| Type | Ships |
|---|---|
| DE | |
| DD | |
| CA | |
| CVL | |
| FBB | |
| SS | |
| LHA | |
| AR | |
| AS | |
| AO |
| # | Selection Node | ||
|---|---|---|---|
| A | 艦隊の針路を選択できます。提督、どちらの針路をとられますか? You can decide the fleet's course. Admiral, which heading should we take? | ||
| # | Selection Node | ||
| # | Formation | Normal Battle Node | AD/AP AS/AS+ |
|---|---|---|---|
| B | Echelon | 0/0 0/0 | |
| Echelon | 0/0 0/0 | ||
| Echelon | 0/0 0/0 | ||
| # | Formation | Normal Battle Node | AD/AP AS/AS+ |
| # | Formation | Air Defense Node | AD/AP AS/AS+ |
|---|---|---|---|
| B1 | Diamond (HA) |
24/48 107/213 | |
| Diamond (HA) |
36/71 158/315 | ||
| Diamond (HA) |
36/71 158/315 | ||
| Diamond (HA) |
35/69 155/309 | ||
| # | Formation | Air Defense Node | AD/AP AS/AS+ |
| # | Formation | Normal Battle Node | AD/AP AS/AS+ |
|---|---|---|---|
| B2 | Echelon Line Abreast |
0/0 0/0 | |
| Echelon Line Abreast |
0/0 0/0 | ||
| # | Formation | Normal Battle Node | AD/AP AS/AS+ |
| # | Empty Node | ||
|---|---|---|---|
| B3 | 敵影を見ず。 No enemy spotted. | ||
| # | Empty Node | ||
| # | Formation | Normal Battle Node | AD/AP AS/AS+ |
|---|---|---|---|
| B4 | Line Ahead Double Line Vanguard |
0/0 0/0 | |
| # | Formation | Normal Battle Node | AD/AP AS/AS+ |
| # | Selection Node | ||
|---|---|---|---|
| C | 艦隊の針路を選択できます。提督、どちらの針路をとられますか? You can decide the fleet's course. Admiral, which heading should we take? | ||
| # | Selection Node | ||
| # | Formation | Normal Battle Node | AD/AP AS/AS+ |
|---|---|---|---|
| D | Line Ahead Double Line Vanguard |
0/0 0/0 | |
| # | Formation | Normal Battle Node | AD/AP AS/AS+ |
| # | Formation | Normal Battle Node | AD/AP AS/AS+ |
|---|---|---|---|
| D1 | Line Ahead Echelon Vanguard |
0/0 0/0 | |
| # | Formation | Normal Battle Node | AD/AP AS/AS+ |
| # | Empty Node | ||
|---|---|---|---|
| D2 | 敵影を見ず。 No enemy spotted. | ||
| # | Empty Node | ||
| # | Formation | Normal Battle Node | AD/AP AS/AS+ |
|---|---|---|---|
| D3 | Echelon Line Abreast |
0/0 0/0 | |
| Echelon Line Abreast |
0/0 0/0 | ||
| # | Formation | Normal Battle Node | AD/AP AS/AS+ |
| # | Formation | Normal Battle Node | AD/AP AS/AS+ |
|---|---|---|---|
| E | Echelon | 0/0 0/0 | |
| Echelon | 0/0 0/0 | ||
| Echelon | 0/0 0/0 | ||
| # | Formation | Normal Battle Node | AD/AP AS/AS+ |
| # | Empty Node | ||
|---|---|---|---|
| E1 | 敵影を見ず。 No enemy spotted. | ||
| # | Empty Node | ||
| # | Formation | Normal Battle Node | AD/AP AS/AS+ |
|---|---|---|---|
| E2 | Line Ahead | 3/6 12/24 | |
| Line Ahead | 9/17 36/72 | ||
| Line Ahead | 43/85 189/378 | ||
| # | Formation | Normal Battle Node | AD/AP AS/AS+ |
| # | Formation | Normal Battle Node | AD/AP AS/AS+ |
|---|---|---|---|
| F | Line Ahead | 0/0 0/0 | |
| Line Ahead | 0/0 0/0 | ||
| Line Ahead | 0/0 0/0 | ||
| # | Formation | Normal Battle Node | AD/AP AS/AS+ |
| # | Formation | Air Defense Node | AD/AP AS/AS+ |
|---|---|---|---|
| F1 | Diamond (HA) |
24/48 107/213 | |
| Diamond (HA) |
36/71 158/315 | ||
| Diamond (HA) |
36/71 158/315 | ||
| Diamond (HA) |
35/69 155/309 | ||
| # | Formation | Air Defense Node | AD/AP AS/AS+ |
| # | Empty Node | ||
|---|---|---|---|
| F2 | 敵影を見ず。 No enemy spotted. | ||
| # | Empty Node | ||
| # | Formation | Normal Battle Node | AD/AP AS/AS+ |
|---|---|---|---|
| F3 | Echelon Line Abreast |
0/0 0/0 | |
| Echelon Line Abreast |
0/0 0/0 | ||
| # | Formation | Normal Battle Node | AD/AP AS/AS+ |
| # | Formation | Boss Battle Node | AD/AP AS/AS+ |
|---|---|---|---|
| G | Line Ahead Diamond |
17/33 72/144 | |
| Line Ahead (Final)
|
19/37 81/162 | ||
| # | Formation | Boss Battle Node | AD/AP AS/AS+ |
| # | Selection Node | ||
|---|---|---|---|
| H | 艦隊の針路を選択できます。提督、どちらの針路をとられますか? You can decide the fleet's course. Admiral, which heading should we take? | ||
| # | Selection Node | ||
| # | Formation | Air Defense Node | AD/AP AS/AS+ |
|---|---|---|---|
| H1 | Diamond (HA) |
24/48 107/213 | |
| Diamond (HA) |
36/71 158/315 | ||
| Diamond (HA) |
36/71 158/315 | ||
| Diamond (HA) |
35/69 155/309 | ||
| # | Formation | Air Defense Node | AD/AP AS/AS+ |
| # | Empty Node | ||
|---|---|---|---|
| H2 | 敵影を見ず。 No enemy spotted. | ||
| # | Empty Node | ||
| # | Formation | Normal Battle Node | AD/AP AS/AS+ |
|---|---|---|---|
| H3 | Echelon Line Abreast |
0/0 0/0 | |
| Echelon Line Abreast |
0/0 0/0 | ||
| # | Formation | Normal Battle Node | AD/AP AS/AS+ |
| # | Formation | Normal Battle Node | AD/AP AS/AS+ |
|---|---|---|---|
| I | Line Ahead Echelon Vanguard |
0/0 0/0 | |
| # | Formation | Normal Battle Node | AD/AP AS/AS+ |
| # | Formation | Normal Battle Node | AD/AP AS/AS+ |
|---|---|---|---|
| I1 | Echelon Line Abreast |
0/0 0/0 | |
| Echelon Line Abreast |
0/0 0/0 | ||
| # | Formation | Normal Battle Node | AD/AP AS/AS+ |
| # | Formation | Air Defense Node | AD/AP AS/AS+ |
|---|---|---|---|
| I2 | Diamond (HA) |
24/48 107/213 | |
| Diamond (HA) |
36/71 158/315 | ||
| Diamond (HA) |
36/71 158/315 | ||
| Diamond (HA) |
35/69 155/309 | ||
| # | Formation | Air Defense Node | AD/AP AS/AS+ |
| # | Formation | Normal Battle Node | AD/AP AS/AS+ |
|---|---|---|---|
| I3 | Line Ahead Double Line Diamond |
9/17 36/72 | |
| # | Formation | Normal Battle Node | AD/AP AS/AS+ |
| # | Formation | Normal Battle Node | AD/AP AS/AS+ |
|---|---|---|---|
| J | Echelon Line Abreast |
0/0 0/0 | |
| Echelon Line Abreast |
0/0 0/0 | ||
| # | Formation | Normal Battle Node | AD/AP AS/AS+ |
| # | Formation | Normal Battle Node | AD/AP AS/AS+ |
|---|---|---|---|
| K | Echelon Line Abreast |
0/0 0/0 | |
| Echelon Line Abreast |
0/0 0/0 | ||
| # | Formation | Normal Battle Node | AD/AP AS/AS+ |
| # | Empty Node | ||
|---|---|---|---|
| K1 | 敵影を見ず。 No enemy spotted. | ||
| # | Empty Node | ||
| # | Formation | Normal Battle Node | AD/AP AS/AS+ |
|---|---|---|---|
| K2 | Line Ahead Double Line Vanguard |
0/0 0/0 | |
| # | Formation | Normal Battle Node | AD/AP AS/AS+ |
| # | Formation | Normal Battle Node | AD/AP AS/AS+ |
|---|---|---|---|
| L | Line Ahead Diamond |
9/17 36/72 | |
| Line Ahead | 36/72 161/321 | ||
| # | Formation | Normal Battle Node | AD/AP AS/AS+ |
| # | Selection Node | ||
|---|---|---|---|
| M | 艦隊の針路を選択できます。提督、どちらの針路をとられますか? You can decide the fleet's course. Admiral, which heading should we take? | ||
| # | Selection Node | ||
| # | Formation | Normal Battle Node | AD/AP AS/AS+ |
|---|---|---|---|
| M1 | Line Ahead Double Line |
0/0 0/0 | |
| Line Ahead | 0/0 0/0 | ||
| # | Formation | Normal Battle Node | AD/AP AS/AS+ |
| # | Formation | Air Defense Node | AD/AP AS/AS+ |
|---|---|---|---|
| M2 | Diamond | 12/23 51/102 | |
| Diamond | 17/33 72/144 | ||
| Diamond | 11/22 48/96 | ||
| Diamond | 23/46 102/204 | ||
| # | Formation | Air Defense Node | AD/AP AS/AS+ |
| # | Formation | Air Defense Node | AD/AP AS/AS+ |
|---|---|---|---|
| N | Diamond (HA) |
24/48 107/213 | |
| Diamond (HA) |
36/71 158/315 | ||
| Diamond (HA) |
35/69 155/309 | ||
| # | Formation | Air Defense Node | AD/AP AS/AS+ |
| # | Empty Node | ||
|---|---|---|---|
| O | 気のせいだった。 Must be my imagination. | ||
| # | Empty Node | ||
| # | Empty Node | ||
|---|---|---|---|
| O1 | 気のせいだった。 Must be my imagination. | ||
| # | Empty Node | ||
| # | Empty Node | ||
|---|---|---|---|
| O2 | 気のせいだった。 Must be my imagination. | ||
| # | Empty Node | ||
| # | Formation | Air Defense Node | AD/AP AS/AS+ |
|---|---|---|---|
| P | Diamond (HA) |
24/48 107/213 | |
| Diamond (HA) |
36/71 158/315 | ||
| Diamond (HA) |
36/71 158/315 | ||
| Diamond (HA) |
35/69 155/309 | ||
| # | Formation | Air Defense Node | AD/AP AS/AS+ |
| # | Formation | Normal Battle Node | AD/AP AS/AS+ |
|---|---|---|---|
| Q | Echelon Line Abreast |
0/0 0/0 | |
| Echelon Line Abreast |
0/0 0/0 | ||
| # | Formation | Normal Battle Node | AD/AP AS/AS+ |
| # | Formation | Boss Battle Node | AD/AP AS/AS+ |
|---|---|---|---|
| R | Cruising Formation 1 | 56/112 251/501 | |
| Cruising Formation 1 (Final)
|
47/94 210/420 | ||
| # | Formation | Boss Battle Node | AD/AP AS/AS+ |
| # | Selection Node | ||
|---|---|---|---|
| S | 艦隊の針路を選択できます。提督、どちらの針路をとられますか? You can decide the fleet's course. Admiral, which heading should we take? | ||
| # | Selection Node | ||
| # | Empty Node | ||
|---|---|---|---|
| S1 | 気のせいだった。 Must be my imagination. | ||
| # | Empty Node | ||
| # | Empty Node | ||
|---|---|---|---|
| S2 | 気のせいだった。 Must be my imagination. | ||
| # | Empty Node | ||
| # | Repair Node | ||
|---|---|---|---|
| # | Repair Node | ||
| # | Formation | Normal Battle Node | AD/AP AS/AS+ |
|---|---|---|---|
| T | Double Line Vanguard |
0/0 0/0 | |
| Line Ahead | 0/0 0/0 | ||
| # | Formation | Normal Battle Node | AD/AP AS/AS+ |
| # | Formation | Normal Battle Node | AD/AP AS/AS+ |
|---|---|---|---|
| U | Cruising Formation 3 | 45/90 201/402 | |
| Cruising Formation 3 | 36/72 161/321 | ||
| # | Formation | Normal Battle Node | AD/AP AS/AS+ |
| # | Formation | Normal Battle Node | AD/AP AS/AS+ |
|---|---|---|---|
| V | Line Ahead Diamond |
10/19 41/81 | |
| Line Ahead | 10/19 42/84 | ||
| # | Formation | Normal Battle Node | AD/AP AS/AS+ |
| # | Empty Node | ||
|---|---|---|---|
| W | 敵影を見ず。 No enemy spotted. | ||
| # | Empty Node | ||
| # | Formation | Boss Battle Node | AD/AP AS/AS+ |
|---|---|---|---|
| X | Cruising Formation 1 | 19/38 84/168 | |
| Cruising Formation 1 (Final)
|
29/58 129/258 | ||
| # | Formation | Boss Battle Node | AD/AP AS/AS+ |
Ship Drops
| Ship drops | |||||||||||||||||||||||||||||||||||||||||||||||||||||||||||||||||||||||||||||||||||||||||||||||||||
|---|---|---|---|---|---|---|---|---|---|---|---|---|---|---|---|---|---|---|---|---|---|---|---|---|---|---|---|---|---|---|---|---|---|---|---|---|---|---|---|---|---|---|---|---|---|---|---|---|---|---|---|---|---|---|---|---|---|---|---|---|---|---|---|---|---|---|---|---|---|---|---|---|---|---|---|---|---|---|---|---|---|---|---|---|---|---|---|---|---|---|---|---|---|---|---|---|---|---|---|
| Type | Ship? | B4 | D1 | E2 | F | G | I3 | K2 | L | M1 | R | T | V | X | |||||||||||||||||||||||||||||||||||||||||||||||||||||||||||||||||||||||||||||||||||||
| DE | Shimushu | Casual+ | Medium+ | Casual+ | Casual+ | Casual+ | Casual+ | Casual+ | Casual+ | Casual+ | Hard+ | Casual+ | Casual+ | Casual+ | |||||||||||||||||||||||||||||||||||||||||||||||||||||||||||||||||||||||||||||||||||||
| DE | Hachijou | Casual+ | Easy+ | Casual+ | Casual+ | Casual+ | Casual+ | Easy+ | Casual+ | Casual+ | Casual+ | Casual+ | Casual+ | ||||||||||||||||||||||||||||||||||||||||||||||||||||||||||||||||||||||||||||||||||||||
| DD | Tamanami | Easy+ | Casual+ | Medium+ | Casual+ | ||||||||||||||||||||||||||||||||||||||||||||||||||||||||||||||||||||||||||||||||||||||||||||||
| DD | Kaya | Casual+ | |||||||||||||||||||||||||||||||||||||||||||||||||||||||||||||||||||||||||||||||||||||||||||||||||
| DD | Kamikaze | Medium+ | Casual+ | Casual+ | Easy+ | Casual+ | Casual+ | ||||||||||||||||||||||||||||||||||||||||||||||||||||||||||||||||||||||||||||||||||||||||||||
| DD | Usugumo | Hard+ | Casual+ | ||||||||||||||||||||||||||||||||||||||||||||||||||||||||||||||||||||||||||||||||||||||||||||||||
| DD | Uranami | Casual+ | Hard+ | Casual+ | Casual+ | Casual+ | Casual+ | Casual+ | Casual+ | Casual+ | Easy+ | Casual+ | Casual+ | Casual+ | |||||||||||||||||||||||||||||||||||||||||||||||||||||||||||||||||||||||||||||||||||||
| DD | Amagiri | Hard+ | Casual+ | Medium+ | Casual+ | Easy+ | Hard+ | Medium+ | Casual+ | ||||||||||||||||||||||||||||||||||||||||||||||||||||||||||||||||||||||||||||||||||||||||||
| DD | Sagiri | Medium+ | Casual+ | Easy+ | Casual+ | Casual+ | Medium+ | Easy+ | Casual+ | ||||||||||||||||||||||||||||||||||||||||||||||||||||||||||||||||||||||||||||||||||||||||||
| DD | Asagumo | Casual+ | Casual+ | Casual+ | Casual+ | Casual+ | Easy+ | Easy+ | Casual+ | Easy+ | Casual+ | ||||||||||||||||||||||||||||||||||||||||||||||||||||||||||||||||||||||||||||||||||||||||
| DD | Suzunami | Easy+ | Casual+ | Hard+ | Casual+ | ||||||||||||||||||||||||||||||||||||||||||||||||||||||||||||||||||||||||||||||||||||||||||||||
| DD | Fujinami | Easy+ | Medium+ | Casual+ | |||||||||||||||||||||||||||||||||||||||||||||||||||||||||||||||||||||||||||||||||||||||||||||||
| DD | Hayanami | Easy+ | Casual+ | Hard+ | Casual+ | ||||||||||||||||||||||||||||||||||||||||||||||||||||||||||||||||||||||||||||||||||||||||||||||
| DD | Asashimo | Casual+ | Casual+ | Casual+ | Casual+ | Casual+ | Casual+ | Casual+ | Casual+ | Casual+ | Casual+ | ||||||||||||||||||||||||||||||||||||||||||||||||||||||||||||||||||||||||||||||||||||||||
| DD | Kiyoshimo | Casual+ | Casual+ | Casual+ | Casual+ | Easy+ | Casual+ | Casual+ | Casual+ | Casual+ | Casual+ | ||||||||||||||||||||||||||||||||||||||||||||||||||||||||||||||||||||||||||||||||||||||||
| CA | Mikuma | Casual+ | |||||||||||||||||||||||||||||||||||||||||||||||||||||||||||||||||||||||||||||||||||||||||||||||||
| CVL | Yawata Maru | Casual+ | |||||||||||||||||||||||||||||||||||||||||||||||||||||||||||||||||||||||||||||||||||||||||||||||||
| FBB | Gangut | Casual+ | |||||||||||||||||||||||||||||||||||||||||||||||||||||||||||||||||||||||||||||||||||||||||||||||||
| SS | Wahoo | Easy+ | Casual+ | ||||||||||||||||||||||||||||||||||||||||||||||||||||||||||||||||||||||||||||||||||||||||||||||||
| LHA | Kumano Maru | Casual+ | |||||||||||||||||||||||||||||||||||||||||||||||||||||||||||||||||||||||||||||||||||||||||||||||||
| AR | Akashi | Casual+ | |||||||||||||||||||||||||||||||||||||||||||||||||||||||||||||||||||||||||||||||||||||||||||||||||
| AS | Heian Maru | Casual+ | |||||||||||||||||||||||||||||||||||||||||||||||||||||||||||||||||||||||||||||||||||||||||||||||||
| AS | Taigei | Casual+ | |||||||||||||||||||||||||||||||||||||||||||||||||||||||||||||||||||||||||||||||||||||||||||||||||
| AO | Kamoi | Casual+ | Hard+ | Casual+ | Casual+ | Casual+ | Casual+ | Casual+ | Casual+ | Casual+ | Easy+ | Casual+ | Casual+ | Casual+ | |||||||||||||||||||||||||||||||||||||||||||||||||||||||||||||||||||||||||||||||||||||
| AO | Souya | Casual+ | Casual+ | Casual+ | Casual+ | Casual+ | Casual+ | Hard+ | Casual+ | Hard+ | Casual+ | Casual+ | |||||||||||||||||||||||||||||||||||||||||||||||||||||||||||||||||||||||||||||||||||||||
| DD | Yamagumo | Casual+ | Casual+ | Casual+ | Casual+ | Casual+ | Casual+ | Casual+ | Casual+ | Casual+ | Casual+ | ||||||||||||||||||||||||||||||||||||||||||||||||||||||||||||||||||||||||||||||||||||||||
| CL | Kinu | Casual+ | Casual+ | Hard+ | Casual+ | Casual+ | |||||||||||||||||||||||||||||||||||||||||||||||||||||||||||||||||||||||||||||||||||||||||||||
| CL | Abukuma | Casual+ | Hard+ | Casual+ | Medium+ | Hard+ | Casual+ | Casual+ | |||||||||||||||||||||||||||||||||||||||||||||||||||||||||||||||||||||||||||||||||||||||||||
| CL | Sendai | Casual+ | Casual+ | ||||||||||||||||||||||||||||||||||||||||||||||||||||||||||||||||||||||||||||||||||||||||||||||||
| CL | Yuubari | Casual+ | Casual+ | ||||||||||||||||||||||||||||||||||||||||||||||||||||||||||||||||||||||||||||||||||||||||||||||||
| CA | Kinugasa | Casual+ | Casual+ | ||||||||||||||||||||||||||||||||||||||||||||||||||||||||||||||||||||||||||||||||||||||||||||||||
| CA | Takao | Hard+ | Casual+ | ||||||||||||||||||||||||||||||||||||||||||||||||||||||||||||||||||||||||||||||||||||||||||||||||
| CA | Atago | Medium+ | Casual+ | ||||||||||||||||||||||||||||||||||||||||||||||||||||||||||||||||||||||||||||||||||||||||||||||||
| CA | Mogami | Casual+ | Casual+ | ||||||||||||||||||||||||||||||||||||||||||||||||||||||||||||||||||||||||||||||||||||||||||||||||
| CA | Suzuya | Casual+ | Casual+ | ||||||||||||||||||||||||||||||||||||||||||||||||||||||||||||||||||||||||||||||||||||||||||||||||
| CA | Kumano | Casual+ | Casual+ | ||||||||||||||||||||||||||||||||||||||||||||||||||||||||||||||||||||||||||||||||||||||||||||||||
| CA | Tone | Casual+ | Casual+ | ||||||||||||||||||||||||||||||||||||||||||||||||||||||||||||||||||||||||||||||||||||||||||||||||
| CA | Chikuma | Casual+ | Casual+ | ||||||||||||||||||||||||||||||||||||||||||||||||||||||||||||||||||||||||||||||||||||||||||||||||
| CVL | Zuihou | Casual+ | Casual+ | Casual+ | Casual+ | ||||||||||||||||||||||||||||||||||||||||||||||||||||||||||||||||||||||||||||||||||||||||||||||
| FBB | Kongou | Medium+ | Casual+ | ||||||||||||||||||||||||||||||||||||||||||||||||||||||||||||||||||||||||||||||||||||||||||||||||
| FBB | Haruna | Casual+ | Casual+ | ||||||||||||||||||||||||||||||||||||||||||||||||||||||||||||||||||||||||||||||||||||||||||||||||
| BB | Fusou | Casual+ | Casual+ | ||||||||||||||||||||||||||||||||||||||||||||||||||||||||||||||||||||||||||||||||||||||||||||||||
| BB | Yamashiro | Casual+ | Casual+ | ||||||||||||||||||||||||||||||||||||||||||||||||||||||||||||||||||||||||||||||||||||||||||||||||
| BB | Ise | Easy+ | Casual+ | ||||||||||||||||||||||||||||||||||||||||||||||||||||||||||||||||||||||||||||||||||||||||||||||||
| BB | Hyuuga | Easy+ | Casual+ | Casual+ | Casual+ | Casual+ | Easy+ | Casual+ | Casual+ | Casual+ | |||||||||||||||||||||||||||||||||||||||||||||||||||||||||||||||||||||||||||||||||||||||||
| BB | Nagato | Casual+ | |||||||||||||||||||||||||||||||||||||||||||||||||||||||||||||||||||||||||||||||||||||||||||||||||
|
| |||||||||
|---|---|---|---|---|---|---|---|---|---|
|
Time until the end of the event:
| |||||||||
Trivia
- This map is off the coast of Rumoi in Hokkaido. Historically, this site has been the planned Soviet Invasion of Hokkaido. The plan involved capturing and occupying Rumoi and then heading to Kushiro, thereby occupying both Eastern and Western Hokkaido.
- Even if Kirov looks out of place (being based in more European waters) there is a historical reason for her being here. It is correct that her sisters Kalinin and Kaganovich were assigned to the Pacific Fleet, but both had several issues at the time. As per what happened in the latter stages of the war, neither were available for the planned operation as they were not combat-ready when the Soviets entered the Pacific Theatre in August of 1945. It is correct that both were transferred to the Soviet Pacific Fleet early on, but they were still not fully completed nor combat ready. Kaganovich was only fully completed in 1947 and was inactive throughout 1945. Kalinin was damaged in 1943 and was still under reconstruction in 1945, which is why she is not even on the roster of ships for inclusion in the invasion of Manchuria (by extension she was not considered for the hypothetical Hokkaido Invasion). With all that, Kirov, among the others was available as a cruiser gunfire support option if the plans did push through. Note that even during the assault on Manchuria and the Kuriles, the Soviets had to borrow Allied transports and other ships.
- Node R is on Rumoi.