- Welcome to the Kancolle Wiki!
- If you have any questions regarding site content, account registration, etc., please visit the KanColle Wiki Discord
Difference between revisions of "Summer 2015 Event"
m (→New Quests) |
Jigaraphale (talk | contribs) m (→E-4) |
||
| (43 intermediate revisions by 12 users not shown) | |||
| Line 1: | Line 1: | ||
| − | [[File:Summer_Event_2015_banner.png]] | + | [[File:Summer_Event_2015_banner.png]]<br> |
| − | + | The Summer 2015 Event "Counterattack! The Second Operation SN" started on the 10th of August, and lasted for about 20 days. The event is based on ''Operation SN,'' the Japanese plan to establish air bases in the southern Solomon Islands; however, there was no actual second Operation SN historically. | |
| + | |||
| + | This is a large-scale event that will contain combined fleet operations and ship locking mechanics. There is a new equipment-related system introduced in the game. | ||
===New Ships=== | ===New Ships=== | ||
<gallery> | <gallery> | ||
| − | File:Teruzuki.png | + | File:Teruzuki.png|link=Teruzuki |
| − | File:Hayasui.png | + | File:Hayasui.png|link=Hayasui |
| − | File:Libeccio.png | + | File:Libeccio.png|link=Libeccio |
| − | File:Kawakaze.png | + | File:Kawakaze.png|link=Kawakaze |
| − | File:Umikaze.png | + | File:Umikaze.png|link=Umikaze |
| − | File:Mizuho.png | + | File:Mizuho.png|link=Mizuho |
| − | File:Kazagumo.png | + | File:Kazagumo.png|link=Kazagumo |
</gallery> | </gallery> | ||
| Line 16: | Line 18: | ||
*[[:wikipedia:Japanese_fleet_oiler_Hayasui|Fleet Oiler]] [[Hayasui]], E-4 clearance reward. | *[[:wikipedia:Japanese_fleet_oiler_Hayasui|Fleet Oiler]] [[Hayasui]], E-4 clearance reward. | ||
*[[:wikipedia:Maestrale-class_destroyer|Maestrale Class destroyer]] [[Libeccio]], E-5 clearance reward. | *[[:wikipedia:Maestrale-class_destroyer|Maestrale Class destroyer]] [[Libeccio]], E-5 clearance reward. | ||
| − | * | + | *{{Class|Shiratsuyu}} [[:wikipedia:Japanese_destroyer_Kawakaze_(1936)|destroyer]] [[Kawakaze]], E-2 clearance reward. |
| − | * | + | *{{Class|Shiratsuyu }} [[:wikipedia:Japanese_destroyer_Umikaze_(1936)|destroyer]] [[Umikaze]], available as drop from E-4Z (Boss) at S-rank. |
| − | *[[ | + | *[[Seaplane Tender]] [[Mizuho]], [[:Wikipedia:Japanese_seaplane_carrier_Mizuho|similar in design to]] [[Chitose]], available as drop from E-3Z (Boss) at S-rank. |
| − | * | + | *{{Class|Yuugumo}} [[:wikipedia:Japanese_destroyer_Kazagumo|destroyer]] [[Kazagumo]] is available as a drop from the E-6 and E-7 boss nodes. |
===New Equipment=== | ===New Equipment=== | ||
| Line 25: | Line 27: | ||
**[[Type 97 Torpedo Bomber (Murata Squadron)]], available on all difficulties | **[[Type 97 Torpedo Bomber (Murata Squadron)]], available on all difficulties | ||
**Through a [[#New Quests|conversion request]] it turns into the [[Tenzan Model 12 (Murata Squadron)]] | **Through a [[#New Quests|conversion request]] it turns into the [[Tenzan Model 12 (Murata Squadron)]] | ||
| − | *[[ | + | *[[Underway Replenishment]] |
| − | *[[Reinforcement | + | *[[Reinforcement Expansion]] |
| − | + | *[[120mm/50 Twin Gun Mount]] (as equipped on [[Libeccio]]) | |
| − | *[[ | + | *[[Combat Ration]] |
===New Quests=== | ===New Quests=== | ||
| − | {{ | + | {{QuestsHeaderKai}} |
| − | {{ | + | {{QuestsKai |
| − | | type = | + | | cat= Sortie| type= One| ID= SN01| lim= True |
| − | | | + | | namejp= 第二次SN作戦、初動作戦完了! |
| − | | namejp = 第二次SN作戦、初動作戦完了! | + | | nameen= Completing The First-Stage Operation For The Second Operation SN! |
| − | | nameen = Completing | + | | text= Crush the enemies deployed in front of the Solomon Seas and complete the first stage of the operation! |
| − | | | + | | req= Clear [[Summer 2015 Event#E-2|E-2]]. |
| − | + | | fuel= 250 | |
| − | | fuel = 250 | + | | steel= 250 |
| − | + | | main= {{QuestRewardItem|Present Box}} {{QuestRewardEquip|Combat Ration}} | |
| − | | steel = 250 | ||
| − | | | ||
| − | | | ||
| − | |||
| − | |||
}} | }} | ||
| − | {{ | + | {{QuestsKai |
| − | | type = | + | | cat= Factory| type= One| ID= SN02| lim= True |
| − | | | + | | qreq1= SN01 |
| − | | namejp = | + | | namejp= 「工廠」倉庫の整理整頓! |
| − | | nameen = Reorganize | + | | nameen= Reorganize The "Factory"! |
| − | | | + | | text= Scrap multiple equipment that you no longer need in order to organize the factory warehouse in preparation for the new equipment! |
| − | + | | req= Scrap equipment 5 equipment. | |
| − | | fuel = 100 | + | | fuel= 100 |
| − | | ammo = 100 | + | | ammo= 100 |
| − | | steel = 100 | + | | steel= 100 |
| − | | bauxite = 100 | + | | bauxite= 100 |
| − | | | + | | main= {{QuestRewardItem|Development Material|qty=2}} {{QuestRewardEquip|Combat Ration}} |
| − | | | ||
| − | |||
}} | }} | ||
| − | {{ | + | {{QuestsKai |
| − | | type = | + | | cat= Sortie| type= One| ID= SN03| lim= True |
| − | | | + | | qreq1= SN02 |
| − | | namejp = 主力機動部隊の前路哨戒を実施せよ! | + | | namejp= 主力機動部隊の前路哨戒を実施せよ! |
| − | | nameen = Carry Out Patrol | + | | nameen= Carry Out Patrol Ahead Of The Main Mobile Task Force! |
| − | | | + | | text= Enemy has deployed more submarines. Eliminate a number of them in order to clear the way ahead of our main mobile task force! |
| − | + | | req= Sink 6 enemy SS. | |
| − | + | | ammo= 250 | |
| − | | ammo = 250 | + | | bauxite= 250 |
| − | + | | main= Unlocks [[Summer 2015 Event#E-3|E-3]] | |
| − | | bauxite = 250 | ||
| − | | | ||
| − | |||
| − | |||
}} | }} | ||
| − | {{ | + | {{QuestsKai |
| − | | type = | + | | cat= Composition| type= One| ID= SN04| lim= True |
| − | | | + | | qreq1= SN03 |
| − | | namejp = 「赤城」に艦攻「村田隊」を配属せよ! | + | | namejp= 「赤城」に艦攻「村田隊」を配属せよ! |
| − | | nameen = Assign | + | | nameen= Assign The "Murata Squadron" Torpedo Bomber To Akagi! |
| − | | | + | | text= Set the aircraft carrier Akagi as the Secretary Ship, and assign the "Murata Squadron" torpedo bomber to her! |
| − | + | | req= Set [[Akagi]] as the Secretary, equipped with a [[Type 97 Torpedo Bomber (Murata Squadron)]]. | |
| − | + | | bauxite= 50 | |
| − | + | | main= {{QuestRewardEquip|Combat Ration|qty=2}} {{QuestRewardItem|Food Supply Ship Mamiya}} | |
| − | + | | notes= If this quest is not cleared when fulfilling the condition, un-check and re-check the quest. | |
| − | |||
| − | |||
| − | |||
| − | |||
| − | |||
| − | |||
| − | |||
}} | }} | ||
| − | {{ | + | {{QuestsKai |
| − | | type = | + | | cat= Sortie| type= One| ID= SN05| lim= True |
| − | | | + | | qreq1= SN03 |
| − | | namejp = ソロモン海方面の制空権を奪え! | + | | namejp= ソロモン海方面の制空権を奪え! |
| − | | nameen = Attain Air Superiority | + | | nameen= Attain Air Superiority Off The Solomon Seas! |
| − | | | + | | text= Charge into the waters near the enemy airfield controlling the skies of the Solomon Seas and crush them! |
| − | + | | req= Clear [[Summer 2015 Event#E-4|E-4]]. | |
| − | | fuel = 400 | + | | fuel= 400 |
| − | + | | steel= 400 | |
| − | | steel = 400 | + | | main= {{QuestRewardItem|Present Box}} {{QuestRewardEquip|Combat Ration}} |
| − | | | ||
| − | | | ||
| − | | | ||
| − | |||
}} | }} | ||
| − | {{ | + | {{QuestsKai |
| − | | type = | + | | cat= Composition| type= One| ID= SN06| lim= True |
| − | | | + | | qreq1= SN05 |
| − | | namejp = 「翔鶴」に艦攻「村田隊」を配置転換せよ! | + | | namejp= 「翔鶴」に艦攻「村田隊」を配置転換せよ! |
| − | | nameen = Transfer | + | | nameen= Transfer The Murata Squadron Torpedo Bomber To Shoukaku! |
| − | | | + | | text= Set the aircraft carrier Shoukaku as the Secretary Ship, and transfer the "Murata Squadron" torpedo bomber to her! |
| − | + | | req= Set [[Shoukaku]] as Secretary, equipped with a [[Type 97 Torpedo Bomber (Murata Squadron)]]. | |
| − | + | | bauxite= 50 | |
| − | + | | main= {{QuestRewardItem|Instant Repair Material|qty=3}} {{QuestRewardItem|Improvement Material|qty=3}} | |
| − | |||
| − | |||
| − | |||
| − | | bauxite = 50 | ||
| − | | | ||
| − | | | ||
| − | | | ||
}} | }} | ||
| − | {{ | + | {{QuestsKai |
| − | | type = | + | | cat= PVP| type= One| ID= SN07| lim= True |
| − | | | + | | qreq1= SN05 |
| − | | namejp = FS作戦に備え、艦隊練度向上に努めよ! | + | | namejp= FS作戦に備え、艦隊練度向上に努めよ! |
| − | | nameen = Increase | + | | nameen= Increase The Fleet's Experience In Preparation For Operation FS! |
| − | | | + | | text= To prepare for Operation FS, try to increase the experience of the fleet! Obtain 4 victories in Exercise today! |
| − | + | | req= Score 4 B+ ranks in PVP within the same day. | |
| − | + | | fuel= 300 | |
| − | | fuel = | + | | ammo= 300 |
| − | | ammo = | + | | main= Unlocks [[Summer 2015 Event#E-5|E-5]] |
| − | | | + | | notes= The counter is shared with {{Q|Cd2}}. |
| − | |||
| − | |||
| − | | notes = | ||
| − | |||
}} | }} | ||
| − | {{ | + | {{QuestsKai |
| − | | type = | + | | cat= Factory| type= One| ID= SN08| lim= True |
| − | | | + | | qreq1= SN06 |
| − | | namejp = | + | | namejp= 機種転換 |
| − | | nameen = | + | | nameen= Model Conversion |
| − | | | + | | text= Scrap 2 Tenzan while your Secretary is Shoukaku equipped with Type 97 Torpedo Bomber (Murata Squadron)! |
| − | + | | req= Set [[Shoukaku]] as Secretary, equipped with a [[Type 97 Torpedo Bomber (Murata Squadron)]], then, scrap 2 [[Tenzan]]. | |
| − | + | | bauxite= 50 | |
| − | + | | main= {{QuestRewardEquip|Tenzan Model 12 (Murata Squadron)}} | |
| − | | | ||
| − | |||
| − | |||
| − | | | ||
| − | | | ||
| − | |||
| − | |||
}} | }} | ||
| − | {{ | + | {{QuestsKai |
| − | | type = | + | | cat= Sortie| type= One| ID= SN09| lim= True |
| − | | | + | | qreq1= SN07 |
| − | | namejp = 西部方面派遣艦隊、出撃せよ! | + | | namejp= 西部方面派遣艦隊、出撃せよ! |
| − | | nameen = Sortie | + | | nameen= Sortie With The Fleet Deployed To The West! |
| − | | | + | | text= Deploy a fleet to the Western Sea Region and strike at the heart of the enemy reinforcements gathering in the area! |
| − | + | | req= Clear [[Summer 2015 Event#E-5|E-5]]. | |
| − | | fuel = 550 | + | | fuel= 550 |
| − | + | | steel= 550 | |
| − | | steel = 550 | + | | main= {{QuestRewardItem|Present Box}} {{QuestRewardEquip|Combat Ration}} |
| − | | | ||
| − | | | ||
| − | | | ||
| − | |||
}} | }} | ||
| − | {{ | + | {{QuestsKai |
| − | | type = | + | | cat= Sortie| type= One| ID= SN10| lim= True |
| − | | | + | | namejp= 空母機動部隊「第三艦隊」を編成せよ! |
| − | | namejp = | + | | nameen= Amass The FS Operation Beachhead! |
| − | | nameen = Amass | + | | text= Enemy is reinforcing their mobile task force. Encounter them, reduce the amount of enemy carriers, and construct a beachhead for the entry to FS! |
| − | | | + | | req= Sink 10 enemy CV or CVL. |
| − | + | | fuel= 300 | |
| − | | fuel = | + | | ammo= 300 |
| − | | ammo = | + | | bauxite= 300 |
| − | | | + | | main= {{QuestRewardItem|Improvement Material|qty=4}} {{QuestRewardEquip|Underway Replenishment}} |
| − | | | + | | notes= Requires [[Summer 2015 Event#E-5|E-5]] clear |
| − | | | ||
| − | | notes = Requires [[#E-5|E-5]] clear | ||
| − | |||
}} | }} | ||
| − | {{ | + | {{QuestsKai |
| − | | type = | + | | cat= Composition| type= One| ID= SN11| lim= True |
| − | | | + | | namejp= FS作戦の橋頭堡を築け! |
| − | | namejp = | + | | nameen= Organise The Aircraft Carrier Task Force "Third Fleet"! |
| − | | nameen = Organise | + | | text= Form the "Third Fleet" including "Shoukaku", "Zuikaku", and "Zuihou" in the first fleet in a combined fleet composition! |
| − | | | + | | req= Assemble a Carrier Task Force (Combined Fleet) containing [[Shoukaku]], [[Zuikaku]], and [[Zuihou]]. |
| − | + | | ammo= 450 | |
| − | + | | bauxite= 450 | |
| − | | ammo = | + | | main= Unlocks [[Summer 2015 Event#E-6|E-6]] |
| − | + | | notes= Requires [[Summer 2015 Event#E-5|E-5]] clear | |
| − | | bauxite = | ||
| − | | | ||
| − | | notes = Requires [[#E-5|E-5]] clear | ||
| − | |||
}} | }} | ||
|} | |} | ||
| Line 213: | Line 164: | ||
*[[Destroyer Ro-Class|Ro-Class Late Model Elite]] | *[[Destroyer Ro-Class|Ro-Class Late Model Elite]] | ||
*[[Destroyer Ha-Class|Ha-Class Late Model Elite]] | *[[Destroyer Ha-Class|Ha-Class Late Model Elite]] | ||
| − | |||
| − | |||
| − | |||
| − | |||
| − | |||
| − | |||
| − | |||
| − | |||
| − | |||
| − | |||
| − | |||
| − | |||
| − | |||
| − | |||
| − | |||
| − | |||
| − | |||
| − | |||
| − | |||
| − | |||
| − | |||
| − | |||
| − | |||
| − | |||
| − | |||
| − | |||
| − | |||
| − | |||
| − | |||
| − | |||
| − | |||
| − | |||
| − | |||
| − | |||
| − | |||
| − | |||
| − | |||
==Mechanics== | ==Mechanics== | ||
| Line 282: | Line 196: | ||
| style="text-align:center;"|''Preparation for Second Operation SN!'' | | style="text-align:center;"|''Preparation for Second Operation SN!'' | ||
| style="text-align:center;"|No | | style="text-align:center;"|No | ||
| − | | style="text-align:center;"| | + | | style="text-align:center;"|{{color|blue|'''BLUE'''}} |
| − | | rowspan= | + | | rowspan=6|'''Tagging''':<br>Ships not already color-tagged will be tagged with the color associated with the map when deployed. This tag exists on all difficulties and is not reset on remodel, etc.<br>'''Deployment Restriction''':<br>''Medium or Hard:'' Must have either the same-colored tag or no tag.<br>''Easy:'' No restrictions. |
| − | + | |'''No restrictions. All difficulties OK''' | |
| − | | rowspan= | + | | rowspan=2| |
|- | |- | ||
! style="font-size:18px;"|''E-2'' | ! style="font-size:18px;"|''E-2'' | ||
| style="text-align:center;"|''Combined Fleet, to the Solomon Sea!'' | | style="text-align:center;"|''Combined Fleet, to the Solomon Sea!'' | ||
| style="text-align:center;"|'''Yes''' | | style="text-align:center;"|'''Yes''' | ||
| − | | style="text-align:center;"| | + | | style="text-align:center;"|{{color|blue|'''BLUE'''}} |
| − | | rowspan= | + | | rowspan=6|'''In order to play these maps on hard, you must complete the previous map on either medium or hard.'''<br>''(e.g., to do E-4 on hard, you must complete E-3 on medium or hard.)'' |
|- | |- | ||
! style="font-size:18px;"|''E-3'' | ! style="font-size:18px;"|''E-3'' | ||
| style="text-align:center;"|''Clash! Second Southern Pacific Ocean Battle'' | | style="text-align:center;"|''Clash! Second Southern Pacific Ocean Battle'' | ||
| style="text-align:center;"|'''Yes''' | | style="text-align:center;"|'''Yes''' | ||
| − | | style="text-align:center;"| | + | | style="text-align:center;"|{{color|green|'''GREEN'''}} |
| − | + | |Requires E-2 completion and Quests [[#SN01|SN01]], [[#SN02|SN02]], and [[#SN03|SN03]] completion to unlock | |
|- | |- | ||
! style="font-size:18px;"|''E-4'' | ! style="font-size:18px;"|''E-4'' | ||
| style="text-align:center;"|''Charge into the Strait! Destroy the Enemy Airfield!'' | | style="text-align:center;"|''Charge into the Strait! Destroy the Enemy Airfield!'' | ||
| style="text-align:center;"|No | | style="text-align:center;"|No | ||
| − | | style="text-align:center;"| | + | | style="text-align:center;"|{{color|yellow|'''YELLOW'''}} |
| − | + | | | |
|- | |- | ||
| rowspan="3" style="text-align:center;"|Extra Operation | | rowspan="3" style="text-align:center;"|Extra Operation | ||
| Line 309: | Line 223: | ||
| style="text-align:center;"|''Hard Battle! Western Region Deployment Fleet'' | | style="text-align:center;"|''Hard Battle! Western Region Deployment Fleet'' | ||
| style="text-align:center;"|No | | style="text-align:center;"|No | ||
| − | | style="text-align:center;"| | + | | style="text-align:center;"|{{color|orange|'''ORANGE'''}} |
| − | + | |Requires E-4 completion and Quest [[#SN07|SN07]] completion to unlock | |
|- | |- | ||
! style="font-size:18px;"|''E-6'' | ! style="font-size:18px;"|''E-6'' | ||
| style="text-align:center;"|''Counterattack! Enter the FS Region'' | | style="text-align:center;"|''Counterattack! Enter the FS Region'' | ||
| style="text-align:center;"|'''Yes''' | | style="text-align:center;"|'''Yes''' | ||
| − | | style="text-align:center;"| | + | | style="text-align:center;"|{{color|green|'''GREEN'''}} |
| − | + | |Requires E-5 completion and Quest [[#SN10|SN10]] completion to unlock | |
|- | |- | ||
! style="font-size:18px;"|''E-7'' | ! style="font-size:18px;"|''E-7'' | ||
| Line 322: | Line 236: | ||
| style="text-align:center;"|'''Yes''' | | style="text-align:center;"|'''Yes''' | ||
| style="text-align:center;"|No tag | | style="text-align:center;"|No tag | ||
| − | + | |'''Deployment Restriction''':<br>''Medium or Hard:'' '''Cannot''' have the {{color|orange|'''ORANGE'''}} tag.<br>''Easy:'' No restrictions. | |
| − | + | | | |
|} | |} | ||
| Line 336: | Line 250: | ||
*(Kills required) 5 (All difficulties) | *(Kills required) 5 (All difficulties) | ||
*'''At least 1 CL and 2 DD required.''' | *'''At least 1 CL and 2 DD required.''' | ||
| − | *'' | + | *''Ship tag {{color|blue|'''BLUE'''}} |
| + | |||
| + | {{{!}}class="wikitable" style="text-align:center" | ||
| + | !colspan=5{{!}}Rewards | ||
| + | {{!-}} | ||
| + | !甲<br>Hard | ||
| + | {{!}}{{QuestRewardItem|Furniture Fairy}} | ||
| + | {{!}}{{QuestRewardItem|Reinforcement Expansion|qty=2}} | ||
| + | {{!}}{{QuestRewardEquip|Combat Ration|qty=4}} | ||
| + | {{!}}{{QuestRewardItem|Food Supply Ship Irako}} | ||
| + | {{!-}} | ||
| + | !乙<br>Medium | ||
| + | {{!}}{{QuestRewardItem|Furniture Fairy}} | ||
| + | {{!}}{{QuestRewardItem|Reinforcement Expansion}} | ||
| + | {{!}}{{QuestRewardEquip|Combat Ration|qty=3}} | ||
| + | {{!}}{{QuestRewardItem|Food Supply Ship Irako}} | ||
| + | {{!-}} | ||
| + | !丙<br>Easy | ||
| + | {{!}}{{QuestRewardItem|Furniture Fairy}} | ||
| + | {{!}}{{QuestRewardItem|Reinforcement Expansion}} | ||
| + | {{!}}{{QuestRewardEquip|Combat Ration|qty=2}} | ||
| + | {{!}} | ||
| + | {{!}}} | ||
| + | |||
| − | |||
| − | |||
| − | |||
| − | |||
|branching = | |branching = | ||
{{#invoke:MapBranching|branchingTemplate | {{#invoke:MapBranching|branchingTemplate | ||
| Line 349: | Line 282: | ||
|A_to_F = If fleet doesn't pass LoS Check (higher priority than the rest) | |A_to_F = If fleet doesn't pass LoS Check (higher priority than the rest) | ||
}} | }} | ||
| − | |tips = <br | + | |tips = <br> |
*South route seems to have success with 2CL 4DD | *South route seems to have success with 2CL 4DD | ||
*If going north, 1CL 2CVL 3DD seems to work. Note however that you go through a sub node and preboss has a Ri-class CA so this might not be worth the shiplocks. | *If going north, 1CL 2CVL 3DD seems to work. Note however that you go through a sub node and preboss has a Ri-class CA so this might not be worth the shiplocks. | ||
| Line 423: | Line 356: | ||
|C1_form = echelon | |C1_form = echelon | ||
|C1_xp = 130 | |C1_xp = 130 | ||
| − | | | + | |C2_node_info = ss_ka-class_elite ss_ka-class ss_ka-class |
| − | | | + | |C2_form = line_abreast |
| − | | | + | |C2_xp = 120 |
| | | | ||
|D_label = | |D_label = | ||
| Line 507: | Line 440: | ||
}} | }} | ||
</tabber> | </tabber> | ||
| − | |dropsA = '''[[ | + | |dropsA = '''[[Destroyer]]s''': [[Fubuki]], [[Shirayuki]], [[Hatsuyuki]], [[Murakumo]], [[Mikazuki]], [[Nagatsuki]], [[Mochizuki]] |
| − | |dropsB = '''[[ | + | |dropsB = '''[[Destroyer]]s''': [[Hatsuyuki]], [[Mutsuki]], [[Mikazuki]] |
| − | <br | + | <br> |
| − | '''[[ | + | '''[[Light Cruiser]]s''': [[Tenryuu]] |
| − | <br | + | <br> |
| − | '''[[ | + | '''[[Heavy Cruiser]]s''': [[Kako]] |
| − | |dropsC = '''[[ | + | |dropsC = '''[[Destroyer]]s''': [[Murakumo]], [[Kisaragi]], [[Mikazuki]], [[Nagatsuki]], [[Mutsuki]], [[Shirayuki]] |
| − | <br | + | <br> |
| − | '''[[ | + | '''[[Light Cruiser]]s''': [[Jintsuu]] |
|dropsD = | |dropsD = | ||
| − | |dropsE = '''[[ | + | |dropsE = '''[[Destroyer]]s''': [[Fubuki]], [[Fumizuki]], [[Hatsuyuki]], [[Kikuzuki]], [[Mochizuki]], [[Mutsuki]], [[Nagatsuki]], [[Yayoi]], [[Tokitsukaze|'''{{color|red|Tokitsukaze}}''']], [[Nowaki|'''{{color|red|Nowaki}}''']] |
| − | <br | + | <br> |
| − | '''[[ | + | '''[[Light Cruiser]]s''': [[Agano]], [[Jintsuu]], [[Nagara]], [[Sendai]], [[Tama]], [[Tatsuta]], [[Ooyodo|'''{{color|red|Ooyodo}}''']], [[Yura]], [[Yuubari]] |
| − | <br | + | <br> |
| − | '''[[ | + | '''[[Heavy Cruiser]]s''': [[Aoba]], [[Choukai]], [[Kako]], [[Furutaka]] |
| − | <br | + | <br> |
| − | '''[[ | + | '''[[Light Carrier]]s''': [[Ryuujou]] |
| − | |dropsF = '''[[ | + | |dropsF = '''[[Destroyer]]s''': [[Mutsuki]], [[Mochizuki]] |
| − | |dropsZ = '''[[ | + | |dropsZ = '''[[Destroyer]]s''': [[Ayanami]], [[Kikuzuki]], [[Kisaragi]], [[Mutsuki]], [[Nowaki|'''{{color|red|Nowaki}}''']], [[Tokitsukaze|'''{{color|red|Tokitsukaze}}''']], [[Tanikaze]], [[Urakaze]], [[Yayoi]] |
| − | <br | + | <br> |
| − | '''[[ | + | '''[[Light Cruiser]]s''': [[Abukuma]], [[Jintsu]], [[Kuma]], [[Nagara]], [[Ooyodo|'''{{color|red|Ooyodo}}''']], [[Sendai]], [[Tatsuta]], [[Tenryu]], [[Yura]], [[Yuubari]], |
| − | <br | + | <br> |
| − | '''[[ | + | '''[[Heavy Cruiser]]s''': [[Aoba]], [[Choukai]], [[Furutaka]], [[Kako]], [[Kinugasa]], [[Kumano]], [[Mogami]], [[Suzuya]], |
| − | <br | + | <br> |
| − | '''[[ | + | '''[[Battleship]]s''': [[Fusou]], [[Kirishima]], [[Kongou]], [[Haruna]], [[Hiei]], [[Yamashiro]] |
| − | <br | + | <br> |
| − | '''[[ | + | '''[[Aircraft Carrier]]s''': [[Ryuujou]] |
| − | <br | + | <br> |
| − | '''[[ | + | '''[[Seaplane Tenders]]s''': [[Chitose]], [[Chiyoda]] |
}} | }} | ||
===E-2=== | ===E-2=== | ||
{{EventMap1 | {{EventMap1 | ||
| − | |||
|banner = [[File:2015SummerE-2Banner.png|450px]] | |banner = [[File:2015SummerE-2Banner.png|450px]] | ||
|map_image = [[File:Summmer2015_E2Map.png|450px]] | |map_image = [[File:Summmer2015_E2Map.png|450px]] | ||
| Line 548: | Line 480: | ||
*[[Combined Fleet]] | *[[Combined Fleet]] | ||
*Boss: [[Light Cruiser Demon]] | *Boss: [[Light Cruiser Demon]] | ||
| − | * 4 Kills Required on Hard and 5 on | + | * 4 Kills Required on Hard and 5 on Medium/Easy (HP ~1050) |
**Unryuu confirmed to drop even on easy. | **Unryuu confirmed to drop even on easy. | ||
| − | *'' | + | *''Ship tag {{color|blue|'''BLUE'''}} |
| − | + | {{{!}}class="wikitable" style="text-align:center" | |
| − | + | !colspan=5{{!}}Rewards | |
| − | + | {{!-}} | |
| − | + | !甲<br>Hard | |
| + | {{!}}{{QuestRewardShip|Kawakaze|small=true}} | ||
| + | {{!}}{{QuestRewardItem|Reinforcement Expansion}} | ||
| + | {{!}}{{QuestRewardEquip|Combat Ration|qty=2}} | ||
| + | {{!}}{{QuestRewardEquip|Type 91 Anti-Aircraft Fire Director}} | ||
| + | {{!-}} | ||
| + | !乙<br>Medium | ||
| + | {{!}}{{QuestRewardShip|Kawakaze|small=true}} | ||
| + | {{!}}{{QuestRewardItem|Reinforcement Expansion}} | ||
| + | {{!}} | ||
| + | {{!}} | ||
| + | {{!-}} | ||
| + | !丙<br>Easy | ||
| + | {{!}}{{QuestRewardShip|Kawakaze|small=true}} | ||
| + | {{!}} | ||
| + | {{!}} | ||
| + | {{!}} | ||
| + | {{!}}} | ||
|branching = | |branching = | ||
| Line 583: | Line 532: | ||
|A1_form = line_ahead | |A1_form = line_ahead | ||
|A1_xp = 170 | |A1_xp = 170 | ||
| − | | | + | |A2_node_info = ca_ri-class_flagship ca_ri-class_flagship dd_ro-class_late_model_elite dd_ro-class_late_model_elite dd_i-class_late_model dd_i-class_late_model |
| − | | | + | |A2_form = double_line |
| − | | | + | |A2_xp = 160 |
| | | | ||
|B_label= 潜水艦哨戒線 | |B_label= 潜水艦哨戒線 | ||
| Line 592: | Line 541: | ||
|B1_xp = 140 | |B1_xp = 140 | ||
| | | | ||
| − | |C_label = | + | |C_label = {{color|blue|Active Branching}} |
|C1_node_info = | |C1_node_info = | ||
| | | | ||
| Line 607: | Line 556: | ||
|E2_xp = 240 | |E2_xp = 240 | ||
| | | | ||
| − | |F_label = | + | |F_label = {{color|green|Aerial Combat Only}}<br>任務部隊II群 |
|F1_node_info = cv_wo-class_flagship cv_wo-class_flagship cl_tsu-class_elite cl_tsu-class_elite dd_ha-class_late_model dd_ha-class_late_model | |F1_node_info = cv_wo-class_flagship cv_wo-class_flagship cl_tsu-class_elite cl_tsu-class_elite dd_ha-class_late_model dd_ha-class_late_model | ||
|F1_form = diamond | |F1_form = diamond | ||
|F1_xp = 200 | |F1_xp = 200 | ||
| − | | | + | |F2_node_info = cv_wo-class_flagship_kai cv_wo-class_flagship cl_tsu-class_elite cl_tsu-class_elite dd_ha-class_late_model dd_ha-class_late_model |
| − | | | + | |F2_form = diamond |
| − | | | + | |F2_xp = 190 |
| | | | ||
|G_label = ソロモン泊地輸送船団 | |G_label = ソロモン泊地輸送船団 | ||
| Line 631: | Line 580: | ||
|H2_xp = 270 | |H2_xp = 270 | ||
| | | | ||
| − | |I_label = | + | |I_label = {{color|purple|Maelstrom}} |
|I1_node_info = fuel - ?? | |I1_node_info = fuel - ?? | ||
| | | | ||
| Line 670: | Line 619: | ||
|B1_xp = 120 | |B1_xp = 120 | ||
| | | | ||
| − | |C_label = | + | |C_label = {{color|blue|Active Branching}} |
|C1_node_info = | |C1_node_info = | ||
| | | | ||
| Line 686: | Line 635: | ||
|E2_xp = 220 | |E2_xp = 220 | ||
| | | | ||
| − | |F_label = | + | |F_label = {{color|green|Aerial Combat Only}}任務部隊II群 |
|F1_node_info = cv_wo-class_flagship cv_wo-class_flagship cl_tsu-class_elite cl_tsu-class_elite dd_ha-class_late_model dd_i-class_late_model | |F1_node_info = cv_wo-class_flagship cv_wo-class_flagship cl_tsu-class_elite cl_tsu-class_elite dd_ha-class_late_model dd_i-class_late_model | ||
|F1_form = diamond | |F1_form = diamond | ||
| Line 707: | Line 656: | ||
|H2_xp = | |H2_xp = | ||
| | | | ||
| − | |I_label = | + | |I_label = {{color|purple|Maelstrom}} |
|I1_node_info = fuel - ?? | |I1_node_info = fuel - ?? | ||
| | | | ||
| Line 742: | Line 691: | ||
|B1_xp = 100 | |B1_xp = 100 | ||
| | | | ||
| − | |C_label = | + | |C_label = {{color|blue|Active Branching}} |
|C1_node_info = | |C1_node_info = | ||
| | | | ||
| Line 754: | Line 703: | ||
|E1_xp = 210 | |E1_xp = 210 | ||
| | | | ||
| − | |F_label = | + | |F_label = {{color|green|Aerial Combat Only}}<br>任務部隊II群 |
|F1_node_info = cv_wo-class_elite cvl_nu-class_elite cl_to-class_elite dd_ha-class dd_i-class dd_i-class | |F1_node_info = cv_wo-class_elite cvl_nu-class_elite cl_to-class_elite dd_ha-class dd_i-class dd_i-class | ||
|F1_form = diamond | |F1_form = diamond | ||
| Line 772: | Line 721: | ||
|H2_xp = | |H2_xp = | ||
| | | | ||
| − | |I_label = | + | |I_label = {{color|purple|Maelstrom}} |
|I1_node_info = fuel - ?? | |I1_node_info = fuel - ?? | ||
| | | | ||
| Line 798: | Line 747: | ||
}} | }} | ||
</tabber> | </tabber> | ||
| − | |dropsA = '''[[ | + | |dropsA = '''[[Destroyer]]s''': [[Nagatsuki]], [[Shirayuki]], [[Ayanami]], [[Murakumo]], [[Akatsuki]], [[Fubuki]], [[Yuudachi]] |
| − | |dropsB = '''[[ | + | |dropsB = '''[[Destroyer]]s''': [[Fubuki]], [[Shirayuki]], [[Mochizuki]], [[Hatsuyuki]], [[Akatsuki]], [[Mikazuki]], [[Ayanami]], [[Murakumo]], [[Isonami]] |
| − | <br | + | <br> |
| − | '''[[ | + | '''[[Light Cruiser]]s''': [[Naka]] |
|dropsC = | |dropsC = | ||
| − | |dropsD = '''[[ | + | |dropsD = '''[[Destroyer]]s''': [[Shirayuki]], [[Isonami]], [[Ayanami]], [[Miyuki]], [[Fubuki]], [[Shikinami]], [[Yuudachi]] |
| − | <br | + | <br> |
| − | '''[[ | + | '''[[Light Cruiser]]s''': [[Kiso]], [[Isuzu]], [[Yura]] |
| − | <br | + | <br> |
| − | '''[[ | + | '''[[Heavy Cruiser]]s''': [[Choukai]] |
| − | <br | + | <br> |
| − | '''[[ | + | '''[[Battleship]]s''': [[Kongou]] |
| − | <br | + | <br> |
| − | '''[[ | + | '''[[Light Carrier]]s''': [[Ryuujou]] |
| − | |dropsE = '''[[ | + | |dropsE = '''[[Destroyer]]s''': [[Hatsuyuki]], [[Shirayuki]], [[Murakumo]], [[Ayanami]], [[Yuudachi]], [[Nagatsuki]], [[Murasame]], [[Mikazuki]] |
| − | <br | + | <br> |
| − | '''[[ | + | '''[[Light Cruiser]]s''': [[Natori]], [[Yura]] |
| − | <br | + | <br> |
| − | '''[[ | + | '''[[Light Carrier]]s''': [[Ryuujou]] |
| − | |dropsF = [[Akatsuki]], '''[[ | + | |dropsF = [[Akatsuki]], '''[[Destroyer]]s''': [[Harusame|'''{{color|red|Harusame}}''']] |
| − | |dropsG = '''[[ | + | |dropsG = '''[[Destroyer]]s''': [[Fubuki]], [[Harusame|'''{{color|red|Harusame}}''']], [[Mikazuki]], [[Shirayuki]], [[Yuudachi]], [[Hatsuyuki]], [[Miyuki]], [[Nagatsuki]], [[Murakumo]] |
| − | <br | + | <br> |
| − | '''[[ | + | '''[[Light Cruiser]]s''': [[Kuma]], [[Nagara]], [[Natori]], [[Tenryuu]], [[Isuzu]] |
| − | <br | + | <br> |
| − | '''[[ | + | '''[[Heavy Cruiser]]s''': [[Choukai]], [[Aoba]], [[Kinugasa|'''{{color|red|Kinugasa}}''']], [[Kako]] |
| − | <br | + | <br> |
| − | '''[[ | + | '''[[Light Carrier]]s:''' [[Ryuujou]], [[Junyou]] |
| − | <br | + | <br> |
| − | '''[[Auxiliary Ships]]: '''[[Taigei|''' | + | '''[[Auxiliary Ships]]: '''[[Taigei|'''{{color|red|Taigei}}''']] |
| − | |dropsH = '''[[ | + | |dropsH = '''[[Destroyer]]s''': [[Murasame]], [[Ayanami]], [[Nagatsuki]], [[Miyuki]] |
| − | <br | + | <br> |
| − | '''[[ | + | '''[[Light Cruiser]]s''': [[Yura]] |
| − | <br | + | <br> |
| − | '''[[ | + | '''[[Heavy Cruiser]]s''': [[Choukai]], [[Kako]], [[Aoba]] |
| − | <br | + | <br> |
| − | '''[[ | + | '''[[Light Carrier]]s''': [[Ryuujou]] |
| − | |dropsJ = '''[[ | + | |dropsJ = '''[[Light Cruiser]]s''': [[Nagara]] |
| − | <br | + | <br> |
| − | '''[[ | + | '''[[Heavy Cruiser]]s''': [[Kako]] |
| − | |dropsL = '''[[ | + | |dropsL = '''[[Light Cruiser]]s''': [[Agano|'''{{color|red|Agano}}''']] |
| − | |dropsZ = '''[[ | + | |dropsZ = '''[[Destroyer]]s:''' [[Mutsuki]], [[Shirayuki]], [[Harusame|'''{{color|red|Harusame}}''']], [[Yayoi]], [[Makigumo|'''{{color|red|Makigumo}}''']], [[Akatsuki]], [[Hatsukaze|'''{{color|red|Hatsukaze}}''']], [[Fubuki]], [[Murakumo]], [[Mutsuki]] |
| − | <br | + | <br> |
| − | '''[[ | + | '''[[Light Cruiser]]s:''' [[Agano|'''{{color|red|Agano}}''']], [[Isuzu]], [[Jintsuu]], [[Noshiro|'''{{color|red|Noshiro}}''']], [[Sendai]], [[Tama]], [[Yuubari]] |
| − | <br | + | <br> |
| − | '''[[ | + | '''[[Heavy Cruiser]]s:''' [[Aoba]], [[Furutaka]], [[Choukai]], [[Kako]], [[Kinugasa|'''{{color|red|Kinugasa}}''']], [[Tone]] |
| − | <br | + | <br> |
| − | '''[[ | + | '''[[Battleship]]s:''' [[Kongou]], [[Hiei]], [[Haruna]], [[Kirishima]], |
| − | <br | + | <br> |
| − | '''[[ | + | '''[[Light Carrier]]s:''' [[Jun'you]], [[Ryuujou]], [[Zuihou|'''{{color|red|Zuihou}}''']], [[Hiyou]] |
| − | <br | + | <br> |
| − | '''[[ | + | '''[[Aircraft Carrier]]s:''' [[Shoukaku|'''{{color|red|Shoukaku}}''']], [[Unryuu|'''{{color|red|Unryuu}}''']], [[Zuikaku|'''{{color|red|Zuikaku}}''']] |
| − | <br | + | <br> |
| − | '''[[Auxiliary Ships]]''': [[Chitose]], '''[[Taigei|''' | + | '''[[Auxiliary Ships]]''': [[Chitose]], '''[[Taigei|'''{{color|red|Taigei}}''']] |
}} | }} | ||
| Line 864: | Line 813: | ||
*Boss: [[Seaplane Tender Princess]] | *Boss: [[Seaplane Tender Princess]] | ||
*6 Kills Required (Gauge roughly 2100 HP) | *6 Kills Required (Gauge roughly 2100 HP) | ||
| − | *'' | + | *''Ship tag {{color|green|'''GREEN'''}} |
*'''Requires completion of a [[#New Quests|quest chain]] in addition to [[#E-2|E-2]].''' | *'''Requires completion of a [[#New Quests|quest chain]] in addition to [[#E-2|E-2]].''' | ||
| − | + | {{{!}}class="wikitable" style="text-align:center" | |
| − | + | !colspan=6{{!}}Rewards | |
| − | + | {{!-}} | |
| − | + | !甲<br>Hard | |
| + | {{!}}{{QuestRewardEquip|Type 97 Torpedo Bomber (Murata Squadron)}} | ||
| + | {{!}}{{QuestRewardItem|Reinforcement Expansion|qty=2}} | ||
| + | {{!}}{{QuestRewardEquip|Emergency Repair Goddess}} | ||
| + | {{!}}{{QuestRewardEquip|15m Duplex Rangefinder + Type 21 Radar Kai 2}} | ||
| + | {{!}}{{QuestRewardItem|Improvement Material|qty=3}} | ||
| + | {{!-}} | ||
| + | !乙<br>Medium | ||
| + | {{!}}{{QuestRewardEquip|Type 97 Torpedo Bomber (Murata Squadron)}} | ||
| + | {{!}}{{QuestRewardItem|Reinforcement Expansion}} | ||
| + | {{!}}{{QuestRewardEquip|Emergency Repair Personnel}} | ||
| + | {{!}}{{QuestRewardEquip|15m Duplex Rangefinder + Type 21 Radar Kai 2}} | ||
| + | {{!}} | ||
| + | {{!-}} | ||
| + | !丙<br>Easy | ||
| + | {{!}}{{QuestRewardEquip|Type 97 Torpedo Bomber (Murata Squadron)}} | ||
| + | {{!}}{{QuestRewardItem|Reinforcement Expansion}} | ||
| + | {{!}}{{QuestRewardEquip|Emergency Repair Personnel}} | ||
| + | {{!}} | ||
| + | {{!}} | ||
| + | {{!}}} | ||
|branching = | |branching = | ||
| Line 894: | Line 863: | ||
**Consider fitting AP shells on your battleships for the boss node. | **Consider fitting AP shells on your battleships for the boss node. | ||
**Node C is considered much better for CTF on hard difficulty; node B has 2 CLT Chi-class Flagship and 1 CL He-class Flagship, which can wreck the escort fleet with their torpedoes (due to only 1 round of shelling). | **Node C is considered much better for CTF on hard difficulty; node B has 2 CLT Chi-class Flagship and 1 CL He-class Flagship, which can wreck the escort fleet with their torpedoes (due to only 1 round of shelling). | ||
| − | **380-390 AS is required AT boss node on Hard to get AS, and the same is true on final form of | + | **380-390 AS is required AT boss node on Hard to get AS, and the same is true on final form of medium. |
| − | *Considering [[Mizuho]] is available at all difficulties (but appears to be S-rank only drop), and the difficult boss formations on Hard, unless your fleet is properly prepared, lowering the difficulty for this map may be wise. Note that the final form for | + | *Considering [[Mizuho]] is available at all difficulties (but appears to be S-rank only drop), and the difficult boss formations on Hard, unless your fleet is properly prepared, lowering the difficulty for this map may be wise. Note that the final form for medium difficulty is the same as the pre-final form for hard difficulty. |
*Recommended compositions include: | *Recommended compositions include: | ||
**CTF: 2BB 2CV 2CVL / 2 DD 1 CL 1 FBB 2 CA | **CTF: 2BB 2CV 2CVL / 2 DD 1 CL 1 FBB 2 CA | ||
| − | ***A CLT can be subbed out for a CA or the FBB, but will be useless in E-6 as it results in a dead-end node | + | ***A CLT can be subbed out for a CA or the FBB, but will be useless in E-6 as it results in a dead-end node. |
<tabber>Hard= | <tabber>Hard= | ||
{{#invoke:EnemyEncounters|encounterTemplate | {{#invoke:EnemyEncounters|encounterTemplate | ||
| − | |A_label = | + | |A_label = {{color|blue|Active Branching}} |
|A1_node_info = | |A1_node_info = | ||
| Line 917: | Line 886: | ||
|C1_xp = 200 | |C1_xp = 200 | ||
| − | |D_label= | + | |D_label= {{color|green|Aerial Combat Only}}<br>任務部隊III群 |
|D1_node_info = CV_wo-class_flagship_2 CV_wo-class_elite CVL_nu-class_elite CL_tsu-class_elite dd_ha-class_elite dd_ha-class_elite | |D1_node_info = CV_wo-class_flagship_2 CV_wo-class_elite CVL_nu-class_elite CL_tsu-class_elite dd_ha-class_elite dd_ha-class_elite | ||
|D1_form = diamond | |D1_form = diamond | ||
|D1_xp = 240 | |D1_xp = 240 | ||
| − | |E_label= | + | |E_label= {{color|green|Aerial Combat Only}}<br>任務部隊IV群 |
|E1_node_info = CV_wo-class_flagship_2 CVL_nu-class_elite CVL_nu-class_elite CL_tsu-class_elite dd_ha-class_elite dd_ha-class_elite | |E1_node_info = CV_wo-class_flagship_2 CVL_nu-class_elite CVL_nu-class_elite CL_tsu-class_elite dd_ha-class_elite dd_ha-class_elite | ||
|E1_form = diamond | |E1_form = diamond | ||
|E1_xp = 250 | |E1_xp = 250 | ||
| − | |F_label = | + | |F_label = {{color|blue|Active Branching}} |
|F1_node_info = | |F1_node_info = | ||
| Line 967: | Line 936: | ||
|-|Medium= | |-|Medium= | ||
{{#invoke:EnemyEncounters|encounterTemplate | {{#invoke:EnemyEncounters|encounterTemplate | ||
| − | |A_label = | + | |A_label = {{color|blue|Active Branching}} |
|A1_node_info = | |A1_node_info = | ||
| Line 983: | Line 952: | ||
|C2_xp = | |C2_xp = | ||
| − | |D_label= | + | |D_label= {{color|green|Aerial Combat Only}}<br>任務部隊III群 |
|D1_node_info = cv_wo-class_flagship_2 cv_wo-class_elite cvl_nu-class_elite cl_tsu-class dd_ha-class_elite dd_ha-class_elite | |D1_node_info = cv_wo-class_flagship_2 cv_wo-class_elite cvl_nu-class_elite cl_tsu-class dd_ha-class_elite dd_ha-class_elite | ||
|D1_form = diamond | |D1_form = diamond | ||
|D1_xp = 230 | |D1_xp = 230 | ||
| − | |E_label= | + | |E_label= {{color|green|Aerial Combat Only}}<br>任務部隊IV群 |
|E1_node_info = cv_wo-class_flagship_2 cvl_nu-class_elite cvl_nu-class_elite cl_tsu-class dd_ha-class_elite dd_ha-class_elite | |E1_node_info = cv_wo-class_flagship_2 cvl_nu-class_elite cvl_nu-class_elite cl_tsu-class dd_ha-class_elite dd_ha-class_elite | ||
|E1_form = diamond | |E1_form = diamond | ||
|E1_xp = 220 | |E1_xp = 220 | ||
| − | |F_label = | + | |F_label = {{color|blue|Active Branching}} |
|F1_node_info = | |F1_node_info = | ||
| Line 1,036: | Line 1,005: | ||
|-|Easy= | |-|Easy= | ||
{{#invoke:EnemyEncounters|encounterTemplate | {{#invoke:EnemyEncounters|encounterTemplate | ||
| − | |A_label = | + | |A_label = {{color|blue|Active Branching}} |
|A1_node_info = | |A1_node_info = | ||
| Line 1,052: | Line 1,021: | ||
|C2_xp = | |C2_xp = | ||
| − | |D_label= | + | |D_label= {{color|green|Aerial Combat Only}}<br>任務部隊III群 |
|D1_node_info = | |D1_node_info = | ||
|D1_form = | |D1_form = | ||
|D1_xp = | |D1_xp = | ||
| − | |E_label= | + | |E_label= {{color|green|Aerial Combat Only}}<br>任務部隊IV群 |
|E1_node_info = | |E1_node_info = | ||
|E1_form = | |E1_form = | ||
|E1_xp = | |E1_xp = | ||
| − | |F_label = | + | |F_label = {{color|blue|Active Branching}} |
|F1_node_info = | |F1_node_info = | ||
| Line 1,102: | Line 1,071: | ||
</tabber> | </tabber> | ||
|dropsA = | |dropsA = | ||
| − | |dropsB = '''[[ | + | |dropsB = '''[[Destroyer]]s''': [[Murasame]] |
| − | |dropsC = '''[[ | + | |dropsC = '''[[Destroyer]]s''': [[Fubuki]], [[Shirayuki]], [[Ayanami]], [[Asashio]], [[Arashio]], [[Kuroshio]], [[Murasame]], [[Yuudachi]] |
|dropsD = | |dropsD = | ||
| − | |dropsE = '''[[ | + | |dropsE = '''[[Destroyer]]s''': [[Kagerou]] |
| − | |dropsH = '''[[ | + | |dropsH = '''[[Destroyer]]s''': [[Fubuki]], [[Shirayuki]], [[Ayanami]], [[Akatsuki]], [[Akigumo]], [[Arashio]], [[Maikaze]], [[Ooshio]], [[Kagerou]] |
| − | <br | + | <br> |
| − | '''[[ | + | '''[[Light Cruiser]]s''': [[Nagara]] |
| − | <br | + | <br> |
| − | '''[[ | + | '''[[Heavy Cruiser]]s''': [[Furutaka]], [[Kumano]], [[Tone]], [[Chikuma]], [[Suzuya]], [[Maya]] |
| − | <br | + | <br> |
| − | '''[[ | + | '''[[Battleship]]s''': [[Hiei]], [[Kirishima]] |
| − | <br | + | <br> |
| − | '''[[ | + | '''[[Aircraft Carrier]]s''': [[Junyou]] |
| − | <br | + | <br> |
| − | |dropsI = '''[[ | + | |dropsI = '''[[Destroyer]]s''': [[Akatsuki]], [[Arashio]], [[Kagerou]], [[Murasame]] |
| − | <br | + | <br> |
| − | '''[[ | + | '''[[Heavy Cruiser]]s''': [[Atago]], [[Furutaka]], [[Kumano]], [[Takao]] |
| − | <br | + | <br> |
| − | '''[[ | + | '''[[Battleship]]s''':[[Hiei]] |
| − | |dropsX = '''[[ | + | |dropsX = '''[[Destroyer]]s''': [[Maikaze]], [[Arashio]], [[Yuudachi]], [[Ooshio]], [[Ayanami]], [[Isokaze|'''{{color|red|Isokaze}}''']] |
| − | <br | + | <br> |
| − | '''[[ | + | '''[[Heavy Cruiser]]s''': [[Kumano]] |
| − | <br | + | <br> |
| − | '''[[ | + | '''[[Battleship]]s''': [[Kirishima]] |
| − | <br | + | <br> |
| − | '''[[ | + | '''[[Light Carrier]]s''': [[Zuihou|'''{{color|red|Zuihou}}''']] |
| − | <br | + | <br> |
| − | '''[[ | + | '''[[Submarine]]s''': [[Maruyu|'''{{color|red|Maruyu}}''']] |
| − | |dropsZ = '''[[ | + | |dropsZ = '''[[Destroyer]]s''': [[Isokaze|'''{{color|red|Amatsukaze}}''']], [[Maikaze]], [[Akigumo]], [[Yuugumo]], [[Amatsukaze]], [[Ayanami]], [[Isokaze|'''{{color|red|Isokaze}}''']], [[Urakaze]], [[Tanikaze]], [[Hamakaze]], [[Kagerou]] |
| − | <br | + | <br> |
| − | '''[[ | + | '''[[Light Cruiser]]s''': [[Isuzu]], [[Kitakami]], [[Kuma]], [[Natori]], [[Ooi]], [[Sendai]] |
| − | <br | + | <br> |
| − | '''[[ | + | '''[[Heavy Cruiser]]s''': [[Myoukou]], [[Atago]], [[Takao]], [[Tone]], [[Kumano]], [[Suzuya]], [[Chikuma]], [[Maya]], [[Mogami]], [[Nachi]] [[Furutaka]] |
| − | <br | + | <br> |
| − | '''[[ | + | '''[[Battleship]]s''': [[Hiei]], [[Haruna]], [[Kirishima]] |
| − | <br | + | <br> |
| − | '''[[ | + | '''[[Aircraft Carrier]]s''': [[Hiyou]], [[Shoukaku|'''{{color|red|Shoukaku}}''']], [[Zuikaku|'''{{color|red|Zuikaku}}''']], [[Ryuujou]], [[Junyou]], [[Shouhou]], [[Zuihou|'''{{color|red|Zuihou}}''']] |
| − | <br | + | <br> |
| − | '''[[ | + | '''[[Seaplane Tenders]]s''': [[Mizuho|'''{{color|red|Mizuho}}''']] |
| − | <br | + | <br> |
| − | '''[[ | + | '''[[Submarine]]s''': [[Maruyu|'''{{color|red|Maruyu}}''']] |
}} | }} | ||
| Line 1,157: | Line 1,126: | ||
*Boss: [[Airfield Princess]] | *Boss: [[Airfield Princess]] | ||
*7 Kills Required (Gauge roughly 3500 HP) | *7 Kills Required (Gauge roughly 3500 HP) | ||
| − | *'' | + | *''Ship tag {{color|yellow|'''YELLOW'''}} |
| − | + | {{{!}}class="wikitable" style="text-align:center" | |
| − | + | !colspan=6{{!}}Rewards | |
| − | + | {{!-}} | |
| − | + | !甲<br>Hard | |
| + | {{!}}{{QuestRewardShip|Hayasui|small=true}} | ||
| + | {{!}}{{QuestRewardEquip|Underway Replenishment|qty=3}} | ||
| + | {{!}}{{QuestRewardEquip|Combat Ration|qty=2}} | ||
| + | {{!}}{{QuestRewardItem|Improvement Material|qty=5}} | ||
| + | {{!}}{{QuestRewardItem|Medal}} | ||
| + | {{!-}} | ||
| + | !乙<br>Medium | ||
| + | {{!}}{{QuestRewardShip|Hayasui|small=true}} | ||
| + | {{!}}{{QuestRewardEquip|Underway Replenishment|qty=2}} | ||
| + | {{!}}{{QuestRewardEquip|Combat Ration}} | ||
| + | {{!}}{{QuestRewardItem|Improvement Material|qty=3}} | ||
| + | {{!}} | ||
| + | {{!-}} | ||
| + | !丙<br>Easy | ||
| + | {{!}}{{QuestRewardShip|Hayasui|small=true}} | ||
| + | {{!}}{{QuestRewardEquip|Underway Replenishment}} | ||
| + | {{!}}{{QuestRewardEquip|Combat Ration}} | ||
| + | {{!}} | ||
| + | {{!}} | ||
| + | {{!}}} | ||
|branching = | |branching = | ||
{{#invoke:MapBranching|branchingTemplate | {{#invoke:MapBranching|branchingTemplate | ||
| − | |start_to_A = If not fixed for B | + | |start_to_A = If not fixed for B |
| − | |start_to_B = Guaranteed if any of the following combination is in fleet:<br>[[Hiei]] and [[Kirishima]]; <br>[[Ayanami]] and [[Kirishima]]; <br> [[Yuudachi]] and [[Akatsuki]]; <br> or [[Yuudachi]] and [[Harusame]]<br>Guaranteed if BB<=3 and BB+CV<=4 and any of the following combination is in fleet:<br>[[Fubuki]] and [[Hatsuyuki]]; <br>[[Hiei]] and [[Yuudachi]]; <br>[[Choukai]] and [[Furutaka]] and [[Kako]]; <br>[[Furutaka]] and [[Fubuki]]; <br> or [[Haruna]] and [[Kongou]] | + | |start_to_B = Guaranteed if any of the following combination is in fleet:<br>[[Hiei]] and [[Kirishima]];<br>[[Ayanami]] and [[Kirishima]];<br>[[Yuudachi]] and [[Akatsuki]];<br>or [[Yuudachi]] and [[Harusame]]<br>Guaranteed if BB<=3 and BB+CV<=4 and any of the following combination is in fleet:<br>[[Fubuki]] and [[Hatsuyuki]];<br>[[Hiei]] and [[Yuudachi]];<br>[[Choukai]] and [[Furutaka]] and [[Kako]];<br>[[Furutaka]] and [[Fubuki]];<br>or [[Haruna]] and [[Kongou]] |
|D_to_E = Active Branching | |D_to_E = Active Branching | ||
|D_to_F = Active Branching | |D_to_F = Active Branching | ||
| − | |F_to_H = BB+CV<=2 and DD>=2, ''or''<br>Fleet includes 2DD plus either [[Ryuujou]] or a CL | + | |F_to_H = BB+CV<=2 and DD>=2, ''or''<br>Fleet includes 2DD plus either [[Ryuujou]] or a CL<br>Weighted Random towards I |
| − | |F_to_I = BB+CV>3,<br> or BB+CV=3 but Ryuujou or CL not in fleet,<br> or DD<2 | + | |F_to_I = BB+CV>3,<br>or BB+CV=3 but Ryuujou or CL not in fleet,<br>or DD<2<br>Weighted Random towards I |
|G_to_K = BB+CV>=5(?) or SS in fleet(?) or Failing LoS Check | |G_to_K = BB+CV>=5(?) or SS in fleet(?) or Failing LoS Check | ||
|G_to_Z = LoS Check | |G_to_Z = LoS Check | ||
| Line 1,179: | Line 1,168: | ||
|I_to_J = DD<=1(?) or BB+CV>=4(?) | |I_to_J = DD<=1(?) or BB+CV>=4(?) | ||
|J_to_H = LoS Check | |J_to_H = LoS Check | ||
| − | |J_to_L = BB+CV>=5,<br> or Failing LoS Check | + | |J_to_L = BB+CV>=5,<br>or Failing LoS Check |
}} | }} | ||
|tips = | |tips = | ||
| − | *Suggested | + | *Node E and G are night battles |
| + | *Nodes E, F, G, and H have different compositions depending on whether the gauge puts the boss on final form, as well as whether you have cleared the map: | ||
| + | :*''If the boss is on final form'': These nodes also take on a final form (marked in the tables); nodes E and G have weaker enemies while nodes F and H have stronger enemies, making it more desirable to attempt the last kill through E and G. | ||
| + | :*''If the map is cleared'': Nodes E and F take on the easier makeup (final form for E, non-final form for F), where as nodes G and H can be either non-final or final form. | ||
| + | ::*On Easy, there is 1 in 3 chance of seeing a high AS-required fleet at H (the H3 Pattern), which is not feasible to obtain via just 1 carriers, but otherwise north route would be much easier due to no enemy battleships until boss. | ||
| + | ::*On Medium and higher, going through F and H will require similar support setup if you were using them, for node F still has the Ta-class Flagship in double line, and node H still has Wo-class Flagship with the new planes. For the night battle route, node G is the variable, but in any case you're counting on evasion no matter which pattern you get. | ||
| + | *Regarding boss, [[Airfield Princess]]: | ||
| + | :*She is an installation, so [[Type 3 Shell]] and [[WG42 (Wurfgerät 42)]] are desired for this map. | ||
| + | ::If using 3 or more BB+CA(V), consider equipping a BB with AP shell (instead of [[Type 3 Shell]]) as flagship to eliminate escorts during daytime. This is especially important on hard due to the toughness of Ru-claas Flagship Kai. | ||
| + | :*Her fighter power doubles for the final kill, and her planes are much more lethal. | ||
| + | :*(Easy Only) During final attempts, because Ru-class Elite does not have recon planes, there is no need to try to get AS for the node. You may simply add another ship, such as CLT (to clear out escort ships) or another ship capable of equipping Type 3 Shells. | ||
| + | :*Boss Support Expedition is highly advised. | ||
| + | *Suggested Compositions: | ||
:*2BB 2DD 2CVL (B -> D -> F -> H -> Z) | :*2BB 2DD 2CVL (B -> D -> F -> H -> Z) | ||
::*Pro: Less problem at node H if AS is obtained. | ::*Pro: Less problem at node H if AS is obtained. | ||
| Line 1,189: | Line 1,190: | ||
::*Pro: Has more punch than the above formation to finish the boss. | ::*Pro: Has more punch than the above formation to finish the boss. | ||
::*Con: Either risk taking more damage at H or go through night battle nodes. | ::*Con: Either risk taking more damage at H or go through night battle nodes. | ||
| − | ::For comparison, [[Chitose | + | ::For comparison, [[Chitose Kou Kai Ni]] with Reppuu Kai (chevron), Reppuu (chevron), and Shiden K2 (chevron) [127 fighter power before modifier] can gain AS at node H against Pattern 1, but can only get air parity against Pattern 2. |
:*3BB 2CA(V) 1CV (B -> D -> E -> G -> Z) | :*3BB 2CA(V) 1CV (B -> D -> E -> G -> Z) | ||
::*Pro: Night battle route good for attempts on final form due to F and H nodes reported to be harder. | ::*Pro: Night battle route good for attempts on final form due to F and H nodes reported to be harder. | ||
| Line 1,196: | Line 1,197: | ||
::*Pro: This allows better air power at H to possibly gain AS (if Ryuujou is used). | ::*Pro: This allows better air power at H to possibly gain AS (if Ryuujou is used). | ||
::*Con: Admirals may already have RJ locked to other maps. | ::*Con: Admirals may already have RJ locked to other maps. | ||
| − | :*2BB 1CV 2DD | + | :*2BB 1CV 2DD 1CL (B -> D -> F -> H -> Z) |
| − | ::*Pro: Alternative of the formation above, but sacrifices AS for utility of a CL. Best used if a high-capacity CV is used (such as Kaga). Bonus if CL brought is [[ | + | ::*Pro: Alternative of the formation above, but sacrifices AS for utility of a CL. Best used if a high-capacity CV is used (such as Kaga). Bonus if CL brought is [[Abukuma Kai Ni]] because of her opening torpedo. |
::*Con: Depending on difficulty chosen, H node may still be air parity. | ::*Con: Depending on difficulty chosen, H node may still be air parity. | ||
| − | |||
| − | |||
| − | |||
| − | |||
| − | |||
| − | |||
<tabber>Hard= | <tabber>Hard= | ||
| Line 1,223: | Line 1,218: | ||
|C1_xp = 270 | |C1_xp = 270 | ||
| | | | ||
| − | |D_label = | + | |D_label = {{color|blue|Active Branching}} |
|D1_node_info = | |D1_node_info = | ||
| | | | ||
| − | |E_label = ソロモン方面守備艦隊前衛<br /> | + | |E_label = ソロモン方面守備艦隊前衛<br />{{color|blue|Night Battle}} |
|E1_node_info = cl_he-class_flagship ca_ri-class_flagship ca_ri-class_flagship dd_ro-class_late_model_elite dd_i-class_late_model_elite dd_i-class_late_model_elite | |E1_node_info = cl_he-class_flagship ca_ri-class_flagship ca_ri-class_flagship dd_ro-class_late_model_elite dd_i-class_late_model_elite dd_i-class_late_model_elite | ||
|E1_form = double_line | |E1_form = double_line | ||
| Line 1,245: | Line 1,240: | ||
|F3_xp = 250 | |F3_xp = 250 | ||
| | | | ||
| − | |G_label = ソロモン方面守備艦隊後衛<br /> | + | |G_label = ソロモン方面守備艦隊後衛<br />{{color|blue|Night Battle}} |
|G1_node_info = bb_ta-class_flagship bb_ta-class_flagship ca_ri-class_flagship cl_ho-class_flagship dd_i-class_late_model_elite dd_i-class_late_model_elite | |G1_node_info = bb_ta-class_flagship bb_ta-class_flagship ca_ri-class_flagship cl_ho-class_flagship dd_i-class_late_model_elite dd_i-class_late_model_elite | ||
|G1_form = line_ahead | |G1_form = line_ahead | ||
| Line 1,297: | Line 1,292: | ||
|C1_xp = 270 | |C1_xp = 270 | ||
| | | | ||
| − | |D_label = | + | |D_label = {{color|blue|Active Branching}} |
|D1_node_info = | |D1_node_info = | ||
| | | | ||
| − | |E_label = ソロモン方面守備艦隊前衛<br /> | + | |E_label = ソロモン方面守備艦隊前衛<br />{{color|blue|Night Battle}} |
|E1_node_info = cl_he-class_flagship ca_ri-class_elite ca_ri-class_elite clt_chi-class_elite dd_i-class_late_model dd_i-class_late_model | |E1_node_info = cl_he-class_flagship ca_ri-class_elite ca_ri-class_elite clt_chi-class_elite dd_i-class_late_model dd_i-class_late_model | ||
|E1_form = double_line | |E1_form = double_line | ||
| Line 1,319: | Line 1,314: | ||
|F3_xp = 240 | |F3_xp = 240 | ||
| | | | ||
| − | |G_label = ソロモン方面守備艦隊後衛<br /> | + | |G_label = ソロモン方面守備艦隊後衛<br />{{color|blue|Night Battle}} |
|G1_node_info = bb_ta-class_flagship bb_ta-class ca_ri-class_elite cl_ho-class_flagship dd_i-class_late_model dd_i-class_late_model | |G1_node_info = bb_ta-class_flagship bb_ta-class ca_ri-class_elite cl_ho-class_flagship dd_i-class_late_model dd_i-class_late_model | ||
|G1_form = line_ahead | |G1_form = line_ahead | ||
| Line 1,371: | Line 1,366: | ||
|C1_xp = | |C1_xp = | ||
| | | | ||
| − | |D_label = | + | |D_label = {{color|blue|Active Branching}} |
|D1_node_info = | |D1_node_info = | ||
| | | | ||
| − | |E_label = ソロモン方面守備艦隊前衛<br /> | + | |E_label = ソロモン方面守備艦隊前衛<br />{{color|blue|Night Battle}} |
|E1_Node_info= cl_he-class_flagship ca_ri-class_elite ca_ri-class clt_chi-class dd_i-class dd_i-class | |E1_Node_info= cl_he-class_flagship ca_ri-class_elite ca_ri-class clt_chi-class dd_i-class dd_i-class | ||
|E1_form = double_line | |E1_form = double_line | ||
| Line 1,393: | Line 1,388: | ||
|F3_xp = | |F3_xp = | ||
| | | | ||
| − | |G_label = ソロモン方面守備艦隊後衛<br /> | + | |G_label = ソロモン方面守備艦隊後衛<br />{{color|blue|Night Battle}} |
|G1_Node_info= ca_ri-class_flagship bb_ta-class_elite cl_ho-class_elite cl_ho-class_elite dd_i-class dd_i-class | |G1_Node_info= ca_ri-class_flagship bb_ta-class_elite cl_ho-class_elite cl_ho-class_elite dd_i-class dd_i-class | ||
|G1_form = line_ahead | |G1_form = line_ahead | ||
| Line 1,415: | Line 1,410: | ||
|H4_xp = | |H4_xp = | ||
| | | | ||
| − | | | + | |I_label = {{color|purple|Maelstrom}} |
| − | | | + | |I1_node_info = |
| | | | ||
|J_label = 深海任務部隊支援群 | |J_label = 深海任務部隊支援群 | ||
| Line 1,446: | Line 1,441: | ||
</tabber> | </tabber> | ||
|dropsA = | |dropsA = | ||
| − | |dropsB ='''[[ | + | |dropsB ='''[[Destroyer]]s''': [[Shiranui]], [[Maikaze]] |
| − | |dropsC ='''[[ | + | |dropsC ='''[[Destroyer]]s''': [[Hayashimo|'''{{color|red|Hayashimo}}''']], [[Yukikaze|'''{{color|red|Yukikaze}}''']], [[Akigumo]], [[Yuugumo]], [[Maikaze]], [[Michishio]], [[Kuroshio]], [[Arare]], [[Fubuki]] |
| − | <br | + | <br> |
| − | '''[[ | + | '''[[Light Cruiser]]s''': [[Kuma]], [[Yahagi|'''{{color|red|Yahagi}}''']] |
| − | <br | + | <br> |
| − | '''[[ | + | '''[[Heavy Cruiser]]s''': [[Tone]], [[Furutaka]], [[Chikuma]] |
| − | <br | + | <br> |
| − | '''[[ | + | '''[[Battleship]]s''': [[Kongou]], [[Hiei]], [[Haruna]], [[Kirishima]] |
| − | <br | + | <br> |
| − | '''[[Auxiliary Ships|Auxiliary Ships]]''':[[Akashi|''' | + | '''[[Auxiliary Ships|Auxiliary Ships]]''':[[Akashi|'''{{color|red|Akashi}}''']] |
| − | <br | + | <br> |
| − | '''[[ | + | '''[[Submarine]]s''': [[Maruyu|'''{{color|red|Maruyu}}''']] |
|dropsD = | |dropsD = | ||
| − | |dropsE = '''[[ | + | |dropsE = '''[[Destroyer]]s''': [[Murakumo]], '''[[Nowaki|'''{{color|red|Nowaki}}''']]''' |
| − | |dropsF = '''[[ | + | |dropsF = '''[[Destroyer]]s''': [[Hatsuharu]], [[Kagerou]], [[Suzukaze]], [[Kuroshio]] |
| − | |dropsG = '''[[ | + | |dropsG = '''[[Destroyer]]s''': [[Ooshio]], [[Kasumi]], [[Murasame]], [[Akigumo]], [[Yukikaze|'''{{color|red|Yukikaze}}''']] |
| − | |dropsH = '''[[ | + | |dropsH = '''[[Destroyer]]s''': [[Akatsuki]], [[Ayanami]], [[Fubuki]], [[Kasumi]], [[Kagerou]], [[Samidare]], [[Shiratsuyu]], [[Yuudachi]], [[Shigure]], [[Kasumi]], [[Asashio]], [[Maikaze]], [[Wakaba]], [[Yuugumo]], [[Hatsuharu]], [[Hayashimo|'''{{color|red|Hayashimo}}''']], [[Yukikaze|'''{{color|red|Yukikaze}}''']] |
| − | <br | + | <br> |
| − | '''[[ | + | '''[[Light Cruiser]]s''': [[Nagara]] |
| − | <br | + | <br> |
| − | '''[[ | + | '''[[Heavy Cruiser]]s''': [[Tone]], [[Chikuma]], [[Choukai]] |
| − | <br | + | <br> |
| − | '''[[ | + | '''[[Battleship]]s''': [[Haruna]], [[Kirishima]], [[Kongou]], [[Hiei]] |
| − | <br | + | <br> |
| − | '''[[ | + | '''[[Aircraft Carrier]]s''': [[Junyou]] |
| − | <br | + | <br> |
| − | '''[[Auxiliary Ships|Auxiliary Ships]]''':[[Akashi|''' | + | '''[[Auxiliary Ships|Auxiliary Ships]]''':[[Akashi|'''{{color|red|Akashi}}''']] |
| − | |dropsI = [[Nowaki|''' | + | |dropsI = [[Nowaki|'''{{color|red|Nowaki}}''']], [[Kinugasa]], [[Kongou]], [[Hiei]], [[Haruna]], [[Kirishima]] |
| − | |dropsZ = '''[[ | + | |dropsZ = '''[[Destroyer]]s''': [[Asashio]], [[Maikaze]], [[Yuugumo]], [[Makigumo]], [[Akigumo]], [[Hatsuharu]], [[Kasumi]], [[Hatsushimo]], [[Umikaze|'''{{color|red|Umikaze}}''']] , [[Yukikaze|'''{{color|red|Yukikaze}}''']], [[Asashimo|'''{{color|red|Asashimo}}''']], [[Kiyoshimo|'''{{color|red|Kiyoshimo}}''']], [[Hayashimo|'''{{color|red|Hayashimo}}''']], [[Takanami|'''{{color|red|Takanami}}''']], [[Nowaki|'''{{color|red|Nowaki}}''']], [[Amatsukaze|'''{{color|red|Amatsukaze}}''']], [[Murasame]] |
| − | <br | + | <br> |
| − | '''[[ | + | '''[[Light Cruiser]]s''': [[Kiso]], [[Kitakami]], [[Ooi]], [[Kuma]], [[Isuzu]], [[Nagara]], [[Sendai]], [[Yahagi|'''{{color|red|Yahagi}}''']] |
| − | <br | + | <br> |
| − | '''[[ | + | '''[[Heavy Cruiser]]s''': [[Aoba]], [[Atago]], [[Kako]], [[Kinugasa]], [[Nachi]], [[Tone]], [[Chikuma]], [[Maya]], [[Mogami]] |
| − | <br | + | <br> |
| − | '''[[ | + | '''[[Battleship]]s''': [[Nagato]], [[Mutsu]], [[Haruna]], [[Kirishima]], [[Kongou]], [[Hiei]] |
| − | <br | + | <br> |
| − | '''[[ | + | '''[[Light Carrier]]s''': [[Shouhou]], [[Hiyou]], [[Junyou]], [[Ryuujou]] |
| − | <br | + | <br> |
| − | '''[[ | + | '''[[Standard Carrier]]s''': [[Zuikaku|'''{{color|red|Zuikaku}}''']] |
| − | <br | + | <br> |
| − | '''[[Auxiliary Ships|Auxiliary Ships]]''': [[Akashi|''' | + | '''[[Auxiliary Ships|Auxiliary Ships]]''': [[Akashi|'''{{color|red|Akashi}}''']], [[Chitose]] |
}} | }} | ||
| Line 1,498: | Line 1,493: | ||
*Boss: [[Battleship Princess]] | *Boss: [[Battleship Princess]] | ||
* 6 Kills required on all difficulties | * 6 Kills required on all difficulties | ||
| − | *'' | + | *''Ship tag {{color|orange|'''ORANGE'''}} |
| + | |||
| + | {{{!}}class="wikitable" style="text-align:center" | ||
| + | !colspan=6{{!}}Rewards | ||
| + | {{!-}} | ||
| + | !甲<br>Hard | ||
| + | {{!}}{{QuestRewardShip|Libeccio|small=true}} | ||
| + | {{!}}{{QuestRewardEquip|Combat Ration|qty=2}} | ||
| + | {{!}}{{QuestRewardEquip|Underway Replenishment|qty=2}} | ||
| + | {{!}}{{QuestRewardItem|Improvement Material|qty=7}} | ||
| + | {{!}}{{QuestRewardItem|Medal}} | ||
| + | {{!-}} | ||
| + | !乙<br>Medium | ||
| + | {{!}}{{QuestRewardShip|Libeccio|small=true}} | ||
| + | {{!}}{{QuestRewardEquip|Combat Ration|qty=2}} | ||
| + | {{!}}{{QuestRewardEquip|Underway Replenishment}} | ||
| + | {{!}} | ||
| + | {{!}} | ||
| + | {{!-}} | ||
| + | !丙<br>Easy | ||
| + | {{!}}{{QuestRewardShip|Libeccio|small=true}} | ||
| + | {{!}} | ||
| + | {{!}} | ||
| + | {{!}} | ||
| + | {{!}} | ||
| + | {{!}}} | ||
| − | |||
| − | |||
| − | |||
| − | |||
|branching = | |branching = | ||
{{#invoke:MapBranching|branchingTemplate | {{#invoke:MapBranching|branchingTemplate | ||
|Start_to_A = Any other composition | |Start_to_A = Any other composition | ||
| − | |Start_to_B = [[Akitsushima]] + 1 DD <br | + | |Start_to_B = [[Akitsushima]] + 1 DD<br>''or'' CAV + 2 DD<br>''or'' SS in fleet |
|B_to_C = Active Branching | |B_to_C = Active Branching | ||
|B_to_E = Active Branching | |B_to_E = Active Branching | ||
| Line 1,524: | Line 1,540: | ||
|A1_xp = 150 | |A1_xp = 150 | ||
| | | | ||
| − | |B_label = 能動分岐<br> | + | |B_label = 能動分岐<br>{{color|blue|Active Branching}} |
|B1_node_info = (no combat) | |B1_node_info = (no combat) | ||
| | | | ||
| Line 1,532: | Line 1,548: | ||
|C1_xp = 250 | |C1_xp = 250 | ||
| | | | ||
| − | |D_label = 航空偵察<br> | + | |D_label = 航空偵察<br>{{color|green|Air Reconnaissance}} |
|D1_node_info = (No combat) | |D1_node_info = (No combat) | ||
| | | | ||
| Line 1,549: | Line 1,565: | ||
|F1_xp = | |F1_xp = | ||
| | | | ||
| − | |G_label = | + | |G_label = 東洋方面反攻拠点泊地 |
| − | |G1_Node_info= | + | |G1_Node_info = harbor_princess bb_ru-class_flagship bb_ru-class_flagship transport_wa-class_flagship dd_ro-class_late_model_elite dd_ro-class_late_model_elite |
| − | |G1_form = | + | |G1_form = line_ahead |
| + | |G1_enemy_air_power = 80 | ||
|G1_xp = | |G1_xp = | ||
| + | |G2_Node_info=harbor_princess bb_ru-class_flagship transport_wa-class_flagship transport_wa-class_flagship dd_ro-class_late_model_elite dd_ro-class_late_model_elite | ||
| + | |G2_form = line_ahead | ||
| + | |G2_enemy_air_power = 80 | ||
| + | |G2_xp = | ||
| | | | ||
|H_label = | |H_label = | ||
| Line 1,559: | Line 1,580: | ||
|H1_xp = | |H1_xp = | ||
| | | | ||
| − | |I_label = 航空偵察<br> | + | |I_label = 航空偵察<br>{{color|green|Air Reconnaissance}} |
|I1_node_info = (No combat) | |I1_node_info = (No combat) | ||
| | | | ||
| Line 1,581: | Line 1,602: | ||
| | | | ||
|M_label = No Combat | |M_label = No Combat | ||
| − | |M1_node_info = | + | |M1_node_info = {{color|blue|"No enemy sighted. Operation was a failure." (battle avoided)}} |
| | | | ||
|Z_label = 東洋方面増援艦隊旗艦 | |Z_label = 東洋方面増援艦隊旗艦 | ||
| Line 1,612: | Line 1,633: | ||
|C1_xp = | |C1_xp = | ||
| | | | ||
| − | |D_label = | + | |D_label = 航空偵察<br>{{color|green|Air Reconnaissance}} |
| − | | | + | |D1_node_info = (No combat) |
| − | | | ||
| − | | | ||
| | | | ||
|E_label = | |E_label = | ||
| Line 1,683: | Line 1,702: | ||
|A1_xp = | |A1_xp = | ||
| | | | ||
| − | |B_label = | + | |B_label = 能動分岐<br>{{color|blue|Active Branching}} |
| − | |B1_node_info = | + | |B1_node_info = (no combat) |
|B1_form = | |B1_form = | ||
|B1_xp = | |B1_xp = | ||
| Line 1,693: | Line 1,712: | ||
|C1_xp = | |C1_xp = | ||
| | | | ||
| − | |D_label = | + | |D_label = 航空偵察<br>{{color|green|Air Reconnaissance}} |
| − | | | + | |D1_node_info = (No combat) |
| − | | | ||
| − | | | ||
| | | | ||
|E_label = | |E_label = | ||
| Line 1,704: | Line 1,721: | ||
| | | | ||
|F_label = | |F_label = | ||
| − | |F1_Node_info= | + | |F1_Node_info= armored_carrier_princess ca_ri-class_elite ca_ri-class_elite dd_ha-class_late_model dd_i-class dd_i-class |
|F1_form = | |F1_form = | ||
|F1_xp = | |F1_xp = | ||
| Line 1,729: | Line 1,746: | ||
| | | | ||
|K_label = | |K_label = | ||
| − | |K1_Node_info= | + | |K1_Node_info= cl_he-class_flagship transport_wa-class_elite transport_wa-class_elite dd_i-class_late_model dd_i-class dd_i-class |
| − | |K1_form = | + | |K1_form = diamond |
|K1_xp = | |K1_xp = | ||
| | | | ||
| Line 1,744: | Line 1,761: | ||
| | | | ||
|Z_label = | |Z_label = | ||
| − | | | + | |Z2_Node_info = battleship_princess cvl_nu-class ca_ri-class_elite ca_ri-class_elite dd_ro-class_late_model dd_ro-class_late_model |
| − | | | + | |Z2_form = line_ahead |
|Z1_xp = | |Z1_xp = | ||
| | | | ||
| − | |final_form = | + | |final_form = Z2 |
|boss_node = Z | |boss_node = Z | ||
}} | }} | ||
</tabber> | </tabber> | ||
| − | |dropsA ='''[[ | + | |dropsA ='''[[Destroyer]]s''': [[Shiranui]] |
|dropsB = | |dropsB = | ||
| − | |dropsC = '''[[ | + | |dropsC = '''[[Destroyer]]s''': [[Kasumi]], [[Michishio]], [[Wakaba]] |
|dropsD = | |dropsD = | ||
| − | |dropsE = '''[[ | + | |dropsE = '''[[Destroyer]]s''': [[Arare]], [[Kasumi]], [[Michishio]], [[Shiranui]] |
| − | |dropsF = '''[[ | + | |dropsF = '''[[Destroyer]]s''': [[Akatsuki]], [[Hibiki]], [[Ikazuchi]], [[Inazuma]], [[Hatsuharu]], [[Nenohi]], [[Wakaba]], [[Hatsushimo]], [[Michishio]], [[Kasumi]], [[Arare]], [[Shiranui]] |
| − | <br | + | <br> |
| − | '''[[ | + | '''[[Heavy Cruiser]]s''': [[Myoukou]], [[Nachi]], [[Ashigara]], [[Haguro]] |
| − | <br | + | <br> |
| − | '''[[ | + | '''[[Battleship]]s''': [[Yamashiro]] |
| − | <br | + | <br> |
| − | '''[[ | + | '''[[Light Carrier]]s''': [[Houshou]] |
| − | |dropsG = '''[[ | + | |dropsG = '''[[Destroyer]]s''': [[Akatsuki]], [[Ikazuchi]], [[Inazuma]], [[Hatsuharu]], [[Wakaba]], [[Hatsushimo]], [[Kasumi]], [[Shiranui]]<br> |
| − | '''[[ | + | '''[[Heavy Cruiser]]s''': [[Myoukou]], [[Nachi]], [[Ashigara]], [[Haguro]]<br> |
| − | '''[[ | + | '''[[Battleship]]s''': [[Hyuuga]], [[Yamashiro]]<br> |
| − | '''[[ | + | '''[[Submarine]]s''': [[U-511|'''{{color|red|U-511}}''']], [[I-19]], [[I-8]], [[I-168]], [[I-58]], [[Maruyu|'''{{color|red|Maruyu}}''']]<br> |
| − | '''[[ | + | '''[[Light Carrier]]s''': [[Houshou]]<br> |
| − | '''[[Auxiliary Ships]]''': [[Akitsu Maru|''' | + | '''[[Auxiliary Ships]]''': [[Akitsu Maru|'''{{color|red|Akitsu Maru}}''']], [[Taigei|'''{{color|red|Taigei}}''']] |
| − | |dropsK = '''[[ | + | |dropsK = '''[[Destroyer]]s''': [[Hibiki]], [[Akatsuki]], [[Ikazuchi]], [[Inazuma]], [[Hatsuharu]], [[Nenohi]], [[Hatsushimo]], [[Wakaba]], [[Michishio]], [[Kasumi]], [[Arare]], [[Shiranui]] |
| − | <br | + | <br> |
| − | '''[[ | + | '''[[Heavy Cruiser]]s''': [[Myoukou]], [[Nachi]], [[Ashigara]], [[Haguro]] |
| − | <br | + | <br> |
| − | '''[[ | + | '''[[Battleship]]s''': [[Fusou]], [[Hyuuga]], [[Yamashiro]], [[Ise]] |
| − | <br | + | <br> |
| − | '''[[ | + | '''[[Submarine]]s''': [[I-19]], [[I-58]], [[I-8]], [[I-168]] |
| − | <br | + | <br> |
| − | '''[[ | + | '''[[Light Carrier]]s''': [[Houshou]] |
| − | |dropsZ = '''[[ | + | |dropsZ = '''[[Destroyer]]s''': [[Shimakaze]], [[Hibiki]] |
| − | <br | + | <br> |
| − | '''[[ | + | '''[[Light Cruiser]]s''': [[Kitakami]], [[Ooi]], [[Kuma]], [[Tama]], [[Kiso]], [[Nagara]], [[Natori]], [[Isuzu]], [[Yura]], [[Sendai]], [[Jintsu]], [[Naka]], [[Kinu]], [[Abukuma]], [[Sakawa|'''{{color|red|Sakawa}}''']] |
| − | <br | + | <br> |
| − | '''[[ | + | '''[[Heavy Cruiser]]s''': [[Atago]], [[Haguro]], [[Nachi]], [[Tone]], [[Myoukou]], [[Ashigara]], [[Takao]], [[Maya]], [[Choukai]], [[Chikuma]] |
| − | <br | + | <br> |
| − | '''[[ | + | '''[[Battleship]]s''': [[Roma|'''{{color|red|Roma}}''']], [[Mutsu]], [[Nagato]], [[Fusou]], [[Yamashiro]], [[Ise]], [[Hyuuga]] |
| − | <br | + | <br> |
| − | '''[[ | + | '''[[Aircraft Carrier]]s''': [[Akagi]], [[Kaga]], [[Hiryuu]], [[Souryuu]] |
| − | <br | + | <br> |
| − | '''[[ | + | '''[[Submarine]]s''': [[U-511|'''{{color|red|U-511}}''']], [[I-19]], [[I-8]], [[I-168]], [[I-58]], [[Maruyu|'''{{color|red|Maruyu}}''']] |
}} | }} | ||
| Line 1,804: | Line 1,821: | ||
*8 Kills Required (~2720 HP) | *8 Kills Required (~2720 HP) | ||
:*This is slightly under 8 times the [[Aircraft Carrier Princess]]'s HP. | :*This is slightly under 8 times the [[Aircraft Carrier Princess]]'s HP. | ||
| − | *'' | + | *''Ship tag {{color|green|'''GREEN'''}} |
| − | + | {{{!}}class="wikitable" style="text-align:center" | |
| − | + | !colspan=6{{!}}Rewards | |
| − | + | {{!-}} | |
| − | + | !甲<br>Hard | |
| − | + | {{!}}{{QuestRewardItem|Medal}} | |
| + | {{!}}{{QuestRewardEquip|Underway Replenishment|qty=3}} | ||
| + | {{!}}{{QuestRewardItem|Improvement Material|qty=10}} | ||
| + | {{!}}{{QuestRewardItem|Prototype Flight Deck Catapult}} | ||
| + | {{!}}{{QuestRewardItem|Reinforcement Expansion}} | ||
| + | {{!-}} | ||
| + | !乙<br>Medium | ||
| + | {{!}}{{QuestRewardItem|Medal}} | ||
| + | {{!}}{{QuestRewardEquip|Underway Replenishment|qty=2}} | ||
| + | {{!}}{{QuestRewardItem|Improvement Material|qty=6}} | ||
| + | {{!}}{{QuestRewardItem|Prototype Flight Deck Catapult}} | ||
| + | {{!}} | ||
| + | {{!-}} | ||
| + | !丙<br>Easy | ||
| + | {{!}}{{QuestRewardItem|Medal}} | ||
| + | {{!}}{{QuestRewardEquip|Underway Replenishment|qty=2}} | ||
| + | {{!}}{{QuestRewardItem|Improvement Material|qty=5}} | ||
| + | {{!}} | ||
| + | {{!}} | ||
| + | {{!}}} | ||
|branching = | |branching = | ||
{{#invoke:MapBranching|branchingTemplate | {{#invoke:MapBranching|branchingTemplate | ||
| − | |Start_to_A = All Surface Task Force<br>Carrier Task Force with any of the following pairs of ships in fleet:<br>[[Yuudachi]] and [[Ayanami]];<br>[[Fubuki]] and [[Furutaka]];<br> or [[Hiei]] and [[Kirishima]] | + | |Start_to_A = All Surface Task Force<br>Carrier Task Force with any of the following pairs of ships in fleet:<br>[[Yuudachi]] and [[Ayanami]];<br>[[Fubuki]] and [[Furutaka]];<br>or [[Hiei]] and [[Kirishima]] |
|Start_to_C = Carrier Task Force not sent to A | |Start_to_C = Carrier Task Force not sent to A | ||
|A_to_B = 1st Fleet is Fast Speed only '''and''' BB+CV<=3 '''and''' 2nd Fleet has 0BB and 4DD | |A_to_B = 1st Fleet is Fast Speed only '''and''' BB+CV<=3 '''and''' 2nd Fleet has 0BB and 4DD | ||
| Line 1,845: | Line 1,881: | ||
::*Routing: | ::*Routing: | ||
:::*C->E->G->H->L->Z: Goes through an aerial battle node (H). | :::*C->E->G->H->L->Z: Goes through an aerial battle node (H). | ||
| − | ::::Node L is the hardest node in this route, because there's a 50% chance to see Wo-Class Kai at this node (on | + | ::::Node L is the hardest node in this route, because there's a 50% chance to see Wo-Class Kai at this node (on medium /hard). This route, however, only guarantees to see Tsu-class at C and Boss (50% chance to see at H), so there is less bauxite usage. |
:::*C->E->G->F->J->K/M->Z: Goes through a normal battle at F. | :::*C->E->G->F->J->K/M->Z: Goes through a normal battle at F. | ||
::::Unless you are farming for Kazagumo (which can drop from node M as well as boss), node K is the choice here; node K only has 1 Wo-Class Kai with the new takoyaki-type planes (as opposed to node M which may have up to 2 additional Wo-Class with the new planes depending on difficulty and pattern faced). | ::::Unless you are farming for Kazagumo (which can drop from node M as well as boss), node K is the choice here; node K only has 1 Wo-Class Kai with the new takoyaki-type planes (as opposed to node M which may have up to 2 additional Wo-Class with the new planes depending on difficulty and pattern faced). | ||
:*Surface Task Force: '''Not Recommended''', but this fleet does have the capability to reach boss. | :*Surface Task Force: '''Not Recommended''', but this fleet does have the capability to reach boss. | ||
| − | ::*Makeup should be either ''3FBB, 2 Fast CVL, 1CA(V) + 1CL 4DD 1CA(V)'' or ''3FBB 1CV 2CA(V) + 1CL 4DD 1CA(V)'' due to the threat of node D (night battle node against a fleet led by either CA Ri-Class Flagship, Ri-Class Flagship Kai, or BB Ru-Class Flagship Kai on easy/ | + | ::*Makeup should be either ''3FBB, 2 Fast CVL, 1CA(V) + 1CL 4DD 1CA(V)'' or ''3FBB 1CV 2CA(V) + 1CL 4DD 1CA(V)'' due to the threat of node D (night battle node against a fleet led by either CA Ri-Class Flagship, Ri-Class Flagship Kai, or BB Ru-Class Flagship Kai on easy/medium/hard respectively). |
::*Your routing will be A->B->F->J->K->Z (M is not recommended on this setup) | ::*Your routing will be A->B->F->J->K->Z (M is not recommended on this setup) | ||
| Line 1,869: | Line 1,905: | ||
|C1_xp = 290 | |C1_xp = 290 | ||
| | | | ||
| − | |D_label = 深海航空集団支援打撃部隊<br /> | + | |D_label = 深海航空集団支援打撃部隊<br />{{color|blue|Night Battle}} |
|D1_node_info = bb_ru-class_flagship_kai ca_ri-class_flagship_kai clt_chi-class_flagship clt_chi-class_flagship dd_ro-class_late_model_elite dd_ro-class_late_model_elite | |D1_node_info = bb_ru-class_flagship_kai ca_ri-class_flagship_kai clt_chi-class_flagship clt_chi-class_flagship dd_ro-class_late_model_elite dd_ro-class_late_model_elite | ||
|D1_form = line_ahead | |D1_form = line_ahead | ||
| Line 1,884: | Line 1,920: | ||
|F1_xp = 300 | |F1_xp = 300 | ||
| | | | ||
| − | |G_label = | + | |G_label = {{color|blue|Active Branching}} |
|G1_node_info = No Combat | |G1_node_info = No Combat | ||
| | | | ||
| − | |H_label = 深海航空集団D群<br> | + | |H_label = 深海航空集団D群<br>{{color|green|Aerial Combat Only}} |
|H1_Node_info= cv_wo-class_flagship_2 cv_wo-class_flagship_2 cvl_nu-class_flagship cvl_nu-class_flagship dd_i-class_late_model dd_i-class_late_model | |H1_Node_info= cv_wo-class_flagship_2 cv_wo-class_flagship_2 cvl_nu-class_flagship cvl_nu-class_flagship dd_i-class_late_model dd_i-class_late_model | ||
|H1_form = diamond | |H1_form = diamond | ||
| Line 1,900: | Line 1,936: | ||
|I1_xp = | |I1_xp = | ||
| | | | ||
| − | |J_label = | + | |J_label = {{color|blue|Active Branching}} |
|J1_node_info = No Combat | |J1_node_info = No Combat | ||
| | | | ||
| Line 1,933: | Line 1,969: | ||
| | | | ||
|O_label = No Combat | |O_label = No Combat | ||
| − | |O1_node_info = | + | |O1_node_info = {{color|blue|"Must be my imagination" (battle avoided)}} |
| | | | ||
|P_label = | |P_label = | ||
| Line 1,970: | Line 2,006: | ||
|C1_xp = 260 | |C1_xp = 260 | ||
| | | | ||
| − | |D_label = 深海航空集団支援打撃部隊<br /> | + | |D_label = 深海航空集団支援打撃部隊<br />{{color|blue|Night Battle}} |
|D1_node_info = ca_ri-class_flagship_kai bb_ta-class_elite clt_chi-class_elite clt_chi-class_elite dd_ro-class_late_model_elite dd_ro-class_late_model_elite | |D1_node_info = ca_ri-class_flagship_kai bb_ta-class_elite clt_chi-class_elite clt_chi-class_elite dd_ro-class_late_model_elite dd_ro-class_late_model_elite | ||
|D1_form = line_ahead | |D1_form = line_ahead | ||
| Line 1,985: | Line 2,021: | ||
|F1_xp = 280 | |F1_xp = 280 | ||
| | | | ||
| − | |G_label = | + | |G_label = {{color|blue|Active Branching}} |
|G1_node_info = No Combat | |G1_node_info = No Combat | ||
| | | | ||
| − | |H_label = 深海航空集団D群<br> | + | |H_label = 深海航空集団D群<br>{{color|green|Aerial Combat Only}} |
|H1_Node_info= cv_wo-class_flagship_2 cv_wo-class_flagship_2 cvl_nu-class_elite cvl_nu-class_elite dd_i-class_late_model dd_i-class_late_model | |H1_Node_info= cv_wo-class_flagship_2 cv_wo-class_flagship_2 cvl_nu-class_elite cvl_nu-class_elite dd_i-class_late_model dd_i-class_late_model | ||
|H1_form = diamond | |H1_form = diamond | ||
| Line 2,001: | Line 2,037: | ||
|I1_xp = | |I1_xp = | ||
| | | | ||
| − | |J_label = | + | |J_label = {{color|blue|Active Branching}} |
|J1_node_info = No Combat | |J1_node_info = No Combat | ||
| | | | ||
| Line 2,029: | Line 2,065: | ||
| | | | ||
|N_label = No Combat | |N_label = No Combat | ||
| − | |N1_Node_info = | + | |N1_Node_info = {{color|blue|"Must be my imagination" (battle avoided)}} |
| | | | ||
|O_label = No Combat | |O_label = No Combat | ||
| − | |O1_node_info = | + | |O1_node_info = {{color|blue|"Must be my imagination" (battle avoided)}} |
| | | | ||
|P_label = | |P_label = | ||
| Line 2,070: | Line 2,106: | ||
|C1_enemy_air_power = 47 | |C1_enemy_air_power = 47 | ||
| | | | ||
| − | |D_label = 深海航空集団支援打撃部隊<br /> | + | |D_label = 深海航空集団支援打撃部隊<br />{{color|blue|Night Battle}} |
|D1_node_info = ca_ri-class_flagship bb_ta-class_elite clt_chi-class clt_chi-class dd_ro-class_late_model dd_ro-class_late_model | |D1_node_info = ca_ri-class_flagship bb_ta-class_elite clt_chi-class clt_chi-class dd_ro-class_late_model dd_ro-class_late_model | ||
|D1_form = line_ahead | |D1_form = line_ahead | ||
| Line 2,086: | Line 2,122: | ||
|F1_enemy_air_power = 28 | |F1_enemy_air_power = 28 | ||
| | | | ||
| − | |G_label = | + | |G_label = {{color|blue|Active Branching}} |
|G1_node_info = No Combat | |G1_node_info = No Combat | ||
| | | | ||
| − | |H_label = 深海航空集団D群<br> | + | |H_label = 深海航空集団D群<br>{{color|green|Aerial Combat Only}} |
|H1_Node_info= cv_wo-class_flagship_2 cv_wo-class_flagship cvl_nu-class_elite cvl_nu-class_elite dd_i-class dd_i-class | |H1_Node_info= cv_wo-class_flagship_2 cv_wo-class_flagship cvl_nu-class_elite cvl_nu-class_elite dd_i-class dd_i-class | ||
|H1_form = diamond | |H1_form = diamond | ||
| Line 2,104: | Line 2,140: | ||
|I1_xp = | |I1_xp = | ||
| | | | ||
| − | |J_label = | + | |J_label = {{color|blue|Active Branching}} |
|J1_node_info = No Combat | |J1_node_info = No Combat | ||
| | | | ||
| Line 2,115: | Line 2,151: | ||
|K2_form = diamond | |K2_form = diamond | ||
|K2_xp = 350 | |K2_xp = 350 | ||
| − | | | + | |K2_enemy_air_power = 180 |
| | | | ||
|L_label = 深海航空集団C群 | |L_label = 深海航空集団C群 | ||
| Line 2,134: | Line 2,170: | ||
| | | | ||
|N_label = No Combat | |N_label = No Combat | ||
| − | |N1_Node_info = | + | |N1_Node_info = {{color|blue|"Must be my imagination" (battle avoided)}} |
| | | | ||
|O_label = No Combat | |O_label = No Combat | ||
| − | |O1_node_info = | + | |O1_node_info = {{color|blue|"Must be my imagination" (battle avoided)}} |
| | | | ||
|P_label = | |P_label = | ||
| Line 2,152: | Line 2,188: | ||
|Z2_form = line_ahead | |Z2_form = line_ahead | ||
|Z2_xp = 420 | |Z2_xp = 420 | ||
| − | | | + | |Z2_enemy_air_power = 106 |
| | | | ||
|final_form = Z2 | |final_form = Z2 | ||
| Line 2,163: | Line 2,199: | ||
|dropsD = | |dropsD = | ||
|dropsL = [[Asashio]], [[Chitose]], [[Choukai]], [[Kinugasa]], [[Kuma]], [[Samidare]], [[Tanikaze]], [[Tone]], [[Urakaze]], [[Yura]] | |dropsL = [[Asashio]], [[Chitose]], [[Choukai]], [[Kinugasa]], [[Kuma]], [[Samidare]], [[Tanikaze]], [[Tone]], [[Urakaze]], [[Yura]] | ||
| − | |dropsZ = '''[[ | + | |dropsZ = '''[[Destroyer]]s''': [[Hamakaze]], [[Urakaze]], [[Makigumo]], [[Asagumo]], [[Naganami]], [[Shimakaze]], [[Tanikaze]], [[Yamagumo]], [[Kazagumo|'''{{color|red|Kazagumo}}''']] |
| − | <br | + | <br> |
| − | '''[[ | + | '''[[Light Cruiser]]s''': [[Kitakami]], [[Ooi]], [[Kuma]], [[Tama]], [[Kiso]], [[Nagara]], [[Isuzu]], [[Natori]], [[Yura]], [[Sendai]], [[Jintsuu]], [[Naka]], [[Kinu]], [[Abukuma]] |
| − | <br | + | <br> |
| − | '''[[ | + | '''[[Heavy Cruiser]]s''': [[Myoukou]], [[Nachi]], [[Ashigara]], [[Haguro]], [[Takao]], [[Atago]], [[Maya]], [[Choukai]], [[Tone]], [[Chikuma]], [[Kinugasa]], [[Suzuya]], [[Kumano]] |
| − | <br | + | <br> |
| − | '''[[ | + | '''[[Battleship]]s''': [[Kongou]], [[Hiei]], [[Haruna]], [[Kirishima]], [[Hyuuga]], [[Ise]], [[Fusou]], [[Yamashiro]] |
| − | <br | + | <br> |
| − | '''[[ | + | '''[[Submarine]]s''': [[I-168]], [[Maruyu|'''{{color|red|Maruyu}}''']] |
}} | }} | ||
| Line 2,184: | Line 2,220: | ||
*Boss: [[Air Defense Princess]] | *Boss: [[Air Defense Princess]] | ||
*8 Kills required | *8 Kills required | ||
| − | *( | + | *(Medium/Hard only) Can use any tagged or untagged ships, '''except''' ships tagged {{color|orange|'''ORANGE'''}} |
| + | |||
| + | {{{!}}class="wikitable" style="text-align:center" | ||
| + | !colspan=6{{!}}Rewards | ||
| + | {{!-}} | ||
| + | !甲<br>Hard | ||
| + | {{!}}{{QuestRewardShip|Teruzuki|small=true}} | ||
| + | {{!}}{{QuestRewardItem|Medal|qty=2}} | ||
| + | {{!}}{{QuestRewardItem|Reinforcement Expansion|qty=2}} | ||
| + | {{!}}{{QuestRewardEquip|Combat Ration|qty=3}} | ||
| + | {{!}}{{QuestRewardItem|First Class Medal}} | ||
| + | {{!-}} | ||
| + | !乙<br>Medium | ||
| + | {{!}}{{QuestRewardShip|Teruzuki|small=true}} | ||
| + | {{!}}{{QuestRewardItem|Medal|qty=2}} | ||
| + | {{!}}{{QuestRewardItem|Reinforcement Expansion}} | ||
| + | {{!}}{{QuestRewardEquip|Combat Ration|qty=2}} | ||
| + | {{!}} | ||
| + | {{!-}} | ||
| + | !丙<br>Easy | ||
| + | {{!}}{{QuestRewardShip|Teruzuki|small=true}} | ||
| + | {{!}}{{QuestRewardItem|Medal}} | ||
| + | {{!}} | ||
| + | {{!}} | ||
| + | {{!}} | ||
| + | {{!}}} | ||
| − | |||
| − | |||
| − | |||
| − | |||
|branching = | |branching = | ||
| Line 2,216: | Line 2,273: | ||
}} | }} | ||
|tips = | |tips = | ||
| − | *Nodes '''B, F and I''' are | + | *Nodes '''B, F and I''' are {{color|red|submarine nodes, '''and do not inform you beforehand.'''}} Take appropriate care when approaching them. |
*Node K is an Air Battle Node. | *Node K is an Air Battle Node. | ||
*No CLTs are allowed. They will result in dead-end nodes. | *No CLTs are allowed. They will result in dead-end nodes. | ||
| Line 2,222: | Line 2,279: | ||
::*The current Japanese consensus is that the effect '''increases the [[Combat#Critical_Modifier|critical modifier]]''' above 150% (which is the normal value). | ::*The current Japanese consensus is that the effect '''increases the [[Combat#Critical_Modifier|critical modifier]]''' above 150% (which is the normal value). | ||
::*Players have reported that the decrease is '''not''' reset when difficulty is changed. | ::*Players have reported that the decrease is '''not''' reset when difficulty is changed. | ||
| − | ::*'''''This effect | + | ::*'''''This effect {{color|red|resets}} daily at midnight JST.''''' This map regenerates '''stats''', not the health bar. |
| + | *[[wikipedia:Comptiq|Comptiq magazine]]'s September issue revealed that S-ranking the X and Y nodes and sinking the transports in node C reduced the [[Air Defense Princess]]' armour. | ||
*Suggestions: | *Suggestions: | ||
| − | :*Unlike other maps, the gimmick of reducing armor that resets at midnight JST means that this map is best done in longer sessions | + | :*Unlike other maps, the gimmick of reducing armor that resets at midnight JST means that this map is generally best done in longer sessions. |
:*For armor reduction runs: | :*For armor reduction runs: | ||
::*'''Surface Fleet''' with [[Akitsu Maru]] will hit both nodes if not sent to A from B. | ::*'''Surface Fleet''' with [[Akitsu Maru]] will hit both nodes if not sent to A from B. | ||
| Line 2,232: | Line 2,290: | ||
:::''Second Fleet'': CL + 2DD + 2CA(V) + 1FBB | :::''Second Fleet'': CL + 2DD + 2CA(V) + 1FBB | ||
::*Equip Makeup: | ::*Equip Makeup: | ||
| − | :::BB/CA(V): 2 Main Guns, Seaplane ([[ | + | :::BB/CA(V): 2 Main Guns, Seaplane ([[SPB|Bombers]] fine for CAV/BBVs), [[Type 3 Shell]] |
:::Akitsumaru: 2 Fighters plus [[Fleet Command Facility]] | :::Akitsumaru: 2 Fighters plus [[Fleet Command Facility]] | ||
:::CVL: 2 Fighters, 1 bomber, plus Saiun or Fighter | :::CVL: 2 Fighters, 1 bomber, plus Saiun or Fighter | ||
:::CV: 3 Fighters plus either [[Type 62 Zero Fighter-bomber]] or another Fighter | :::CV: 3 Fighters plus either [[Type 62 Zero Fighter-bomber]] or another Fighter | ||
| − | :::CL: Sonar, Depth Charge, plus WG42 (or [[Type A Ko-hyoteki]] for [[ | + | :::CL: Sonar, Depth Charge, plus WG42 (or [[Type A Ko-hyoteki]] for [[Abukuma Kai Ni]]) |
:::DD: Sonar, Depth Charge, plus WG42 or Sonar. | :::DD: Sonar, Depth Charge, plus WG42 or Sonar. | ||
::*Route is B -> X -> D -> H -> Y, and return to base after Y. Ensure you enter night battle at both nodes for S-rank. It may be possible to S-rank node X during the day, but not as likely for node Y. | ::*Route is B -> X -> D -> H -> Y, and return to base after Y. Ensure you enter night battle at both nodes for S-rank. It may be possible to S-rank node X during the day, but not as likely for node Y. | ||
| Line 2,246: | Line 2,304: | ||
::*Equip Makeup: | ::*Equip Makeup: | ||
:::*For Chipping runs: | :::*For Chipping runs: | ||
| − | ::::''First Fleet'': 10 Slots of Fighters can gain AS+ everywhere (depending on expertise level and slot capacity). Note that enemy has good anti-air defense, so expect a lot of loss on the bombers. BB and CA(V) should use the normal [[Artillery Spotting | + | ::::''First Fleet'': 10 Slots of Fighters can gain AS+ everywhere (depending on expertise level and slot capacity). Note that enemy has good anti-air defense, so expect a lot of loss on the bombers. BB and CA(V) should use the normal [[Artillery Spotting]] equipment setup, unless [[Maya Kai Ni]] is using her AACI in the first fleet. |
::::''Second Fleet'': you don't need to necessarily go for the kill, so most of the time you can get away without using double attack gear. It's more important that you bring all three night battle equipment ([[Searchlight]], [[Type 98 Recon Seaplane (Night Scout)]], and [[Star Shell]]) to increase the effectiveness of your attacks. | ::::''Second Fleet'': you don't need to necessarily go for the kill, so most of the time you can get away without using double attack gear. It's more important that you bring all three night battle equipment ([[Searchlight]], [[Type 98 Recon Seaplane (Night Scout)]], and [[Star Shell]]) to increase the effectiveness of your attacks. | ||
:::*For Clearing runs: | :::*For Clearing runs: | ||
| Line 2,286: | Line 2,344: | ||
| | | | ||
|G_label = | |G_label = | ||
| − | |G1_Node_info= | + | |G1_Node_info= {{color|blue|Active Branching}} |
|G1_form = | |G1_form = | ||
|G1_xp = | |G1_xp = | ||
| | | | ||
|H_label = | |H_label = | ||
| − | |H1_Node_info= | + | |H1_Node_info= {{color|blue|Active Branching}} |
|H1_form = | |H1_form = | ||
|H1_xp = | |H1_xp = | ||
| Line 2,305: | Line 2,363: | ||
|J1_xp = 400 | |J1_xp = 400 | ||
| | | | ||
| − | |K_label = FS方面残存航空集団C群<br> | + | |K_label = FS方面残存航空集団C群<br>{{color|green|Aerial Combat Only}} |
|K1_Node_info= cv_wo-class_flagship_kai cv_wo-class_flagship_2 cv_wo-class_flagship_2 cl_tsu-class_elite dd_ni-class_late_model_elite dd_ni-class_late_model_elite | |K1_Node_info= cv_wo-class_flagship_kai cv_wo-class_flagship_2 cv_wo-class_flagship_2 cl_tsu-class_elite dd_ni-class_late_model_elite dd_ni-class_late_model_elite | ||
|K1_form = diamond | |K1_form = diamond | ||
| Line 2,392: | Line 2,450: | ||
| | | | ||
|G_label = | |G_label = | ||
| − | |G1_Node_info= | + | |G1_Node_info= {{color|blue|Active Branching}} |
|G1_form = | |G1_form = | ||
|G1_xp = | |G1_xp = | ||
| | | | ||
|H_label = | |H_label = | ||
| − | |H1_Node_info= | + | |H1_Node_info= {{color|blue|Active Branching}} |
|H1_form = | |H1_form = | ||
|H1_xp = | |H1_xp = | ||
| Line 2,411: | Line 2,469: | ||
|J1_xp = 380 | |J1_xp = 380 | ||
| | | | ||
| − | |K_label = FS方面残存航空集団C群<br> | + | |K_label = FS方面残存航空集団C群<br>{{color|green|Aerial Combat Only}} |
|K1_Node_info= | |K1_Node_info= | ||
|K1_form = | |K1_form = | ||
| Line 2,495: | Line 2,553: | ||
| | | | ||
|G_label = 能動分岐 | |G_label = 能動分岐 | ||
| − | |G1_Node_info= | + | |G1_Node_info= {{color|blue|Active Branching}} |
|G1_form = | |G1_form = | ||
|G1_xp = | |G1_xp = | ||
| | | | ||
|H_label = 能動分岐 | |H_label = 能動分岐 | ||
| − | |H1_Node_info= | + | |H1_Node_info= {{color|blue|Active Branching}} |
|H1_form = | |H1_form = | ||
|H1_xp = | |H1_xp = | ||
| Line 2,514: | Line 2,572: | ||
|J1_xp = 360 | |J1_xp = 360 | ||
| | | | ||
| − | |K_label = FS方面残存航空集団C群<br> | + | |K_label = FS方面残存航空集団C群<br>{{color|green|Aerial Combat Only}} |
|K1_Node_info= cv_wo-class_flagship_kai cvl_nu-class_flagship cvl_nu-class_flagship dd_ni-class dd_ni-class dd_ni-class | |K1_Node_info= cv_wo-class_flagship_kai cvl_nu-class_flagship cvl_nu-class_flagship dd_ni-class dd_ni-class dd_ni-class | ||
|K1_form = diamond | |K1_form = diamond | ||
| Line 2,530: | Line 2,588: | ||
| | | | ||
|N_label = No Combat | |N_label = No Combat | ||
| − | |N1_node_info = | + | |N1_node_info = {{color|blue|""No enemy sighted" (battle avoided)}} |
| | | | ||
|O_label = | |O_label = | ||
| Line 2,575: | Line 2,633: | ||
|dropsK = [[Murakumo]], [[Naka]], [[Sendai]] | |dropsK = [[Murakumo]], [[Naka]], [[Sendai]] | ||
|dropsM = [[Atago]] | |dropsM = [[Atago]] | ||
| − | |dropsY = '''[[ | + | |dropsY = '''[[Destroyer]]s''': [[Fubuki]], [[Kazagumo|'''{{color|red|Kazagumo}}''']] |
| − | <br | + | <br> |
| − | '''[[ | + | '''[[Submarine]]s''': [[I-401|'''{{color|red|I-401}}''']] |
| − | |dropsZ = '''[[ | + | |dropsZ = '''[[Destroyer]]s''': [[Kazagumo|'''{{color|red|Kazagumo}}''']] |
| − | <br | + | <br> |
| − | '''[[ | + | '''[[Light Cruiser]]s''': [[Kinu]] |
| − | <br | + | <br> |
| − | '''[[ | + | '''[[Battleship]]s''': [[Ise]] |
| − | <br | + | <br> |
| − | '''[[ | + | '''[[Submarine]]s''':[[Maruyu|'''{{color|red|Maruyu}}''']] |
}} | }} | ||
| Line 2,661: | Line 2,719: | ||
|link = https://twitter.com/KanColle_STAFF/status/627676609915453441 | |link = https://twitter.com/KanColle_STAFF/status/627676609915453441 | ||
|JP = 現在「艦これ」運営鎮守府では、来週【8/10】より展開予定の、夏イベント2015:期間限定海域【反撃!第二次SN作戦】を開発/準備中です。同作戦は、夏季恒例の多段階【大規模作戦】です。※「甲作戦」及び「乙作戦」では、各作戦段階にそれぞれ艦隊戦力を投入する必要があります。 | |JP = 現在「艦これ」運営鎮守府では、来週【8/10】より展開予定の、夏イベント2015:期間限定海域【反撃!第二次SN作戦】を開発/準備中です。同作戦は、夏季恒例の多段階【大規模作戦】です。※「甲作戦」及び「乙作戦」では、各作戦段階にそれぞれ艦隊戦力を投入する必要があります。 | ||
| − | |EN = We are currently preparing for the summer 2015 event [Counterattack! The 2nd Operation SN] for August, 10th. This event will be in multiple stage format. *Hard along with | + | |EN = We are currently preparing for the summer 2015 event [Counterattack! The 2nd Operation SN] for August, 10th. This event will be in multiple stage format. *Hard along with Medium will require seperate ships per stage. |
}} | }} | ||
| Line 2,733: | Line 2,791: | ||
* [http://www.kancolle-calc.net/aircrafts.html Air Superiority Calculator] (in Japanese) | * [http://www.kancolle-calc.net/aircrafts.html Air Superiority Calculator] (in Japanese) | ||
* [http://tsoft-web.com/sub/kancolle/2-5/ Effective LoS Calculator] (in Japanese) | * [http://tsoft-web.com/sub/kancolle/2-5/ Effective LoS Calculator] (in Japanese) | ||
| − | + | <!--- | |
===Discussions=== | ===Discussions=== | ||
*IRC Channel: [http://webchat.esper.net/?nick=NamelessShip...&channels=kancolle&prompt=1 #kancolle] | *IRC Channel: [http://webchat.esper.net/?nick=NamelessShip...&channels=kancolle&prompt=1 #kancolle] | ||
| − | *[[Talk:Summer 2015 Event]], ''no inanity, please. Feel free, however, to report significant branching rules, identify content that is missing, and propose changes to the article's layout. Thank you for your compliance.'' | + | *[[Talk:Summer 2015 Event]], ''no inanity, please. Feel free, however, to report significant branching rules, identify content that is missing, and propose changes to the article's layout. Thank you for your compliance.'' ---> |
===Player Live Streams=== | ===Player Live Streams=== | ||
| Line 2,747: | Line 2,805: | ||
{{EventsPortal}} | {{EventsPortal}} | ||
| − | |||
[[category:Events]] | [[category:Events]] | ||
Latest revision as of 15:08, 1 November 2025

The Summer 2015 Event "Counterattack! The Second Operation SN" started on the 10th of August, and lasted for about 20 days. The event is based on Operation SN, the Japanese plan to establish air bases in the southern Solomon Islands; however, there was no actual second Operation SN historically.
This is a large-scale event that will contain combined fleet operations and ship locking mechanics. There is a new equipment-related system introduced in the game.
New Ships
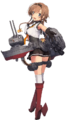
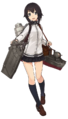


- Teruzuki, the second Akizuki-class destroyer, E-7 clearance reward.
- Fleet Oiler Hayasui, E-4 clearance reward.
- Maestrale Class destroyer Libeccio, E-5 clearance reward.
- Shiratsuyu-class destroyer Kawakaze, E-2 clearance reward.
- Shiratsuyu -class destroyer Umikaze, available as drop from E-4Z (Boss) at S-rank.
- Seaplane Tender Mizuho, similar in design to Chitose, available as drop from E-3Z (Boss) at S-rank.
- Yuugumo-class destroyer Kazagumo is available as a drop from the E-6 and E-7 boss nodes.
New Equipment
- Two torpedo bombers:
- Type 97 Torpedo Bomber (Murata Squadron), available on all difficulties
- Through a conversion request it turns into the Tenzan Model 12 (Murata Squadron)
- Underway Replenishment
- Reinforcement Expansion
- 120mm/50 Twin Gun Mount (as equipped on Libeccio)
- Combat Ration
New Quests
| Quest info | Rewards | |||||
|---|---|---|---|---|---|---|
SN01 |
第二次SN作戦、初動作戦完了!
Completing The First-Stage Operation For The Second Operation SN! |
250 |
0 |
250 |
0 | |
| Crush the enemies deployed in front of the Solomon Seas and complete the first stage of the operation! | Present Box  Combat Ration | |||||
| Clear E-2. | ||||||
| Prerequisites | ||||||
| Notes | Limited Time Quest | |||||
SN02 |
「工廠」倉庫の整理整頓!
Reorganize The "Factory"! |
100 |
100 |
100 |
100 | |
| Scrap multiple equipment that you no longer need in order to organize the factory warehouse in preparation for the new equipment! | Development Material 2x Combat Ration | |||||
| Scrap equipment 5 equipment. | ||||||
| Prerequisites | SN01 | |||||
| Notes | Limited Time Quest | |||||
SN03 |
主力機動部隊の前路哨戒を実施せよ!
Carry Out Patrol Ahead Of The Main Mobile Task Force! |
0 |
250 |
0 |
250 | |
| Enemy has deployed more submarines. Eliminate a number of them in order to clear the way ahead of our main mobile task force! | Unlocks E-3 | |||||
| Sink 6 enemy SS. | ||||||
| Prerequisites | SN02 | |||||
| Notes | Limited Time Quest | |||||
SN04 |
「赤城」に艦攻「村田隊」を配属せよ!
Assign The "Murata Squadron" Torpedo Bomber To Akagi! |
0 |
0 |
0 |
50 | |
| Set the aircraft carrier Akagi as the Secretary Ship, and assign the "Murata Squadron" torpedo bomber to her! | Combat Ration 2x Food Supply Ship Mamiya | |||||
| Set Akagi as the Secretary, equipped with a Type 97 Torpedo Bomber (Murata Squadron). | ||||||
| Prerequisites | SN03 | |||||
| Notes | Limited Time Quest If this quest is not cleared when fulfilling the condition, un-check and re-check the quest. | |||||
SN05 |
ソロモン海方面の制空権を奪え!
Attain Air Superiority Off The Solomon Seas! |
400 |
0 |
400 |
0 | |
| Charge into the waters near the enemy airfield controlling the skies of the Solomon Seas and crush them! | Present Box Combat Ration | |||||
| Clear E-4. | ||||||
| Prerequisites | SN03 | |||||
| Notes | Limited Time Quest | |||||
SN06 |
「翔鶴」に艦攻「村田隊」を配置転換せよ!
Transfer The Murata Squadron Torpedo Bomber To Shoukaku! |
0 |
0 |
0 |
50 | |
| Set the aircraft carrier Shoukaku as the Secretary Ship, and transfer the "Murata Squadron" torpedo bomber to her! | Instant Repair Material 3x Improvement Material 3x | |||||
| Set Shoukaku as Secretary, equipped with a Type 97 Torpedo Bomber (Murata Squadron). | ||||||
| Prerequisites | SN05 | |||||
| Notes | Limited Time Quest | |||||
SN07 |
FS作戦に備え、艦隊練度向上に努めよ!
Increase The Fleet's Experience In Preparation For Operation FS! |
300 |
300 |
0 |
0 | |
| To prepare for Operation FS, try to increase the experience of the fleet! Obtain 4 victories in Exercise today! | Unlocks E-5 | |||||
| Score 4 B+ ranks in PVP within the same day. | ||||||
| Prerequisites | SN05 | |||||
| Notes | Limited Time Quest The counter is shared with Cd2. | |||||
SN08 |
機種転換
Model Conversion |
0 |
0 |
0 |
50 | |
| Scrap 2 Tenzan while your Secretary is Shoukaku equipped with Type 97 Torpedo Bomber (Murata Squadron)! |  Tenzan Model 12 (Murata Squadron) | |||||
| Set Shoukaku as Secretary, equipped with a Type 97 Torpedo Bomber (Murata Squadron), then, scrap 2 Tenzan. | ||||||
| Prerequisites | SN06 | |||||
| Notes | Limited Time Quest | |||||
SN09 |
西部方面派遣艦隊、出撃せよ!
Sortie With The Fleet Deployed To The West! |
550 |
0 |
550 |
0 | |
| Deploy a fleet to the Western Sea Region and strike at the heart of the enemy reinforcements gathering in the area! | Present Box Combat Ration | |||||
| Clear E-5. | ||||||
| Prerequisites | SN07 | |||||
| Notes | Limited Time Quest | |||||
SN10 |
空母機動部隊「第三艦隊」を編成せよ!
Amass The FS Operation Beachhead! |
300 |
300 |
0 |
300 | |
| Enemy is reinforcing their mobile task force. Encounter them, reduce the amount of enemy carriers, and construct a beachhead for the entry to FS! | Improvement Material 4x  Underway Replenishment | |||||
| Sink 10 enemy CV or CVL. | ||||||
| Prerequisites | ||||||
| Notes | Limited Time Quest Requires E-5 clear | |||||
SN11 |
FS作戦の橋頭堡を築け!
Organise The Aircraft Carrier Task Force "Third Fleet"! |
0 |
450 |
0 |
450 | |
| Form the "Third Fleet" including "Shoukaku", "Zuikaku", and "Zuihou" in the first fleet in a combined fleet composition! | Unlocks E-6 | |||||
| Assemble a Carrier Task Force (Combined Fleet) containing Shoukaku, Zuikaku, and Zuihou. | ||||||
| Prerequisites | ||||||
| Notes | Limited Time Quest Requires E-5 clear | |||||
New Enemy Vessels
- Seaplane Tender Princess
- Air Defense Princess
- I-Class Late Model Elite
- Ro-Class Late Model Elite
- Ha-Class Late Model Elite
Mechanics
Participation requirements
- Must have a 75% sortie win ratio.
- Must have 5 empty ship slots for new ships.
- Must have 20 free equipment slots.
Special Mechanics
- The difficulty system first used in Spring 2015 Event returns: you can choose between Operation A (甲, Hard), Operation B (乙, Medium) or Operation C (丙, Easy).
- Choosing A or B requires certain HQ Level (HQ Lv 35 for B / 80 for A in Spring 2015 Event).
- With the exception of E-1, in order to choose Operation A, the previous map must be cleared on A or B.
- A new system will be introduced with the release of this event involving carrier-based planes.
- The Air Reconnaissance system introduced in 6-3 makes a reappearance in E-5, utilizing your recon planes equipped to your ships to gain more resources after winning at the boss node.
- Official tweets have confirmed that there are "supply bases" on the map that will lower the armor of the boss node. This has been confirmed to be the case in E-7. Clearing supply bases lowers the boss armor until midnight JST, at which point it is necessary to defeat the bases again.
- The original theory teased was that winning sorties at the X nodes on E-3 and E-7 may be the key to lowering the boss armor and finishing the event.
- This may also be the case on E-3.
Event Maps
Quick Info Table
| Classification | Map | Name | Combined Fleet? | Color of Tag | Tag Condition & Deployment Restriction | Difficulty Restrictions | Notes |
|---|---|---|---|---|---|---|---|
| Main Operation | E-1 | Preparation for Second Operation SN! | No | BLUE | Tagging: Ships not already color-tagged will be tagged with the color associated with the map when deployed. This tag exists on all difficulties and is not reset on remodel, etc. Deployment Restriction: Medium or Hard: Must have either the same-colored tag or no tag. Easy: No restrictions. |
No restrictions. All difficulties OK | |
| E-2 | Combined Fleet, to the Solomon Sea! | Yes | BLUE | In order to play these maps on hard, you must complete the previous map on either medium or hard. (e.g., to do E-4 on hard, you must complete E-3 on medium or hard.) | |||
| E-3 | Clash! Second Southern Pacific Ocean Battle | Yes | GREEN | Requires E-2 completion and Quests SN01, SN02, and SN03 completion to unlock | |||
| E-4 | Charge into the Strait! Destroy the Enemy Airfield! | No | YELLOW | ||||
| Extra Operation | E-5 | Hard Battle! Western Region Deployment Fleet | No | ORANGE | Requires E-4 completion and Quest SN07 completion to unlock | ||
| E-6 | Counterattack! Enter the FS Region | Yes | GREEN | Requires E-5 completion and Quest SN10 completion to unlock | |||
| E-7 | Operation FS | Yes | No tag | Deployment Restriction: Medium or Hard: Cannot have the ORANGE tag. Easy: No restrictions. |
E-1
Information
|
  | ||||||||||||||||||||||||||||||||||||||||||||||||||||||||||||||||||||||||||||||||||||||||||||||||||||||||||||||||||||||||||||||||||||||||||||||||||||||||||||||||||||||||||||||||||||||||||||||||||
|
Branching rules
| |||||||||||||||||||||||||||||||||||||||||||||||||||||||||||||||||||||||||||||||||||||||||||||||||||||||||||||||||||||||||||||||||||||||||||||||||||||||||||||||||||||||||||||||||||||||||||||||||||
|
Tips
| |||||||||||||||||||||||||||||||||||||||||||||||||||||||||||||||||||||||||||||||||||||||||||||||||||||||||||||||||||||||||||||||||||||||||||||||||||||||||||||||||||||||||||||||||||||||||||||||||||
E-2
Information
|
  | |||||||||||||||||||||||||||||||||||||||||||||||||||||||||||||||||||||||||||||||||||||||||||||||||||||||||||||||||||||||||||||||||||||||||||||||||||||||||||||||||||||||||||||||||||||||||||||||||||||||||||||||||||||||||||||||||||||||||||||||||||||||||||||||||||||||||||||||||||||
|
Branching rules
| ||||||||||||||||||||||||||||||||||||||||||||||||||||||||||||||||||||||||||||||||||||||||||||||||||||||||||||||||||||||||||||||||||||||||||||||||||||||||||||||||||||||||||||||||||||||||||||||||||||||||||||||||||||||||||||||||||||||||||||||||||||||||||||||||||||||||||||||||||||||
|
Tips
| ||||||||||||||||||||||||||||||||||||||||||||||||||||||||||||||||||||||||||||||||||||||||||||||||||||||||||||||||||||||||||||||||||||||||||||||||||||||||||||||||||||||||||||||||||||||||||||||||||||||||||||||||||||||||||||||||||||||||||||||||||||||||||||||||||||||||||||||||||||||

E-3
Information
|
  | ||||||||||||||||||||||||||||||||||||||||||||||||||||||||||||||||||||||||||||||||||||||||||||||||||||||||||||||||||||||||||||||||||||||||||||||||||||||||||||||||||||||||||||||||||||||||||||||||||||||||||||||||||||||||||||||||||||||||||
|
Branching rules
| |||||||||||||||||||||||||||||||||||||||||||||||||||||||||||||||||||||||||||||||||||||||||||||||||||||||||||||||||||||||||||||||||||||||||||||||||||||||||||||||||||||||||||||||||||||||||||||||||||||||||||||||||||||||||||||||||||||||||||
|
Tips
| |||||||||||||||||||||||||||||||||||||||||||||||||||||||||||||||||||||||||||||||||||||||||||||||||||||||||||||||||||||||||||||||||||||||||||||||||||||||||||||||||||||||||||||||||||||||||||||||||||||||||||||||||||||||||||||||||||||||||||


E-4
Information
|
  | |||||||||||||||||||||||||||||||||||||||||||||||||||||||||||||||||||||||||||||||||||||||||||||||||||||||||||||||||||||||||||||||||||||||||||||||||||||||||||||||||||||||||||||||||||||||||||||||||||||||||||||||||||||||||||||||||||||||||||||||||||||||||||||||||||||||||||||||||||||||||||||
|
Branching rules
| ||||||||||||||||||||||||||||||||||||||||||||||||||||||||||||||||||||||||||||||||||||||||||||||||||||||||||||||||||||||||||||||||||||||||||||||||||||||||||||||||||||||||||||||||||||||||||||||||||||||||||||||||||||||||||||||||||||||||||||||||||||||||||||||||||||||||||||||||||||||||||||||
|
Tips
| ||||||||||||||||||||||||||||||||||||||||||||||||||||||||||||||||||||||||||||||||||||||||||||||||||||||||||||||||||||||||||||||||||||||||||||||||||||||||||||||||||||||||||||||||||||||||||||||||||||||||||||||||||||||||||||||||||||||||||||||||||||||||||||||||||||||||||||||||||||||||||||||
E-5
Information
|
  | ||||||||||||||||||||||||||||||||||||||||||||||||||||||||||||||||||||||||||||||||||||||||||||||||||||||||||||||||||||||||||||||||||||||||||||||||||||||||||||||||||||||||||||||||||||||||||||||||||||||||||||||||||||||||||||||||||||||||||||||||||||||||||||||||||||||||||||||||||||||||||||||||
|
Branching rules
| |||||||||||||||||||||||||||||||||||||||||||||||||||||||||||||||||||||||||||||||||||||||||||||||||||||||||||||||||||||||||||||||||||||||||||||||||||||||||||||||||||||||||||||||||||||||||||||||||||||||||||||||||||||||||||||||||||||||||||||||||||||||||||||||||||||||||||||||||||||||||||||||||
|
Tips
| |||||||||||||||||||||||||||||||||||||||||||||||||||||||||||||||||||||||||||||||||||||||||||||||||||||||||||||||||||||||||||||||||||||||||||||||||||||||||||||||||||||||||||||||||||||||||||||||||||||||||||||||||||||||||||||||||||||||||||||||||||||||||||||||||||||||||||||||||||||||||||||||||
E-6
Information
|
  | ||||||||||||||||||||||||||||||||||||||||||||||||||||||||||||||||||||||||||||||||||||||||||||||||||||||||||||||||||||||||||||||||||||||||||||||||||||||||||||||||||||||||||||||||||||||||||||||||||||||||||||||||||||||||||||||||||||||||||||||||||||||||||||||||||||||||||||||||||||||||||||||||||||||||||||||||||||||||||||||||||||||||||||||||||||||||||||||||||||||||||||||||||||||||||||||||||||||||||||||||||||||||||||
|
Branching rules
| |||||||||||||||||||||||||||||||||||||||||||||||||||||||||||||||||||||||||||||||||||||||||||||||||||||||||||||||||||||||||||||||||||||||||||||||||||||||||||||||||||||||||||||||||||||||||||||||||||||||||||||||||||||||||||||||||||||||||||||||||||||||||||||||||||||||||||||||||||||||||||||||||||||||||||||||||||||||||||||||||||||||||||||||||||||||||||||||||||||||||||||||||||||||||||||||||||||||||||||||||||||||||||||
|
Tips
| |||||||||||||||||||||||||||||||||||||||||||||||||||||||||||||||||||||||||||||||||||||||||||||||||||||||||||||||||||||||||||||||||||||||||||||||||||||||||||||||||||||||||||||||||||||||||||||||||||||||||||||||||||||||||||||||||||||||||||||||||||||||||||||||||||||||||||||||||||||||||||||||||||||||||||||||||||||||||||||||||||||||||||||||||||||||||||||||||||||||||||||||||||||||||||||||||||||||||||||||||||||||||||||
E-7
Information
|
  | |||||||||||||||||||||||||||||||||||||||||||||||||||||||||||||||||||||||||||||||||||||||||||||||||||||||||||||||||||||||||||||||||||||||||||||||||||||||||||||||||||||||||||||||||||||||||||||||||||||||||||||||||||||||||||||||||||||||||||||||||||||||||||||||||||||||||||||||||||||||||||||||||||||||||||||||||||||||||||||||||||||||||||||||
|
Branching rules
| ||||||||||||||||||||||||||||||||||||||||||||||||||||||||||||||||||||||||||||||||||||||||||||||||||||||||||||||||||||||||||||||||||||||||||||||||||||||||||||||||||||||||||||||||||||||||||||||||||||||||||||||||||||||||||||||||||||||||||||||||||||||||||||||||||||||||||||||||||||||||||||||||||||||||||||||||||||||||||||||||||||||||||||||||
|
Tips
| ||||||||||||||||||||||||||||||||||||||||||||||||||||||||||||||||||||||||||||||||||||||||||||||||||||||||||||||||||||||||||||||||||||||||||||||||||||||||||||||||||||||||||||||||||||||||||||||||||||||||||||||||||||||||||||||||||||||||||||||||||||||||||||||||||||||||||||||||||||||||||||||||||||||||||||||||||||||||||||||||||||||||||||||||
Tweets
| Event-related tweets | ||||||||||||||||||||||||||||||||||||||||||||||||||||||||||||||||||||||||||||||||||||||||||||||||||||||||||||||||||
|---|---|---|---|---|---|---|---|---|---|---|---|---|---|---|---|---|---|---|---|---|---|---|---|---|---|---|---|---|---|---|---|---|---|---|---|---|---|---|---|---|---|---|---|---|---|---|---|---|---|---|---|---|---|---|---|---|---|---|---|---|---|---|---|---|---|---|---|---|---|---|---|---|---|---|---|---|---|---|---|---|---|---|---|---|---|---|---|---|---|---|---|---|---|---|---|---|---|---|---|---|---|---|---|---|---|---|---|---|---|---|---|---|---|---|
| ||||||||||||||||||||||||||||||||||||||||||||||||||||||||||||||||||||||||||||||||||||||||||||||||||||||||||||||||||
See Also
References
Japanese Army in World War II, The South Pacific and New Guinea, 1942-43, contains information regarding Operation SN and a summary of the plans behind it.
Tools
- KanColle Calculator and tools by no1244 (in Japanese)
- Air Superiority Calculator (in Japanese)
- Effective LoS Calculator (in Japanese)
Player Live Streams
- http://www.twitch.tv/remi_scarlet Remi's stream. Will be doing all hard front-line on day 1. Hoping to clear entire event in one sitting.
- http://www.twitch.tv/hydragoliath , usually starts around 1PM EST.
- http://www.twitch.tv/bl2w (Zak提督's stream); will be playing every day of the event: from August 10th to August 30th @ 4:00 PM to 6:30 PM EST
- http://www.twitch.tv/yamato_kai2000
- http://www.twitch.tv/hatsushimo
- http://www.twitch.tv/nigamonp
| ||||||||||||||||||||||||||||||||||||||||||||||||||||||||||||||||