Difference between revisions of "Damage Calculations"
Jigaraphale (talk | contribs) |
|||
| (258 intermediate revisions by 11 users not shown) | |||
| Line 1: | Line 1: | ||
| − | + | {{CombatPortal}} | |
| + | The main goal of the game is to sink Abyssals. Abyssals are sunk by doing '''Damage''' to them. This page lists all the applicable formulas and mechanics that affect the calculation of '''Damage'''. | ||
| − | <math>\ | + | '''Please note that all formulas between <math>\lfloor \ \rfloor</math> or marked with <math>\downarrow</math> are [[wikipedia:Floor and ceiling functions|rounded down]]. |
| − | * <math>\ | + | * For example, <math>\lfloor 4.2 \rfloor = 4</math>. |
| − | * <math>\ | + | * <math>4.2 \times_\downarrow 1.5 = \lfloor 4.2 \times 1.5 \rfloor = \lfloor 6.3 \rfloor = 6</math>, '''but''' <math>4.2 \times_\downarrow 1 = 4.2</math> (by definition, <math>\times_\downarrow</math> is then a non-commutative non-associative operator, it is assumed to be left-associative with lower priority than the usual multiplication operator). |
| − | + | **<math>\times_\downarrow</math> is used when the round down applies only when the modifier is applied. | |
| − | |||
| − | * <math>\ | ||
| − | |||
| − | + | =Damage Formula= | |
| + | The '''Damage''' is the reduction of '''HP''' {{HP}} caused by an attack hitting a target. The formula is the same for all attacks as well as abyssals. It stems from the difference between the final attack power of the assailant and the defense power of the target. | ||
| + | {{Formula | ||
| + | |Title=Damage Formula | ||
| + | |Math=\text{Damage} = \biggl \lfloor \biggl ( \text{Atk}_\text{post-cap} - \text{DEF} \biggr ) \times \text{Ammo} \biggr \rfloor | ||
| + | |Var=<math>\text{Atk}_\text{post-cap}</math> the final attack power of the assailant after the cap and all the modifiers have been applied, described below, | ||
| + | * <math>\text{DEF}</math> the '''[[#Defense Power|defensive power]]''' of the target, | ||
| + | * <math>\text{Ammo}</math> the '''[[#Ammunition Modifier|remaining ammunition]]''' modifier. | ||
| + | |Notes=If <math>\text{Atk}_\text{post-cap}</math> is inferior to <math>\text{DEF}</math> or if <math>\text{Ammo}=0</math> then the attacks will deal "[[#Scratch Damage|scratch damage]]". | ||
| + | }} | ||
| − | + | =Defense Power= | |
| − | * <math>\text{ | + | Defense power represents the ability of a ship to resist damage. It's calculated from the '''Armor''' {{Armor}} plus a random element. |
| − | * <math>\text{ | + | {{Formula |
| + | |Title=Defense Formula | ||
| + | |Math=\text{DEF} = \left( \text{Armor} \times 0.7 + \text{Armor}_\text{rand} \times 0.6 \right) - \text{Pen} | ||
| + | |Var=<math>\text{Armor}</math> the armor {{Armor}} of the target including all equipment and upgrade bonuses, | ||
| + | **This stat is be directly affected by [[#Debuffs|Debuffs]] when applicable. | ||
| + | * <math>\text{Armor}_\text{rand}</math> a random number between <math>0</math> and <math>\lfloor\text{Armor}\rfloor - 1</math>, | ||
| + | ** Note that it is inclusive, meaning it can also output <math>0</math> and <math>\lfloor\text{Armor}\rfloor - 1</math> | ||
| + | * <math>\text{Pen}</math> any applicable armor penetration mechanic: | ||
| + | ** ''See [[#Anti-Submarine Warfare|ASW]] for details on ASW armor penetration, | ||
| + | |Notes=The range of armor values is uniformly distributed, every armor roll has the same chance of occurring. | ||
| + | }} | ||
| − | ''' | + | For short, defensive power randomly varies between '''1.3''' x{{Armor}} and '''0.7''' x{{Armor}}. |
| − | |||
| − | |||
| − | = | + | =Attacks Power= |
| − | + | Attack power represents the ability of a ship to inflict damage. It's affected by a lot of different elements (stats, mechanics, "battle state", etc.) through 4 steps of calcul: | |
| + | #'''Basic | ||
| + | #*Generally calculated from the relevant stats of the ship using different formulas according to the type of attack and the phase of battle | ||
| + | #'''Pre-cap | ||
| + | #*The basic attack goes through different modifiers | ||
| + | #'''Cap | ||
| + | #* If the attack is superior to a cap it's reduced | ||
| + | #'''Post-cap | ||
| + | #*These modifiers are more potent because they are not limited by the cap | ||
| − | + | {|class="wikitable mw-collapsible mw-collapsed" width="100%" | |
| − | + | !colspan=2|Attack Step Formulas | |
| + | |- | ||
| + | !width=20px|<div style=writing-mode:vertical-rl;transform:rotate(180deg); text-align:left;>Pre-cap</div> | ||
| + | | | ||
| − | + | {|style="padding:10px; margin:20px; border:1px solid orange; border-radius:10px" | |
| + | |valign="center"| <math>\text{Atk}_\text{pre-cap} = \text{Atk}_\text{base} \times \text{Mod}_\text{pre-cap}</math> | ||
| + | |} | ||
| − | + | ;With | |
| − | + | * <math>\text{Atk}_\text{base}</math> is the basic attack power of the relevant attack. | |
| + | * <math>\text{Mod}_\text{pre}</math> is any '''[[#Attack Power Corrections|pre-cap modifiers]] that are applicable. | ||
| + | |- | ||
| + | !width=20px|<div style=writing-mode:vertical-rl;transform:rotate(180deg); text-align:left;>Cap</div> | ||
| + | | | ||
| + | The attack is then capped as follows: | ||
| + | {|style="padding:10px; margin:20px; border:1px solid orange; border-radius:10px" | ||
| + | |valign="center"| <math>\text{Atk}_\text{cap} = \text{Cap} + \sqrt{\text{Atk}_\text{pre-cap} - \text{Cap}} </math> | ||
| + | |} | ||
| + | ;With | ||
| + | * <math>\text{Cap}</math> is the '''damage cap''' relevant to the phase. | ||
| − | + | {|class="wikitable" | |
| − | + | !colspan=2|<math>Cap</math> | |
| − | + | |- | |
| − | + | !Attack Type!!Cap | |
| − | + | |- | |
| − | + | |Support Expeditions||rowspan=3|{{Cap|value=Support Damage}} | |
| − | + | |- | |
| + | |ASW | ||
| + | |- | ||
| + | |Airstrike | ||
| + | |- | ||
| + | |Opening Torpedo Salvo||rowspan=2|{{Cap|value=Torpedo Salvo Damage}} | ||
| + | |- | ||
| + | |Closing Torpedo Salvo | ||
| + | |- | ||
| + | |LBAS||rowspan=2|{{Cap|value=LBAS Damage}}<ref>https://twitter.com/Divinity_123/status/1651948848351158273</ref> | ||
| + | |- | ||
| + | |Day shelling | ||
| + | |- | ||
| + | |Night battle||{{Cap|value=Night Battle Damage}} | ||
| + | |} | ||
| + | <references/> | ||
| + | |- | ||
| + | !width=20px|<div style=writing-mode:vertical-rl;transform:rotate(180deg); text-align:left;>Post-cap</div> | ||
| + | | | ||
| + | Capped attack is then modified by post-cap modifiers: | ||
| + | {|style="padding:10px; margin:20px; border:1px solid orange; border-radius:10px" | ||
| + | |valign="center"| <math>\text{Atk}_\text{post-cap} = \lfloor \text{Atk}_\text{cap} \rfloor \times \text{Mod}_\text{spotting} \times \text{Mod}_\text{CVCI} \times \text{Mod}_\text{balloon S} \times_\downarrow \text{Mod}_\text{AP} \times \text{Mod}_\text{post} \times \text{Mod}_\text{balloon N} \times_\downarrow \text{Crit}</math> | ||
| + | |} | ||
| − | + | ;With | |
| − | + | * <math>\text{Atk}_\text{cap}</math> the '''Cap Adjusted Attack Power''', | |
| + | * <math>\text{Mod}_\text{spotting}</math> the bonus from [[#Artillery_Spotting|artillery spotting]], | ||
| + | * <math>\text{Mod}_\text{CVCI} </math> the bonus from [[#Carrier_Cut-In_Attacks|carrier cut-ins]], | ||
| + | * <math>\text{Mod}_\text{AP}</math> the bonus from [[#Armor-Piercing_Modifier|AP shells]], | ||
| + | ** The value is rounded down after applying <math>\text{Mod}_\text{AP}</math> only if the target is able to take extra damage from AP shells, even if <math>\text{Mod}_\text{AP}</math> is '''1''' due to the attacker not having AP shells. | ||
| + | *<math>\text{Mod}_\text{balloon}</math> the bonus from [[#Barrage Balloon Modifier|barrage balloons]]. The position of the modifier in the formula depend of the type of attack: | ||
| + | **<math>\text{Mod}_\text{balloon S}</math> is the position for artillery spotting, CVCI and special attacks, | ||
| + | **<math>\text{Mod}_\text{balloon N}</math> is the position for normal attacks. | ||
| + | * <math>\text{Mod}_\text{post}</math> any remaining '''[[#Post-cap Modifiers|post-cap modifiers]]''' that are applicable, | ||
| + | * <math>\text{Crit}</math> the '''[[#Criticals|critical]]''' modifier, | ||
| + | ** The value is rounded down after applying <math>\text{Crit}</math> only if the attack is critical. | ||
| + | |} | ||
| − | <math>\text{ | + | ==Basic Attack Power Formulas== |
| + | The following section details the different formulas to calculate <math>\text{Atk}_\text{base}</math>. As the formula depends on the type of attacks and the combat phase. | ||
| − | * <math>\text{ | + | Below are the common variables used in all accuracy formulas: |
| − | * <math>\text{Count}_\text{Plane}</math> is the | + | * <math>\text{FP}</math> is the '''Firepower''' {{Firepower}} of the ship including equipment. |
| + | * <math>\text{TP}</math> is the '''Torpedo''' {{Torpedo}} of the ship including equipment or the torpedo of a plane. | ||
| + | * <math>\text{ASW}</math> is the '''Anti-submarine''' {{ASW}} of the ship or equipment. | ||
| + | * <math>\text{DB}</math> is the '''Dive bombing''' {{Dive}} of the plane. | ||
| + | * <math>\bigstar</math> is the upgrade bonus of the equipment. | ||
| + | ** See [[Improvement]] or [https://akashi-list.me/ Akashi List] for upgrade bonus values. | ||
| + | * <math>\text{Count}_\text{Plane}</math> is the remaining amount of planes in a slot, performing the attack. | ||
| + | * <math>\text{Mod}_\text{CF}</math> is the combined fleet modifier based on the tables below: | ||
| − | {| class="wikitable" | + | <tabber> |
| + | |-|Combined vs Single= | ||
| + | {|class="wikitable" style="text-align:center; width:980px" | ||
| + | !width=26%|Combat Phase | ||
| + | !width=14%|Forces | ||
| + | !width=20%|Carrier Task Force | ||
| + | !width=20%|Surface Task Force | ||
| + | !width=20%|Transport Escort Force | ||
|- | |- | ||
| − | + | |rowspan=2|Main Fleet Shelling | |
| − | + | |Allies|| {{color|green|+2}}|| {{color|green|+10}}|| {{color|red|-5}} | |
| − | |||
|- | |- | ||
| − | | | + | |Enemy|| {{color|green|+10}}|| {{color|green|+5}}|| {{color|green|+10}} |
| − | | | ||
| − | | | ||
|- | |- | ||
| − | | | + | |rowspan=2|Escort Fleet Shelling |
| − | + | |Allies|| {{color|green|+10}}|| {{color|red|-5}}|| {{color|green|+10}} | |
| − | |||
| − | | | ||
| − | | | ||
|- | |- | ||
| − | | | + | |Enemy|| {{color|green|+5}}|| {{color|red|-5}}|| {{color|green|+5}} |
| − | |||
| − | | | ||
| − | | | ||
|- | |- | ||
| − | | | + | |rowspan=2|Torpedo |
| − | + | |Allies|| {{color|red|-5}}|| {{color|red|-5}}|| {{color|red|-5}} | |
| − | | | ||
| − | | | ||
|- | |- | ||
| + | |Enemy|| {{color|red|-5}}|| {{color|red|-5}}|| {{color|red|-5}} | ||
|} | |} | ||
| − | + | |-|Combined vs Combined= | |
| − | + | {|class="wikitable" style="text-align:center; width:980px" | |
| − | + | !width=26%|Combat Phase | |
| − | + | !width=14%|Forces | |
| − | + | !width=20%|Carrier Task Force | |
| − | + | !width=20%|Surface Task Force | |
| + | !width=20%|Transport Escort Force | ||
| + | |- | ||
| + | |rowspan=2|Main Fleet Shelling | ||
| + | | Allies|| {{color|green|+2}}|| {{color|green|+2}}|| {{color|red|-5}} | ||
| + | |- | ||
| + | | Enemy|| {{color|green|+10}}|| {{color|green|+10}}|| {{color|green|+10}} | ||
| + | |- | ||
| + | |rowspan=2|Escort Fleet Shelling | ||
| + | | Allies|| {{color|red|-5}}|| {{color|red|-5}}|| {{color|red|-5}} | ||
| + | |- | ||
| + | | Enemy|| {{color|red|-5}}|| {{color|red|-5}}|| {{color|red|-5}} | ||
| + | |- | ||
| + | |rowspan=2|Torpedo | ||
| + | |Allies|| {{color|green|+10}}|| {{color|green|+10}}|| {{color|green|+10}} | ||
| + | |- | ||
| + | |Enemy|| {{color|green|+10}}|| {{color|green|+10}}|| {{color|green|+10}} | ||
| + | |} | ||
| − | == | + | |-|Single vs Combined= |
| + | {|class="wikitable" style="text-align:center; width:980px" | ||
| + | !width=26%|Combat Phase | ||
| + | !width=14%|Forces | ||
| + | !width=60%|Bonus | ||
| + | |- | ||
| + | |rowspan=2|Vs Main Fleet | ||
| + | |Allies||{{color|green|+5}} | ||
| + | |- | ||
| + | |Enemy||{{color|green|+10}} | ||
| + | |- | ||
| + | |rowspan=2|Vs Escort | ||
| + | |Allies||{{color|green|+5}} | ||
| + | |- | ||
| + | |Enemy||{{color|red|-5}} | ||
| + | |- | ||
| + | |rowspan=2|Torpedo | ||
| + | |Allies||{{color|green|+10}} | ||
| + | |- | ||
| + | |Enemy||{{color|green|+10}} | ||
| + | |} | ||
| − | + | |-|Airstrike vs Combined= | |
| + | {|class="wikitable" style="text-align:center; width:980px" | ||
| + | !width=26%|Combat Phase | ||
| + | !width=14%|Forces | ||
| + | !width=60%|Bonus[https://docs.google.com/spreadsheets/d/1qWBdN1BlJNjFyDZCxRpsZFyTNbKMkCs308HQMKnymZc/edit?gid=1339328510#gid=1339328510] | ||
| + | |- | ||
| + | |rowspan=2|Vs Main Fleet | ||
| + | |Allies||{{color|red|-10}} | ||
| + | |- | ||
| + | |Enemy||{{color|red|-10?}} | ||
| + | |- | ||
| + | |rowspan=2|Vs Escort | ||
| + | |Allies||{{color|red|-20}} | ||
| + | |- | ||
| + | |Enemy||{{color|red|-20?}} | ||
| + | |} | ||
| + | </tabber> | ||
| − | ''' | + | ===Airstrike=== |
| − | * | + | The damage from airstrikes is calculated independently for each plane slot and mainly depends on the stats of the plane and the current plane count of the slot. |
| − | * | + | {{Formula |
| + | |Title=Airstrike Attack Formula | ||
| + | |Math=\text{Atk}_\text{base airstrike} = \text{Type} \times \biggl( \left( \text{DB or TP} + \bigstar + \text{Fit}_\text{SDP+} + \text{Fit}_\text{plane} \right) \times \sqrt{\text{Count}_\text{Plane} } + 25 + \text{Mod}_\text{CF} \biggr) + \text{Mod}_\text{Jet} | ||
| + | |Var=<math>\text{DB or TP}</math> here this is the '''base''' {{Torpedo}} stat of {{Torpedo Bomber}} and the '''base''' {{Dive}} of {{Dive Bomber}}/{{SPB}}/{{Jet Kikka}}/{{Jet Keiun}}/{{Flying Wing Jet Bomber}} | ||
| + | * <math>\text{Fit}_\text{SDP+}</math> are the {{Torpedo}}/{{Dive}} [[Equipment_Bonuses|visible fit bonus]]es given by the {{Equipment/Link|Skilled Deck Personnel + Aviation Maintenance Hands}}. | ||
| + | * <math>\text{Fit}_\text{plane}</math> is the applied {{Torpedo}} [[Equipment_Bonuses|visible fit bonus]]es given by planes. | ||
| + | ** ''For more information see [[Equipment_Bonuses#Airstrike|here]].'' | ||
| + | * <math>\text{Type}</math> is a multiplier based on the type of the plane. See below for details. | ||
| + | * <math>\text{Mod}_\text{Jet}</math> is a flat bonus for [[Jets]][https://x.com/kancolle_aki/status/1940740730487804068?t=j3z4p-hRUBGt9zbJWv39xw&s=19]. | ||
| − | == | + | {{{!}}class="wikitable" style="text-align:center" |
| + | !colspan=2{{!}}Plane Type | ||
| + | !<math>\text{Type}</math> | ||
| + | !<math>\text{Mod}_\text{Jet}</math> | ||
| + | !Notes | ||
| + | {{!}}- | ||
| + | {{!}} {{Torpedo Bomber}} {{!!}} [[Torpedo Bomber]]s {{!!}} 0.8x or 1.5x {{!!}} 0 | ||
| + | {{!}} The multiplier is chosen randomly.<br>The chance is roughly 50%. | ||
| + | {{!}}- | ||
| + | {{!}} {{Dive Bomber}}<br>{{SPB}}<br>{{IconText|{{Liaison}}|Hayabusa|8}} {{!!}} [[Dive Bomber]]s<br>[[Seaplane Bomber]]s<br>{{Equipment/Link|Type 1 Fighter Hayabusa Model II Kai (20th Squadron)|Type 1 Fighter Hayabusa Model III Kai (Skilled/20th Squadron)|link=Liaison Aircraft|text=ASW Hayabusa}} {{!!}} 1.0x {{!!}} 0 {{!!}} {{IconText|{{Liaison}}|Hayabusa|8}} {{Equipment/Link|Type 1 Fighter Hayabusa Model II Kai (20th Squadron)|Type 1 Fighter Hayabusa Model III Kai (Skilled/20th Squadron)|link=Liaison Aircraft|text=ASW Hayabusa}}'s {{Dive}}<br>is counted as '''0'''. | ||
| + | {{!}}- | ||
| + | {{!}}rowspan=2{{!}} {{Jet Kikka}}<br>{{Jet Keiun}}<br>{{Flying Wing Jet Bomber}} {{!!}}rowspan=2{{!}} [[Jets]]<br> {{!!}} 1.0x {{!!}}0 {{!!}} During jet assault | ||
| + | {{!}}- | ||
| + | {{!}} 0.7x {{!!}}'''0.5''' {{!!}} During normal bombing | ||
| + | {{!}}} | ||
| + | |Notes=Airstrike power is calculated independently for each equipment slot on the carrier. | ||
| + | * The firepower of the carrier does not affect airstrike power. | ||
| + | * The power is calculated '''after''' the air combat and anti-air fire phases which means bombers getting shot down will affect the final calculation. | ||
| + | * It is not affected by [[#Engagement|engagement]], [[#Formation|formation]] or [[#Damage State|damage states]]. | ||
| + | * It is affected by [[#Aerial Contact|contact]]. | ||
| + | * Note that {{Dive}} stat of {{Torpedo Bomber}} and the {{Torpedo}} stat of {{Dive Bomber}}/{{SPB}}/{{Jet Kikka}}/{{Jet Keiun}}/{{Flying Wing Jet Bomber}} are ignored for airstrike. | ||
| + | * Against [[Installation]]s {{Torpedo}} is counted as '''0'''. | ||
| + | This applies to [[Jet Assault]]s (including LBAS Jet Assaults) and [[Airstrike]]s. | ||
| + | }} | ||
| − | + | ===Surface Shelling=== | |
| + | The surface shelling damage stems directly from the '''Firepower''' {{Firepower}} of the ship. | ||
| + | {{Formula | ||
| + | |Title=Surface Attack Formula | ||
| + | |Math=\text{Atk}_\text{base shelling} = \text{FP} + \bigstar + \text{Mod}_\text{CF} + 5 | ||
| + | |Notes=The caliber of the gun does not affect damage. | ||
| + | * Abyssal installations that are not equipped with a plane that has a torpedo or dive bombing stat will use the surface shelling formula for calculating damage. | ||
| + | This applies to most ships during the [[Shelling]] phase (unless it is an ASW attack). | ||
| + | }} | ||
| − | + | ===Carrier Shelling Attacks=== | |
| − | + | Unlike during airstrikes, carrier shelling does not depend on the plane slot and instead combines the stat of the carrier and all planes equipped to one attack. | |
| − | * If a carrier is not equipped with any torpedo or dive bombers, she will not participate in shelling. | + | {{Formula |
| + | |Title=Carrier Shelling Attack Formula | ||
| + | |Math=\text{Atk}_\text{base carrier shelling} = \bigl\lfloor \left( \text{FP} + \text{TP} + \bigstar + \left[ \text{DB} \times 1.3 \right] + \text{Mod}_\text{CF} \right) \times 1.5 \bigr\rfloor + 55 | ||
| + | |Notes=Dive and Torpedo groups contribute, respectively, 1.95 and 1.5 times their dive bomb and torpedo stats toward shelling power | ||
| + | * <math>TP</math> is the sum of all {{Torpedo}} torpedo stat any equipment including [[Fit Bonus]]. | ||
| + | * <math>DB</math> is the sum of all {{Dive}} bombing stat any equipment including [[Fit Bonus]]. | ||
| + | * If a carrier is not equipped with any {{Torpedo Bomber}} torpedo or {{Dive Bomber}} dive bombers, she will not participate in shelling. | ||
** This also applies if they have lost all bombers during the aerial combat phase. | ** This also applies if they have lost all bombers during the aerial combat phase. | ||
| + | ** But even if an air group has had all its planes shot down, it will still contribute towards carrier shelling power (if the CV is still capable of attacking). | ||
| + | * Remember that there are potentially multiple sources of <math>\bigstar</math> bonuses. | ||
| + | * Slot sizes and the number of remaining aircraft '''do not affect''' carrier attack power during shelling. | ||
* Carriers have the easiest time hitting the damage cap. This makes them very powerful assets for the fleet. | * Carriers have the easiest time hitting the damage cap. This makes them very powerful assets for the fleet. | ||
* Abyssal installations equipped with a plane that has a torpedo or dive bombing stat will use the carrier formula for determining shelling damage. | * Abyssal installations equipped with a plane that has a torpedo or dive bombing stat will use the carrier formula for determining shelling damage. | ||
| + | * Planes are '''not shot down''' when a carrier participates in shelling. | ||
| + | This applies to [[carrier]]s during the [[Shelling]] phase (unless it is an ASW attack). | ||
| + | *This also applies {{Ship/Link|Hayasui Kai}}/{{Ship/Link|Yamashio Maru Kai}}/{{Ship/Link|Shimane Maru Kai}} if they carry at least 1 bomber {{AnyBomber}}. | ||
| + | *This does not apply to other ship types, such as the {{Class|Ise|Kai Ni}}, and [[Kumano Maru Kai]]. | ||
| + | }} | ||
| − | ==Torpedo Attacks== | + | ===Torpedo Attacks=== |
| − | + | Torpedo damage stems directly from the '''Torpedo''' {{Torpedo}} of the ship. | |
| − | + | {{Formula | |
| − | + | |Title=Torpedo Attack Formula | |
| − | + | |Math=\text{Atk}_\text{base torpedo} = \text{TP} + \bigstar + \text{Mod}_\text{CF} + 5 | |
| − | + | |Var= | |
| − | ** If the only available targets are submarines | + | |Notes=Torpedoes cannot target submarines and Abyssal installations. |
| + | ** If the only available targets are submarines, the attack will trigger but always miss. | ||
| + | **If the only available targets are installations, the attack will not trigger. | ||
* A ship must have a base torpedo stat of more than 0 to perform torpedo attacks. | * A ship must have a base torpedo stat of more than 0 to perform torpedo attacks. | ||
| + | Torpedo Attacks only include the [[Opening Torpedo Salvo]] and [[Closing Torpedo Salvo]]. | ||
| + | }} | ||
| − | ==Anti-Submarine Warfare== | + | ===Anti-Submarine Warfare=== |
| − | + | {{details|Anti-Submarine Warfare}} | |
| + | {{:Anti-Submarine Warfare}} | ||
| − | + | ===Surface Night Battle=== | |
| − | + | Night battle damage stems directly from the sum of '''Firepower''' {{Firepower}} and '''Torpedo''' {{Torpedo}} of the ship. | |
| + | {{Formula | ||
| + | |Title=Night Attack Formula | ||
| + | |Math=\text{Night Battle Power} = \text{FP} + \text{TP} + \bigstar + \text{Mod}_\text{contact} | ||
| + | |Var=<math>\text{Mod}_\text{contact}</math> is the Night Battle Contact if {{Night Recon}} [[Night Recon]] is triggered. The value depend of the '''Accuracy''' {{Hit}}: | ||
| + | ** '''5''' for 1 {{Hit}}, | ||
| + | ** '''7''' for 2 {{Hit}}, | ||
| + | ** '''9''' for 3 {{Hit}}. | ||
| + | |Notes=Night battle is unaffected by engagement. | ||
| + | ** Exceptions is [[Special Attacks]]. | ||
| + | * [[Graf Zeppelin]], [[Saratoga|Base Saratoga]], {{Class|Taiyou|Kai Ni}}, [[Kaga Kai Ni Go]], and [[Ark Royal|Ark Royal (with Swordfish)]] use the surface night battle formula if they are not performing a carrier night attack. | ||
| + | * In night battle versus Abyssal installations, '''the torpedo stat is ignored'''. | ||
| + | ** This also means any upgrade bonuses to torpedo power is ignored. | ||
| + | This applies to most ships during [[Night Battle]]. | ||
| + | }} | ||
| − | + | ===Carrier Night Air Attacks=== | |
| − | + | The carrier night air attack damage calculation is complex but for short only take the stat of the night plane. | |
| − | |||
| − | |||
| − | |||
| − | |||
| − | |||
| − | |||
| − | |||
| − | |||
| − | |||
| − | |||
| − | {| | + | A table of the yasen given by each plane can be found ''[[:Category:Carrier-based Night Aircraft|here]]''. |
| − | |+ | + | {{Formula |
| − | + | |Title=Carrier Night Air Attack Formula | |
| − | ! style=" | + | |Math=\text{Atk}_\text{base CNAA} = \text{FP}_\text{ship} + \sum_{\text{All } Night Planes} \text{FP}_\text{night plane} + \text{TP}_\text{night plane} + \text{TP}_\text{fit bonus} + \text{DB}_\text{night plane} + \text{DP}_\text{fit bonus} + \text{Mod}_\text{contact} + \text{Mod}_\text{Night Plane} |
| − | + | |Var=<math>\text{Mod}_\text{Night Plane}</math> being: | |
| − | + | {{{!}}style="padding:10px; margin:20px; border:1px solid orange; border-radius:10px" | |
| − | + | {{!}}valign="center"{{!}} <math>\text{Mod}_\text{Night Plane} = \mathrm{A} \times \text{Count}_\text{Plane} + \mathrm{B} \times \left( \text{FP}_\text{night plane} + \text{TP}_\text{night plane} + \text{DB}_\text{night plane} + \text{ASW}_\text{night plane} \right) \times \sqrt{\text{Count}_\text{Plane}} + \sqrt{\bigstar} </math> | |
| − | + | {{!}}} | |
| − | + | * <math>Night Planes</math> being planes from the following list '''with a plane count above 0''': | |
| − | + | ** {{Night Fighter}} [[Night Fighter]]s | |
| − | + | ** {{Night Torpedo Bomber}} [[Night Torpedo Bomber]]s | |
| − | + | ** {{Night Dive Bomber}} [[Night Dive Bomber]]s | |
| − | | | + | ** {{Torpedo Bomber}} {{Equipment/Link|Swordfish|Swordfish Mk.II (Skilled)|Swordfish Mk.III (Skilled)|text=Swordfish}} |
| − | | | + | ** {{Dive Bomber}} {{Equipment/Link|Zero Fighter Model 62 (Fighter-bomber / Iwai Squadron)|text=Zero FB Iwai}} |
| − | | | + | ** {{Dive Bomber}} {{Equipment/Link|Suisei Model 12 (w/ Type 31 Photoelectric Fuze Bombs)|text=Suisei PhotoBomber}} |
| − | | | + | *** other planes are ignored. |
| − | | | + | * <math>\text{FP}_\text{ship}</math> is the base {{Firepower}} firepower of the ship. |
| − | |} | + | * <math>\text{FP}_\text{night plane}, \text{TP}_\text{night plane}, \text{DB}_\text{night plane}, \text{ASW}_\text{night plane}</math> are respectively the '''base''' {{Firepower}}, {{Torpedo}}, {{Dive}}, {{ASW}} of the Night Planes. |
| − | * | + | * <math>\text{TP}_\text{fit bonus}, \text{DP}_\text{fit bonus}</math> are the {{Torpedo}}/{{Dive}} [[Fit Bonus]]es of either Night plane or the {{Aviation Personnel}} {{Equipment/Link|Skilled Deck Personnel + Aviation Maintenance Hands|text=SDP+}}. |
| − | ** | + | ** {{Firepower}} Firepower fit bonuses are ignored. |
| − | * | + | * <math>\text{Mod}_\text{contact}</math> is the Night Battle Contact if {{Night Recon}} [[Night Recon]] is triggered. The value depend of the '''Accuracy''' {{Hit}}: |
| − | * | + | ** '''5''' for 1 {{Hit}}, |
| − | * | + | ** '''7''' for 2 {{Hit}}. |
| − | * | + | * <math>\mathrm{A}</math> is: |
| − | ** | + | **'''3''' for [[Night Plane]]s, |
| − | * | + | **'''0''' for {{Equipment/Link|Swordfish|Swordfish Mk.II (Skilled)|Swordfish Mk.III (Skilled)|text=Swordfish}}, {{Equipment/Link|Zero Fighter Model 62 (Fighter-bomber / Iwai Squadron)|text=Zero FB Iwai}} and {{Equipment/Link|Suisei Model 12 (w/ Type 31 Photoelectric Fuze Bombs)|text=Suisei Photobomb}}. |
| − | ** | + | * <math>\mathrm{B}</math> is: |
| − | ** | + | **'''0.45''' for [[Night Plane]]s, |
| − | * | + | **'''0.3''' for {{Equipment/Link|Swordfish|Swordfish Mk.II (Skilled)|Swordfish Mk.III (Skilled)|text=Swordfish}}, {{Equipment/Link|Zero Fighter Model 62 (Fighter-bomber / Iwai Squadron)|text=Zero FB Iwai}} and {{Equipment/Link|Suisei Model 12 (w/ Type 31 Photoelectric Fuze Bombs)|text=Suisei Photobomb}}. |
| + | * <math>\bigstar</math> unlike other formula this is directly the [[improvement]] level of the plane. | ||
| + | |Notes=Unlike daytime carrier attacks, it is possible to attack even if no bombers are equipped. | ||
| + | ** Night fighters are still needed to trigger the attack. | ||
| + | * Like daytime carrier attacks, carriers are unable to attack if '''{{Chuuha}}''' or worse. | ||
| + | ** Armored carriers are only disabled at '''{{Taiha}}'''. | ||
| + | ** Carriers that can use the night battle shelling formula will use that instead if '''{{Chuuha}}'''. | ||
| + | * The formula '''only takes into account the base stats of the carrier and night attack capable planes equipped'''. | ||
| + | ** The [[Improvement]] stats are not taken into account. | ||
| + | *** This means any other stats and upgrade bonuses from equipment like guns and non-night-capable planes are ignored. | ||
| + | ** This also means that any [[Visible Bonus]] from other planes are also ignored. | ||
| + | This applies to [[Combat/Night_Battle#Carrier_Night_Attacks|carrier night air attack]] | ||
| + | }} | ||
| − | + | ===Anti-Installation Attacks=== | |
| − | + | {{details|Anti-Installation}} | |
| − | + | Installations differ from regular enemy warships, as they are immune to certain attack elements like the torpedo stat, but are extremely weak against specialized gears. | |
| − | |||
| − | |||
| − | |||
| − | |||
| − | == | + | ==Support Expedition Attack Power Formula== |
| + | [[Support Expedition]] attack formulas are close but not the same as combat formulas. They also are only affected by the following modifiers: | ||
| + | *[[#Engagement|Engagement]] | ||
| + | *[[#Formation|Formation]] | ||
| + | *[[#Criticals|Criticals]] | ||
| − | <math>\text{ | + | ===Shelling Support=== |
| + | Basic attack power is calculated in a similar way as normal for [[#Surface_Shelling|surface ships]] and carriers except that firepower is reduced by 1. | ||
| + | {{Formula | ||
| + | |Title=Surface Attack Formula | ||
| + | |Math=\text{Atk}_\text{support shelling} = \text{FP} + 4 | ||
| + | |Var=<math>FP</math> the sum of all {{Firepower}} visible firepower stat, including [[Visible Fit Bonus]]es. | ||
| + | |Notes= Hidden fit bonuses and {{Star}} improvement bonuses do not work in support. | ||
| + | }} | ||
| + | {{Formula | ||
| + | |Title=Carrier Shelling Attack Formula | ||
| + | |Math=\text{Atk}_\text{base carrier shelling} = \bigl\lfloor \left( \text{FP} + \text{TP} + \left[ \text{DB} \times 1.3 \right] - 1 \right) \times 1.5 \bigr\rfloor + 55 | ||
| + | |Var=<math>TP</math> the sum of all {{Torpedo}} visible torpedo stat of all equipment, including [[Visible Fit Bonus]]es. | ||
| + | * <math>DB</math> the sum of all {{Dive}} visible bombing stat of all equipment, including [[Visible Fit Bonus]]es. | ||
| + | ** The inclusion of plane's torpedo [[Fit Bonus]] is still unverified. | ||
| + | |Notes=Dive and Torpedo groups contribute, respectively, 1.95 and 1.5 times their dive bomb and torpedo stats toward shelling power | ||
| + | * If a carrier is not equipped with any torpedo or dive bombers, she will not participate in shelling support. | ||
| + | ** This also applies if they have lost all bombers during the aerial combat phase. | ||
| + | ** But even if an air group has had all its planes shot down, it will still contribute towards carrier shelling power (if the CV is still capable of attacking). | ||
| + | * {{Star}} improvement bonuses do not work in support. | ||
| + | * Slot sizes and the number of remaining aircraft '''do not affect''' carrier attack power during shelling support. | ||
| + | * Carriers have the easiest time hitting the damage cap. This makes them very powerful assets for support. | ||
| + | * Planes are '''not shot down''' when a carrier participates in shelling. | ||
| + | *Unlike in normal shelling {{Ship/Link|Hayasui Kai}}/{{Ship/Link|Yamashio Maru Kai}} use the surface shelling formula. | ||
| + | }} | ||
| − | + | ===Airstrike Support=== | |
| + | {{Formula | ||
| + | |Title=Airstrike Support Attack Formula | ||
| + | |Math=\text{Airstrike Support} = \biggl\lfloor \biggl\{ \text{Type} \times \bigl( \left( \text{DB or TP} \right) \times \sqrt{\text{Count}_\text{Plane} } + 3 \bigr) \biggr\} \times \text{Mod}_\text{crit} \biggr\rfloor \times 1.35 | ||
| + | |Notes=The [[Damage_Calculations#Damage_Formula|damage cap]] of 170 is applied to the result between <math>\{ \ \}</math>. | ||
| + | * <math>\text{Type}</math> is the bomber's type modifier, similar to airstrikes. | ||
| + | ** <math>1.0</math> for dive bombers and seaplane bombers. | ||
| + | ** Either <math>0.8</math> or <math>1.5</math> for torpedo bombers. | ||
| + | * The critical modifier and the 1.35x airstrike support modifier are both '''post-cap'''. | ||
| + | *Is not affected by [[#Formation|formation]] like normal airstrike. | ||
| + | *The [[proficiency]] has '''no effect''' on this support. | ||
| + | }} | ||
| − | ''' | + | ===Anti-Submarine Support=== |
| − | + | {{Formula | |
| − | * | + | |Title=Anti-Submarine Support Attack Formula |
| − | + | |Math=\text{ASW Support} = \biggl\lfloor \biggl\{ \bigl(\text{ASW} \times \sqrt{\text{Count}_\text{Plane} } + 3 \bigr) \times \left(0.9 + \text{Rand} \right) \biggr\} \times \text{Mod}_\text{crit} \biggr\rfloor \times 1.35 | |
| − | * | + | |Var=<math>\text{Rand}</math> a random number from 0 to 0.75 inclusive. |
| − | * | + | * The critical modifier and the 1.35x airstrike support modifier are both '''post-cap'''. |
| + | * The [[Damage_Calculations#Damage_Formula|damage cap]] of 170 is applied to the result between <math>\{ \ \}</math>. | ||
| + | |Notes=Because slot size matters, carriers make much better ASW support ships than light carriers. | ||
| + | * It has a chance of triggering at every node so consider the enemy compositions of all nodes when running ASW support to help with submarine nodes. | ||
| + | ** A full ASW support setup that runs into enemy airpower will get destroyed. | ||
| + | * Because even the autogyros and liaison aircraft participate in aerial combat, they can be shot down. | ||
| + | * It can be useful for chipping down submarines to reduce the number of opening and closing torpedoes faced by the fleet. | ||
| + | }} | ||
| − | == | + | ===Long Range Torpedo Support=== |
| + | {{Formula | ||
| + | |Title=Long-Range Torpedo Attack Formula | ||
| + | |Math=\text{Atk}_\text{base torpedo support} = \text{TP} + 8 | ||
| + | |Var=For this formula it's unknown if <math>\text{TP}</math> include fit bonus or not. | ||
| + | |Notes=Do not bother using this type of support, since it is by design inferior to the other ones. | ||
| + | }} | ||
| − | + | ==LBAS Attack Power Formulas== | |
| + | {{details|LBAS}} | ||
| + | {{:LBAS}} | ||
| − | + | =Attack Power Corrections= | |
| − | + | After calculating the basic attack power of the attack being made, it is then adjusted based on various factors. Attack power modifiers can be split into pre- and post-cap modifiers. Post-cap modifiers are more powerful to have because they aren't reduced by the cap. | |
| − | + | ==Pre-cap Modifiers== | |
| − | |||
| − | + | ===Engagement=== | |
| − | + | {{details|Engagement}} | |
| − | |||
| − | |||
| − | |||
| − | |||
| − | |||
| − | |||
| − | |||
| − | |||
| − | |||
| − | == | + | {|class="wikitable" style="text-align:center" |
| + | !Form!!Common name!!Damage Modifier!!Chance!!Chance with {{Equipment/Link|Saiun|Saiun (Eastern Caroline Air Group)|Saiun (4th Recon Squad)|text=Saiun}} | ||
| + | |- | ||
| + | |Crossing the T ('''{{color|green|Advantage}}''') | ||
| + | |style="color:green"|'''Green T''' | ||
| + | |1.2||15%||15% | ||
| + | |- | ||
| + | |Parallel Engagement | ||
| + | |'''Parallel | ||
| + | |1.0||45%||45% | ||
| + | |- | ||
| + | |Head-on Engagement | ||
| + | |'''Head-on | ||
| + | |0.8||30%||40% | ||
| + | |- | ||
| + | |Crossing the T ('''{{color|red|Disadvantage}}''') | ||
| + | |style="color:red"|'''Red T''' | ||
| + | |0.6||10%||0% | ||
| + | |} | ||
| − | + | * Engagement modifier affects the [[Shelling]] Phase, as well as the [[Battle Opening]]s, the [[Closing Torpedo Salvo]], and [[Support Expedition]]s. | |
| + | ** All engagement forms '''affect both sides equally''', including {{color|green|'''Green T'''}} and {{color|red|'''Red T'''}}. | ||
| + | ** The exception are some [[Special Attacks]]. | ||
| + | * [[Night Battle]] and [[Aerial Combat]] are '''not affected by engagement'''. | ||
| − | + | ===Formation=== | |
| − | + | {{details|Formation}} | |
| − | |||
| − | {| class="wikitable" | + | {|class="wikitable" style="text-align:center" |
| − | + | !colspan=5|Formation Attack Power Modifiers | |
| − | |||
| − | |||
| − | |||
| − | ! | ||
|- | |- | ||
| − | ! | + | !Formation!!Shelling!!Torpedo!!ASW!!Night Battle |
| − | ! | ||
| − | ! | ||
| − | ! | ||
| − | ! | ||
| − | ! | ||
|- | |- | ||
| − | | | + | |Line Ahead |
| − | | | + | |1.0||1.0||style="color:red"|0.6||1.0 |
| − | | style=" | ||
| − | | | ||
|- | |- | ||
| − | | | + | | Double Line |
| − | | style=" | + | |style="color:red"|0.8||style="color:red"|0.8||style="color:red"|0.8||1.0 |
| − | | style=" | ||
| − | | style=" | ||
|- | |- | ||
| − | | | + | | Diamond |
| − | | style=" | + | |style="color:red"|0.7||style="color:red"|0.7||style="color:green"|1.2||1.0 |
| − | | | ||
| − | | style=" | ||
| − | |||
| − | | style=" | ||
| − | | | ||
|- | |- | ||
| − | | | + | | Echelon |
| − | | style=" | + | |style="color:red"|0.75||style="color:red"|0.6||style="color:green"|1.1||1.0 |
| − | |||
| − | | style=" | ||
| − | | | ||
| − | | style=" | ||
| − | | | ||
|- | |- | ||
| − | | | + | | Line Abreast |
| − | | style=" | + | |style="color:red"|0.6||style="color:red"|0.6||style="color:green"|1.3||1.0 |
| − | | | ||
| − | | style=" | ||
| − | | | ||
| − | | style=" | ||
| − | | | ||
|- | |- | ||
| − | | | + | |rowspan=2|Vanguard |
| − | | style=" | + | |style="color:red"|0.5||1.0||1.0||style="color:red"|0.5 |
| − | | | ||
| − | | style=" | ||
|- | |- | ||
| − | | | + | |1.0||1.0||style="color:red"|0.6||1.0 |
| − | | | + | |} |
| − | | style=" | + | |
| − | | style="text-align:center | + | Combined Fleets have special formations that differ from the standard single fleet [[formation]]s. The following formations can be selected. |
| + | |||
| + | {|class="wikitable" style="text-align:center" | ||
| + | !width=270px|Formation | ||
| + | !Formation Icon | ||
| + | !Fleet | ||
| + | !Shelling<ref>https://twitter.com/Divinity_123/status/1470001784009773057</ref> | ||
| + | !Torpedo | ||
| + | !ASW | ||
| + | !Night | ||
| + | !width=320px|Notes | ||
|- | |- | ||
| − | | | + | |rowspan=2|'''Cruising Formation 1 (ASW Alert)<br>第一警戒航行序列(対潜警戒)''' |
| − | | | + | |rowspan=2|{{CruisingForm1}} |
| − | | style=" | + | |Main |
| − | | | + | |style="color:red"|0.8 <!--Shelling DMG main--> |
| − | | style=" | + | | - |
| − | | | + | |style="color:green"|1.3 <!--ASW DMG main--> |
| − | | | + | | - |
| + | |rowspan=2|Moderate shelling and torpedo accuracy. | ||
| + | Similar to Line Abreast. | ||
|- | |- | ||
| − | | | + | |Escort |
| − | | style=" | + | |style="color:red"|0.8 <!--Shelling DMG escort--> |
| − | | style=" | + | |style="color:red"|0.7 <!--Torpedo DMG escort--> |
| − | | style=" | + | |style="color:green"|1.3 <!--ASW DMG escort--> |
| + | |? <!--Night DMG escort--> | ||
|- | |- | ||
| − | |''' | + | |rowspan=2|'''Cruising Formation 2 (Forward Alert)<br>第二警戒航行序列(前方警戒)''' |
| − | | style=" | + | |rowspan=2|{{CruisingForm2}} |
| + | |Main | ||
| + | |1.0 <!--Shelling DMG main--> | ||
| + | | - | ||
| + | |style="color:green"|1.1 <!--ASW DMG main--> | ||
| + | | - | ||
| + | |rowspan=2|Higher shelling and torpedo accuracy than Formation 1. | ||
| + | Similar to Double Line without the accuracy bonus. | ||
|- | |- | ||
| − | | | + | |Escort |
| − | | | + | |1.0 <!--Shelling DMG escort--> |
| − | | style=" | + | |style="color:red"|0.9 <!--Torpedo DMG escort--> |
| − | + | |style="color:green"|1.1 <!--ASW DMG escort--> | |
| − | + | |? <!--Night DMG escort--> | |
| − | | style=" | ||
| − | | | ||
|- | |- | ||
| − | |''' | + | |rowspan=2|'''Cruising Formation 3 (Ring Formation)<br>第三警戒航行序列(輪形陣)''' |
| − | | style=" | + | |rowspan=2|{{CruisingForm3}} |
| + | |Main | ||
| + | |style="color:red"|0.7 <!--Shelling DMG main--> | ||
| + | | - | ||
| + | |1.0 <!--ASW DMG main--> | ||
| + | | - | ||
| + | |rowspan=2|Requires 5 or more ships in the 2nd fleet. Very low shelling and torpedo accuracy. | ||
| + | Similar to Diamond. | ||
|- | |- | ||
| + | |Escort | ||
| + | |style="color:red"|0.7 <!--Shelling DMG escort--> | ||
| + | |style="color:red"|0.6 <!--Torpedo DMG escort--> | ||
| + | |1.0 <!--ASW DMG escort--> | ||
| + | |? <!--Night DMG escort--> | ||
|- | |- | ||
| − | | | + | |rowspan=2|'''Cruising Formation 4 (Battle Formation)<br>第四警戒航行序列(戦闘隊形)''' |
| − | | style=" | + | |rowspan=2|{{CruisingForm4}} |
| − | | style=" | + | |Main |
| − | | | + | |style="color:green"|1.1 <!--Shelling DMG main--> |
| + | | - | ||
| + | |style="color:red"|0.7 <!--ASW DMG main--> | ||
| + | | - | ||
| + | |rowspan=2|Requires 4 or more ships in the 2nd fleet. Highest shelling and torpedo accuracy. | ||
| + | Similar to Line Ahead. | ||
|- | |- | ||
| − | | | + | |Escort |
| − | + | |style="color:green"|1.1 <!--Shelling DMG escort--> | |
| − | | style=" | + | |1.0 <!--Torpedo DMG escort--> |
| − | + | |style="color:red"|0.7 <!--ASW DMG escort--> | |
| − | + | |? <!--Night DMG escort--> | |
| − | + | |} | |
| − | + | <references/> | |
| − | |||
| − | | style=" | ||
| − | |||
| − | | | ||
| − | |||
| − | |} <references/> | ||
| − | |||
{{clear}} | {{clear}} | ||
| − | {| class="wikitable" | + | The following tab resume when engagement and formation are effective: |
| − | + | {|class="wikitable" style="text-align:center" | |
| − | + | !rowspan=2|Modifier!!rowspan=2|LBAS!!rowspan=2|Airstrike!!colspan=3|Support!!colspan=2|Shelling!!rowspan=2|Torpedo!!rowspan=2|ASW!!rowspan=2|Night Battle!!rowspan=2|Sub Touch | |
| − | ! | ||
|- | |- | ||
| − | ! | + | !Shelling!!Aerial!!Torpedo!!Surface!!Carrier |
| − | ! | ||
| − | ! | ||
| − | ! | ||
|- | |- | ||
| − | | | + | !Engagement |
| − | | | + | |❌||❌||✔️||❌||✔️||✔️||✔️||✔️||✔️||{{Tooltip|❌*|Except Special attacks and ASW}}||❌ |
| − | | | ||
| − | | | ||
| − | | | ||
|- | |- | ||
| − | | | + | !Formation |
| − | | | + | |❌||❌||✔️||❌||✔️||✔️||✔️||✔️||✔️||✔️||❌ |
| − | + | |} | |
| − | | | + | |
| − | + | ;Note | |
| + | *If one of the fleet si a combined one then the formation modifier become '''1''' for the support. | ||
| + | |||
| + | ===Damage State=== | ||
| + | {|class="wikitable" style="text-align:center" | ||
| + | ! Damage State | ||
| + | ! Shelling | ||
| + | ! Torpedo | ||
| + | ! ASW | ||
|- | |- | ||
| − | | | + | |{{TextGlow|'''Not Damaged'''|black|text-colour=lime|glow-size=2px}} |
| − | | | + | |rowspan=2| 1.0||rowspan=2| 1.0||rowspan=2| 1.0 |
| − | | | ||
| − | | | ||
| − | | | ||
|- | |- | ||
| − | | | + | |'''{{Shouha}}''' |
| − | |||
| − | |||
| − | |||
| − | |||
|- | |- | ||
| − | | | + | |'''{{Chuuha}}''' |
| − | | | + | | 0.7|| 0.8|| 0.7 |
| − | |||
| − | | | ||
| − | | | ||
|- | |- | ||
| − | | | + | |'''{{Taiha}}''' |
| − | | | + | | 0.4|| 0|| 0.4 |
| − | | | + | |} |
| − | |} | ||
| − | + | ;Notes | |
| − | * | + | * Damage state does not affect aerial combat. |
| + | ** It will affect carrier attacks in the shelling phase. | ||
| − | |||
| − | |||
| − | |||
| − | |||
| − | = | + | ===Night Battle Cut-In=== |
| + | {{details|Night Cut-In}} | ||
| − | + | Night Cut-Ins will apply extra modifiers if triggered. | |
| − | + | {| | |
| − | + | |- style="vertical-align:top" | |
| − | + | | | |
| − | + | {|class="wikitable" style="text-align:center" | |
| − | + | !colspan=4|<math>\text{Mod}_\text{CI}</math> | |
| − | |||
| − | |||
| − | |||
| − | |||
| − | |||
| − | |||
| − | = | ||
| − | |||
| − | |||
| − | |||
| − | {| class="wikitable" | ||
|- | |- | ||
| − | ! | + | !colspan=4|"New" Cut-ins |
| − | |||
| − | |||
| − | |||
|- | |- | ||
| − | + | !Attack Type | |
| − | + | !Prerequisites | |
| − | + | !Notes | |
| − | + | !Damage<br>Modifier | |
|- | |- | ||
| − | + | !style="background-color:#ff7f50; color:black" rowspan=14|Destroyer Cut-ins | |
| − | + | |rowspan=6|{{Torpedo Weapon}}{{Light Gun}}{{Surface Radar}} | |
| − | + | | | |
| − | + | |1.3 | |
| − | |- | ||
| − | | | ||
| − | |||
| − | |||
| − | |||
| − | |||
| − | |||
| − | |||
| − | |||
| − | |||
| − | |||
| − | |||
| − | |||
| − | |||
| − | |||
| − | |||
| − | |||
| − | |||
| − | |||
| − | |||
| − | |||
| − | |||
| − | |||
| − | |||
| − | |||
|- | |- | ||
| − | + | |With {{Equipment/Link|12.7cm Twin Gun Mount Model D Kai 2|text=12.7cm Mod D K2}} | |
| − | + | |{{tooltip|1.625|1.3 x 1.25}} | |
| − | |||
| − | |||
| − | |||
|- | |- | ||
| − | | | + | |With {{Equipment/Link|12.7cm Twin Gun Mount Model D Kai 3|text=12.7cm Mod D K3}} |
| − | | | + | |{{tooltip|1.706|1.3 x 1.25 x 1.05}} |
| − | | | ||
| − | |||
| − | |||
|- | |- | ||
| − | | | + | |With '''2''' {{Equipment/Link|12.7cm Twin Gun Mount Model D Kai 2|text=12.7cm Mod D K2}} |
| − | | | + | |{{tooltip|1.820|1.3 x 1.4}} |
| − | |||
| − | | | ||
| − | | | ||
|- | |- | ||
| − | | | + | |With '''both''' 12.7cm Mod D {{Equipment/Link|12.7cm Twin Gun Mount Model D Kai 2|text=K2}} & {{Equipment/Link|12.7cm Twin Gun Mount Model D Kai 3|text=K3}} |
| − | | | + | |{{tooltip|1.911|1.3 x 1.4 x 1.05}} |
| − | |||
| − | | | ||
| − | | | ||
|- | |- | ||
| − | | | + | |With '''2''' {{Equipment/Link|12.7cm Twin Gun Mount Model D Kai 3|text=12.7cm Mod D K3}} |
| − | | | + | |{{tooltip|2.002|1.3 x 1.4 x 1.1}} |
| − | |||
| − | | | ||
| − | | | ||
|- | |- | ||
| − | | | + | |rowspan=6|{{Torpedo Weapon}}{{Surface Radar}}{{Lookout}} |
| − | + | | | |
| − | + | |1.2 | |
| − | |||
| − | |||
| − | |||
| − | |||
| − | | | ||
| − | |||
| − | | | ||
| − | |||
|- | |- | ||
| − | | | + | |With {{Equipment/Link|12.7cm Twin Gun Mount Model D Kai 2|text=12.7cm Mod D K2}} |
| − | | | + | |{{tooltip|1.5|1.2 x 1.25}} |
| − | | | ||
| − | | | ||
|- | |- | ||
| − | | | + | |With {{Equipment/Link|12.7cm Twin Gun Mount Model D Kai 3|text=12.7cm Mod D K3}} |
| − | + | |{{tooltip|1.575|1.2 x 1.25 x 1.05}} | |
| − | {{ | ||
| − | |||
| − | |||
| − | {| | ||
| − | |||
| − | |||
| − | |||
| − | |||
|- | |- | ||
| − | | | + | |With '''2''' {{Equipment/Link|12.7cm Twin Gun Mount Model D Kai 2|text=12.7cm Mod D K2}}<ref name="Tash">[[Tashkent Kai]] only.</ref> |
| − | + | |{{tooltip|1.680|1.2 x 1.4}} | |
| − | |||
| − | | | ||
| − | | | ||
|- | |- | ||
| − | | | + | |With '''both''' 12.7cm Mod D {{Equipment/Link|12.7cm Twin Gun Mount Model D Kai 2|text=K2}} & {{Equipment/Link|12.7cm Twin Gun Mount Model D Kai 3|text=K3}}<ref name="Tash"/> |
| − | + | |{{tooltip|1.768|1.2 x 1.4 x 1.05}} | |
| − | | | ||
| − | | | ||
| − | | | ||
|- | |- | ||
| − | | | + | |With '''2''' {{Equipment/Link|12.7cm Twin Gun Mount Model D Kai 3|text=12.7cm Mod D K3}}<ref name="Tash"/> |
| − | + | |{{tooltip|1.848?|1.2 x 1.4 x 1.1?}} | |
| − | |||
| − | | | ||
| − | | | ||
|- | |- | ||
| − | |} | + | |{{Torpedo Weapon}}{{Torpedo Weapon}}{{Equipment/Card|Torpedo Squadron Skilled Lookouts|size=40px}} |
| − | + | |Requires {{Equipment/Link|Torpedo Squadron Skilled Lookouts|text=TSLO}} | |
| − | + | |1.5 | |
| − | |||
| − | |||
| − | |||
| − | |||
| − | |||
| − | |||
| − | {| | ||
|- | |- | ||
| − | + | |{{Torpedo Weapon}}{{Drum}}{{Equipment/Card|Torpedo Squadron Skilled Lookouts|size=40px}} | |
| − | + | |Requires {{Equipment/Link|Torpedo Squadron Skilled Lookouts|text=TSLO}} | |
| − | + | |1.3 | |
| − | |||
| − | |||
| − | | | ||
| − | |||
| − | |||
| − | |||
| − | |||
| − | |||
| − | |||
|- | |- | ||
| − | + | !style="background-color:#81c784; color:black" rowspan=4|Carrier Cut-ins<ref>NB CVCI [https://twitter.com/Divinity__123/status/1481091340876369921]</ref> | |
| − | + | |{{NightFighterEn}}{{NightFighterEn}}{{NightBomberEn}} | |
| − | | | + | |rowspan=4|{{WildCard}} = {{NightFighterEn}}{{NightBomberEn}}{{NightDivebomberEn}}{{AnyBomber}} |
| − | | | + | |1.25 |
| − | |||
| − | |||
| − | |||
| − | |||
| − | |||
| − | |||
| − | |||
|- | |- | ||
| − | | | + | |{{NightFighterEn}}{{NightBomberEn}} |
| − | + | |1.2 | |
| − | |||
| − | |||
| − | |||
| − | |||
| − | |||
| − | |||
| − | |||
| − | |||
| − | |||
|- | |- | ||
| − | | | + | |{{NightFighterEn}}{{NightDivebomberEn}}<br>'''OR'''<br>{{NightBomberEn}} {{NightDivebomberEn}} |
| − | + | |1.2 | |
| − | |||
| − | |||
| − | |||
| − | |||
| − | |||
| − | |||
| − | |||
| − | |||
|- | |- | ||
| − | | | + | |{{NightFighterEn}}{{WildCard}}{{WildCard}} |
| − | + | |1.18 | |
| − | |||
| − | |||
| − | |||
| − | |||
| − | |||
| − | |||
| − | | | ||
| − | |||
|- | |- | ||
| − | + | !style="background-color:#9370db; color:black" rowspan=4|Night Zuiun Cut-ins | |
| − | + | |{{Large Gun}}{{Large Gun}}{{Night SPB}}{{Night SPB}}{{Surface Radar}} | |
| − | | | + | |rowspan=4| - |
| − | + | |1.36 | |
| − | |||
| − | | | ||
| − | |||
| − | |||
| − | |||
| − | |||
|- | |- | ||
| − | | | + | |{{Large Gun}}{{Large Gun}}{{Night SPB}}{{Night SPB}} |
| − | + | |1.32 | |
| − | |||
| − | |||
| − | | | ||
| − | |||
| − | |||
| − | |||
| − | |||
| − | |||
|- | |- | ||
| − | | | + | |{{Large Gun}}{{Large Gun}}{{Night SPB}}{{Surface Radar}} |
| − | | | + | |1.28 |
| − | |||
| − | |||
| − | |||
| − | |||
| − | |||
| − | |||
| − | |||
| − | |||
|- | |- | ||
| − | | | + | |{{Large Gun}}{{Large Gun}}{{Night SPB}} |
| − | + | |1.24 | |
| − | + | |} | |
| − | | | + | | |
| − | | | + | {|class="wikitable" style="text-align:center" |
| − | | | + | !colspan=3|<math>\text{Mod}_\text{CI}</math> |
| − | |||
| − | |||
| − | |||
| − | |||
|- | |- | ||
| − | + | !colspan=3|"Old" Cut-ins | |
| − | |||
| − | |||
| − | |||
| − | |||
| − | |||
| − | |||
| − | |||
| − | |||
| − | |||
|- | |- | ||
| − | + | !Attack Type | |
| − | + | !Prerequisites | |
| − | + | !Damage<br>Modifier | |
| − | |||
| − | |||
| − | |||
| − | |||
| − | |||
| − | |||
|- | |- | ||
| − | + | !style="background-color:#ff7f50; color:black"|Gun Cut-in | |
| − | + | |nowrap|{{Large Gun}}{{Large Gun}}{{Large Gun}} | |
| − | + | |2 | |
| − | |||
| − | |||
| − | |||
| − | |||
| − | ! style=" | ||
| − | |||
| − | |||
|- | |- | ||
| − | + | !style="background-color:#ff7f50; color:black"|Mixed Gun Cut-in | |
| − | | | + | |{{Large Gun}}{{Large Gun}}{{Sec Gun}} |
| − | + | |1.75 | |
| − | |||
| − | |||
|- | |- | ||
| − | + | !style="background-color:#59f; color:black" rowspan=2|Submarine Cut-ins | |
| − | + | |{{LM Sub Torpedo}} {{Submarine Radar}} | |
| − | + | |1.75 | |
| − | |||
|- | |- | ||
| − | | | + | |{{LM Sub Torpedo}} {{LM Sub Torpedo}} |
| − | | | + | |1.6 |
| − | |||
|- | |- | ||
| − | | | + | !style="background-color:#59f; color:black"|Torpedo Cut-in |
| − | + | |{{Torpedo Weapon}}{{Torpedo Weapon}} | |
| − | | | + | |1.5 |
|- | |- | ||
| − | | | + | !style="background-color:#59f; color:black"|Mixed Torpedo Cut-in |
| − | + | |{{Torpedo Weapon}}{{Large Gun}} | |
| − | + | |1.3 | |
| − | | | ||
|- | |- | ||
| − | | | + | !style="background-color:gold; color:black" rowspan=3|Double Attack |
| − | + | |{{Large Gun}}{{Large Gun}} | |
| + | |rowspan=3|1.2 | ||
|- | |- | ||
| − | | | + | |{{Large Gun}}{{Sec Gun}} |
| − | |||
| − | |||
|- | |- | ||
| + | |{{Sec Gun}}{{Sec Gun}} | ||
| + | |} | ||
|} | |} | ||
| + | <references/> | ||
| + | |||
| + | ===ASW Synergy=== | ||
| + | {{Equipment/ASW_Synergy|expand=true}} | ||
| − | |||
| − | === | + | ===Special Attack Bonus=== |
| + | {{details|Special Attacks}} | ||
| + | The Special attacks modifier are post-cap for day battle. But are pre-cap for night battle. | ||
| − | Unlike the other pre-cap bonuses, this is just | + | |
| + | ===Hidden Fit Bonuses=== | ||
| + | {{details|Hidden Fit Bonuses}} | ||
| + | |||
| + | Unlike the other pre-cap bonuses, this is just a minor additive firepower bonus added for some ships (mostly cruisers) when equipped with certain guns. | ||
==Post-cap Modifiers== | ==Post-cap Modifiers== | ||
| + | |||
===Aerial Contact=== | ===Aerial Contact=== | ||
| − | + | {{details|Aerial Combat#Contact}} | |
| − | During aerial combat, there is a chance for | + | During aerial combat, there is a chance for the ships to trigger Contact. When it is triggered, the is a bonus multiplier applied to airstrike damage depending on the '''Accuracy''' {{Hit}} of the plane that triggered contact. |
| − | {| class="wikitable" | + | {|class="wikitable" style="text-align:center" |
| − | + | !Accuracy {{Acc}}!!Damage Modifier | |
| − | ! | ||
| − | |||
| − | |||
| − | |||
|- | |- | ||
| − | + | |0||1.12 | |
| − | | | ||
|- | |- | ||
| − | | | + | |1||1.12 |
| − | | | ||
|- | |- | ||
| − | | | + | |2||1.17 |
| − | | | ||
|- | |- | ||
| + | |3+||1.2 | ||
|} | |} | ||
| − | |||
| − | |||
| − | {| class="wikitable" | + | ===Airstrike Special Bonus=== |
| − | ! | + | There's a bonus when attacking certain Princess and Demon-type enemies during airstrike. The multiplier is chosen randomly between two values. The chance is roughly 50%. |
| − | + | ||
| − | + | {|class="wikitable mw-collapsible" | |
| + | !colspan=4|<math>\text{Mod}_\text{boss}</math>[https://x.com/Divinity_123/status/1852761324813799585] | ||
|- | |- | ||
| − | + | !Boss (ID) !!Low mod !!High mod !!Rate<br>Low/High | |
| − | + | |- | |
| − | + | |{{Enemy/Link|PT Imp Pack|Schnellboot Imp Pack|link=PT Imp Pack|text=PT Imp (1637-1640, 2192-2194)}} ||0.5 ||0.8 ||60% / 40% | |
| − | | | ||
| − | | | ||
|- | |- | ||
| − | | | + | |{{Enemy/Link|Battleship Princess|text=BB Hime (1557)}} ||1.4 ||2.0 ||65% / 35% |
| − | |||
| − | |||
| − | | | ||
| − | | | ||
|- | |- | ||
| − | | | + | |{{Enemy/Link|Battleship Summer Princess|text= Summer BB Hime (1696-1698)}}||1.3 ||1.8 ||? |
| − | |||
| − | |||
| − | | | ||
| − | | | ||
|- | |- | ||
| − | | | + | |{{Enemy/Link|Aircraft Carrier Princess|text=CV Hime (1586)}} ||1.4? ||2.2? ||? |
| − | |||
| − | | | ||
| − | | | ||
|- | |- | ||
| − | | | + | |{{Enemy/Link|Aircraft Carrier Princess B|text=CV Hime B (2105-2108)}} ||1.4? ||2.2? ||? |
| − | | | ||
| − | | | ||
|- | |- | ||
| − | | | + | |{{Enemy/Link|Aircraft Carrier Summer Demon|text=Summer CV Demon (1751)}} ||1.2? ||1.6? ||? |
| − | |||
| − | | | ||
|- | |- | ||
| + | |{{Enemy/Link|European Princess|text=Ark Hime (1755-1760)}} ||? ||? ||? | ||
|} | |} | ||
| − | |||
| − | |||
| − | {| class="wikitable" | + | ===Artillery Spotting=== |
| − | + | {{details|Combat/Artillery Spotting}} | |
| − | ! style=" | + | |
| − | + | {|class="wikitable" style="text-align:center" | |
| + | !Attack Type | ||
| + | !Prerequisites | ||
| + | ![[Damage_Calculations#Damage_Formula|Post-cap]]<br>Damage<br>Modifier | ||
| + | !Notes | ||
| + | |- | ||
| + | !style="background-color:#ff7f50" |{{color|black|Main Zuiun Cut-in<br>(Zuiun CI)}} | ||
| + | |{{Large Gun}}{{ZuiunPlane}}{{ZuiunPlane}} | ||
| + | |1.35 | ||
| + | |rowspan=2|{{Ship/Link|Ise/Kai Ni|Hyuuga/Kai Ni|text=''Ise''-class Kai Ni|link_class=Ise}} only | ||
|- | |- | ||
| − | + | !style="background-color:#ff7f50" |{{color|black|Main Suisei Cut-in<br>(Suisei CI)}} | |
| − | + | |{{Large Gun}}{{Dive Bomber}}{{Dive Bomber}} | |
| − | Dive Bomber | + | |1.3 |
| − | + | |- | |
| − | | style=" | + | !style="background-color:#81c784" |{{color|black|Main AP Shell Cut-in<br>(APCI)}} |
| + | |{{Large Gun}}{{Large Gun}}{{Seaplane}}{{AP Shell}} | ||
| + | |1.5 | ||
| | | | ||
|- | |- | ||
| − | + | !style="background-color:gold"|{{color|black|Secondary AP Shell Cut-in<br>(Sec APCI)}} | |
| − | + | |{{Large Gun}}{{Sec Gun}}{{Seaplane}}{{AP Shell}} | |
| − | + | |1.3 | |
| − | |||
| | | | ||
|- | |- | ||
| − | + | !style="background-color:gold"|{{color|black|Secondary Radar Cut-in<br>(Radar CI)}} | |
| − | + | |{{Large Gun}}{{Sec Gun}}{{Seaplane}}{{Radar}} | |
| − | + | |1.2 | |
| | | | ||
|- | |- | ||
| − | + | !style="background-color:gold"|{{color|black|Secondary Cut-in<br>(Sec CI)}} | |
| − | | | + | |{{Large Gun}}{{Sec Gun}}{{Seaplane}} |
| − | | | + | |1.1 |
| + | | | ||
|- | |- | ||
| + | !style="background-color:#59f"|{{color|black|Double Attack<br>(DA)}} | ||
| + | |{{Large Gun}}{{Large Gun}}{{Seaplane}} | ||
| + | |1.2 | ||
| + | | | ||
|} | |} | ||
| + | * If an Artillery Spotting attack is evaded, it will deal [[Scratch Damage]] instead. | ||
| + | |||
| − | === | + | ===Carrier Cut-In Attacks=== |
| − | + | {{details|CVCI}} | |
| − | {| class="wikitable" | + | {|class="wikitable" style="text-align:center" |
| + | !Attack Type | ||
| + | !Prerequisites | ||
| + | ![[Damage_Calculations#Damage_Formula|Post-cap]]<br>Damage<br>Modifier | ||
|- | |- | ||
| − | !style=" | + | !style="background-color:#81c784" |{{color|black|Fighter-Bomber-Attacker<br>(FBA)}} |
| − | + | |nowrap|{{Fighter}}{{Dive Bomber}}{{Torpedo Bomber}} | |
| + | |1.25 | ||
|- | |- | ||
| − | + | !style="background-color:#ff7f50" |{{color|black|Bomber-Bomber-Attacker<br>(BBA)}} | |
| − | + | |nowrap|{{Dive Bomber}}{{Dive Bomber}}{{Torpedo Bomber}} | |
| − | + | |1.2 | |
|- | |- | ||
| − | + | !style="background-color:#59f" |{{color|black|Bomber-Attacker<br>(BA)}} | |
| − | + | |nowrap|{{Dive Bomber}}{{Torpedo Bomber}} | |
| − | + | |1.15 | |
| − | | | + | |} |
| + | If a CVCI attack is evaded, it will deal [[#Scratch Damage|Scratch Damage]] instead. | ||
| + | |||
| + | |||
| + | ===Armor-Piercing Modifier=== | ||
| + | During day combat, certain enemy ships take extra damage from {{AP Shell}} {{Equipment/Link|Type 91 Armor Piercing Shell|Type 1 Armor Piercing Shell|Type 1 Armor Piercing Shell Kai|text=AP Shells|link_category=Armor Piercing Shells}}. | ||
| + | * The bonus only applies against [[FBB]], [[BB]], [[BBV]], [[CV]], [[CVB]], [[CA]], and [[CAV]]. | ||
| + | ** This includes [[Installation]]s. | ||
| + | ** This means that this bonus does not apply against all other types, namely CVL, CL(T), CT, DD, DE, SS(V), AV, AS, AR, LHA, or AP. | ||
| + | |||
| + | For clarity purposes: | ||
| + | * {{Large Gun}} is used to indicate a '''[[Main Gun]]''' of ''any size'', | ||
| + | * {{Sec Gun}} is used to indicate a '''[[Secondary Gun]]''' of ''any size'', | ||
| + | * {{AP Shell}} is used to indicate an '''[[AP Shell]]''', | ||
| + | * {{Radar}} is used to indicate a '''[[Radar]]''' of ''any type'', | ||
| + | |||
| + | {|class="wikitable" | ||
| + | !Type!!Modifier | ||
|- | |- | ||
| − | | | + | |{{Large Gun}}{{AP Shell}} |
| − | + | |1.08 | |
| − | |||
| − | |||
|- | |- | ||
| − | | | + | |{{Large Gun}}{{AP Shell}}{{Radar}} |
| − | + | |1.10 | |
| − | |||
| − | |||
| − | |||
|- | |- | ||
| + | |{{Large Gun}}{{AP Shell}}{{Sec Gun}}<br>{{Large Gun}}{{AP Shell}}{{Sec Gun}}{{Radar}} | ||
| + | |1.15 | ||
|} | |} | ||
| − | * It is ''' | + | ;Note |
| − | * | + | *It is '''unadvisable''' to run any of the other setups beyond the most basic Gun+AP, as the other setups will interfere with artillery spotting and give worse bonuses. |
| − | + | *This modifier doesn't affect support shelling. | |
| + | |||
| + | |||
| + | ===Barrage Balloon Modifier=== | ||
| + | {{Category:Barrage Balloons}} | ||
| + | |||
===Anti-Installation Equipment Modifiers=== | ===Anti-Installation Equipment Modifiers=== | ||
| − | {| | + | {{details|Anti-Installation}} |
| − | | | + | |
| − | + | ||
| − | ! | + | ===Special Attack Bonus=== |
| + | {{details|Special Attacks}} | ||
| + | The Special attacks modifier are post-cap for day battle. But are pre-cap for night battle. | ||
| + | |||
| + | |||
| + | ===Criticals=== | ||
| + | For more details on how critical chance is calculated, please see [[Critical]]. | ||
| + | |||
| + | ;Normal Criticals | ||
| + | {|class="wikitable" | ||
| + | !Attack Type | ||
| + | !Modifier | ||
|- | |- | ||
| − | + | |Normal | |
| − | + | |1.0 | |
|- | |- | ||
| − | | | + | |Critical |
| − | | style="text-align:center | + | |<math>1.5 \times \text{Mod}_\text{proficiency}</math> |
| + | |} | ||
| + | |||
| + | ;Plane Proficiency Critical Modifier | ||
| + | {{details|Plane Proficiency}} | ||
| + | |||
| + | =Ammunition Modifier= | ||
| + | The damage of the fleet is reduced once their ammunition falls below 50%. This modifier '''cannot go above 1'''. The formula used to determine this is: | ||
| + | {{Formula | ||
| + | |Title=<math>\text{Ammo}</math> formula | ||
| + | |Math=\text{Ammo} = \dfrac{\Big\lfloor \dfrac{\text{Current Ammo} }{\text{Max Ammo} } \times 100 \Big\rfloor}{50} | ||
| + | |Var=<math>\text{Current Ammo}</math> the current ammo of the ship. | ||
| + | *<math>\text{Max Ammo}</math> the max ammo of the ship (indicated under '''consuption''' on the ship info). | ||
| + | |Notes= | ||
| + | }} | ||
| + | |||
| + | {| class="wikitable" style="text-align:center" | ||
| + | !Remaining Ammo!!Ammo Modifier!!Notes | ||
|- | |- | ||
| − | | | + | | >50%|| 1.0|| |
| − | | | ||
|- | |- | ||
| − | | | + | | 40%|| 0.8|| 4th Battle |
| − | | | ||
| − | | | ||
|- | |- | ||
| − | | | + | | 30%|| 0.6|| |
| − | | | ||
| − | | | ||
|- | |- | ||
| − | | | + | | 20%|| 0.4|| 5th Battle |
| − | | | ||
| − | | | ||
|- | |- | ||
| − | | | + | | 10%|| 0.2|| |
| − | | | ||
|- | |- | ||
| − | | | + | | 0%|| 0|| 6th Battle |
| − | + | |} | |
| − | |||
| − | |||
| − | |||
| − | |||
| − | |||
| − | |||
| − | |||
| − | |||
| − | |||
| − | |||
| − | |||
| − | |||
| − | |||
| − | |||
| − | |||
| − | |||
| − | |||
| − | |||
| − | |||
| − | | | ||
| − | | | ||
| − | |||
| − | |||
| − | |||
| − | |||
| − | |||
| − | |||
| − | |||
| − | |||
| − | | | ||
| − | |} | ||
| − | {{ | + | * The battle number indicated in the notes assumes only normal surface engagements. Engaging in night battles and other special engagements can change that number. |
| + | * Whatever ammunition modifier applies in day battle carries over to night battle. | ||
| + | * Maelstroms that reduce ammunition also count towards this modifier. | ||
| + | * Using {{Supplies}} {{EquipmentLink|Underway Replenishment}} is a way to medigate ammo penalties. | ||
| + | * The ammunition modifier affects aerial battle. | ||
| + | * Once a ship hits 0% ammo, all attacks become [[#Scratch Damage|scratch damage]]. | ||
| + | * Debuffs are affected by the ammunition modifier. | ||
| − | ''' | + | =Miscellaneous Damage Modifiers= |
| − | * | + | {{Anchor|Chip Damage}} |
| − | * | + | ===Scratch Damage=== |
| − | * | + | In the following cases, attacks will deal '''"scratch damage"''' instead of normal ones: |
| − | ** | + | *If a [[Cut-in]] or a [[Special Attack|special attack]] is evaded, |
| − | + | *The target's armor cannot be penetrated (attack inferior to the enemy defense), | |
| − | * | + | *The ammo count hits 0, |
| + | *When a single fleet attacks submarines during night battle, | ||
| + | **ASW attack works as usual on Night Battle and Night to Day Battle nodes, | ||
| + | *When a [[Friendly Fleet]] attacks the last remaining ship of an enemy fleet. | ||
| − | + | Scratch damage is dealt as a percentage of remaining HP calculated using the following formula: | |
| − | |||
| − | + | {|class="wikitable mw-collapsible mw-collapsed" width="100%" | |
| − | {| class="wikitable" | + | !Scratch Damage formula |
| − | |||
| − | ! | ||
|- | |- | ||
| − | | style=" | + | | |
| − | | | + | {|style="padding:10px; margin:20px; border:1px solid orange; border-radius:10px" |
| − | | | + | |valign="center"| <math>\text{Damage}_\text{scratch} = \text{HP}_\text{current} \times 0.06 + Random[0 ; (\text{HP}_\text{current} - 1)] \times 0.08 </math> |
| − | + | |} | |
| − | + | ;With | |
| + | * <math>\text{HP}_\text{current}</math> the current '''HP''' {{HP}} of the target. | ||
| + | |||
| + | ;Notes | ||
| + | *Scratch damage is: | ||
| + | **A maximum of <math>\text{HP}_\text{current} \times 0.14 - 0.08</math> | ||
| + | **A minimum of <math>\text{HP}_\text{current} \times 0.06</math>. | ||
|- | |- | ||
| + | | | ||
| + | ;Friendly Fleet | ||
| + | A [[Friendly Fleet]] cannot kill the last ship of the opposing fleet, dealing special scratch damage instead: | ||
| + | {|style="padding:10px; margin:20px; border:1px solid orange; border-radius:10px" | ||
| + | |valign="center"| <math>\text{Damage}_\text{scratch} = \text{HP}_\text{current} \times 0.5</math> | ||
| + | |} | ||
|} | |} | ||
| + | * Scratch damage is generally between '''6 and 14 % of current HP'''. | ||
| + | * If the target's HP is low, it is possible for the result of the formula to return a result of 0, as all formulas are rounded down. | ||
| + | **'''{{color|red|This means that scratch damage cannot sink any ship.}} | ||
| − | == | + | ===PT Imps=== |
| − | + | {{Anti-PT Imp Setups|uncollapsed=true}} | |
| − | + | ===Historical Bonus=== | |
| − | + | On almost every [[Event]] map, as well as some regular maps ([[7-4]] & [[7-5]] so far), certain ships, types of ships, equipment, or types of equipment will bring bonuses. | |
| + | *Those bonuses are most of the time raw damage multipliers, and sometimes, accuracy bonuses. | ||
| + | *Bonuses are independent to each ship, so only the ships with any historical bonus or ships equipped with historical equipment will be affected. | ||
| + | *Bonuses may be applicable to some parts of a map only, such as specific phases of nodes. | ||
| − | + | This mechanic is here to encourage the use of "historically significant fleets and setups". | |
| − | * | + | *By nature, historical bonuses are arbitrary, so refer to each individual map to see what bonuses are applicable. |
| − | |||
| − | |||
| − | '' | + | ====Summer Mode Bonuses==== |
| − | + | There are consistent bonuses against the following abyssal bosses' summer forms. These bonuses may differ on some [[event]]'s maps. | |
| − | + | {|class="wikitable" style="text-align:center" | |
| − | + | !colspan=2 rowspan=2| | |
| + | !colspan=5|Damage Bonuses [https://x.com/yukicacoon/status/1984176180279611490] | ||
| + | |- | ||
| + | !{{Enemy/Banner|Battleship Summer Princess|small=true}} | ||
| + | !{{Enemy/Banner|Heavy Cruiser Summer Princess|small=true}} | ||
| + | !{{Enemy/Banner|Aircraft Carrier Summer Demon|small=true}} | ||
| + | !{{Enemy/Banner|European Water Princess|small=true}} | ||
| + | !{{Enemy/Banner|French Battleship Princess Vacation Mode|small=true}} | ||
| + | |- | ||
| + | !rowspan=2|Ships<br><span class="mw-customtoggle-names" style="cursor:pointer; color:blue">''[Toggle Names]''</span> | ||
| − | = | + | !{{QuestRewardShip|Bismarck Drei|small=true|collapsed=names}}{{QuestRewardShip|Nelson Kai|small=true|collapsed=names}}<br>{{QuestRewardShip|Ark Royal Kai|small=true|collapsed=names}}<br>{{QuestRewardShip|Prinz Eugen Kai|small=true|collapsed=names}}{{QuestRewardShip|Gotland Andra|small=true|collapsed=names}} |
| − | + | |colspan=3|1.1x | |
| − | + | |1.15x | |
| − | + | ! - | |
| − | < | ||
| − | |||
| − | {| | ||
| − | |||
| − | |||
| − | ! | ||
|- | |- | ||
| − | | | + | !{{QuestRewardShip|Richelieu Deux|small=true|collapsed=names}}{{QuestRewardShip|Jean Bart Kai|small=true|collapsed=names}}<br>{{QuestRewardShip|Mogador Kai|small=true|collapsed=names}}{{QuestRewardShip|Gloire Kai|small=true|collapsed=names}}<br>{{QuestRewardShip|Commandant Teste Kai|small=true|collapsed=names}} |
| − | | | + | !colspan=4| - |
| − | | | + | |1.15x |
|- | |- | ||
| − | + | !rowspan=6|Equipment | |
| − | | | + | !{{AP Shell}} {{Equipment/Link|Type 91 Armor Piercing Shell|Type 1 Armor Piercing Shell|Type 1 Armor Piercing Shell Kai|text=AP Shells|link=AP Shell}} |
| − | | | + | | 1.2x |
| − | | | + | | 1.1x |
| − | | | + | | 1.1x |
| − | | | + | | 1.15x |
| − | | | + | | 1.2x |
|- | |- | ||
| − | | | + | !{{SPB}} [[SPB]]<br>{{SPF}} [[SPF]] |
| − | | | + | | 1.1x |
| − | | | + | | 1.15x |
| + | | 1.1x | ||
| + | | 1.1x | ||
| + | | 1.1x | ||
|- | |- | ||
| − | | | + | !{{SPB}} {{Equipment/Link|Laté 298B}} |
| − | | | + | !colspan=4| - |
| − | | | + | | {{ToolTip|1.32x|1.1 x 1.2}} |
|- | |- | ||
| − | | | + | !{{Torpedo Bomber}} {{Equipment/Link|Swordfish|Swordfish Mk.II (Skilled)|Swordfish Mk.III (Skilled)|text=Swordfish|link=Swordfish (disambiguation)}} |
| − | | | + | |1 = 1.15x<br>2 = 1.32x |
| − | | | + | |1 = 1.15x<br>2 = 1.21x |
| + | |1 = 1.1x<br>2 = 1.21x | ||
| + | |1 = 1.2x<br>2 = ?x | ||
| + | ! - | ||
|- | |- | ||
| + | !{{Dive Bomber}} [[Dive Bomber]]s | ||
| + | !colspan=2| - | ||
| + | |1 = 1.1x<br>2 = 1.32x | ||
| + | ! - | ||
| + | |1 = 1.1x<br>2 = 1.265x | ||
|} | |} | ||
| − | + | The {{Equipment/Link|Laté 298B}} bonus includes the [[SPB]] bonus. | |
| − | |||
| − | |||
| − | |||
| − | |||
| − | |||
| − | |||
| − | |||
| − | |||
| − | |||
| − | |||
| − | |||
| − | + | The whole bonuses is counted for the airstrike phase [https://x.com/Divinity_123/status/1852761324813799585]. | |
| − | + | ====Foreign Plane Bonuses==== | |
| − | * | + | "Foreign Plane Bonuses" is an event-only mechanic where most foreign planes (not from the IJN/IJA) get various damage bonuses on maps based in Europe. |
| + | *See ''[[Foreign Plane Bonuses]]'' for more details. | ||
| − | + | ===Debuffs=== | |
| + | Debuffs are a special case that only applies during [[events]]. | ||
| − | + | Certain event maps have debuff mechanics that require completing certain gimmicks once Last Dance is reached, in order to trigger the boss or boss' fleet debuff. | |
| − | + | *See ''[[Debuffs|here]]'' for more details on past event debuffs. | |
| − | + | Debuffs can be either: | |
| − | + | *A reduction to the enemy's [[#Defense Power|armor]] {{Armor}}, | |
| − | + | *A post-cap damage modifier for the attacking fleet (probably cases of misinterpretation of armor reductions). | |
| − | |||
| − | |||
| − | |||
=Overkill Protection= | =Overkill Protection= | ||
| − | When a ship in | + | When a ship in the fleet takes more damage than her current HP, she will take a percentage of her current HP in damage instead. |
* The ship must be the flagship OR | * The ship must be the flagship OR | ||
| − | * The ship must not be | + | * The ship must not be '''{{Taiha}}''' nor {{color|red|'''red morale}} [[File:Battle Card Status Heavy Fatigue Face.png]] at the start of the battle. |
** If the ship has red morale, she will just have her HP reduced to 1. | ** If the ship has red morale, she will just have her HP reduced to 1. | ||
| + | {{Formula | ||
| + | |Title=Overkill Formula | ||
| + | |Math=\text{Damage}_\text{Overkill} = \text{HP}_\text{current} \times 0.5 + Random[0 ; (\text{HP}_\text{current} - 1)] \times 0.3 | ||
| + | |Var=<math>\text{HP}_\text{current}</math> the current '''HP''' {{HP}} of the ship. | ||
| + | |Notes=Damage from overkill protection is: | ||
| + | **At worst <math>\text{HP}_\text{current} \times 0.8 - 0.3</math> | ||
| + | **At best <math>\text{HP}_\text{current} \times 0.5</math> | ||
| + | }} | ||
| − | + | Overkill protection will take off between '''50-80 % of the ship's current HP {{HP}}'''. | |
| − | * | + | ;Important Information |
| − | * | + | * In general: |
| + | ** Overkill protection is most applicable to DDs. | ||
| + | *** The most pronounced effects of overkill protection occur at low HP | ||
| + | *** It is also the primary means of surviving a hit they fail to evade | ||
| + | *** For example, a 32 HP DD has a 15.5 % chance of being '''{{Taiha}}''' by a BB Hime, while a 31 HP DD has just a 6.5 % chance | ||
| + | *** This has great implications when marrying ships, 36 HP has one of the highest chances of a taiha | ||
| + | ** Odd-numbered HP is better when overkill protection is triggered. This is because the damage calculations round down, reducing the likelihood of being knocked down to heavy damage. | ||
| + | ** Therefore ships with maximum HP that are divisible by 4 have worse survivability. | ||
| + | *** This theory is most applicable to ships '''at full HP'''. Once a ship starts taking damage, the utility of overkill protection is unchanged. Therefore sometimes it becomes better survivability from an overkill damage. | ||
| + | *** For example, max 6 HP [[Maruyu]] has no chance to be taiha by an overkill hit, because max 4 damage remains 2/6 HP, so still > 25 % HP. So does it for a damaged ship who remains at 6 HP, if her max HP < 8. | ||
| − | + | ;Overkill table | |
| + | *4n are in {{Color|red|red}} | ||
| + | *4n+2 (2n) are in {{Color|orange|orange}} | ||
| + | *4n+1 & 4n+3 are in {{Color|green|green}} | ||
| − | + | {|class="wikitable sortable mw-collapsible mw-collapsed fixed-header" | |
| − | + | |- class="fixed-header-1" | |
| − | + | !colspan=4|Overkill | |
| − | + | |- class="fixed-header-2" | |
| + | !{{HP}} HP !!{{Taiha}} !!{{Chuuha}} !!{{Shouha}} | ||
| + | |- | ||
| + | |style="color:orange"|6 ||0.0 % ||100.0 % ||0.0 % | ||
| + | |- | ||
| + | |style="color:green"|7 ||0.0 % ||71.4 % ||28.6 % | ||
| + | |- | ||
| + | |style="color:red"|8 ||12.5 % ||87.5 % ||0.0 % | ||
| + | |- | ||
| + | |style="color:green"|9 ||0.0 % ||77.8 % ||22.2 % | ||
| + | |- | ||
| + | |style="color:orange"|10 ||0.0 % ||100.0 % ||0.0 % | ||
| + | |- | ||
| + | |style="color:green"|11 ||0.0 % ||81.8 % ||18.2 % | ||
| + | |- | ||
| + | |style="color:red"|12 ||16.7 % ||83.3 % ||0.0 % | ||
| + | |- | ||
| + | |style="color:green"|13 ||7.7 % ||76.9 % ||15.4 % | ||
| + | |- | ||
| + | |style="color:orange"|14 ||0.0 % ||100.0 % ||0.0 % | ||
| + | |- | ||
| + | |style="color:green"|15 ||0.0 % ||86.7 % ||13.3 % | ||
| + | |- | ||
| + | |style="color:red"|16 ||12.5 % ||87.5 % ||0.0 % | ||
| + | |- | ||
| + | |style="color:green"|17 ||11.8 % ||76.5 % ||11.8 % | ||
| + | |- | ||
| + | |style="color:orange"|18 ||5.6 % ||94.4 % ||0.0 % | ||
| + | |- | ||
| + | |style="color:green"|19 ||0.0 % ||89.5 % ||10.5 % | ||
| + | |- | ||
| + | |style="color:red"|20 ||15.0 % ||85.0 % ||0.0 % | ||
| + | |- | ||
| + | |style="color:green"|21 ||9.5 % ||81.0 % ||9.5 % | ||
| + | |- | ||
| + | |style="color:orange"|22 ||9.1 % ||90.9 % ||0.0 % | ||
| + | |- | ||
| + | |style="color:green"|23 ||4.3 % ||87.0 % ||8.7 % | ||
| + | |- | ||
| + | |style="color:red"|24 ||16.7 % ||83.3 % ||0.0 % | ||
| + | |- | ||
| + | |style="color:green"|25 ||12.0 % ||80.0 % ||8.0 % | ||
| + | |- | ||
| + | |style="color:orange"|26 ||7.7 % ||92.3 % ||0.0 % | ||
| + | |- | ||
| + | |style="color:green"|27 ||7.4 % ||85.2 % ||7.4 % | ||
| + | |- | ||
| + | |style="color:red"|28 ||14.3 % ||85.7 % ||0.0 % | ||
| + | |- | ||
| + | |style="color:green"|29 ||13.8 % ||79.3 % ||6.9 % | ||
| + | |- | ||
| + | |style="color:orange"|30 ||10.0 % ||90.0 % ||0.0 % | ||
| + | |- | ||
| + | |style="color:green"|31 ||6.5 % ||87.1 % ||6.5 % | ||
| + | |- | ||
| + | |style="color:red"|32 ||15.6 % ||84.4 % ||0.0 % | ||
| + | |- | ||
| + | |style="color:green"|33 ||12.1 % ||81.8 % ||6.1 % | ||
| + | |- | ||
| + | |style="color:orange"|34 ||11.8 % ||88.2 % ||0.0 % | ||
| + | |- | ||
| + | |style="color:green"|35 ||8.6 % ||85.7 % ||5.7 % | ||
| + | |- | ||
| + | |style="color:red"|36 ||16.7 % ||83.3 % ||0.0 % | ||
| + | |- | ||
| + | |style="color:green"|37 ||13.5 % ||81.1 % ||5.4 % | ||
| + | |- | ||
| + | |style="color:orange"|38 ||10.5 % ||89.5 % ||0.0 % | ||
| + | |- | ||
| + | |style="color:green"|39 ||10.3 % ||84.6 % ||5.1 % | ||
| + | |- | ||
| + | |style="color:red"|40 ||15.0 % ||85.0 % ||0.0 % | ||
| + | |- | ||
| + | |style="color:green"|41 ||14.6 % ||80.5 % ||4.9 % | ||
| + | |- | ||
| + | |style="color:orange"|42 ||11.9 % ||88.1 % ||0.0 % | ||
| + | |- | ||
| + | |style="color:green"|43 ||9.3 % ||86.0 % ||4.7 % | ||
| + | |- | ||
| + | |style="color:red"|44 ||15.9 % ||84.1 % ||0.0 % | ||
| + | |- | ||
| + | |style="color:green"|45 ||13.3 % ||82.2 % ||4.4 % | ||
| + | |- | ||
| + | |style="color:orange"|46 ||13.0 % ||87.0 % ||0.0 % | ||
| + | |- | ||
| + | |style="color:green"|47 ||10.6 % ||85.1 % ||4.3 % | ||
| + | |- | ||
| + | |style="color:red"|48 ||16.7 % ||83.3 % ||0.0 % | ||
| + | |- | ||
| + | |style="color:green"|49 ||14.3 % ||81.6 % ||4.1 % | ||
| + | |- | ||
| + | |style="color:orange"|50 ||12.0 % ||88.0 % ||0.0 % | ||
| + | |- | ||
| + | |style="color:green"|51 ||11.8 % ||84.3 % ||3.9 % | ||
| + | |- | ||
| + | |style="color:red"|52 ||15.4 % ||84.6 % ||0.0 % | ||
| + | |- | ||
| + | |style="color:green"|53 ||15.1 % ||81.1 % ||3.8 % | ||
| + | |- | ||
| + | |style="color:orange"|54 ||13.0 % ||87.0 % ||0.0 % | ||
| + | |- | ||
| + | |style="color:green"|55 ||10.9 % ||85.5 % ||3.6 % | ||
| + | |- | ||
| + | |style="color:red"|56 ||16.1 % ||83.9 % ||0.0 % | ||
| + | |- | ||
| + | |style="color:green"|57 ||14.0 % ||82.5 % ||3.5 % | ||
| + | |- | ||
| + | |style="color:orange"|58 ||13.8 % ||86.2 % ||0.0 % | ||
| + | |- | ||
| + | |style="color:green"|59 ||11.9 % ||84.7 % ||3.4 % | ||
| + | |- | ||
| + | |style="color:red"|60 ||16.7 % ||83.3 % ||0.0 % | ||
| + | |- | ||
| + | |style="color:green"|61 ||14.8 % ||82.0 % ||3.3 % | ||
| + | |- | ||
| + | |style="color:orange"|62 ||12.9 % ||87.1 % ||0.0 % | ||
| + | |- | ||
| + | |style="color:green"|63 ||12.7 % ||84.1 % ||3.2 % | ||
| + | |- | ||
| + | |style="color:red"|64 ||15.6 % ||84.4 % ||0.0 % | ||
| + | |- | ||
| + | |style="color:green"|65 ||15.4 % ||81.5 % ||3.1 % | ||
| + | |- | ||
| + | |style="color:orange"|66 ||13.6 % ||86.4 % ||0.0 % | ||
| + | |- | ||
| + | |style="color:green"|67 ||11.9 % ||85.1 % ||3.0 % | ||
| + | |- | ||
| + | |style="color:red"|68 ||16.2 % ||83.8 % ||0.0 % | ||
| + | |- | ||
| + | |style="color:green"|69 ||14.5 % ||82.6 % ||2.9 % | ||
| + | |- | ||
| + | |style="color:orange"|70 ||14.3 % ||85.7 % ||0.0 % | ||
| + | |- | ||
| + | |style="color:green"|71 ||12.7 % ||84.5 % ||2.8 % | ||
| + | |- | ||
| + | |style="color:red"|72 ||16.7 % ||83.3 % ||0.0 % | ||
| + | |- | ||
| + | |style="color:green"|73 ||15.1 % ||82.2 % ||2.7 % | ||
| + | |- | ||
| + | |style="color:orange"|74 ||13.5 % ||86.5 % ||0.0 % | ||
| + | |- | ||
| + | |style="color:green"|75 ||13.3 % ||84.0 % ||2.7 % | ||
| + | |- | ||
| + | |style="color:red"|76 ||15.8 % ||84.2 % ||0.0 % | ||
| + | |- | ||
| + | |style="color:green"|77 ||15.6 % ||81.8 % ||2.6 % | ||
| + | |- | ||
| + | |style="color:orange"|78 ||14.1 % ||85.9 % ||0.0 % | ||
| + | |- | ||
| + | |style="color:green"|79 ||12.7 % ||84.8 % ||2.5 % | ||
| + | |- | ||
| + | |style="color:red"|80 ||16.3 % ||83.8 % ||0.0 % | ||
| + | |- | ||
| + | |style="color:green"|81 ||14.8 % ||82.7 % ||2.5 % | ||
| + | |- | ||
| + | |style="color:orange"|82 ||14.6 % ||85.4 % ||0.0 % | ||
| + | |- | ||
| + | |style="color:green"|83 ||13.3 % ||84.3 % ||2.4 % | ||
| + | |- | ||
| + | |style="color:red"|84 ||16.7 % ||83.3 % ||0.0 % | ||
| + | |- | ||
| + | |style="color:green"|85 ||15.3 % ||82.4 % ||2.4 % | ||
| + | |- | ||
| + | |style="color:orange"|86 ||14.0 % ||86.0 % ||0.0 % | ||
| + | |- | ||
| + | |style="color:green"|87 ||13.8 % ||83.9 % ||2.3 % | ||
| + | |- | ||
| + | |style="color:red"|88 ||15.9 % ||84.1 % ||0.0 % | ||
| + | |- | ||
| + | |style="color:green"|89 ||15.7 % ||82.0 % ||2.2 % | ||
| + | |- | ||
| + | |style="color:orange"|90 ||14.4 % ||85.6 % ||0.0 % | ||
| + | |- | ||
| + | |style="color:green"|91 ||13.2 % ||84.6 % ||2.2 % | ||
| + | |- | ||
| + | |style="color:red"|92 ||16.3 % ||83.7 % ||0.0 % | ||
| + | |- | ||
| + | |style="color:green"|93 ||15.1 % ||82.8 % ||2.2 % | ||
| + | |- | ||
| + | |style="color:orange"|94 ||14.9 % ||85.1 % ||0.0 % | ||
| + | |- | ||
| + | |style="color:green"|95 ||13.7 % ||84.2 % ||2.1 % | ||
| + | |- | ||
| + | |style="color:red"|96 ||16.7 % ||83.3 % ||0.0 % | ||
| + | |- | ||
| + | |style="color:green"|97 ||15.5 % ||82.5 % ||2.1 % | ||
| + | |- | ||
| + | |style="color:orange"|98 ||14.3 % ||85.7 % ||0.0 % | ||
| + | |- | ||
| + | |style="color:green"|99 ||14.1 % ||83.8 % ||2.0 % | ||
| + | |- | ||
| + | |style="color:red"|100 ||16.0 % ||84.0 % ||0.0 % | ||
| + | |- | ||
| + | |style="color:green"|101 ||15.8 % ||82.2 % ||2.0 % | ||
| + | |- | ||
| + | |style="color:orange"|102 ||14.7 % ||85.3 % ||0.0 % | ||
| + | |- | ||
| + | |style="color:green"|103 ||13.6 % ||84.5 % ||1.9 % | ||
| + | |- | ||
| + | |style="color:red"|104 ||16.3 % ||83.7 % ||0.0 % | ||
| + | |- | ||
| + | |style="color:green"|105 ||15.2 % ||82.9 % ||1.9 % | ||
| + | |- | ||
| + | |style="color:orange"|106 ||15.1 % ||84.9 % ||0.0 % | ||
| + | |- | ||
| + | |style="color:green"|107 ||14.0 % ||84.1 % ||1.9 % | ||
| + | |- | ||
| + | |style="color:red"|108 ||16.7 % ||83.3 % ||0.0 % | ||
| + | |- | ||
| + | |style="color:green"|109 ||15.6 % ||82.6 % ||1.8 % | ||
| + | |- | ||
| + | |style="color:orange"|110 ||14.5 % ||85.5 % ||0.0 % | ||
| + | |} | ||
| − | = | + | =See Also= |
{{Mechanics}} | {{Mechanics}} | ||
| − | |||
| − | |||
Latest revision as of 11:34, 1 November 2025
The main goal of the game is to sink Abyssals. Abyssals are sunk by doing Damage to them. This page lists all the applicable formulas and mechanics that affect the calculation of Damage.
Please note that all formulas between [math]\displaystyle{ \lfloor \ \rfloor }[/math] or marked with [math]\displaystyle{ \downarrow }[/math] are rounded down.
- For example, [math]\displaystyle{ \lfloor 4.2 \rfloor = 4 }[/math].
- [math]\displaystyle{ 4.2 \times_\downarrow 1.5 = \lfloor 4.2 \times 1.5 \rfloor = \lfloor 6.3 \rfloor = 6 }[/math], but [math]\displaystyle{ 4.2 \times_\downarrow 1 = 4.2 }[/math] (by definition, [math]\displaystyle{ \times_\downarrow }[/math] is then a non-commutative non-associative operator, it is assumed to be left-associative with lower priority than the usual multiplication operator).
- [math]\displaystyle{ \times_\downarrow }[/math] is used when the round down applies only when the modifier is applied.
Damage Formula
The Damage is the reduction of HP ![]() caused by an attack hitting a target. The formula is the same for all attacks as well as abyssals. It stems from the difference between the final attack power of the assailant and the defense power of the target.
caused by an attack hitting a target. The formula is the same for all attacks as well as abyssals. It stems from the difference between the final attack power of the assailant and the defense power of the target.
| Damage Formula | |
|---|---|
| |
|
Defense Power
Defense power represents the ability of a ship to resist damage. It's calculated from the Armor ![]() plus a random element.
plus a random element.
| Defense Formula | |
|---|---|
| |
|
For short, defensive power randomly varies between 1.3 x![]() and 0.7 x
and 0.7 x![]() .
.
Attacks Power
Attack power represents the ability of a ship to inflict damage. It's affected by a lot of different elements (stats, mechanics, "battle state", etc.) through 4 steps of calcul:
- Basic
- Generally calculated from the relevant stats of the ship using different formulas according to the type of attack and the phase of battle
- Pre-cap
- The basic attack goes through different modifiers
- Cap
- If the attack is superior to a cap it's reduced
- Post-cap
- These modifiers are more potent because they are not limited by the cap
| Attack Step Formulas | ||||||||||||||||||
|---|---|---|---|---|---|---|---|---|---|---|---|---|---|---|---|---|---|---|
Pre-cap
|
| |||||||||||||||||
Cap
|
The attack is then capped as follows:
| |||||||||||||||||
Post-cap
|
Capped attack is then modified by post-cap modifiers:
| |||||||||||||||||
Basic Attack Power Formulas
The following section details the different formulas to calculate [math]\displaystyle{ \text{Atk}_\text{base} }[/math]. As the formula depends on the type of attacks and the combat phase.
Below are the common variables used in all accuracy formulas:
- [math]\displaystyle{ \text{FP} }[/math] is the Firepower
 of the ship including equipment.
 - [math]\displaystyle{ \text{TP} }[/math] is the Torpedo
 of the ship including equipment or the torpedo of a plane.
 - [math]\displaystyle{ \text{ASW} }[/math] is the Anti-submarine
 of the ship or equipment.
 - [math]\displaystyle{ \text{DB} }[/math] is the Dive bombing
 of the plane.
 - [math]\displaystyle{ \bigstar }[/math] is the upgrade bonus of the equipment.
- See Improvement or Akashi List for upgrade bonus values.
- [math]\displaystyle{ \text{Count}_\text{Plane} }[/math] is the remaining amount of planes in a slot, performing the attack.
- [math]\displaystyle{ \text{Mod}_\text{CF} }[/math] is the combined fleet modifier based on the tables below:
| Combat Phase | Forces | Carrier Task Force | Surface Task Force | Transport Escort Force |
|---|---|---|---|---|
| Main Fleet Shelling | Allies | +2 | +10 | -5 |
| Enemy | +10 | +5 | +10 | |
| Escort Fleet Shelling | Allies | +10 | -5 | +10 |
| Enemy | +5 | -5 | +5 | |
| Torpedo | Allies | -5 | -5 | -5 |
| Enemy | -5 | -5 | -5 |
| Combat Phase | Forces | Carrier Task Force | Surface Task Force | Transport Escort Force |
|---|---|---|---|---|
| Main Fleet Shelling | Allies | +2 | +2 | -5 |
| Enemy | +10 | +10 | +10 | |
| Escort Fleet Shelling | Allies | -5 | -5 | -5 |
| Enemy | -5 | -5 | -5 | |
| Torpedo | Allies | +10 | +10 | +10 |
| Enemy | +10 | +10 | +10 |
| Combat Phase | Forces | Bonus |
|---|---|---|
| Vs Main Fleet | Allies | +5 |
| Enemy | +10 | |
| Vs Escort | Allies | +5 |
| Enemy | -5 | |
| Torpedo | Allies | +10 |
| Enemy | +10 |
| Combat Phase | Forces | Bonus[1] |
|---|---|---|
| Vs Main Fleet | Allies | -10 |
| Enemy | -10? | |
| Vs Escort | Allies | -20 |
| Enemy | -20? |
Airstrike
The damage from airstrikes is calculated independently for each plane slot and mainly depends on the stats of the plane and the current plane count of the slot.
| Airstrike Attack Formula | ||||||||||||||||||||||||
|---|---|---|---|---|---|---|---|---|---|---|---|---|---|---|---|---|---|---|---|---|---|---|---|---|
| ||||||||||||||||||||||||
This applies to Jet Assaults (including LBAS Jet Assaults) and Airstrikes. | ||||||||||||||||||||||||
Surface Shelling
The surface shelling damage stems directly from the Firepower ![]() of the ship.
of the ship.
| Surface Attack Formula | |
|---|---|
| |
This applies to most ships during the Shelling phase (unless it is an ASW attack). |
Carrier Shelling Attacks
Unlike during airstrikes, carrier shelling does not depend on the plane slot and instead combines the stat of the carrier and all planes equipped to one attack.
| Carrier Shelling Attack Formula | |
|---|---|
| |
This applies to carriers during the Shelling phase (unless it is an ASW attack).
|


Torpedo Attacks
Torpedo damage stems directly from the Torpedo ![]() of the ship.
of the ship.
| Torpedo Attack Formula | |
|---|---|
| |
Torpedo Attacks only include the Opening Torpedo Salvo and Closing Torpedo Salvo. |
Anti-Submarine Warfare
- For more information on this topic, see Anti-Submarine Warfare.
The stats used to calculate damage against submarines is the ![]() ASW.
ASW.
- When contributing to ASW power, Base ASW is square rooted, while equipment ASW is multiplied by 1.5.
- Anti-submarine weaponry is therefore the primary source of ASW damage, with the base ship ASW playing a very minor role damage-wise.
- However, base ship ASW is the primary determinant of whether a ship can reach 100 total ASW to perform "Opening ASW" (OASW) attacks.
Only the following equipment count as "anti-submarine equipment" (contributing to damage):
 Smalls Small Sonars, Larges Large Sonars,
  Depth Charges,
 Torpedo Bombers,
 Dive Bombers,
  BomberSeaplane Bombers,
  Rotorcraft,
  Liaison Aircraft.
All the following equipment are known to sometimes have some ASW ![]() , but do not count and contribute to ASW damage (still count for other elements like OASW requirements):
, but do not count and contribute to ASW damage (still count for other elements like OASW requirements):

 Main Guns,
  Radars,
  Fighters,
  Carrier Recons, Recon Seaplane Recons,
  Seaplane Fighters,
  Large Flying Boats,
  Surface Ship Personnels.
Unlike shelling, ASW damage is capped at 170.
ASW attacks have different modifiers gained from Formations:
- Line Abreast
 is the main ASW formation, with a 1.3x damage modifier,
 - Cruising Formation 1
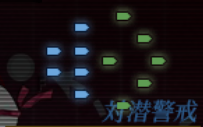 is the main ASW formation for Combined Fleets, with a 1.3x damage modifier.


| Anti-Submarine Formula | |||||||||||||||||
|---|---|---|---|---|---|---|---|---|---|---|---|---|---|---|---|---|---|
| |||||||||||||||||
| |||||||||||||||||
Surface Night Battle
Night battle damage stems directly from the sum of Firepower ![]() and Torpedo
and Torpedo ![]() of the ship.
of the ship.
| Night Attack Formula | |
|---|---|
| |
This applies to most ships during Night Battle. |
Carrier Night Air Attacks
The carrier night air attack damage calculation is complex but for short only take the stat of the night plane.
A table of the yasen given by each plane can be found here.
| Carrier Night Air Attack Formula | ||
|---|---|---|
| ||
This applies to carrier night air attack |
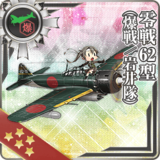
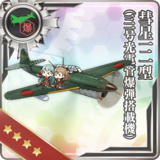
Anti-Installation Attacks
- For more information on this topic, see Anti-Installation.
Installations differ from regular enemy warships, as they are immune to certain attack elements like the torpedo stat, but are extremely weak against specialized gears.
Support Expedition Attack Power Formula
Support Expedition attack formulas are close but not the same as combat formulas. They also are only affected by the following modifiers:
Shelling Support
Basic attack power is calculated in a similar way as normal for surface ships and carriers except that firepower is reduced by 1.
| Surface Attack Formula | |
|---|---|
| |
|
| Carrier Shelling Attack Formula | |
|---|---|
| |
|
Airstrike Support
| Airstrike Support Attack Formula | |
|---|---|
| |
|
Anti-Submarine Support
| Anti-Submarine Support Attack Formula | |
|---|---|
| |
|
Long Range Torpedo Support
| Long-Range Torpedo Attack Formula | |
|---|---|
| |
|
LBAS Attack Power Formulas
- For more information on this topic, see LBAS.
| Anti-Ship | ||||||||||||||||||||||||||||||||||||||||||||||||||||||||||
|---|---|---|---|---|---|---|---|---|---|---|---|---|---|---|---|---|---|---|---|---|---|---|---|---|---|---|---|---|---|---|---|---|---|---|---|---|---|---|---|---|---|---|---|---|---|---|---|---|---|---|---|---|---|---|---|---|---|---|
Pre-cap
|
| |||||||||||||||||||||||||||||||||||||||||||||||||||||||||
Post-cap
|
| |||||||||||||||||||||||||||||||||||||||||||||||||||||||||
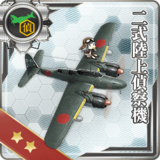
| Anti-Installation | ||||||||||||||||||||||||||||||||||||||||||||||||||||||||||||||||||
|---|---|---|---|---|---|---|---|---|---|---|---|---|---|---|---|---|---|---|---|---|---|---|---|---|---|---|---|---|---|---|---|---|---|---|---|---|---|---|---|---|---|---|---|---|---|---|---|---|---|---|---|---|---|---|---|---|---|---|---|---|---|---|---|---|---|---|
Pre-cap
|
| |||||||||||||||||||||||||||||||||||||||||||||||||||||||||||||||||
Post-cap
|
| |||||||||||||||||||||||||||||||||||||||||||||||||||||||||||||||||
| ASW | ||
|---|---|---|
Pre-cap
|
| |
Post-cap
|
| |
| ||
- Notes
- Unlike carrier airstrikes, the 1.2x critical proficiency bonus applies to each slot independently.
- Jet Assault use the airstrike formula even on land base.
Attack Power Corrections
After calculating the basic attack power of the attack being made, it is then adjusted based on various factors. Attack power modifiers can be split into pre- and post-cap modifiers. Post-cap modifiers are more powerful to have because they aren't reduced by the cap.
Pre-cap Modifiers
Engagement
- For more information on this topic, see Engagement.
| Form | Common name | Damage Modifier | Chance | Chance with Saiun  
|
|---|---|---|---|---|
| Crossing the T (Advantage) | Green T | 1.2 | 15% | 15% |
| Parallel Engagement | Parallel | 1.0 | 45% | 45% |
| Head-on Engagement | Head-on | 0.8 | 30% | 40% |
| Crossing the T (Disadvantage) | Red T | 0.6 | 10% | 0% |
- Engagement modifier affects the Shelling Phase, as well as the Battle Openings, the Closing Torpedo Salvo, and Support Expeditions.
- All engagement forms affect both sides equally, including Green T and Red T.
- The exception are some Special Attacks.
- Night Battle and Aerial Combat are not affected by engagement.
Formation
- For more information on this topic, see Formation.
| Formation Attack Power Modifiers | ||||
|---|---|---|---|---|
| Formation | Shelling | Torpedo | ASW | Night Battle |
| Line Ahead | 1.0 | 1.0 | 0.6 | 1.0 |
| Double Line | 0.8 | 0.8 | 0.8 | 1.0 |
| Diamond | 0.7 | 0.7 | 1.2 | 1.0 |
| Echelon | 0.75 | 0.6 | 1.1 | 1.0 |
| Line Abreast | 0.6 | 0.6 | 1.3 | 1.0 |
| Vanguard | 0.5 | 1.0 | 1.0 | 0.5 |
| 1.0 | 1.0 | 0.6 | 1.0 | |
Combined Fleets have special formations that differ from the standard single fleet formations. The following formations can be selected.
| Formation | Formation Icon | Fleet | Shelling[1] | Torpedo | ASW | Night | Notes |
|---|---|---|---|---|---|---|---|
| Cruising Formation 1 (ASW Alert) 第一警戒航行序列(対潜警戒) |
|
Main | 0.8 | - | 1.3 | - | Moderate shelling and torpedo accuracy.
Similar to Line Abreast. |
| Escort | 0.8 | 0.7 | 1.3 | ? | |||
| Cruising Formation 2 (Forward Alert) 第二警戒航行序列(前方警戒) |
|
Main | 1.0 | - | 1.1 | - | Higher shelling and torpedo accuracy than Formation 1.
Similar to Double Line without the accuracy bonus. |
| Escort | 1.0 | 0.9 | 1.1 | ? | |||
| Cruising Formation 3 (Ring Formation) 第三警戒航行序列(輪形陣) |

|
Main | 0.7 | - | 1.0 | - | Requires 5 or more ships in the 2nd fleet. Very low shelling and torpedo accuracy.
Similar to Diamond. |
| Escort | 0.7 | 0.6 | 1.0 | ? | |||
| Cruising Formation 4 (Battle Formation) 第四警戒航行序列(戦闘隊形) |

|
Main | 1.1 | - | 0.7 | - | Requires 4 or more ships in the 2nd fleet. Highest shelling and torpedo accuracy.
Similar to Line Ahead. |
| Escort | 1.1 | 1.0 | 0.7 | ? |
The following tab resume when engagement and formation are effective:
| Modifier | LBAS | Airstrike | Support | Shelling | Torpedo | ASW | Night Battle | Sub Touch | |||
|---|---|---|---|---|---|---|---|---|---|---|---|
| Shelling | Aerial | Torpedo | Surface | Carrier | |||||||
| Engagement | ❌ | ❌ | ✔️ | ❌ | ✔️ | ✔️ | ✔️ | ✔️ | ✔️ | ❌* | ❌ |
| Formation | ❌ | ❌ | ✔️ | ❌ | ✔️ | ✔️ | ✔️ | ✔️ | ✔️ | ✔️ | ❌ |
- Note
- If one of the fleet si a combined one then the formation modifier become 1 for the support.
Damage State
| Damage State | Shelling | Torpedo | ASW |
|---|---|---|---|
| Not Damaged | 1.0 | 1.0 | 1.0 |
| Shouha Lightly Damaged (小破) | |||
| ChuuhaModerately Damaged (中破) | 0.7 | 0.8 | 0.7 |
| TaihaHeavily Damaged (大破) | 0.4 | 0 | 0.4 |
- Notes
- Damage state does not affect aerial combat.
- It will affect carrier attacks in the shelling phase.
Night Battle Cut-In
- For more information on this topic, see Night Cut-In.
Night Cut-Ins will apply extra modifiers if triggered.
|
| ||||||||||||||||||||||||||||||||||||||||||||||||||||||||||||||||||||||||||||||||||||||||||||||||
ASW Synergy
| ASW Damage Synergy | |||
|---|---|---|---|
Small Sonars |
 Type 93 Passive Sonar  Type 4 Passive Sonar  Type 3 Active Sonar  Type 3 Active Sonar Kai  Type124 ASDIC  Type144/147 ASDIC  HF/DF + Type144/147 ASDIC | ||
Large Sonars |
 Type 0 Passive Sonar | ||
Depth Charge Projectors (DCP) |
 Type 94 Depth Charge Projector  Type 3 Depth Charge Projector  Type 3 Depth Charge Projector Kai  Type 3 Depth Charge Projector (Concentrated Deployment)  Prototype 15cm 9-tube ASW Rocket Launcher  RUR-4A Weapon Alpha Kai  Mk.32 ASW Torpedo (Mk.2 Thrower) | ||
Depth Charge (Racks) (DCR) |
 Type 95 Depth Charge  Type 2 Depth Charge  Type 2 Depth Charge Kai Ni  Lightweight ASW Torpedo (Initial Test Model)  Hedgehog (Initial Model) | ||
ASW Mortars |
 Type 2 12cm Mortar Kai  Type 2 12cm Mortar Kai (Concentrated Deployment) | ||
| ASW Damage Modifiers: [math]\displaystyle{ \text{Mod}_\text{synergy} = {Mod}_\text{1} \times {Mod}_\text{2} }[/math] | |||
| [math]\displaystyle{ {Mod}_\text{1} }[/math] | (Any Sonar + Any Depth Charge) |
1.15 | |
| [math]\displaystyle{ {Mod}_\text{2} }[/math] | 1.1 | ||
| 1.25 | |||
| Examples | |||
| [math]\displaystyle{ \text{Mod}_\text{synergy} }[/math] | 1.4375[math]\displaystyle{ 1.15 \times 1.25 }[/math] | ||
| 1.265[math]\displaystyle{ 1.15 \times 1.1 }[/math] | |||
| Armor Penetration | |||
Indepentant of synergies, some equipment provides additional armor penetration to ASW attacks.
The flat armor penetration value is calculated as follows:
| |||
Special Attack Bonus
- For more information on this topic, see Special Attacks.
The Special attacks modifier are post-cap for day battle. But are pre-cap for night battle.
Hidden Fit Bonuses
- For more information on this topic, see Hidden Fit Bonuses.
Unlike the other pre-cap bonuses, this is just a minor additive firepower bonus added for some ships (mostly cruisers) when equipped with certain guns.
Post-cap Modifiers
Aerial Contact
- For more information on this topic, see Aerial Combat#Contact.
During aerial combat, there is a chance for the ships to trigger Contact. When it is triggered, the is a bonus multiplier applied to airstrike damage depending on the Accuracy ![]() of the plane that triggered contact.
of the plane that triggered contact.
| Accuracy |
Damage Modifier |
|---|---|
| 0 | 1.12 |
| 1 | 1.12 |
| 2 | 1.17 |
| 3+ | 1.2 |
Airstrike Special Bonus
There's a bonus when attacking certain Princess and Demon-type enemies during airstrike. The multiplier is chosen randomly between two values. The chance is roughly 50%.
| [math]\displaystyle{ \text{Mod}_\text{boss} }[/math][9] | |||
|---|---|---|---|
| Boss (ID) | Low mod | High mod | Rate Low/High |
PT Imp (1637-1640, 2192-2194)  |
0.5 | 0.8 | 60% / 40% |
BB Hime (1557) |
1.4 | 2.0 | 65% / 35% |
Summer BB Hime (1696-1698) |
1.3 | 1.8 | ? |
CV Hime (1586) |
1.4? | 2.2? | ? |
CV Hime B (2105-2108) |
1.4? | 2.2? | ? |
Summer CV Demon (1751) |
1.2? | 1.6? | ? |
Ark Hime (1755-1760) |
? | ? | ? |
Artillery Spotting
- For more information on this topic, see Combat/Artillery Spotting.
| Attack Type | Prerequisites | Post-cap Damage Modifier |
Notes |
|---|---|---|---|
| Main Zuiun Cut-in (Zuiun CI) |
1.35 | Ise-class Kai Ni  only only
| |
| Main Suisei Cut-in (Suisei CI) |
1.3 | ||
| Main AP Shell Cut-in (APCI) |
1.5 | ||
| Secondary AP Shell Cut-in (Sec APCI) |
1.3 | ||
| Secondary Radar Cut-in (Radar CI) |
1.2 | ||
| Secondary Cut-in (Sec CI) |
1.1 | ||
| Double Attack (DA) |
1.2 |
- If an Artillery Spotting attack is evaded, it will deal Scratch Damage instead.
Carrier Cut-In Attacks
- For more information on this topic, see CVCI.
| Attack Type | Prerequisites | Post-cap Damage Modifier |
|---|---|---|
| Fighter-Bomber-Attacker (FBA) |
1.25 | |
| Bomber-Bomber-Attacker (BBA) |
1.2 | |
| Bomber-Attacker (BA) |
1.15 |
If a CVCI attack is evaded, it will deal Scratch Damage instead.
Armor-Piercing Modifier
During day combat, certain enemy ships take extra damage from ![]() AP Shells
AP Shells
 .
.
- The bonus only applies against FBB, BB, BBV, CV, CVB, CA, and CAV.
- This includes Installations.
- This means that this bonus does not apply against all other types, namely CVL, CL(T), CT, DD, DE, SS(V), AV, AS, AR, LHA, or AP.
For clarity purposes:
 is used to indicate a Main Gun of any size,
 is used to indicate a Secondary Gun of any size,
 is used to indicate an AP Shell,
- is used to indicate a Radar of any type,
| Type | Modifier |
|---|---|
| 1.08 | |
| 1.10 | |
| 1.15 |
- Note
- It is unadvisable to run any of the other setups beyond the most basic Gun+AP, as the other setups will interfere with artillery spotting and give worse bonuses.
- This modifier doesn't affect support shelling.
Barrage Balloon Modifier

![]() Barrage Balloons can be deployed in certain situations during day battles.
Barrage Balloons can be deployed in certain situations during day battles.
- Barrage Balloons can only be deployed on certain combat nodes (notably with Installations).
| Compatible Nodes | |||
|---|---|---|---|
| Map | Node | Notes | |
| 3-5 | H | ||
| 4-3 | N | Boss | |
| 4-5 | T | Boss | |
| 6-4 | N | Boss | |
| Events | Refers to the current event page | ||
| references | [10][11][12][13] | ||
- Once deployed
- For every ship with a balloon equipped will boost the damage of the fleet and the LBAS (post-cap):
| Balloon Effects | |||
|---|---|---|---|
| 1 | 2 | 3 | |
| Allied Day Shelling Damage | |||
| Allied Balloons [14] | 1.02 | 1.04 | 1.06 |
| Allied LBAS/Airstrike Damage | |||
| Allied Balloons [15] | 1.02 | 1.04 | 1.06 |
| Enemy Balloons [16] | 0.95 | 0.90 | 0.85 |
| Allied LBAS/Airstrike Accuracy | |||
| Allied Balloons | ? | ? | ? |
| Enemy Balloons [17] | ? | ~0.8 | ? |
- The effect stacks up to 3 balloons, and up to 1 balloon per ship
- The effect applies to LBAS, airstrike and day shelling, with the enemy balloons also negatively affecting allied LBAS and airstrike
- The effect does not apply to torpedo phases or night battles
- If the ship deploying it is sunk, the balloon is then removed, as well as its effects
Anti-Installation Equipment Modifiers
- For more information on this topic, see Anti-Installation.
Special Attack Bonus
- For more information on this topic, see Special Attacks.
The Special attacks modifier are post-cap for day battle. But are pre-cap for night battle.
Criticals
For more details on how critical chance is calculated, please see Critical.
- Normal Criticals
| Attack Type | Modifier |
|---|---|
| Normal | 1.0 |
| Critical | [math]\displaystyle{ 1.5 \times \text{Mod}_\text{proficiency} }[/math] |
- Plane Proficiency Critical Modifier
- For more information on this topic, see Plane Proficiency.
Ammunition Modifier
The damage of the fleet is reduced once their ammunition falls below 50%. This modifier cannot go above 1. The formula used to determine this is:
| [math]\displaystyle{ \text{Ammo} }[/math] formula | |
|---|---|
|
| Remaining Ammo | Ammo Modifier | Notes |
|---|---|---|
| >50% | 1.0 | |
| 40% | 0.8 | 4th Battle |
| 30% | 0.6 | |
| 20% | 0.4 | 5th Battle |
| 10% | 0.2 | |
| 0% | 0 | 6th Battle |
- The battle number indicated in the notes assumes only normal surface engagements. Engaging in night battles and other special engagements can change that number.
- Whatever ammunition modifier applies in day battle carries over to night battle.
- Maelstroms that reduce ammunition also count towards this modifier.
- Using
 Underway Replenishment
 is a way to medigate ammo penalties.
 - The ammunition modifier affects aerial battle.
- Once a ship hits 0% ammo, all attacks become scratch damage.
- Debuffs are affected by the ammunition modifier.
Miscellaneous Damage Modifiers
Scratch Damage
In the following cases, attacks will deal "scratch damage" instead of normal ones:
- If a Cut-in or a special attack is evaded,
- The target's armor cannot be penetrated (attack inferior to the enemy defense),
- The ammo count hits 0,
- When a single fleet attacks submarines during night battle,
- ASW attack works as usual on Night Battle and Night to Day Battle nodes,
- When a Friendly Fleet attacks the last remaining ship of an enemy fleet.
Scratch damage is dealt as a percentage of remaining HP calculated using the following formula:
| Scratch Damage formula | |
|---|---|
| |
A Friendly Fleet cannot kill the last ship of the opposing fleet, dealing special scratch damage instead:
|
- Scratch damage is generally between 6 and 14 % of current HP.
- If the target's HP is low, it is possible for the result of the formula to return a result of 0, as all formulas are rounded down.
- This means that scratch damage cannot sink any ship.
PT Imps
| Anti-PT boat | |||||||||||||||||||||||||||||||||||||||||||||||||||||||||||||||||||||||||||||||||||||||||||||||||||||||||||||||||||||||||||||||||||||||||||
|---|---|---|---|---|---|---|---|---|---|---|---|---|---|---|---|---|---|---|---|---|---|---|---|---|---|---|---|---|---|---|---|---|---|---|---|---|---|---|---|---|---|---|---|---|---|---|---|---|---|---|---|---|---|---|---|---|---|---|---|---|---|---|---|---|---|---|---|---|---|---|---|---|---|---|---|---|---|---|---|---|---|---|---|---|---|---|---|---|---|---|---|---|---|---|---|---|---|---|---|---|---|---|---|---|---|---|---|---|---|---|---|---|---|---|---|---|---|---|---|---|---|---|---|---|---|---|---|---|---|---|---|---|---|---|---|---|---|---|---|
Unlike most standard Abyssals, "PT boats" (PT Imp Pack & Schnellboot Imp Pack ) are "very small and fast".
During Events, some special bonuses may be added, with "historical" ships and equipment gaining some accuracy bonuses[10].
| |||||||||||||||||||||||||||||||||||||||||||||||||||||||||||||||||||||||||||||||||||||||||||||||||||||||||||||||||||||||||||||||||||||||||||
| [edit] | |||||||||||||||||||||||||||||||||||||||||||||||||||||||||||||||||||||||||||||||||||||||||||||||||||||||||||||||||||||||||||||||||||||||||||


![[11]](https://cdn.discordapp.com/attachments/425302689887289344/1147504362369847377/image.png)
![[12]](https://cdn.discordapp.com/attachments/425302689887289344/1147504594268737556/image.png)
Historical Bonus
On almost every Event map, as well as some regular maps (7-4 & 7-5 so far), certain ships, types of ships, equipment, or types of equipment will bring bonuses.
- Those bonuses are most of the time raw damage multipliers, and sometimes, accuracy bonuses.
- Bonuses are independent to each ship, so only the ships with any historical bonus or ships equipped with historical equipment will be affected.
- Bonuses may be applicable to some parts of a map only, such as specific phases of nodes.
This mechanic is here to encourage the use of "historically significant fleets and setups".
- By nature, historical bonuses are arbitrary, so refer to each individual map to see what bonuses are applicable.
Summer Mode Bonuses
There are consistent bonuses against the following abyssal bosses' summer forms. These bonuses may differ on some event's maps.
| Damage Bonuses [18] | ||||||
|---|---|---|---|---|---|---|
| Ships [Toggle Names] |
Bismarck Drei Nelson Kai Ark Royal Kai Prinz Eugen Kai Gotland Andra |
1.1x | 1.15x | - | ||
Richelieu Deux Jean Bart Kai Mogador Kai Gloire Kai Commandant Teste Kai |
- | 1.15x | ||||
| Equipment |
|
1.2x | 1.1x | 1.1x | 1.15x | 1.2x |
| 1.1x | 1.15x | 1.1x | 1.1x | 1.1x | ||
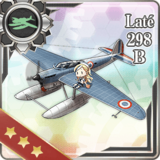
|
- | 1.32x1.1 x 1.2 | ||||
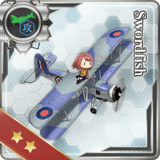  
|
1 = 1.15x 2 = 1.32x |
1 = 1.15x 2 = 1.21x |
1 = 1.1x 2 = 1.21x |
1 = 1.2x 2 = ?x |
- | |
| - | 1 = 1.1x 2 = 1.32x |
- | 1 = 1.1x 2 = 1.265x | |||
The Laté 298B bonus includes the SPB bonus.
The whole bonuses is counted for the airstrike phase [19].
Foreign Plane Bonuses
"Foreign Plane Bonuses" is an event-only mechanic where most foreign planes (not from the IJN/IJA) get various damage bonuses on maps based in Europe.
- See Foreign Plane Bonuses for more details.
Debuffs
Debuffs are a special case that only applies during events.
Certain event maps have debuff mechanics that require completing certain gimmicks once Last Dance is reached, in order to trigger the boss or boss' fleet debuff.
- See here for more details on past event debuffs.
Debuffs can be either:
- A reduction to the enemy's armor
 ,
, - A post-cap damage modifier for the attacking fleet (probably cases of misinterpretation of armor reductions).
Overkill Protection
When a ship in the fleet takes more damage than her current HP, she will take a percentage of her current HP in damage instead.
- The ship must be the flagship OR
- The ship must not be TaihaHeavily Damaged (大破) nor red morale
 at the start of the battle.
- If the ship has red morale, she will just have her HP reduced to 1.
| Overkill Formula | |
|---|---|
| |
|
Overkill protection will take off between 50-80 % of the ship's current HP ![]() .
.
- Important Information
- In general:
- Overkill protection is most applicable to DDs.
- The most pronounced effects of overkill protection occur at low HP
- It is also the primary means of surviving a hit they fail to evade
- For example, a 32 HP DD has a 15.5 % chance of being TaihaHeavily Damaged (大破) by a BB Hime, while a 31 HP DD has just a 6.5 % chance
- This has great implications when marrying ships, 36 HP has one of the highest chances of a taiha
- Odd-numbered HP is better when overkill protection is triggered. This is because the damage calculations round down, reducing the likelihood of being knocked down to heavy damage.
- Therefore ships with maximum HP that are divisible by 4 have worse survivability.
- This theory is most applicable to ships at full HP. Once a ship starts taking damage, the utility of overkill protection is unchanged. Therefore sometimes it becomes better survivability from an overkill damage.
- For example, max 6 HP Maruyu has no chance to be taiha by an overkill hit, because max 4 damage remains 2/6 HP, so still > 25 % HP. So does it for a damaged ship who remains at 6 HP, if her max HP < 8.
- Overkill protection is most applicable to DDs.
- Overkill table
- 4n are in red
- 4n+2 (2n) are in orange
- 4n+1 & 4n+3 are in green
| Overkill | |||
|---|---|---|---|
| TaihaHeavily Damaged (大破) | ChuuhaModerately Damaged (中破) | Shouha Lightly Damaged (小破) | |
| 6 | 0.0 % | 100.0 % | 0.0 % |
| 7 | 0.0 % | 71.4 % | 28.6 % |
| 8 | 12.5 % | 87.5 % | 0.0 % |
| 9 | 0.0 % | 77.8 % | 22.2 % |
| 10 | 0.0 % | 100.0 % | 0.0 % |
| 11 | 0.0 % | 81.8 % | 18.2 % |
| 12 | 16.7 % | 83.3 % | 0.0 % |
| 13 | 7.7 % | 76.9 % | 15.4 % |
| 14 | 0.0 % | 100.0 % | 0.0 % |
| 15 | 0.0 % | 86.7 % | 13.3 % |
| 16 | 12.5 % | 87.5 % | 0.0 % |
| 17 | 11.8 % | 76.5 % | 11.8 % |
| 18 | 5.6 % | 94.4 % | 0.0 % |
| 19 | 0.0 % | 89.5 % | 10.5 % |
| 20 | 15.0 % | 85.0 % | 0.0 % |
| 21 | 9.5 % | 81.0 % | 9.5 % |
| 22 | 9.1 % | 90.9 % | 0.0 % |
| 23 | 4.3 % | 87.0 % | 8.7 % |
| 24 | 16.7 % | 83.3 % | 0.0 % |
| 25 | 12.0 % | 80.0 % | 8.0 % |
| 26 | 7.7 % | 92.3 % | 0.0 % |
| 27 | 7.4 % | 85.2 % | 7.4 % |
| 28 | 14.3 % | 85.7 % | 0.0 % |
| 29 | 13.8 % | 79.3 % | 6.9 % |
| 30 | 10.0 % | 90.0 % | 0.0 % |
| 31 | 6.5 % | 87.1 % | 6.5 % |
| 32 | 15.6 % | 84.4 % | 0.0 % |
| 33 | 12.1 % | 81.8 % | 6.1 % |
| 34 | 11.8 % | 88.2 % | 0.0 % |
| 35 | 8.6 % | 85.7 % | 5.7 % |
| 36 | 16.7 % | 83.3 % | 0.0 % |
| 37 | 13.5 % | 81.1 % | 5.4 % |
| 38 | 10.5 % | 89.5 % | 0.0 % |
| 39 | 10.3 % | 84.6 % | 5.1 % |
| 40 | 15.0 % | 85.0 % | 0.0 % |
| 41 | 14.6 % | 80.5 % | 4.9 % |
| 42 | 11.9 % | 88.1 % | 0.0 % |
| 43 | 9.3 % | 86.0 % | 4.7 % |
| 44 | 15.9 % | 84.1 % | 0.0 % |
| 45 | 13.3 % | 82.2 % | 4.4 % |
| 46 | 13.0 % | 87.0 % | 0.0 % |
| 47 | 10.6 % | 85.1 % | 4.3 % |
| 48 | 16.7 % | 83.3 % | 0.0 % |
| 49 | 14.3 % | 81.6 % | 4.1 % |
| 50 | 12.0 % | 88.0 % | 0.0 % |
| 51 | 11.8 % | 84.3 % | 3.9 % |
| 52 | 15.4 % | 84.6 % | 0.0 % |
| 53 | 15.1 % | 81.1 % | 3.8 % |
| 54 | 13.0 % | 87.0 % | 0.0 % |
| 55 | 10.9 % | 85.5 % | 3.6 % |
| 56 | 16.1 % | 83.9 % | 0.0 % |
| 57 | 14.0 % | 82.5 % | 3.5 % |
| 58 | 13.8 % | 86.2 % | 0.0 % |
| 59 | 11.9 % | 84.7 % | 3.4 % |
| 60 | 16.7 % | 83.3 % | 0.0 % |
| 61 | 14.8 % | 82.0 % | 3.3 % |
| 62 | 12.9 % | 87.1 % | 0.0 % |
| 63 | 12.7 % | 84.1 % | 3.2 % |
| 64 | 15.6 % | 84.4 % | 0.0 % |
| 65 | 15.4 % | 81.5 % | 3.1 % |
| 66 | 13.6 % | 86.4 % | 0.0 % |
| 67 | 11.9 % | 85.1 % | 3.0 % |
| 68 | 16.2 % | 83.8 % | 0.0 % |
| 69 | 14.5 % | 82.6 % | 2.9 % |
| 70 | 14.3 % | 85.7 % | 0.0 % |
| 71 | 12.7 % | 84.5 % | 2.8 % |
| 72 | 16.7 % | 83.3 % | 0.0 % |
| 73 | 15.1 % | 82.2 % | 2.7 % |
| 74 | 13.5 % | 86.5 % | 0.0 % |
| 75 | 13.3 % | 84.0 % | 2.7 % |
| 76 | 15.8 % | 84.2 % | 0.0 % |
| 77 | 15.6 % | 81.8 % | 2.6 % |
| 78 | 14.1 % | 85.9 % | 0.0 % |
| 79 | 12.7 % | 84.8 % | 2.5 % |
| 80 | 16.3 % | 83.8 % | 0.0 % |
| 81 | 14.8 % | 82.7 % | 2.5 % |
| 82 | 14.6 % | 85.4 % | 0.0 % |
| 83 | 13.3 % | 84.3 % | 2.4 % |
| 84 | 16.7 % | 83.3 % | 0.0 % |
| 85 | 15.3 % | 82.4 % | 2.4 % |
| 86 | 14.0 % | 86.0 % | 0.0 % |
| 87 | 13.8 % | 83.9 % | 2.3 % |
| 88 | 15.9 % | 84.1 % | 0.0 % |
| 89 | 15.7 % | 82.0 % | 2.2 % |
| 90 | 14.4 % | 85.6 % | 0.0 % |
| 91 | 13.2 % | 84.6 % | 2.2 % |
| 92 | 16.3 % | 83.7 % | 0.0 % |
| 93 | 15.1 % | 82.8 % | 2.2 % |
| 94 | 14.9 % | 85.1 % | 0.0 % |
| 95 | 13.7 % | 84.2 % | 2.1 % |
| 96 | 16.7 % | 83.3 % | 0.0 % |
| 97 | 15.5 % | 82.5 % | 2.1 % |
| 98 | 14.3 % | 85.7 % | 0.0 % |
| 99 | 14.1 % | 83.8 % | 2.0 % |
| 100 | 16.0 % | 84.0 % | 0.0 % |
| 101 | 15.8 % | 82.2 % | 2.0 % |
| 102 | 14.7 % | 85.3 % | 0.0 % |
| 103 | 13.6 % | 84.5 % | 1.9 % |
| 104 | 16.3 % | 83.7 % | 0.0 % |
| 105 | 15.2 % | 82.9 % | 1.9 % |
| 106 | 15.1 % | 84.9 % | 0.0 % |
| 107 | 14.0 % | 84.1 % | 1.9 % |
| 108 | 16.7 % | 83.3 % | 0.0 % |
| 109 | 15.6 % | 82.6 % | 1.8 % |
| 110 | 14.5 % | 85.5 % | 0.0 % |