Introduction
The Winter 2016 Event Sortie! Operation Rei-Go is planned to start on February 10th, 2016 at 1900 JST. The event will be based off of Operation Rei-Go, a one day battle that took place along Mindoro Island where the IJN counterattacked US forces staging a landing on December 26th, 1944.
The Event is composed of only three maps, and allows for difficulty selection like in previous events. The Hard difficulty will be more difficult compared to usual event maps.
The first two stages will be themed on Operation Rei-Go and the Final Stage will be an Extra Operation, a "What If" scenario focusing on an Interception Mission.
In addition, it will feature battles against land based air units and a new gimmick system in E-3 that will be different from the usual armor reduction gimmick.
It's also been noted that for the first two maps, fleet requirements will be flexible; this will vary depending on the difficulty setting.
Information
New Ships
Currently, 3 new ships are slated to appear as part of the event. The ships we are aware of so far are:
- An Akizuki Class destroyer that bravely sacrificed herself to protect some members of the Ozawa fleet, allowing them time to escape. She was commissioned and struck from the list during winter. It has been confirmed that this is Hatsuzuki and she is a reward for clearing E-2.
- The February issue of Comtiq Magazine revealed that a Yuugumo-class destroyer would be added during the event. This ship fought in the same battle as Hatsuzuki and sunk soon afterwards. It turns out to be Okinami.
- February's Comtiq Magazine also revealed that a foreign ship would be expected to appear in the extra operation map. This turns out to be the heavy cruiser Zara.
New Equipment
- Zara comes with two new pieces of equipment:
New Abyssals
New Abyssal Land Based planes: Abyssal Land Based Bomber and Abyssal Land Based Bomber Ace
Mechanics
Participation requirements
- Must have a 75% sortie win ratio.
- Must have 5 empty ship slots for new ships.
- Must have 20 free equipment slots.
Special Mechanics
- The difficulty system first used in Spring 2015 Event returns: you can choose between Operation A (甲, Hard), Operation B (乙, Medium) or Operation C (丙, Easy).
- Choosing A or B requires certain HQ Level (HQ Lv 35 for B / 80 for A in Spring 2015 Event).
- It's been noted that the Extra Operation will involve a use a new gimmick that will not be related to the armor reduction gimmick.
- There does not appear to be any shiplocking this event.
Special Quests and Expeditions
Sortie! Operation Rei-Go has a series of quests you need to complete as you play through the event. After completing the Operation Rei-Go maps, in order to gain access to the final map, you will need to complete two sets of quests along with a special expedition in order to unlock E-3: Operation Sho-Go 4
| ID
|
Prereq.
|
Quest Name (Original)
Quest Name (Translated)
|
Description
|
Rewards
|
Note
|

|

|

|

|
Other
|
| SN11
|
|
水上反撃作戦【礼号作戦】を完遂せよ!
Carry out Counter-Attack Operation "Operation Rei-Go!"
|
Form an assault fleet at the Campan Gulf to carry out and launch a counter attack at "Operation "Rei-Go!"
- Completion Condition: Clear E-2.
|
500
|
500
|
0
|
0
|
Present Box x1
Instant Repairs x5
|
If you clear E2 without having this quest checked, the quest will show up as 80% done, but if you check the quest after clearing e2, the quest will show up as done.
One time only.
|
| SN12
|
SN11
|
親善艦参加観艦式を実施せよ!
Carry out a Friendly Ship Naval Review!
|
Partake in a Naval Review in the limited time waters to help make contact with ships from overseas.
Complete the Limited Time Expedition "Friendly Ship Naval Review"
- You can use 6 ships of any kind
- Foreign Ships like the Germans and the Italian Ships are not necessary.
|
100
|
100
|
300
|
100
|
203 mm / 53 cm Twin Gun Mount
|
Gain Access to E-3
One time only.
|
Special Expediton
Event Maps
Quick Info Table
| Classification
|
Map
|
Name
|
Combined Fleet?
|
Tag Condition & Deployment Restriction
|
Difficulty Restrictions
|
Notes
|
Main Operation
Operation Rei-Go
|
E-1
|
Preparation for Operation Rei-Go
|
No
|
|
No restrictions. All difficulties OK
|
FBBs, BBs, and CVs are not allowed on this map.
|
| E-2
|
Sortie! Operation Rei-Go!
|
In order to play these maps on hard, you must complete the previous map on either normal or hard.
(e.g., to do E-3 on hard, you must complete E-2 on normal or hard.)
|
|
| Extra Operation
|
E-3
|
Operation Shou-Go 4
|
Yes
|
|
E-1
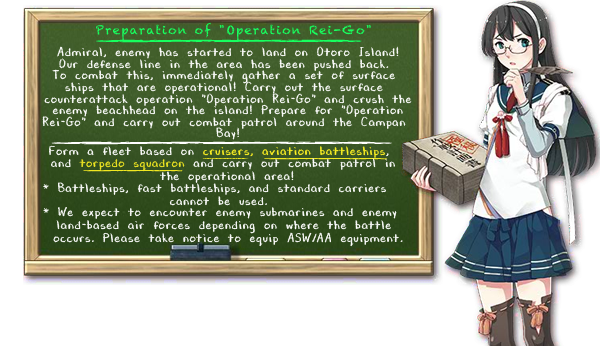
| Campan Gulf "Operation Rei-Go!" Preperation
|
| No map name yet
|
Information
- Boss: Submarine Princess
- 6-7 kills required on all difficulties (800 HP on hard)
- FBBs, BBs, and CVs are not allowed on this map.
- Ships tagged: None
- Rewards upon clearance: Mamiya, Irako
|
|
Branching rules
Show/Hide Branching Rules
| Branching Rules |
|---|
| Node | Split | Condition |
|---|
| START | A | 2+ DD (random) or Kasumi flagship | | B | <2 DD | | D | C | LoS check (fail) | | J | LoS check (pass) | | E | F | Active Branching | | G | Active Branching |
|
Tips
- Recommended fleet compositions:
- 1 BBV plus 4DD/CL plus either CVL/CL
- You can use Kasumi as flagship to take the northeast route.
- Recommended fleet to accomplish this: Kasumi + 1 DD, 1 CLT, 1 CA, 1 BBV, 1 CVL
- Note that node G and H are air raids: It is a single air battle phase, but you will not be able to inflict any damage. At these nodes, damage taken determines the victory rank (it is not an automatic loss). You will not be able to enter night battle at these nodes either.
|
|
|
|
|
E-2

| Otoro Island Marmalade Gulf "Operation Rei-go"
|
| No map name yet
|
Information
- Boss: Supply Depot Princess
- 5 kills required on all difficulties (Hard: 3000 HP)
- Because the boss's health drops in Last Dance, it may be required to repeat Last Dance twice.
- Ships tagged None
- Rewards upon clearance: Hatsuzuki
- Clearing on Hard (甲): 8x Improvement materials, 2x Maritime Resupply, Skilled Pilot, Medal
- Clearing on Medium (乙): 3x Improvement materials, 1 Medal
- Clearing on Easy (丙):
|
|
Branching rules
Show/Hide Branching Rules
| Branching Rules |
|---|
| Node | Split | Condition |
|---|
| START | A | Only 1 CA, CAV, or CL. 3+ DDs | | C | 2+ CA, CAV, CL or any BB, CV(L), AX. <3 DDs | | A | B | | | E | | | C | D | 2 CV, CA, BB (?) | | G | | | E | F | Active Branching | | I | Active Branching | | H | J | | | L | | | K | L | <2 DD | | N | 2+ DD (?) |
|
Tips
- Umikaze does not drop on Easy.
- Recommended fleet compositions:
- North: Rei-Go Fleet (Kasumi, Ooyodo, Ashigara, Kiyoshimo, Asashimo) + 1 CAV. It is possible to have the same ship class from Rei-Go and still go to the North Route (3 DD, 1 CL, 1 CA). In addition, only two of the DDs are needed.
- There are two different routes you can take depending on your fleet.
- North Route cannot have CVs or BBs or else you will start at south.
- Supply Depot Princess is an installation type boss, so Type 3 Shells and WG42 are highly recommended.
- The southern route allows for much more firepower, and more type 3 shells.
- 4BB 2CV or 2BB 2CA 2CV allows for maximum firepower, but takes a very roundabout route (CDGKLMO).
- 1fBB 2CA(v) 2DD 1CV allows for the much shorter CGKN route. AACI is recommended for one of the DDs since Type 3 Shells is needed for the CAs and BBs
- Nodes D and K in South Route and Nodes F, H, and I in North Route are Single Aerial battles. Consider using Diamond formation or bring an AACI setup.
|
|
|
|
|
E-3

| Operation Sho-Go 4
|
| No map name yet
|
Information
Transport Gauge: 500 TP (Hard)
- x kills required on all difficulties (Hard: 2100 HP)
- Rewards upon clearance: Zara
- Clearing on Hard (甲): Medal x2, Ro.43 Recon Seaplane, Hard Medal
- Clearing on Medium (乙):
- Clearing on Easy (丙):
|
|
Branching rules
Show/Hide Branching Rules
| Branching Rules |
|---|
| Node | Split | Condition |
|---|
| START | A | Transport Escort Fleet | | E | | | F | | | J | Surface Task Force | | B | C | | | D | | | J | K | Active Branching | | M | Active Branching | | L | O | | | T | | | N | Q | | | T | | | P | N | | | R | |
|
Tips
Transport Phase
- Recommended fleet compositions:
- Transport Fleet: 2BBV and 4DD (1st Fleet) and 1CL (Abukuma Kai Ni preferred), 2CA(V), and 3DD (2nd Fleet)
- While this will take you to the Airfield Hime node, this in turn will give your fleet a better chance at S-ranking to boss node to maximize the TP gained upon completing the run.
- DD in the first fleet should be fully equipped with drums. Abukuma and Kasumi at Kai Ni can use 1-2 Daihatsu. If you use a CAV consider bringing 1 drum for them. Everyone else needs to be armed to battle.
- Transport Boss is the Destroyer Princess
- Set up mentioned above should easily make short work of the enemy fleet with little issue.
Battle Phase
- Recommended fleet compositions:
- Surface Task Force: 4BB and 2 CVL (1st Fleet) and 1CL (Abukuma Kai Ni preferred), 2-3 CLT, 0-1 FBB, 2DD (2nd Fleet).
- Fleet has the option to go east or south at first intersection. It's recommended to go east as it is easier to reach the boss node, the south route will have you fight BB himes along the way, but is however the shorter route and is also recommend for the final part of the fight.
- Heavy Cruiser Princess will usually have a pair of Battleship Princesses with her. But can occasionally have a Standard Aircraft Carrier Hime on in place of the Tsu-Class Elite (On Hard mode).
- Boss Fleet Support is highly recommended
- In-Route Support is recommended if you have trouble making your way on the final kill.
Show/Hide Nodes and Enemy Encounters
| Nodes and Enemy Encounters |
|---|
| Node | Pattern | Xp | Node Info | Form |
|---|
A
| Pattern 1 | | | | B
| Pattern 1 | | | | C
| Pattern 1 | | | | | Pattern 2 | | | | D
| Pattern 1 | | | | E
| Pattern 1 | | | | | Pattern 2 | | | | F
| Pattern 1 | | | | G
Supply | Pattern 1 | | Supply Node | | H
| Pattern 1 | | | | | Pattern 2 | | | | I
| Pattern 1 | | | | J
| Pattern 1 | | | | | Pattern 2 | | | | K
| Pattern 1 | | | | L
| Pattern 1 | | | | M
| Pattern 1 | | | | N
| Pattern 1 | | | | O
| Pattern 1 | | | | P
| Pattern 1 | | | | Q
Air Battle | Pattern 1 | 155 |  | | R
| Pattern 1 | | | | S
| Pattern 1 | | | | T
| Pattern 1 | | | |
Show/Hide Nodes and Enemy Encounters
| Nodes and Enemy Encounters |
|---|
| Node | Pattern | Xp | Node Info | Form | Air |
|---|
A
| Pattern 1 | | | | | B
| Pattern 1 | | | | | C
| Pattern 1 | 100 | | | | | Pattern 2 | | | | | D
| Pattern 1 | | | | | E
| Pattern 1 | | | | | | Pattern 2 | | | | | F
| Pattern 1 | | | | | | Pattern 2 | | | | | G
Supply | Pattern 1 | | Supply Node | | | H
| Pattern 1 | | | | | I
| Pattern 1 | | | | | J
| Pattern 1 | | | | | | Pattern 2 | | | | | K
| Pattern 1 | | | | | L
| Pattern 1 | | | | | M
| Pattern 1 | | | | | N
| Pattern 1 | | | | | O
| Pattern 1 | | | | | P
| Pattern 1 | | | | | Q
| Pattern 1 | | | | | R
| Pattern 1 | | | | | S
| Pattern 1 | | | | | T
| Pattern 1 | | | | |
|
|
|
|
|
|
Events |
|---|
|
2013 | | |
2014 | | |
2015 | | |
2016 | | |
2017 | | |
2018 | | |
2019 | | |
2020 | | |
2021 | | |
2022 | | |
2023 | | |
2024 | | |
2025 | | | |
|
2015 · 2016 · 2017 · 2018 · 2019(& sardine) · 2021(large) · 2022 · 2023 · 2024 · 2025(large) | | |
2015 · 2016(simple quest) · 2017(simple quest) · 2020(large) · 2021 · 2022(simple quest) · 2026(simple quest) | | |
2019 · 2020 · 2021 · 2022 · 2023 · 2024 · 2025 · 2026 | | |
2022 · 2023 · 2024 · 2025 | | |
2018 | | |
2014 · 2015 |
| | |
Normal Maps |
|


