- Welcome to the Kancolle Wiki!
- If you have any questions regarding site content, account registration, etc., please visit the KanColle Wiki Discord
Difference between revisions of "Help:Ship Farming (Advanced)"
Jigaraphale (talk | contribs) m (→7-4) |
Minhfongboy (talk | contribs) |
||
| (28 intermediate revisions by 3 users not shown) | |||
| Line 36: | Line 36: | ||
==Sorties== | ==Sorties== | ||
Dropping Maruyu is usually the best way to farm her as it is generally cheaper than the [[LSC]] cost. | Dropping Maruyu is usually the best way to farm her as it is generally cheaper than the [[LSC]] cost. | ||
| + | |||
| + | [[File:Maruyu table MFB.png|1200px|thumb|center|Summary of the efficiency of dropping Maruyu compared to LSC (Click the picture to enlarge it)]] | ||
| + | |||
| + | To sum up, the efficiency of getting [[Maruyu]] are as the following (from top to bottom): | ||
| + | *Farming [[3-5]] '''in LD or Post-clear''' | ||
| + | *Farming [[4-5]] when you own '''none of her''' | ||
| + | *Farming [[6-2]] | ||
| + | *[[LSC]] | ||
| + | *Farming [[4-5]] when you own '''at least 1 of her'''. | ||
===3-5=== | ===3-5=== | ||
| Line 92: | Line 101: | ||
! {{Enemy/Banner|Harbour Princess/II|small=true}}{{Enemy/Banner|Escort Fortress|small=true}}{{Enemy/Banner|Escort Fortress/II|small=true}}{{Enemy/Banner|Battleship Ru-Class/Kai Flagship|small=true}}{{Enemy/Banner|Heavy Cruiser Ne-Class/Elite|small=true}}{{Enemy/Banner|Transport Ship Wa-Class/Flagship|small=true}} | ! {{Enemy/Banner|Harbour Princess/II|small=true}}{{Enemy/Banner|Escort Fortress|small=true}}{{Enemy/Banner|Escort Fortress/II|small=true}}{{Enemy/Banner|Battleship Ru-Class/Kai Flagship|small=true}}{{Enemy/Banner|Heavy Cruiser Ne-Class/Elite|small=true}}{{Enemy/Banner|Transport Ship Wa-Class/Flagship|small=true}} | ||
{{Enemy/Banner|Harbour Princess/II|small=true}}{{Enemy/Banner|Escort Fortress/II|small=true}}{{Enemy/Banner|Battleship Ru-Class/Kai Flagship|small=true}}{{Enemy/Banner|Heavy Cruiser Ne-Class/Elite|small=true}}{{Enemy/Banner|Transport Ship Wa-Class/Flagship|small=true}}{{Enemy/Banner|Transport Ship Wa-Class/Elite|small=true}} | {{Enemy/Banner|Harbour Princess/II|small=true}}{{Enemy/Banner|Escort Fortress/II|small=true}}{{Enemy/Banner|Battleship Ru-Class/Kai Flagship|small=true}}{{Enemy/Banner|Heavy Cruiser Ne-Class/Elite|small=true}}{{Enemy/Banner|Transport Ship Wa-Class/Flagship|small=true}}{{Enemy/Banner|Transport Ship Wa-Class/Elite|small=true}} | ||
| − | | 3% || 1. | + | | 3% || 1.85% |
|- | |- | ||
! ''All Other Enemy Compositions'' | ! ''All Other Enemy Compositions'' | ||
| − | | 2% || 0. | + | | 2% || 0.85% |
|} | |} | ||
| Line 114: | Line 123: | ||
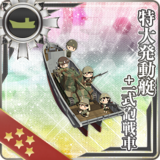
Node {{MapRoute|T|red}} flagship is a soft-skin installation {{Enemy/Link|Harbour Princess|Harbour Princess II|text=Harbour Princess|link=installation}}, requiring equipment such as {{AA Shell}} [[AA Shell]]s and {{Landing Craft}}{{Amphibious Tank}} [[Landing Equipment]] to deal with her. | Node {{MapRoute|T|red}} flagship is a soft-skin installation {{Enemy/Link|Harbour Princess|Harbour Princess II|text=Harbour Princess|link=installation}}, requiring equipment such as {{AA Shell}} [[AA Shell]]s and {{Landing Craft}}{{Amphibious Tank}} [[Landing Equipment]] to deal with her. | ||
| − | 2 DDs should be capable of carrying {{Landing Craft}}/{{Amphibious Tank}} '''and''' {{ | + | 2 DDs should be capable of carrying {{Landing Craft}}/{{Amphibious Tank}} '''and''' {{Extra Armor}} Armor Bulges to increase the pass rate. They should also be able to do decent [[OASW]] damage to deal with submarines. Therefore, the best setup for them should be '''a strong special DLC/Tank + {{Sonar}}Sonar + 2 Bulges''' (One bulge in RE). |
*As of January 2025, the most effective special DLC/Tank that can deal with {{Enemy/Link|Harbour Princess|Harbour Princess II}} '''alone''' (Hitting the day cap of 220 base damage before armor) are as follows (From strongest to weakest): | *As of January 2025, the most effective special DLC/Tank that can deal with {{Enemy/Link|Harbour Princess|Harbour Princess II}} '''alone''' (Hitting the day cap of 220 base damage before armor) are as follows (From strongest to weakest): | ||
**{{EquipmentLink|Toku Daihatsu Landing Craft + Panzer III Ausf. J}} | **{{EquipmentLink|Toku Daihatsu Landing Craft + Panzer III Ausf. J}} | ||
| Line 120: | Line 129: | ||
**{{EquipmentLink|Toku Daihatsu Landing Craft + Panzer III (North African Specification)}} | **{{EquipmentLink|Toku Daihatsu Landing Craft + Panzer III (North African Specification)}} | ||
**{{EquipmentLink|Special Type 4 Amphibious Tank Kai}} | **{{EquipmentLink|Special Type 4 Amphibious Tank Kai}} | ||
| − | *If '''married, it's possible to perform [[OASW]] with only 1 sonar'''. If not married, it's recommended to '''prioritize {{Sonar}}Sonar + {{ | + | *If '''married, it's possible to perform [[OASW]] with only 1 sonar'''. If not married, it's recommended to '''prioritize {{Sonar}}Sonar + {{Depth Charge}}Depth Charge setup to enable it, removing one bulge''' to keep the passing rate high. |
The last DD should be the one doing AACI duty, preferably {{ShipLink|Hatsuzuki Kai Ni}} as she has an extra slot to bring along an extra [[WG42]] as well. | The last DD should be the one doing AACI duty, preferably {{ShipLink|Hatsuzuki Kai Ni}} as she has an extra slot to bring along an extra [[WG42]] as well. | ||
*If she is married and is a high enough level, she can also OASW with 1 sonar and help with the sub node. | *If she is married and is a high enough level, she can also OASW with 1 sonar and help with the sub node. | ||
| Line 142: | Line 151: | ||
Fleet setup reference: [https://jervis.vercel.app/?p=v2gg1_Rqq6E] | Fleet setup reference: [https://jervis.vercel.app/?p=v2gg1_Rqq6E] | ||
| − | | LOS = Cn3: | + | | LOS = Cn3: 51 |
| Route = {{MapRoute|C|red|E|blue|J|red|K|red}} | | Route = {{MapRoute|C|red|E|blue|J|red|K|red}} | ||
| AS = 153 | | AS = 153 | ||
| Line 175: | Line 184: | ||
{{FleetGuide | {{FleetGuide | ||
| Map = 7-4 Farming | | Map = 7-4 Farming | ||
| − | | Fleet = ''' | + | | Fleet = '''{{ShipLink|Zuihou Kai Ni B|Ryuuhou Kai Ni E|text=Zuihou and Ryuuhou Kai Ni B/E}}, 1 CL, 3 DD |
| − | Fleet setup reference: [https://jervis.vercel.app/?p= | + | Fleet setup reference: [https://jervis.vercel.app/?p=U3Tk0bfsEkM] |
| LOS = Cn4: 37 | | LOS = Cn4: 37 | ||
| Route = {{MapRoute|A|blue|B|red|E|pink|J|red|L|red|P|red}} | | Route = {{MapRoute|A|blue|B|red|E|pink|J|red|L|red|P|red}} | ||
| AS = 146 | | AS = 146 | ||
| − | | Note = ''' | + | | Note = '''5 [[OASW]] (with 4 being strong)''' is the absolute minimum requirement to stabilize the route. Fewer than 5 will increase the retreat rate. |
| − | *A "strong OASW" is defined as a setup utilizing [[ASW Synergy]] ([[Small Sonar]] + [[Depth Charge]]) | + | *A "strong OASW" is defined as a setup utilizing [[ASW Synergy]] ([[Small Sonar]] + [[Depth Charge]]). |
| − | *It is important to keep in mind that most retreats here are due to submarines. Especially at '''HQ 120''' where 7-4 is mutated into its last scaling stage, | + | *It is important to keep in mind that most retreats here are due to submarines. Especially at '''HQ 120''' where 7-4 is mutated into its last scaling stage, changing the enemy patterns and stats, making farming more difficult if lacking enough strong OASW. An example of these changes are as the following: |
| + | **Node J always has 3 {{Enemy/Link|Submarine So-Class Flagship|text=So-Class Flagship}} | ||
| + | **The boss gains more armor | ||
| + | **The boss node in LD always has a {{Enemy/Link|Submarine So-Class Flagship|text=So-Class Flagship}} | ||
| + | |||
[[CVE]] should be either Zuihou or Ryuuhou for OASW. While not as strong as the strong OASW setup above, they can still sink some weaker submarines on the way.<br> | [[CVE]] should be either Zuihou or Ryuuhou for OASW. While not as strong as the strong OASW setup above, they can still sink some weaker submarines on the way.<br> | ||
| − | An [[AACI]] is recommended to disable the boss and pass node {{MapRoute|E|pink}} on the way. | + | An [[AACI]] DD is recommended (usually {{ShipLink|Hatsuzuki Kai Ni}}) to disable the boss and pass node {{MapRoute|E|pink}} on the way. |
| − | |||
| − | |||
| − | |||
| − | |||
All DE have '''damage, accuracy, and evasion bonuses''' here, so they can be a good option to bring along. One of them can be used as flagship to get as much EXP as possible, making this map '''one of the best options to grind them'''.<br> | All DE have '''damage, accuracy, and evasion bonuses''' here, so they can be a good option to bring along. One of them can be used as flagship to get as much EXP as possible, making this map '''one of the best options to grind them'''.<br> | ||
| Line 202: | Line 211: | ||
}} | }} | ||
| − | = | + | =Other limited drops= |
| − | ? | + | ===Map 2-3=== |
| + | |||
| + | {{FleetGuide | ||
| + | | Map = 2-3 Farming (99% Boss roll) | ||
| + | | Fleet = '''1 AV, 2 CV(B/L), 3 DD''' | ||
| + | Fleet setup reference: [https://jervis.vercel.app/?p=uNShMX8urRE] | ||
| + | | Route = Random | ||
| + | | AS = 81 | ||
| + | | Note = | ||
| + | }} | ||
| + | |||
| + | ===Map 2-5=== | ||
| + | |||
| + | {{FleetGuide | ||
| + | | Map = 2-5 Farming | ||
| + | | Fleet = '''1 CV, 1 CVL, 1 CL, 3 DD''' | ||
| + | Fleet setup reference: [https://jervis.vercel.app/?p=sdecLFNUyFY] | ||
| + | | Route = {{MapRoute|C|red|E|red|I|blue|O|red}} | ||
| + | | AS = 42 | ||
| + | | Speed = Fast | ||
| + | | LOS = 34 Cn1 | ||
| + | | Note = | ||
| + | }} | ||
| + | |||
| + | ===Map 5-3=== | ||
| + | |||
| + | {{FleetGuide | ||
| + | | Map = 5-3 Farming (Torpedo Squadron) | ||
| + | | Fleet = '''CL (Flagship), 3 DD, 2 CLT <font color="red">(Torpedo Squadron)</font>''' | ||
| + | Fleet setup reference: [https://jervis.vercel.app/?p=mUy4pTNJWf8] | ||
| + | | Route = {{MapRoute|D|blue|G|blue|I|purple|O|blue|P|purple|K|purple|E|blue|Q|red}} | ||
| + | | AS = 140 | ||
| + | | Note = | ||
| + | }} | ||
| + | |||
| + | ===Map 6-3=== | ||
| + | |||
| + | {{FleetGuide | ||
| + | | Map = 6-3 Farming | ||
| + | | Fleet = '''1 CL, 1 AV, 4 DD''' | ||
| + | Fleet setup reference: [https://jervis.vercel.app/?p=5e92mT6ZLA] | ||
| + | | Route = {{MapRoute|A|blue|C|red|E|red|G|green|H|green|J|red}} | ||
| + | | AS = 0 | ||
| + | | LOS = 38 Cn3 | ||
| + | | Note = | ||
| + | }} | ||
=See Also= | =See Also= | ||
*[[Modernization]] | *[[Modernization]] | ||
{{Help}} | {{Help}} | ||
Latest revision as of 02:33, 2 October 2025
This article aims to provide advice on the better ways to farm for certain ships in order to use them as Modernization fodder. Those ships notably include:
Maruyu
Maruyu Kai is the best way to reliably modernize the luck of any ship in the game.
- For more information on this topic, see Maruyu modding.
LSC
Maruyu is a reliable LSC craft
- She can be crafted by using the minimum resource amounts.
- Her crafting rate can be improved by crafting with as few "free docks" as possible.
- LSC attempts are advised only when reaching the resource caps in order to avoid wasting any resource gains.
| Maruyu | |||||
|---|---|---|---|---|---|
| Note | |||||
| 1500 | 1500 | 2000 | 1000 | 1 | Recommended recipe |
|
|||||
Sorties
Dropping Maruyu is usually the best way to farm her as it is generally cheaper than the LSC cost.

To sum up, the efficiency of getting Maruyu are as the following (from top to bottom):
- Farming 3-5 in LD or Post-clear
- Farming 4-5 when you own none of her
- Farming 6-2
- LSC
- Farming 4-5 when you own at least 1 of her.
3-5
3-5 is the best place to farm Maruyu, being relatively cheap and fast. The main downsides are the morale drain resulting from ending the sortie on an "off-route node" and the low amount of ranking points awarded.
- It is important to first clear the map in order to have the proper drop rate.
| Enemy Compositions | HQ ≥ 85 | HQ ≤ 84 |
|---|---|---|
| 1.4% | 0% | |
| Last Dance Post-Clear |
2.5% | |
| All Other Enemy Compositions | 0% |
- This means it is impossible to get her here if the HQ is 84 or lower.
| 3-5 Farming | |||||||||||||||||||||||||||||||||
|---|---|---|---|---|---|---|---|---|---|---|---|---|---|---|---|---|---|---|---|---|---|---|---|---|---|---|---|---|---|---|---|---|---|
|
| ||||||||||||||||||||||||||||||||
| Fleet Notes | |||||||||||||||||||||||||||||||||
Node H flagship is a soft-skin installation , requiring equipment such as , requiring equipment such as It is recommended to bring a Nelson-class to utilize her touch at node D. The CAV/AV should be preferably Mogami-class Kai Ni Toku As the final node is a resource node, it is possible to continue the sortie even when being taiha on H. The use of | |||||||||||||||||||||||||||||||||


4-5
4-5 has one of the cheapest comps to farm Maruyu and awards a large amount of ranking points relatively quickly. The main downside is the drop rate is reduced significantly when owning any copies of her.
| Enemy Compositions | 0 Maruyu | 1+ Maruyu |
|---|---|---|
|
3% | 1.85% |
| All Other Enemy Compositions | 2% | 0.85% |
Therefore, it's only recommended to farm Maruyu here with 0 owned copies in the base.
| 4-5 Farming | |||||||||||||||||||||||||||||||||
|---|---|---|---|---|---|---|---|---|---|---|---|---|---|---|---|---|---|---|---|---|---|---|---|---|---|---|---|---|---|---|---|---|---|
|
| ||||||||||||||||||||||||||||||||
| Fleet Notes | |||||||||||||||||||||||||||||||||
Node T flagship is a soft-skin installation Harbour Princess  , requiring equipment such as , requiring equipment such as 2 DDs should be capable of carrying
The last DD should be the one doing AACI duty, preferably Hatsuzuki Kai Ni
For the comp using Nelson-class, it's best to utilize her touch at node H.
All comps listed above have some upsides and downsides mainly due to the usage of Jets, so it's up to players to decide which comp is best for them:
| |||||||||||||||||||||||||||||||||


6-2
Drop rate: 2.0 %
| 6-2 Farming | |||||||||||||||||||||||||||||||||
|---|---|---|---|---|---|---|---|---|---|---|---|---|---|---|---|---|---|---|---|---|---|---|---|---|---|---|---|---|---|---|---|---|---|
|
| ||||||||||||||||||||||||||||||||
| Fleet Notes | |||||||||||||||||||||||||||||||||
| It is advised to bring a Nelson-class to utilize her touch at node J.
The recommended CAV/AV are Mogami-class Kai Ni Toku This map is pretty simple and straight forward as you get better passing rate if your ships have higher armor, so for DDs, just stack all the bulges on them. | |||||||||||||||||||||||||||||||||
DE
DE are the best way to modernize the HP of any ship in the game, as well as the only way to modernize ASW and a good way to modernize Luck.
- For more information on this topic, see DE modding.
Sorties
- DE can only be obtained via drops, and only limited time drops so far. Thus, there is almost no truly reliable way to farm them.
- Unlike any other ship type in the game, DE are subject to unique drop cap behavior, similar to overfishing.
- To farm for them efficiently, knowing how their drop mechanic works is important.
- Having more than 3 duplicates of a certain DE will decrease its drop rate on all maps.
- Using an individual DE as fodder 10+ times will start decreasing its drop rate on all maps, as seen in map 1-3. It's safe to assume the same counter is applied for map 7-4.
- To farm for them efficiently, knowing how their drop mechanic works is important.
- For more information on this topic, see Overfishing Cap.
7-4
So far, only 7-4 has a constant set of DE drops, making it a reliable farming location.
- The drop rate of all DE here depends on the above-mentioned drop behaviors, as well as the current limited drop pool.
- To check their drop rate, please refer to KcNav or PoiDB.
| 7-4 Farming | |||||||||||||||||||||||||||||||||||||||||||||
|---|---|---|---|---|---|---|---|---|---|---|---|---|---|---|---|---|---|---|---|---|---|---|---|---|---|---|---|---|---|---|---|---|---|---|---|---|---|---|---|---|---|---|---|---|---|
|
| ||||||||||||||||||||||||||||||||||||||||||||
| Fleet Notes | |||||||||||||||||||||||||||||||||||||||||||||
5 OASW (with 4 being strong) is the absolute minimum requirement to stabilize the route. Fewer than 5 will increase the retreat rate.
CVE should be either Zuihou or Ryuuhou for OASW. While not as strong as the strong OASW setup above, they can still sink some weaker submarines on the way. An AACI DD is recommended (usually Hatsuzuki Kai Ni All DE have damage, accuracy, and evasion bonuses here, so they can be a good option to bring along. One of them can be used as flagship to get as much EXP as possible, making this map one of the best options to grind them. Shigure also has great accuracy and evasion bonuses (but no damage bonus), being the only DD with any bonus here, making her a great DD pick when paired with her above mentioned RE capability. | |||||||||||||||||||||||||||||||||||||||||||||
| LBAS Notes | |||||||||||||||||||||||||||||||||||||||||||||
The LBAS should have 4 fighters that will never be pulled out of this LBAS and never resupplied. Their slots will never go below 3 and can continue sortieing to keep the cost cheap.
| |||||||||||||||||||||||||||||||||||||||||||||


Other limited drops
Map 2-3
| 2-3 Farming (99% Boss roll) | |||||||||||||||||||||||||||||||||
|---|---|---|---|---|---|---|---|---|---|---|---|---|---|---|---|---|---|---|---|---|---|---|---|---|---|---|---|---|---|---|---|---|---|
|
| ||||||||||||||||||||||||||||||||
| Fleet Notes | |||||||||||||||||||||||||||||||||
Map 2-5
| 2-5 Farming | |||||||||||||||||||||||||||||||||
|---|---|---|---|---|---|---|---|---|---|---|---|---|---|---|---|---|---|---|---|---|---|---|---|---|---|---|---|---|---|---|---|---|---|
|
| ||||||||||||||||||||||||||||||||
| Fleet Notes | |||||||||||||||||||||||||||||||||
Map 5-3
| 5-3 Farming (Torpedo Squadron) | |||||||||||||||||||||||||||||||||
|---|---|---|---|---|---|---|---|---|---|---|---|---|---|---|---|---|---|---|---|---|---|---|---|---|---|---|---|---|---|---|---|---|---|
|
| ||||||||||||||||||||||||||||||||
| Fleet Notes | |||||||||||||||||||||||||||||||||
Map 6-3
| 6-3 Farming | |||||||||||||||||||||||||||||||||
|---|---|---|---|---|---|---|---|---|---|---|---|---|---|---|---|---|---|---|---|---|---|---|---|---|---|---|---|---|---|---|---|---|---|
|
| ||||||||||||||||||||||||||||||||
| Fleet Notes | |||||||||||||||||||||||||||||||||
See Also
| |||||||||||||||||