|
|
| (245 intermediate revisions by 9 users not shown) |
| Line 1: |
Line 1: |
| − | == How to Use ==
| + | {{PortMechanicsPortal}} |
| − | * Improvement materials [[file:Improvement Materials.png|20px]] are the primary component for improvement. They can be obtained through the following means:
| + | "Improvements" are increases in performance for equipment, being represented using {{Star}} stars. |
| − | # Specific quests
| |
| − | # 4 improvement materials in exchange for a [[Blueprint|medal]].
| |
| − | # The in-game cash shop, which sells them in packages of 10 for 700 DMM points.
| |
| − | # Event map clearance rewards and first-class medals, the latter of which yields 10.
| |
| − | * The 2nd ship in your first fleet determines which upgrades are available.
| |
| − | * Improvements can fail.
| |
| − | ** Your chance of failure rises with equipment improvement ranking.
| |
| − | ** Your success rate is higher when using a remodeled [[Akashi]].
| |
| − | ** On failure, components used will disappear; however, the equipment being upgraded remains unchanged.
| |
| − | ** There is a slider that guaranteed success in exchange for an increase in required development and improvement materials.
| |
| − | * Equipment that has been improved will have a ★. Improvement ranks range from ★+1 to ★+10. ★+10 appears as ★max.
| |
| − | * All improvement attempts from ★+6 onward use up equipment (most of the time this is the same as the equipment being upgraded). This requirement is present on some equipment even from ★+0.
| |
| − | ** Locked and previously improved equipment cannot be used as improvement fodder.
| |
| − | ** As equipment is spent even on failure, you are recommended to use the success slider when improvements consume rare equipment.
| |
| − | * There is no visible stat difference between improved and unimproved equipment.
| |
| − | ** Improvements on equipment have been shown to increase firepower, torpedo, and ASW depending on the category of the equipment. They are also speculated to contribute to [[Combat#Base_Attack_Power|base attack power]].
| |
| − | ** Preliminary results as of May 31, 2015, are:
| |
| − | *** 12.7cm Twin Gun Mount (firepower), 25mm Triple Autocannon (torpedo), Type 94 Depth Charge (ASW), etc:
| |
| − | **** ★+1~3: +1 bonus to firepower/torpedo/ASW
| |
| − | **** ★+4~8: +2 bonus to firepower/torpedo/ASW
| |
| − | **** ★+9~10: +3 bonus to firepower/torpedo/ASW
| |
| − | *** 35.6cm Twin Gun Mount, 41cm Twin Gun Mount, etc:
| |
| − | **** ★+1: +1 bonus to firepower
| |
| − | **** ★+2~4: +2 bonus to firepower
| |
| − | **** ★+5~7: +3 bonus to firepower
| |
| − | **** ★+8~10: +4 bonus to firepower
| |
| − | *** 61cm Quad (Oxygen) Torpedo, 61cm Quint (Oxygen) Torpedo, etc
| |
| − | **** ★+1~2: +1 bonus to torpedo
| |
| − | **** ★+3~6: +2 bonus to torpedo
| |
| − | **** ★+7~10: +3 bonus to torpedo
| |
| − | *** Type 94 Depth Charge, Type 3 SONAR, etc
| |
| − | **** ★+2~7: +1 bonus to non-ASW firepower
| |
| − | **** ★+8~10: +2 bonus to non-ASW firepower
| |
| − | *** Depth charges, sonars, fire directors, and searchlights increase shelling damage ([[Type 91 Anti-Aircraft Fire Director|Type 91 FD]] ★+10 shown to increase effective firepower by 3). Torpedoes and autocannons do not.
| |
| − | ::* Autocannons improvements increases the damage for torpedo salvo. (Example: [[25mm Triple Autocannon Mount]] ★+9 shown to increase effective torpedo by 3)
| |
| − | :::*The damage increase is speculated to be the same formula as the 61cm Quad (Oxygen) Torpedo Mount.
| |
| − | ::*The effective increase is speculated to be <math> \text {Effective Bonus} = \text {Equipment Type Modifier} \times \sqrt {\text {★ value}}</math>. Equipment Type Modifier is listed in the collapsed table (as it depends on situation).
| |
| − | :::*Example 1: 12.6cm Twin Gun Mount ★+6 (2.449) and ★+7 (2.645) provides a total of +5 effective bonus.
| |
| − | :::*Example 2: 35.6cm Twin Gun Mount ★+6 (3.674) and ★+5 (3.354) provides a total of +7 effective bonus.
| |
| − | :::*ASW equipment bonus are applied not to the equipment bonus nor the base ASW value, but instead for damage calculation.
| |
| − | :::*The bonus is not applied to [[Expeditions#Support_Expeditions|support shelling fire]].
| |
| | | | |
| − | {| class="mw-collapsible mw-collapsed wikitable" style="width:100%;" | + | Improvements are notably done via "[[Akashi's Improvement Arsenal]]", requiring [[Akashi]] and Improvement Materials {{IM}}, or may be already present on the equipment when obtained. |
| − | ! colspan="3" | Bonus Details | + | *''See how to perform improvements [[Akashi's Improvement Arsenal|here]]. |
| | + | *''See the full list of improvable equipment [[:Category:Improvable Equipment|here]] (this omit the equipment not improvable but obtainable already improved) . |
| | + | **''For a comprehensive list, please refer to [https://akashi-list.me/ Akashi-List]. |
| | + | *''See the full list of ship Helpers [[Improvement/Helper|here]]. |
| | + | |
| | + | =Overview= |
| | + | # Improvement levels are displayed beside equipment names. |
| | + | #* They run from {{Star}}'''+1''' to {{MaxStar}} (+10). |
| | + | # Improvement bonuses are '''hidden''' stat increases. The increase in stats is not reflected on ship girls' stat cards. |
| | + | #* This means they do not count for reaching certain thresholds like for [[OASW]]. |
| | + | #* Those bonuses work to some extent to reach regular [[Expeditions]] thresholds (''see [[#Expeditions Bonus|here]]''). |
| | + | #** For [[Support Expedition]]s, only the [[#Misc Bonuses|FCA]] bonuses do work, with any damage, accuracy, and fighter power bonuses notably not working. |
| | + | #* Some improvements on equipment can also add some additional [[#Visible Fit Bonuses|Visible Fit Bonuses]], or even affect the [[RE]]'s [[#Equipability|equipability]]. |
| | + | #** This works on an equipment-to-equipment and ship-to-ship basis with no general rule. |
| | + | # Most conversion quests (e.g. {{Q|F62}}), allow to use improved equipment, but any {{Star}} are {{color|red|lost during conversion}}. |
| | + | # Certain conversion quests that do not require improved equipment, will carry over any {{Star}} from the required equipment to the upgraded equipment. |
| | + | #*So far, this is only applicable to quests {{Q|F13}}, {{Q|F14}}, {{Q|F19}}, {{Q|F24}}, {{Q|F26}}, {{Q|F28}}, {{Q|F29}}, {{Q|F30}}, {{Q|Fm1}}, and {{Q|Fm2}}. |
| | + | #* This is currently the '''only''' way to obtain improved versions of the {{Equipment/Link|Tenzan Model 12 (Tomonaga Squadron)}}, {{Equipment/Link|Suisei (Egusa Squadron)}} & {{Equipment/Link|Reppuu (601 Air Group)}} (through F13-14-15 respectively, unimprovable otherwise). |
| | + | #Improved equipment cannot be used as fodder via [[Akashi's Improvement Arsenal]]. |
| | + | #Improved equipment can be used in ship [[Remodeling]] ([[Yamato Kai Ni]] only so far). |
| | + | |
| | + | =Improvement Bonuses= |
| | + | The bonus stats gained from improvement will vary depending on the type of equipment as well as the stat itself. |
| | + | *Most improved stats will come as decimal numbers, due to how [[wikipedia:Square root|square roots]] work. |
| | + | *It is important to note that '''decimals must not be discarded in favor of whole numbers''', as stats will be multiplied by various formulas anyway, to finally be rounded down/up. |
| | + | *''For calculated improvement bonuses, please refer to the [[Improvement/Categories|Categories Charts]]. |
| | + | |
| | + | The improvement effects are unknown/unclear for some equipment types/cases. |
| | + | |
| | + | ==Square Rooted Bonus== |
| | + | Most bonuses are all a function of the square root of the improvement level. The bonus can be calculated by: |
| | + | {|style="padding:10px; margin:20px; border:1px solid orange; border-radius:10px" |
| | + | |valign="center"| <math>\text{Bonus}_\text{stat} = \sum_{\text{All equips}} \text{Mod}_\text{equip} \sqrt{\bigstar}</math> |
| | + | |} |
| | + | |
| | + | ;With |
| | + | * <math>\bigstar</math> the improvement level of the equipment. |
| | + | * <math>\text{Mod}_\text{equip}</math> the equipment modifier for that stat, described below: |
| | + | |
| | + | {|class="wikitable fixed-header" style="text-align:center" |
| | + | |- class="fixed-header-1" |
| | + | !colspan=2 rowspan=2|Equipment Type |
| | + | !colspan=2|Day Battle |
| | + | !rowspan=2 width=78px|Night Battle |
| | + | !rowspan=2|ASW |
| | + | !colspan=2|AA |
| | + | !rowspan=2|Fighter Power |
| | + | !rowspan=2|LoS |
| | + | !colspan=4|Accuracy |
| | + | !colspan=2|Evasion |
| | + | |- class="fixed-header-2" |
| | + | !width=78px|Firepower!!Torpedo |
| | + | !width=78px|Ship!!width=78px|Fleet |
| | + | !width=78px|Day!!width=78px|Night<ref>[https://docs.google.com/spreadsheets/d/183MFdMfBS7Oc3doCZYyI-R1jxDaCZ-Y9wMt_HW8PFEg/edit#gid=0]</ref>!!Torpedo!!ASW |
| | + | !Shelling!!Torpedo |
| | + | |- |
| | + | | rowspan=3|[[Main Gun]]s |
| | + | |([[Very Large Caliber Main Gun|Very]]) [[Large Caliber Main Gun|Large]]<br>{{Large Gun}}{{Very Large Gun}} |
| | + | | 1.5|| -|| 1|| -|| -|| -|| -|| -|| 1|| 1.3|| -|| -|| -|| - |
| | + | |- |
| | + | |[[Medium Caliber Main Gun|Medium]]/[[Small Caliber Main Gun|Small]] (Red)<br>{{Med Gun}}{{Light Gun}} |
| | + | | 1|| -|| 1|| -|| -|| -|| -|| -|| 1|| 1.3|| -|| -|| -|| - |
| | + | |- |
| | + | |[[:Category:Main High-Angle Guns|HA]] (Green)<br>{{Main HA Gun}} |
| | + | | 1|| -|| 1|| -||rowspan=3| 2 ({{AA}}≤7)<br>3 ({{AA}}≥8)||rowspan=3| 2 ({{AA}}≤7)<br>3 ({{AA}}≥8)|| -|| -|| 1|| 1.3|| -|| -|| -|| - |
| | + | |- |
| | + | | rowspan=4|[[Secondary Gun]]s |
| | + | |{{EquipmentLink|90mm Single High-angle Gun Mount|text=90 mm Single HA}}<br>{{Sec HA Gun}} |
| | + | | 1|| -|| 1|| -|| -|| -|| 1|| 1.3|| -|| -|| -|| - |
| | + | |- |
| | + | |(Large) [[:Category:Secondary High-Angle Guns|HA]] (Green)<br>{{Sec HA Gun}} {{Large Sec HA Gun}} |
| | + | |rowspan=2| [[#Linear Bonus|Linear]]:<br>0.2 ({{Firepower}}≤3)<br>0.3 ({{Firepower}}≥5)|| -||rowspan=2| [[#Linear Bonus|Linear]]:<br>0.2 ({{Firepower}}≤3)<br> 0.3 ({{Firepower}}≥5)|| -|| -|| -|| 1|| 1.3|| -|| -|| -|| - |
| | + | |- |
| | + | |Surface (Yellow)<br>{{Sec Gun}} |
| | + | | -|| -|| -|| -|| -|| -|| 1|| 1.3|| -|| -|| -|| - |
| | + | |- |
| | + | |{{EquipmentLink|15.2cm Single Gun Mount|text=15.2 cm Single}} & {{EquipmentLink|OTO 152mm Triple Rapid Fire Gun Mount|text=OTO}}<br>{{Sec Gun}} |
| | + | | 1|| -|| 1|| -|| -|| -|| -|| -|| 1|| 1.3|| -|| -|| -|| - |
| | + | |- |
| | + | | colspan=2|[[Anti-Aircraft Fire Director]]s<br>{{AAFD}} |
| | + | | 1|| -|| 1|| -|| 2 ({{AA}}≤7)<br>3 ({{AA}}≥8)|| 2 ({{AA}}≤7)<br>3 ({{AA}}≥8)|| -|| -|| 1|| 1.3|| -|| -|| -|| - |
| | + | |- |
| | + | | colspan=2|[[AA Gun|Anti-Air Guns]]<br>{{AA Gun}} |
| | + | | 1|| 1.2|| -|| -|| 4 ({{AA}}≤7)<br>6 ({{AA}}≥8)|| -|| -|| -|| -|| -|| 2|| -|| -|| - |
| | |- | | |- |
| − | ! style="font-size:15px;"|Equipment Type
| + | | colspan=2|[[Torpedo]]es<br>{{Torpedo Weapon}} |
| − | ! style="font-size:15px;"|Damage the Bonus Applies to
| + | | -|| 1.2|| 1|| -|| -|| -|| -|| -|| -|| 1.3|| 2|| -|| -|| - |
| − | ! style="font-size:15px;"|Equipment Type Modifier
| |
| | |- | | |- |
| − | | style="text-align:center;"|Small Caliber Gun<br/>Medium Caliber Gun<br/>Secondary Gun | + | | colspan=2|[[Midget Submarine]]s<br>{{Minisub}} |
| − | | rowspan="5" style="text-align:center;"|Shelling | + | | -|| -|| 1|| -|| -|| -|| -|| -|| -|| 1.3|| -|| -|| -|| - |
| − | | style="text-align:center;"|x1 | |
| | |- | | |- |
| − | | style="text-align:center;"|AP Shell | + | | colspan=2|(Large) [[Carrier Recon]]s/[[Large Flying Boat]]s<br>{{Carrier Recon}}{{Large Recon}}{{LFB}} |
| − | | style="text-align:center;"|x1<br>(Note: ★+5 shown to give +2 bonus, but +3 bonus not confirmed yet) | + | | -|| -|| -|| -|| -|| -|| -|| 1.2|| -|| -|| -|| -|| -|| - |
| | |- | | |- |
| − | | style="text-align:center;"|Fire Director<br>Searchlight | + | | colspan=2|[[LB Recon]]s<br>{{Land-Based Recon}} |
| − | | style="text-align:center;"|x1 | + | | -|| -|| -|| -|| -|| -|| -|| 1.2?<ref>LoS might be affected like other recons, but it is not measurable, due to how LBAS work.</ref>|| -|| -|| -|| -|| -|| - |
| | |- | | |- |
| − | | style="text-align:center;"|Large Caliber Gun (Daytime) | + | | rowspan=2|[[Seaplane]]s<br>{{Seaplane}}{{Night Recon}} |
| − | | style="text-align:center;"|x1.5 | + | |[[SPR|Recons]] |
| | + | | -|| -|| -|| -|| -|| -|| -|| 1.2|| -|| -|| -|| -|| -|| - |
| | |- | | |- |
| − | | style="text-align:center;"|Large Caliber Gun (Nighttime) | + | |[[SPB|Bombers]] |
| − | | style="text-align:center;"|x1 | + | | -|| -|| -|| -|| -|| -|| -|| 1.1|| -|| -|| -|| -|| -|| - |
| | |- | | |- |
| − | | style="text-align:center;"|Torpedo (Daytime) | + | | colspan=2|[[Rotorcraft]]/[[Liaison Aircraft]]<br>{{Autogyro}}{{Liaison}} |
| − | | rowspan="3" style="text-align:center;"|Torpedo | + | | -|| -|| -|| [[#Linear Bonus|Linear]]|| -|| -|| -|| 0 {{Rotorcraft}}<ref>[https://x.com/CC_jabberwock/status/1124684463051395073]</ref><br>1 {{Liaison}}<ref>[https://x.com/CC_jabberwock/status/1523715685834129408]</ref>|| 1?<ref name="?">Unconfirmed yet</ref>|| 1.3?<ref name="?"/>|| -|| -|| -|| - |
| − | | style="text-align:center;"|x1.2 | |
| | |- | | |- |
| − | | style="text-align:center;"|Torpedo (Nighttime) | + | | colspan=2|[[Night Plane]]s<br>{{Night Fighter}}{{Night Torpedo Bomber}}{{IconText|{{Torpedo Bomber}}|Swordfish}}{{Night Dive Bomber}}{{IconText|{{Dive Bomber}}|Photo}} {{IconText|{{Dive Bomber}}|Iwai}} |
| − | | style="text-align:center;"|x1 | + | | -|| -|| 1<ref>[[Damage_Calculations#Carrier_Night_Air_Attacks|Carrier Night Air Attack damage only]]</ref>|| -|| -|| -|| -|| -|| -|| -|| -|| -|| -|| - |
| | |- | | |- |
| − | | style="text-align:center;"|Autocannon | + | | rowspan=2|[[Land Based Bomber]]s |
| − | | style="text-align:center;"|x1 | + | |[[LB Attacker|Attackers]]/[[LB Assault|Assault]]/[[LB Patrol|ASW]]/[[LB Heavy|Heavy Bombers]]<br>{{LB Attacker}}{{LB Assault}}{{LB ASW}}{{LB Heavy}} |
| | + | | -||{{ToolTip|0.7*|both {{Torpedo}} and {{Dive}}[https://twitter.com/Divinity_123/status/1659942246353891329]}}|| -|| -|| -|| -||rowspan=2| 0.5|| -|| -|| -|| -|| -|| -|| - |
| | |- | | |- |
| − | | rowspan="2" style="text-align:center;"|Sonar<br/>Depth Charge | + | |{{EquipmentLink|Bomb-carrying Type 1 Fighter Hayabusa Model III Kai (65th Squadron)|text=Hayabusa bomber}}<br>{{IconText|{{LB Fighter 2}}|bomber}} |
| − | | style="text-align:center;"|Shelling | + | | -|| {{ToolTip|0.7*|only against DD and Installation [https://twitter.com/Divinity_123/status/1659942251257004035] }}|| -|| -|| -|| -|| -|| -|| -|| -|| -|| -|| - |
| − | | style="text-align:center;"|x0.75 | |
| | |- | | |- |
| − | | style="text-align:center;"|ASW | + | | colspan=2|[[Radar]]s<br>{{Radar}} |
| − | | style="text-align:center;"|x1 | + | | -|| -|| -|| -|| -|| 0 {{Surface Radar}}<br>1.5 {{Air Radar}}|| -|| 1.25 {{Small Radar}}<br>1.4 {{Large Radar}}|| 1 ({{Hit}}≤2)<br>1.7 ({{Hit}}≥3)|| 1.3 ({{Hit}}≤2)<br>1.6 ({{Hit}}≥3)|| -|| -|| -|| - |
| − | |} | + | |- |
| − | | + | | colspan=2|{{EquipmentLink|Type 95 Depth Charge|text=T95 DC}} & {{EquipmentLink|Type 2 Depth Charge|Type 2 Depth Charge Kai 2|text=T2/K2 DC}}<br>{{Depth Charge}} |
| − | * If the equipment reaches the maximum improvement level (★max), it can sometimes be upgraded into stronger equipment. Be aware that the equipment's improvement level will reset, and a ★+10 equipment could be stronger than its unimproved upgrade.
| + | | -|| -|| -||rowspan=3| 1 <ref>[https://x.com/dd_izokaze_fake/status/1164149227024334848][https://x.com/CC_jabberwock/status/1557133104954761216]</ref>|| -|| -|| -|| -|| -|| -|| -|| -|| -|| - |
| − | ** If the new equipment after upgrading is something you can develop from conventional development, the improvement level will be automatically set to ★+3 (or ★+5 in a few cases).
| + | |- |
| − | ** This has a higher chance of failure than normal improvement.
| + | | colspan=2|[[Depth Charge]]s<br>{{Depth Charge}} |
| − | | + | |rowspan=2| 0.75|| -|| -|| -|| -|| -|| -|| -|| -|| -||rowspan=2|1.3 || -|| - |
| − | ==Success Rate for Improvements== | + | |- |
| − | [[Akashi|Akashi's]] success rate lowers with each improvement after 4-5★, based on whether or not she is at Kai or not. If she is not at Kai, her success rate is lower in comparison to when she is at Kai. As of now, Akashi's level may not have any additional influence on her success rate. Therefore, all admirals who manage to get a hold of [[Akashi]] are advised to train her to Kai at the very least to maximize her success rate when modifying equipment.<ref>Data details extracted from Kancolle Kai Data Pull which are closely connected to the browser game</ref> <ref>table data based on data pull info from Kancolle Kai http://bbs.ngacn.cc/read.php?tid=10007970&topid=196108376&page=1#pid196108376Anchor</ref>
| + | | colspan=2|[[Sonar]]s<br>{{Sonar}} |
| − | {| class="wikitable" | + | || -|| -|| -|| -|| -|| -|| -|| -|| -|| -|| 1.5 |
| | + | |- |
| | + | | colspan=2|[[Engine Improvement]]s<br>{{Turbine}} |
| | + | | -|| -|| -|| -|| -|| -|| -|| -|| -|| -|| -|| -||colspan=2| 1.5 |
| | |- | | |- |
| − | ! Modification Level !! 1★ !! 2★ !! 3★ !! 4★ !! 5★ !! 6★ !! 7★ !! 8★ !! 9★ !! Max★!! Upgrade
| + | | colspan=2|[[Submarine Equipment]]s<br>{{Submarine Radar}} |
| | + | | -|| -|| -|| -|| -|| -|| -|| -|| -|| -|| -|| -|| 1.5<ref>[https://x.com/PorterXRey/status/1864620483049869524]</ref>|| - |
| | |- | | |- |
| − | |Akashi || 100% || 100% || 100% || 100% || 95% || 90% || 80% || 77% || 72% || 60% || 50% | + | | colspan=2|[[Shell]]s/[[Searchlights]]/[[Lookout]]s/[[Landing Equipment]]<br>[[Command Facilities]]/[[Aviation Personnel]]s<br>{{AA Shell}}{{AP Shell}}{{Searchlight}}{{Lookout}}{{Landing Craft}}{{Amphibious Tank}}{{Army Units}}{{FCF}}{{Aviation Personnel}} |
| | + | | 1|| -|| 1|| -|| -|| -|| -|| -|| 1|| 1.3|| -|| -|| -|| - |
| | |- | | |- |
| − | |Akashi Kai || 100% || 100% || 100% || 100% || 100% || 95% || 90% || 82% || 77% || 67% || 62% | + | | colspan=2|[[Anti-Ground Rocket]]s<br>[[Smoke Generator]]s<br>{{Anti-Ground Rocket}}{{Smoke}} |
| | + | | 1|| -|| 1|| -|| -|| -|| -|| -|| 1?<ref name="?"/>|| 1.3?<ref name="?"/>|| -|| -|| -|| - |
| | |} | | |} |
| − | *Note : While the data is based on KanColle Kai Data, there is still a chance of a tiny chance of failure even at 100% in the browser version.
| + | <references/> |
| − | | + | {{Clear}} |
| − | == Possible Improvements ==
| |
| − | Equipment that can be improved depends on the day of the week and the ship in the second slot of the first fleet. Changes at 0:00 JST.
| |
| − | | |
| − | When the 2nd Ship varies by day, the ship's initial is used; '✓' denotes that any ship listed may be used.
| |
| − | | |
| − | A ship named can do the improvement regardless of remodel level unless specified.
| |
| | | | |
| − | === Small Guns === | + | ==Linear Bonus== |
| − | {{AkashiWorkshop}}
| + | Some bonuses have a linear growth. The bonus can be calculated by: |
| − | {{AkashiWorkshopLine
| + | {|style="padding:10px; margin:20px; border:1px solid orange; border-radius:10px" |
| − | |Name=10cm Twin High-angle Mount + Anti-Aircraft Fire Director
| + | |valign="center"| <math>\text{Bonus}_\text{stat} = \sum_{\text{All equips}} \text{Mod}_\text{equip} \times \bigstar</math> |
| − | |ItemType=GreenGunDP
| |
| − | |Fuel=10
| |
| − | |Ammo=60
| |
| − | |Steel=150
| |
| − | |Baux=50
| |
| − | |Mats0-5=6/7
| |
| − | |Mats6-9=5/8
| |
| − | |Mats10=-
| |
| − | |Screws0-5=3/4
| |
| − | |Screws6-9=4/7
| |
| − | |Screws10=-
| |
| − | |EquipConsume0-5=-
| |
| − | |EquipConsume6-9={{Tooltip|2|10cm Twin High-angle Mount}}
| |
| − | |EquipConsume10=-
| |
| − | |Sun={{Tooltip|T|Teruzuki}}
| |
| − | |Mon={{Tooltip|A|Akizuki}}
| |
| − | |Tue={{Tooltip|A|Akizuki}}
| |
| − | |Wed={{Tooltip|A|Akizuki}}
| |
| − | |Thu=✓
| |
| − | |Fri={{Tooltip|T|Teruzuki}}
| |
| − | |Sat={{Tooltip|T|Teruzuki}}
| |
| − | |2ndShip=[[Akizuki]]<br/>[[Teruzuki]]
| |
| − | |Notes=★6~★9 uses [[10cm Twin High-angle Mount]] for improvement.
| |
| − | }}
| |
| − | {{AkashiWorkshopLine
| |
| − | |Name=12.7cm Twin Gun Mount
| |
| − | |ItemType=RedGunLight
| |
| − | |Fuel=10
| |
| − | |Ammo=30
| |
| − | |Steel=60
| |
| − | |Baux=0
| |
| − | |Mats0-5=1/2
| |
| − | |Mats6-9=1/2
| |
| − | |Mats10=2/3
| |
| − | |Screws0-5=1/2
| |
| − | |Screws6-9=1/2
| |
| − | |Screws10=3/6
| |
| − | |EquipConsume0-5=-
| |
| − | |EquipConsume6-9={{Tooltip|1|12.7cm Twin Mount}}
| |
| − | |EquipConsume10={{Tooltip|2|12.7cm Twin Mount}}
| |
| − | |Sun=✓
| |
| − | |Mon=✓
| |
| − | |Tue=✓
| |
| − | |Wed=✓
| |
| − | |Thu=✓
| |
| − | |Fri=✓
| |
| − | |Sat=✓
| |
| − | |Notes=★Max conversion uses 2 [[12.7cm Twin Gun Mount]] to convert to a '''[[12.7cm Twin Mount Type-B Kai 2]]'''.
| |
| − | }}
| |
| − | {{AkashiWorkshopLine
| |
| − | |Name=12.7cm Twin Mount Type-B Kai 2
| |
| − | |ItemType=RedGunLight
| |
| − | |Fuel=10
| |
| − | |Ammo=60
| |
| − | |Steel=100
| |
| − | |Baux=0
| |
| − | |Mats0-5=2/2
| |
| − | |Mats6-9=2/2
| |
| − | |Mats10=4/8
| |
| − | |Screws0-5=2/3
| |
| − | |Screws6-9=2/4
| |
| − | |Screws10=4/7
| |
| − | |EquipConsume0-5=-
| |
| − | |EquipConsume6-9={{Tooltip|1|12.7cm Twin Mount Type-B Kai 2}}
| |
| − | |EquipConsume10={{Tooltip|3|12.7cm Twin Mount}}
| |
| − | |Mon={{Tooltip|Y|Yuudachi}}{{Tooltip|A|Ayanami}}
| |
| − | |Tue={{Tooltip|Y|Yuudachi}}{{Tooltip|A|Ayanami}}
| |
| − | |Wed=✓
| |
| − | |Thu={{Tooltip|K|Kawakaze}}
| |
| − | |2ndShip=[[Yuudachi|Yuudachi Kai Ni]]<br/>[[Ayanami|Ayanami Kai Ni]]<br/>[[Kawakaze|Kawakaze Kai Ni]]
| |
| − | |Notes=★6~★9 uses [[12.7cm Twin Mount Type-B Kai 2]] for improvement.<br/>★Max conversion uses 3 [[12.7cm Twin Gun Mount]] to convert to a '''[[12.7cm Twin Mount Type-C Kai 2]]'''.
| |
| − | }}
| |
| − | {{AkashiWorkshopLine
| |
| − | |Name=12.7cm Twin Mount Type-C Kai 2
| |
| − | |ItemType=RedGunLight
| |
| − | |Fuel=10
| |
| − | |Ammo=50
| |
| − | |Steel=80
| |
| − | |Baux=0
| |
| − | |Mats0-5=2/3
| |
| − | |Mats6-9=3/4
| |
| − | |Mats10=6/10
| |
| − | |Screws0-5=2/3
| |
| − | |Screws6-9=3/4
| |
| − | |Screws10=4/8
| |
| − | |EquipConsume0-5={{Tooltip|1|12.7cm Twin Mount}}
| |
| − | |EquipConsume6-9={{Tooltip|1|12.7cm Twin Mount Type-B Kai 2}}
| |
| − | |EquipConsume10={{Tooltip|2/'''1'''/'''1'''|Type 22 Surface RADAR}}
| |
| − | |Sun={{Tooltip|Mi|Michishio}}
| |
| − | |Mon={{Tooltip|Mi|Michishio}}
| |
| − | |Tue={{Tooltip|Mi|Michishio}}
| |
| − | |Wed={{Tooltip|Mi|Michishio}}{{Tooltip|Mu|Murasame}}{{Tooltip|Ar|Arashio}}
| |
| − | |Thu=✓
| |
| − | |Fri=✓
| |
| − | |Sat=✓
| |
| − | |2ndShip=[[Michishio|Michishio Kai Ni]]<br/>[[Arashio|Arashio Kai Ni]]<br/>[[Yukikaze|Yukikaze Kai]]<br/>[[Murasame|Murasame Kai Ni]]
| |
| − | |Notes=★0~★5 uses [[12.7cm Twin Gun Mount]] for improvement.<br/>★6~★9 uses [[12.7cm Twin Mount Type-B Kai 2]] for improvement.<br/>★Max conversion uses 2 [[Type 22 Surface RADAR]], 1 New Type Artillery Armament Material and 1 Action Report to convert to a '''[[12.7cm Twin Mount Type-D Kai 2]]'''.
| |
| − | }}
| |
| − | {{AkashiWorkshopLine
| |
| − | |Name=12.7cm Twin Mount Type-D Kai 2
| |
| − | |ItemType=RedGunLight
| |
| − | |Fuel=20
| |
| − | |Ammo=70
| |
| − | |Steel=90
| |
| − | |Baux=20
| |
| − | |Mats0-5=6/7
| |
| − | |Mats6-9=7/10
| |
| − | |Mats10=-
| |
| − | |Screws0-5=5/6
| |
| − | |Screws6-9=6/9
| |
| − | |Screws10=-
| |
| − | |EquipConsume0-5={{Tooltip|2|10cm Twin High-angle Mount}}
| |
| − | |EquipConsume6-9={{Tooltip|1|12.7cm Twin Mount Type-C Kai 2}}
| |
| − | |EquipConsume10=-
| |
| − | |Sun=✓
| |
| − | |Mon={{Tooltip|N|Naganami}}
| |
| − | |Tue={{Tooltip|N|Naganami}}
| |
| − | |Wed=✓
| |
| − | |Thu=✓
| |
| − | |Fri={{Tooltip|N|Naganami}}
| |
| − | |Sat={{Tooltip|N|Naganami}}
| |
| − | |2ndShip=[[Naganami|Naganami Kai Ni]]<br/>[[Yuugumo|Yuugumo Kai]]
| |
| − | |Notes=★0~★5 uses [[10cm Twin High-angle Mount]] for improvement.<br/>★6~★9 uses [[12.7cm Twin Mount Type-C Kai 2]] for improvement.
| |
| − | }}
| |
| − | {{AkashiWorkshopLine
| |
| − | |Name= QF 4.7inch Gun Mk.XII Kai
| |
| − | |ItemType=RedGunLight
| |
| − | |Fuel=20
| |
| − | |Ammo=60
| |
| − | |Steel=80
| |
| − | |Baux=20
| |
| − | |Mats0-5=6/7
| |
| − | |Mats6-9=7/8
| |
| − | |Mats10=-
| |
| − | |Screws0-5=4/5
| |
| − | |Screws6-9=6/7
| |
| − | |Screws10=-
| |
| − | |EquipConsume0-5={{Tooltip|2|12.7cm Twin Mount}}
| |
| − | |EquipConsume6-9={{Tooltip|2|12.7cm Twin Mount Type-B Kai 2}}
| |
| − | |EquipConsume10=-
| |
| − | |Sun=✓
| |
| − | |Mon=✓
| |
| − | |Tue=✓
| |
| − | |Wed=✓
| |
| − | |Thu=✓
| |
| − | |Fri=✓
| |
| − | |Sat=✓
| |
| − | |2ndShip=[[Jervis]]
| |
| − | |Notes=★0~★5 uses 2 [[12.7cm Twin Gun Mount]]s for improvement.<br/>★6~★9 uses 2 [[12.7cm Twin Mount Type-C Kai 2]]s for improvement.
| |
| − | }}
| |
| − | {{AkashiWorkshopLine
| |
| − | |Name= 130mm B-13 Twin Gun Mount
| |
| − | |ItemType=RedGunLight
| |
| − | |Fuel=40
| |
| − | |Ammo=90
| |
| − | |Steel=190
| |
| − | |Baux=50
| |
| − | |Mats0-5=8/9
| |
| − | |Mats6-9=9/13
| |
| − | |Mats10=-
| |
| − | |Screws0-5=5/6
| |
| − | |Screws6-9=7/8
| |
| − | |Screws10=-
| |
| − | |EquipConsume0-5={{Tooltip|3|12.7cm Twin Mount}}
| |
| − | |EquipConsume6-9={{Tooltip|4|14cm Naval Gun}}
| |
| − | |EquipConsume10=- | |
| − | |Sun=✓ | |
| − | |Mon=✓
| |
| − | |Tue=✓
| |
| − | |Wed=✓
| |
| − | |Thu=✓
| |
| − | |Fri=✓
| |
| − | |Sat=✓
| |
| − | |2ndShip=[[Tashkent]]
| |
| − | |Notes=★0~★5 uses 3 [[12.7cm Twin Gun Mount]]s for improvement.<br/>★6~★9 uses 4 [[14cm Naval Gun]]s for improvement. | |
| − | }}
| |
| − | |}
| |
| − | | |
| − | === Medium Guns ===
| |
| − | {{AkashiWorkshop}} | |
| − | {{AkashiWorkshopLine | |
| − | |Name=14cm Naval Gun
| |
| − | |ItemType=RedGunMedium
| |
| − | |Fuel=10
| |
| − | |Ammo=50
| |
| − | |Steel=80
| |
| − | |Baux=0
| |
| − | |Mats0-5=1/2
| |
| − | |Mats6-9=1/2
| |
| − | |Mats10=3/4
| |
| − | |Screws0-5=1/2
| |
| − | |Screws6-9=1/2
| |
| − | |Screws10=3/6
| |
| − | |EquipConsume0-5=-
| |
| − | |EquipConsume6-9=1
| |
| − | |EquipConsume10=2
| |
| − | |Sun=✓
| |
| − | |Mon=✓
| |
| − | |Tue=✓
| |
| − | |Wed=✓
| |
| − | |Thu=✓
| |
| − | |Fri=✓
| |
| − | |Sat=✓
| |
| − | |Notes=★Max conversion uses 2 [[14cm Naval Gun]] to convert to a '''[[14cm Twin Gun Mount]]'''.
| |
| − | }} | |
| − | {{AkashiWorkshopLine
| |
| − | |Name=14cm Twin Gun Mount
| |
| − | |ItemType=RedGunMedium
| |
| − | |Fuel=10
| |
| − | |Ammo=60
| |
| − | |Steel=100
| |
| − | |Baux=0
| |
| − | |Mats0-5=2/2
| |
| − | |Mats6-9=2/4
| |
| − | |Mats10=-
| |
| − | |Screws0-5=1/2
| |
| − | |Screws6-9=2/3
| |
| − | |Screws10=-
| |
| − | |EquipConsume0-5=-
| |
| − | |EquipConsume6-9=1
| |
| − | |EquipConsume10=-
| |
| − | |Mon=✓
| |
| − | |Thu=✓
| |
| − | |2ndShip=[[Yuubari]]
| |
| − | }}
| |
| − | {{AkashiWorkshopLine | |
| − | |Name=15.2cm Twin Gun Mount
| |
| − | |ItemType=RedGunMedium
| |
| − | |Fuel=10
| |
| − | |Ammo=60
| |
| − | |Steel=100
| |
| − | |Baux=0
| |
| − | |Mats0-5=2/2
| |
| − | |Mats6-9=2/3
| |
| − | |Mats10=5/8
| |
| − | |Screws0-5=2/3
| |
| − | |Screws6-9=2/4
| |
| − | |Screws10=4/10
| |
| − | |EquipConsume0-5=-
| |
| − | |EquipConsume6-9=1
| |
| − | |EquipConsume10=1*
| |
| − | |Sun=N
| |
| − | |Mon=N<br>Y
| |
| − | |Tue=Y
| |
| − | |Wed=Y
| |
| − | |Thu=A<br>Y
| |
| − | |Fri=A<br>N
| |
| − | |Sat=A<br>N
| |
| − | |2ndShip=[[Agano]]<br>[[Noshiro]]<br>[[Yahagi]]
| |
| − | |Notes=★Max conversion uses 1 [[Type 22 Surface RADAR]] to convert to a '''[[15.2cm Twin Gun Mount Kai]]'''.
| |
| − | }} | |
| − | {{AkashiWorkshopLine | |
| − | |Name=15.2cm Twin Gun Mount Kai
| |
| − | |ItemType=RedGunMedium
| |
| − | |Fuel=20
| |
| − | |Ammo=80
| |
| − | |Steel=100
| |
| − | |Baux=30
| |
| − | |Mats0-5=3/4
| |
| − | |Mats6-9=4/6
| |
| − | |Mats10=-
| |
| − | |Screws0-5=2/3
| |
| − | |Screws6-9=3/6
| |
| − | |Screws10=-
| |
| − | |EquipConsume0-5=1*
| |
| − | |EquipConsume6-9=1*
| |
| − | |EquipConsume10=-
| |
| − | |Sun=S
| |
| − | |Mon=S
| |
| − | |Tue=S
| |
| − | |Wed=Y
| |
| − | |Thu=Y
| |
| − | |Fri=Y
| |
| − | |Sat=✓
| |
| − | |2ndShip=[[Sakawa]]<br>[[Yahagi]]
| |
| − | |Notes=★0~★9 uses [[15.2cm Twin Gun Mount]]s for improvement.
| |
| − | }}
| |
| − | {{AkashiWorkshopLine
| |
| − | |Name=15.5cm Triple Gun Mount (Main)
| |
| − | |ItemType=RedGunMedium
| |
| − | |Fuel=10
| |
| − | |Ammo=90
| |
| − | |Steel=120
| |
| − | |Baux=0
| |
| − | |Mats0-5=2/2
| |
| − | |Mats6-9=2/3
| |
| − | |Mats10=8/12
| |
| − | |Screws0-5=2/3
| |
| − | |Screws6-9=2/4
| |
| − | |Screws10=4/8
| |
| − | |EquipConsume0-5=-
| |
| − | |EquipConsume6-9=1
| |
| − | |EquipConsume10=2/1*
| |
| − | |Sun=O
| |
| − | |Mon=O
| |
| − | |Fri=✓
| |
| − | |Sat=✓
| |
| − | |2ndShip=[[Mogami]]<br>[[Ooyodo]]
| |
| − | |Notes=★Max conversion uses 2 [[15.5cm Triple Gun Mount (Main)]] and 1 New Type Artillery Armament Materials to convert to a '''[[15.5cm Triple Gun Mount Kai (Main)]]'''.
| |
| − | }} | |
| − | {{AkashiWorkshopLine
| |
| − | |Name=15.5cm Triple Gun Mount Kai (Main)
| |
| − | |ItemType=RedGunMedium
| |
| − | |Fuel=15
| |
| − | |Ammo=120
| |
| − | |Steel=150
| |
| − | |Baux=30
| |
| − | |Mats0-5=6/7
| |
| − | |Mats6-9=8/9
| |
| − | |Mats10=9/10
| |
| − | |Screws0-5=4/5
| |
| − | |Screws6-9=5/7
| |
| − | |Screws10=2/3
| |
| − | |EquipConsume0-5=2*
| |
| − | |EquipConsume6-9=2**
| |
| − | |EquipConsume10=1**
| |
| − | |Fri=✓
| |
| − | |Sat=✓
| |
| − | |2ndShip=[[Ooyodo]]
| |
| − | |Notes=★0~★5 uses [[15.5cm Triple Gun Mount (Main)]] for improvement.<br/>★6~★9 uses [[15.5cm Triple Gun Mount (Secondary)]] for improvement.<br/>★Max conversion uses 1 [[15.5cm Triple Gun Mount (Secondary)]] to convert to a ★7 '''[[15.5cm Triple Gun Mount Kai (Secondary)]]'''.
| |
| − | }}
| |
| − | {{AkashiWorkshopLine
| |
| − | |Name=20.3cm Twin Gun Mount
| |
| − | |ItemType=RedGunMedium
| |
| − | |Fuel=10
| |
| − | |Ammo=90
| |
| − | |Steel=120
| |
| − | |Baux=0
| |
| − | |Mats0-5=1/2
| |
| − | |Mats6-9=2/3
| |
| − | |Mats10=2/5
| |
| − | |Screws0-5=2/3
| |
| − | |Screws6-9=2/3
| |
| − | |Screws10=4/10
| |
| − | |EquipConsume0-5=-
| |
| − | |EquipConsume6-9=1
| |
| − | |EquipConsume10=2
| |
| − | |Sun=✓
| |
| − | |Mon=K
| |
| − | |Tue=K
| |
| − | |Wed=K
| |
| − | |Thu=✓
| |
| − | |Fri=✓
| |
| − | |Sat=✓
| |
| − | |2ndShip=[[Aoba]]<br>[[Kinugasa]]
| |
| − | |Notes=★Max conversion uses 2 [[20.3cm Twin Gun Mount]] to convert to a '''[[20.3cm(no.2) Twin Gun Mount]]'''.
| |
| − | }}
| |
| − | {{AkashiWorkshopLine
| |
| − | |Name=20.3cm(no.2) Twin Gun Mount
| |
| − | |ItemType=RedGunMedium
| |
| − | |Fuel=10
| |
| − | |Ammo=100
| |
| − | |Steel=130
| |
| − | |Baux=0
| |
| − | |Mats0-5=2/3
| |
| − | |Mats6-9=2/4
| |
| − | |Mats10=4/8
| |
| − | |Screws0-5=2/3
| |
| − | |Screws6-9=2/4
| |
| − | |Screws10=4/11
| |
| − | |EquipConsume0-5=-
| |
| − | |EquipConsume6-9=1
| |
| − | |EquipConsume10=2
| |
| − | |Sun=✓
| |
| − | |Mon=✓
| |
| − | |Tue=✓
| |
| − | |2ndShip=[[Myoukou]]
| |
| − | |Notes=★Max conversion uses 1 [[20.3cm(no.2) Twin Gun Mount]] to convert to a '''[[20.3cm(no.3) Twin Gun Mount]]'''.
| |
| − | }}
| |
| − | {{AkashiWorkshopLine
| |
| − | |Name=20.3cm(no.3) Twin Gun Mount
| |
| − | |ItemType=RedGunMedium
| |
| − | |Fuel=10
| |
| − | |Ammo=110
| |
| − | |Steel=140
| |
| − | |Baux=0
| |
| − | |Mats0-5=3/4
| |
| − | |Mats6-9=3/5
| |
| − | |Mats10=-
| |
| − | |Screws0-5=2/3
| |
| − | |Screws6-9=3/5
| |
| − | |Screws10=-
| |
| − | |EquipConsume0-5=-
| |
| − | |EquipConsume6-9=1
| |
| − | |EquipConsume10=-
| |
| − | |Tue=✓
| |
| − | |Wed=✓
| |
| − | |2ndShip=[[Mikuma]]
| |
| − | }}
| |
| | |} | | |} |
| | | | |
| − | === Large Guns ===
| + | ;With |
| − | {{AkashiWorkshop}}
| + | * <math>\bigstar</math> the improvement level of the equipment: |
| − | {{AkashiWorkshopLine
| + | * <math>\text{Mod}_\text{equip}</math> the equipment modifier for that stat, described below: |
| − | |Name=35.6cm Twin Gun Mount
| |
| − | |ItemType=RedGunHeavy
| |
| − | |Fuel=20
| |
| − | |Ammo=240
| |
| − | |Steel=300
| |
| − | |Baux=0
| |
| − | |Mats0-5=2/3
| |
| − | |Mats6-9=3/4
| |
| − | |Mats10=6/12
| |
| − | |Screws0-5=1/2
| |
| − | |Screws6-9=2/4
| |
| − | |Screws10=5/12
| |
| − | |EquipConsume0-5=-
| |
| − | |EquipConsume6-9={{Tooltip|1|35.6cm Twin Gun Mount}}
| |
| − | |EquipConsume10={{Tooltip|3|35.6cm Twin Gun Mount}}
| |
| − | |Sun=✓
| |
| − | |Fri=✓
| |
| − | |Sat=✓
| |
| − | |2ndShip=[[Fusou]]
| |
| − | |Notes=★Max conversion uses 3 [[35.6cm Twin Gun Mount]] to convert to a '''[[Prototype 35.6cm Triple Gun Mount]]'''.
| |
| − | }}
| |
| − | {{AkashiWorkshopLine
| |
| − | |Name=35.6cm Twin Gun Mount (Dazzle Camouflage)
| |
| − | |ItemType=RedGunHeavy
| |
| − | |Fuel=30
| |
| − | |Ammo=250
| |
| − | |Steel=300
| |
| − | |Baux=30
| |
| − | |Mats0-5=3/4
| |
| − | |Mats6-9=4/5
| |
| − | |Mats10=-
| |
| − | |Screws0-5=2/3
| |
| − | |Screws6-9=3/5
| |
| − | |Screws10=-
| |
| − | |EquipConsume0-5={{Tooltip|1|35.6cm Twin Gun Mount}}
| |
| − | |EquipConsume6-9={{Tooltip|2|35.6cm Twin Gun Mount}}
| |
| − | |EquipConsume10=-
| |
| − | |Sun=✓
| |
| − | |Mon=✓
| |
| − | |Tue=✓
| |
| − | |Wed=✓
| |
| − | |Sat=✓
| |
| − | |2ndShip=[[Haruna|Haruna Kai Ni]]
| |
| − | |Notes=★0~★9 uses [[35.6cm Twin Gun Mount]] for improvement.
| |
| − | }}
| |
| − | {{AkashiWorkshopLine
| |
| − | |Name=Prototype 35.6cm Triple Gun Mount
| |
| − | |ItemType=RedGunHeavy
| |
| − | |Fuel=30
| |
| − | |Ammo=330
| |
| − | |Steel=390
| |
| − | |Baux=30
| |
| − | |Mats0-5=4/6
| |
| − | |Mats6-9=6/9
| |
| − | |Mats10=-
| |
| − | |Screws0-5=3/4
| |
| − | |Screws6-9=4/7
| |
| − | |Screws10=-
| |
| − | |EquipConsume0-5={{Tooltip|2|35.6cm Twin Gun Mount}}
| |
| − | |EquipConsume6-9={{Tooltip|3|35.6cm Twin Gun Mount}}
| |
| − | |EquipConsume10=-
| |
| − | |Sun=Y
| |
| − | |Wed=F<br/>K
| |
| − | |Thu=✓
| |
| − | |Fri=F<br/>Y<br/>H
| |
| − | |Sat=F<br/>H
| |
| − | |2ndShip=[[Fusou|Fusou Kai Ni]]<br/>[[Yamashiro|Yamashiro Kai Ni]]<br/>[[Kongou|Kongou Kai Ni]]<br/>[[Haruna|Haruna Kai Ni]]
| |
| − | |Notes=★0~★9 uses [[35.6cm Twin Gun Mount]] for improvement.
| |
| − | }}
| |
| − | {{AkashiWorkshopLine
| |
| − | |Name=38cm Twin Gun Mount
| |
| − | |ItemType=RedGunHeavy
| |
| − | |Fuel=20
| |
| − | |Ammo=380
| |
| − | |Steel=450
| |
| − | |Baux=20
| |
| − | |Mats0-5=4/5
| |
| − | |Mats6-9=5/8
| |
| − | |Mats10=10/20
| |
| − | |Screws0-5=2/3
| |
| − | |Screws6-9=3/5
| |
| − | |Screws10=6/13
| |
| − | |EquipConsume0-5={{Tooltip|1|35.6cm Twin Gun Mount}}
| |
| − | |EquipConsume6-9={{Tooltip|2|35.6cm Twin Gun Mount}}
| |
| − | |EquipConsume10={{Tooltip|2|41cm Twin Gun Mount}}
| |
| − | |Thu=✓
| |
| − | |Fri=✓
| |
| − | |Sat=✓
| |
| − | |2ndShip=[[Bismarck]]
| |
| − | |Notes=★0~★9 uses [[35.6cm Twin Gun Mount]] for improvement.<br/>★Max conversion uses 2 [[41cm Twin Gun Mount]] to convert to a '''[[38cm Twin Gun Mount Kai]]'''.
| |
| − | }}
| |
| − | {{AkashiWorkshopLine
| |
| − | |Name=38cm Twin Gun Mount Kai
| |
| − | |ItemType=RedGunHeavy
| |
| − | |Fuel=30
| |
| − | |Ammo=390
| |
| − | |Steel=470
| |
| − | |Baux=30
| |
| − | |Mats0-5=5/7
| |
| − | |Mats6-9=6/9
| |
| − | |Mats10=-
| |
| − | |Screws0-5=3/4
| |
| − | |Screws6-9=4/6
| |
| − | |Screws10=-
| |
| − | |EquipConsume0-5={{Tooltip|1|41cm Twin Gun Mount}}
| |
| − | |EquipConsume6-9={{Tooltip|2|41cm Twin Gun Mount}}
| |
| − | |EquipConsume10=-
| |
| − | |Sun=✓
| |
| − | |Mon=✓
| |
| − | |Tue=✓
| |
| − | |2ndShip=[[Bismarck]]
| |
| − | |Notes=★0~★9 uses [[41cm Twin Gun Mount]] for improvement.
| |
| − | }}
| |
| − | {{AkashiWorkshopLine
| |
| − | |Name=381mm / 50 Triple Gun Mount
| |
| − | |ItemType=RedGunHeavy
| |
| − | |Fuel=30
| |
| − | |Ammo=400
| |
| − | |Steel=480
| |
| − | |Baux=20
| |
| − | |Mats0-5=4/5
| |
| − | |Mats6-9=5/8
| |
| − | |Mats10=12/22
| |
| − | |Screws0-5=2/3
| |
| − | |Screws6-9=3/5
| |
| − | |Screws10=7/14
| |
| − | |EquipConsume0-5={{Tooltip|1|35.6cm Twin Gun Mount}}
| |
| − | |EquipConsume6-9={{Tooltip|2|35.6cm Twin Gun Mount}}
| |
| − | |EquipConsume10={{Tooltip|2|25mm Twin Autocannon Mount}}
| |
| − | |Sun=R
| |
| − | |Mon=R
| |
| − | |Tue=L
| |
| − | |Wed=L
| |
| − | |Thu=L
| |
| − | |Fri=L
| |
| − | |Sat=R
| |
| − | |2ndShip=[[Littorio]]<br/>[[Roma]]
| |
| − | |Notes=★0~★9 uses [[35.6cm Twin Gun Mount]] for improvement.<br/>★Max conversion uses 2 [[25mm Twin Autocannon Mount]] to convert to a '''[[381mm / 50 Triple Gun Mount Kai]]'''.
| |
| − | }}
| |
| − | {{AkashiWorkshopLine
| |
| − | |Name=381mm / 50 Triple Gun Mount Kai
| |
| − | |ItemType=RedGunHeavy
| |
| − | |Fuel=40
| |
| − | |Ammo=440
| |
| − | |Steel=500
| |
| − | |Baux=50
| |
| − | |Mats0-5=4/7
| |
| − | |Mats6-9=7/10
| |
| − | |Mats10=-
| |
| − | |Screws0-5=3/4
| |
| − | |Screws6-9=4/6
| |
| − | |Screws10=-
| |
| − | |EquipConsume0-5={{Tooltip|1|41cm Twin Gun Mount}}
| |
| − | |EquipConsume6-9={{Tooltip|2|41cm Twin Gun Mount}}
| |
| − | |EquipConsume10=-
| |
| − | |Sun=L
| |
| − | |Mon=L
| |
| − | |Tue=R
| |
| − | |Wed=R
| |
| − | |Thu=R
| |
| − | |Fri=R
| |
| − | |Sat=L
| |
| − | |2ndShip=[[Littorio]]<br/>[[Roma]]
| |
| − | |Notes=★0~★9 uses [[41cm Twin Gun Mount]] for improvement.
| |
| − | }}
| |
| − | {{AkashiWorkshopLine
| |
| − | |Name=41cm Twin Gun Mount
| |
| − | |ItemType=RedGunHeavy
| |
| − | |Fuel=30
| |
| − | |Ammo=350
| |
| − | |Steel=480
| |
| − | |Baux=0
| |
| − | |Mats0-5=3/4
| |
| − | |Mats6-9=4/7
| |
| − | |Mats10=12/20
| |
| − | |Screws0-5=2/3
| |
| − | |Screws6-9=3/6
| |
| − | |Screws10=10/15
| |
| − | |EquipConsume0-5={{Tooltip|1|41cm Twin Gun Mount}}
| |
| − | |EquipConsume6-9={{Tooltip|2|41cm Twin Gun Mount}}
| |
| − | |EquipConsume10={{Tooltip|2/'''2'''|46cm Triple Gun Mount}}
| |
| − | |Sun=M
| |
| − | |Mon=M
| |
| − | |Tue=N
| |
| − | |Thu=M
| |
| − | |Fri=N
| |
| − | |Sat=N
| |
| − | |2ndShip=[[Nagato]]<br/>[[Mutsu]]
| |
| − | |Notes=★Max conversion uses 2 [[46cm Triple Gun Mount]] and 2 New Type Artillery Armament Materials to convert into a '''[[Prototype 41cm Triple Gun Mount]]'''.
| |
| − | }}
| |
| − | {{AkashiWorkshopLine
| |
| − | |Name=Prototype 41cm Triple Gun Mount
| |
| − | |ItemType=RedGunHeavy
| |
| − | |Fuel=40
| |
| − | |Ammo=440
| |
| − | |Steel=620
| |
| − | |Baux=40
| |
| − | |Mats0-5=5/7
| |
| − | |Mats6-9=8/10
| |
| − | |Mats10=15/30
| |
| − | |Screws0-5=4/6
| |
| − | |Screws6-9=5/8
| |
| − | |Screws10=12/16
| |
| − | |EquipConsume0-5={{Tooltip|2|41cm Twin Gun Mount}}
| |
| − | |EquipConsume6-9={{Tooltip|3|41cm Twin Gun Mount}}
| |
| − | |EquipConsume10={{Tooltip|2/'''2'''|46cm Triple Gun Mount}}
| |
| − | |Sun=N
| |
| − | |Mon=N
| |
| − | |Tue=M
| |
| − | |Wed=✓
| |
| − | |Thu=N
| |
| − | |Fri=M
| |
| − | |Sat=M
| |
| − | |2ndShip=[[Nagato|Nagato Kai]]<br/>[[Mutsu|Mutsu Kai]]
| |
| − | |Notes=★0~★9 uses [[41cm Twin Gun Mount]] for improvement.<br/>★Max conversion uses 2 [[46cm Triple Gun Mount]] and 2 New Type Artillery Armament Materials to convert into a '''[[41cm Triple Gun Mount Kai]]'''.
| |
| − | }}
| |
| − | {{AkashiWorkshopLine
| |
| − | |Name=41cm Triple Gun Mount Kai
| |
| − | |ItemType=RedGunHeavy
| |
| − | |Fuel=45
| |
| − | |Ammo=450
| |
| − | |Steel=700
| |
| − | |Baux=45
| |
| − | |Mats0-5=6/8
| |
| − | |Mats6-9=10/12
| |
| − | |Mats10=-
| |
| − | |Screws0-5=6/7
| |
| − | |Screws6-9=7/10
| |
| − | |Screws10=-
| |
| − | |EquipConsume0-5={{Tooltip|2|41cm Twin Gun Mount}}
| |
| − | |EquipConsume6-9={{Tooltip|2|46cm Triple Gun Mount}}
| |
| − | |EquipConsume10=-
| |
| − | |Mon=✓
| |
| − | |Tue=✓
| |
| − | |Wed=✓
| |
| − | |2ndShip=[[Nagato|Nagato Kai Ni]]
| |
| − | |Notes=★0~★5 uses [[41cm Twin Gun Mount]] for improvement.<br/>★6~9 uses [[46cm Triple Gun Mount]] for improvement.
| |
| − | }}
| |
| − | {{AkashiWorkshopLine
| |
| − | |Name=46cm Triple Gun Mount
| |
| − | |ItemType=RedGunHeavy
| |
| − | |Fuel=50
| |
| − | |Ammo=480
| |
| − | |Steel=800
| |
| − | |Baux=50
| |
| − | |Mats0-5=6/8
| |
| − | |Mats6-9=8/10
| |
| − | |Mats10=18/36
| |
| − | |Screws0-5=4/6
| |
| − | |Screws6-9=5/8
| |
| − | |Screws10=12/16
| |
| − | |EquipConsume0-5={{Tooltip|1|46cm Triple Gun Mount}}
| |
| − | |EquipConsume6-9={{Tooltip|2|46cm Triple Gun Mount}}
| |
| − | |EquipConsume10={{Tooltip|4/'''2'''|46cm Triple Gun Mount}}
| |
| − | |Sun=M
| |
| − | |Mon=M
| |
| − | |Tue=Y<br/>Y+
| |
| − | |Wed=Y<br/>Y+
| |
| − | |Thu=Y<br/>Y+
| |
| − | |Fri=Y
| |
| − | |Sat=Y
| |
| − | |2ndShip=[[Musashi]]<br/>[[Yamato]]<br/>[[Yamato|Yamato Kai]]
| |
| − | |Notes=★0~★5 uses [[46cm Triple Gun Mount]] for improvement.<br/>★6~★9 uses [[46cm Triple Gun Mount]] for improvement.<br/>★Max conversion uses 4 [[46cm Triple Gun Mount]] and 2 New Type Artillery Armament Material to convert to a '''[[46cm Triple Gun Mount Kai]]'''.
| |
| − | }}
| |
| − | {{AkashiWorkshopLine
| |
| − | |Name=Prototype 46cm Twin Gun Mount
| |
| − | |ItemType=RedGunHeavy
| |
| − | |Fuel=40
| |
| − | |Ammo=420
| |
| − | |Steel=650
| |
| − | |Baux=40
| |
| − | |Mats0-5=5/6
| |
| − | |Mats6-9=6/8
| |
| − | |Mats10=12/18
| |
| − | |Screws0-5=3/5
| |
| − | |Screws6-9=4/7
| |
| − | |Screws10=4/14
| |
| − | |EquipConsume0-5={{Tooltip|2|41cm Twin Gun Mount}}
| |
| − | |EquipConsume6-9={{Tooltip|3|41cm Twin Gun Mount}}
| |
| − | |EquipConsume10={{Tooltip|4|41cm Twin Gun Mount}}
| |
| − | |Sun=Y
| |
| − | |Mon=Y
| |
| − | |Tue=M
| |
| − | |Wed=M
| |
| − | |2ndShip=[[Yamato]]<br />[[Musashi]]
| |
| − | |Notes=★0~★9 uses [[41cm Twin Gun Mount]] for improvement.<br/>★Max conversion uses 3 [[41cm Twin Gun Mount]] to convert to a '''[[46cm Triple Gun Mount]]'''.
| |
| − | }}
| |
| − | {{AkashiWorkshopLine
| |
| − | |Name=Prototype 51cm Twin Cannon
| |
| − | |ItemType=RedGunHeavy
| |
| − | |Fuel=50
| |
| − | |Ammo=550
| |
| − | |Steel=950
| |
| − | |Baux=80
| |
| − | |Mats0-5=7/9
| |
| − | |Mats6-9=10/15
| |
| − | |Mats10=
| |
| − | |Screws0-5=5/7
| |
| − | |Screws6-9=7/10
| |
| − | |Screws10=-
| |
| − | |EquipConsume0-5={{Tooltip|2|46cm Triple Gun Mount}}
| |
| − | |EquipConsume6-9={{Tooltip|3|46cm Triple Gun Mount}}
| |
| − | |EquipConsume10=-
| |
| − | |Mon=✓
| |
| − | |Tue=Y
| |
| − | |Wed=M
| |
| − | |2ndShip=[[Yamato|Yamato Kai]]<br />[[Musashi|Musashi Kai]]
| |
| − | |Notes=★0~★9 uses [[46cm Triple Gun Mount]] for improvement.
| |
| − | }}
| |
| − | {{AkashiWorkshopLine
| |
| − | |Name=16in Triple Gun Mount Mk.7
| |
| − | |ItemType=RedGunHeavy
| |
| − | |Fuel=45
| |
| − | |Ammo=450
| |
| − | |Steel=750
| |
| − | |Baux=100
| |
| − | |Mats0-5=10/15
| |
| − | |Mats6-9=16/24
| |
| − | |Mats10=20/28
| |
| − | |Screws0-5=6/8
| |
| − | |Screws6-9=8/12
| |
| − | |Screws10=12/20
| |
| − | |EquipConsume0-5={{Tooltip|3|41cm Twin Gun Mount}}
| |
| − | |EquipConsume6-9={{Tooltip|3|46cm Triple Gun Mount}}
| |
| − | |EquipConsume10={{Tooltip|2|Type 32 Surface RADAR}}
| |
| − | |Sun=✓
| |
| − | |Mon=✓
| |
| − | |Tue=✓
| |
| − | |Wed=✓
| |
| − | |Thu=✓
| |
| − | |Fri=✓
| |
| − | |Sat=✓
| |
| − | |2ndShip=[[Iowa]]
| |
| − | |Notes=★0~★5 uses [[41cm Twin Gun Mount]] for improvement.<br/>★6~★9 uses [[46cm Triple Gun Mount]] for improvement.<br/>★Max conversion uses 2 [[Type 32 Surface RADAR]] to convert to a '''[[16in Triple Gun Mount Mk.7 + GFCS]]'''.
| |
| − | }}
| |
| − | {{AkashiWorkshopLine
| |
| − | |Name=16in Triple Gun Mount Mk.7 + GFCS
| |
| − | |ItemType=RedGunHeavy
| |
| − | |Fuel=45
| |
| − | |Ammo=500
| |
| − | |Steel=770
| |
| − | |Baux=500
| |
| − | |Mats0-5=16/24
| |
| − | |Mats6-9=16/24
| |
| − | |Mats10=-
| |
| − | |Screws0-5=8/12
| |
| − | |Screws6-9=8/16
| |
| − | |Screws10=-
| |
| − | |EquipConsume0-5={{Tooltip|2|Type 22 Surface RADAR}}
| |
| − | |EquipConsume6-9={{Tooltip|2|Type 32 Surface RADAR}}
| |
| − | |EquipConsume10=-
| |
| − | |Sun=✓
| |
| − | |Thu=✓
| |
| − | |Fri=✓
| |
| − | |Sat=✓
| |
| − | |2ndShip=[[Iowa]]
| |
| − | |Notes=★0~★5 uses [[Type 22 Surface RADAR]] for improvement.<br/>★6~★9 uses [[Type 32 Surface RADAR]] for improvement.
| |
| − | }}
| |
| − | {{AkashiWorkshopLine
| |
| − | |Name=38.1cm Mk.I Twin Gun Mount
| |
| − | |ItemType=RedGunHeavy
| |
| − | |Fuel=24
| |
| − | |Ammo=280
| |
| − | |Steel=380
| |
| − | |Baux=0
| |
| − | |Mats0-5=3/4
| |
| − | |Mats6-9=4/6
| |
| − | |Mats10=8/15
| |
| − | |Screws0-5=3/4
| |
| − | |Screws6-9=3/5
| |
| − | |Screws10=6/12
| |
| − | |EquipConsume0-5={{Tooltip|2|35.6cm Twin Gun Mount}}
| |
| − | |EquipConsume6-9={{Tooltip|2|41cm Twin Gun Mount}}
| |
| − | |EquipConsume10={{Tooltip|2|25mm Single Autocannon Mount}}
| |
| − | |Sun=✓
| |
| − | |Thu=✓
| |
| − | |Fri=✓
| |
| − | |Sat=✓
| |
| − | |2ndShip=[[Warspite]]
| |
| − | |Notes=★0~★5 uses [[35.6cm Twin Gun Mount]] for improvement.<br/>★6~★9 uses [[41cm Twin Gun Mount]] for improvement.<br/>★Max conversion uses 2 [[25mm Single Autocannon Mount]] to convert to a '''[[38.1cm Mk.I/N Twin Gun Mount Kai]]'''.
| |
| − | }}
| |
| − | {{AkashiWorkshopLine
| |
| − | |Name=38.1cm Mk.I/N Twin Gun Mount Kai
| |
| − | |ItemType=RedGunHeavy
| |
| − | |Fuel=28
| |
| − | |Ammo=320
| |
| − | |Steel=420
| |
| − | |Baux=40
| |
| − | |Mats0-5=4/6
| |
| − | |Mats6-9=6/8
| |
| − | |Mats10=-
| |
| − | |Screws0-5=3/5
| |
| − | |Screws6-9=4/7
| |
| − | |Screws10=-
| |
| − | |EquipConsume0-5={{Tooltip|1|341cm Twin Gun Mount}}
| |
| − | |EquipConsume6-9={{Tooltip|2|41cm Twin Gun Mount}}
| |
| − | |EquipConsume10=-
| |
| − | |Tue=✓
| |
| − | |Wed=✓
| |
| − | |Thu=✓
| |
| − | |Fri=✓
| |
| − | |2ndShip=[[Warspite]]
| |
| − | |Notes=★0~★9 uses [[41cm Twin Gun Mount]] for improvement.
| |
| − | }}
| |
| − | {{AkashiWorkshopLine
| |
| − | |Name=46cm Triple Gun Mount Kai
| |
| − | |ItemType=RedGunHeavy
| |
| − | |Fuel=50
| |
| − | |Ammo=490
| |
| − | |Steel=860
| |
| − | |Baux=80
| |
| − | |Mats0-5=8/9
| |
| − | |Mats6-9=9/16
| |
| − | |Mats10=-
| |
| − | |Screws0-5=5/6
| |
| − | |Screws6-9=8/9
| |
| − | |Screws10=-
| |
| − | |EquipConsume0-5={{Tooltip|3|25mm Triple Autocannon Mount}}
| |
| − | |EquipConsume6-9={{Tooltip|3|46cm Triple Gun Mount}}
| |
| − | |EquipConsume10=-
| |
| − | |Sun=M
| |
| − | |Mon=Y
| |
| − | |Tue=Y
| |
| − | |Wed=Y
| |
| − | |Fri=M
| |
| − | |Sat=M
| |
| − | |2ndShip=[[Yamato|Yamato Kai]]<br/>[[Musashi|Musashi Kai]]
| |
| − | |Notes=★0~★5 uses [[25mm Triple Autocannon Mount]] for improvement.
| |
| − | }}
| |
| − | {{AkashiWorkshopLine
| |
| − | |Name=51cm Twin Gun Mount
| |
| − | |ItemType=RedGunHeavy
| |
| − | |Fuel=100
| |
| − | |Ammo=700
| |
| − | |Steel=950
| |
| − | |Baux=200
| |
| − | |Mats0-5=20/25
| |
| − | |Mats6-9=25/50
| |
| − | |Mats10=
| |
| − | |Screws0-5=7/8
| |
| − | |Screws6-9=10/13
| |
| − | |Screws10=-
| |
| − | |EquipConsume0-5={{Tooltip|4|41cm Twin Gun Mount}}
| |
| − | |EquipConsume6-9={{Tooltip|4|46cm Triple Gun Mount}}
| |
| − | |EquipConsume10=-
| |
| − | |Sun=✓
| |
| − | |Fri=✓
| |
| − | |Sat=✓
| |
| − | |2ndShip=[[Musashi|Musashi Kai Ni]]
| |
| − | |Notes=★0~★5 uses 4 [[41cm Twin Gun Mount]]s for improvement.<br> ★6~★9 uses 4 [[46cm Triple Gun Mount]]s for improvement.
| |
| − | }}
| |
| − | |}
| |
| | | | |
| − | === Secondary Guns ===
| + | {|class="wikitable" style="text-align:center" |
| − | {{AkashiWorkshop}}
| + | !colspan=2|Equipment Type |
| − | {{AkashiWorkshopLine | + | !Fighter Power |
| − | |Name=90mm Single High Angled Gun | + | !Dive Bomb |
| − | |ItemType=GreenGunDP
| + | !Torpedo |
| − | |Fuel=10
| + | !ASW |
| − | |Ammo=20 | + | !Armor |
| − | |Steel=70
| + | |- |
| − | |Baux=10
| + | | colspan=2|[[Submarine Torpedo]]es<br>{{Sub Torpedo}} |
| − | |Mats0-5=1/2
| + | | -|| -|| 0.2|| -|| - |
| − | |Mats6-9=2/3
| + | |- |
| − | |Mats10=-
| + | | colspan=2|[[Fighter]]s/[[SPF]]/[[Interceptor|LB Fighters]]<br>{{Fighter}}{{Night Fighter}}{{SPF}}{{LB Fighter 1}}{{LB Fighter 2}}{{LB Fighter Jet}}{{LB Shinden}} |
| − | |Screws0-5=1/2 | + | | 0.2|| -|| -|| -|| - |
| − | |Screws6-9=1/2 | + | |- |
| − | |Screws10=-
| + | | colspan=2|{{EquipmentLink|Type 0 Fighter Model 64 (Air Superiority Fighter Specification)|text=Mod 64 Zero AS}}<br>{{Fighter}} |
| − | |EquipConsume0-5=1* | + | | 0.3<ref name="M64">[https://x.com/noro_006/status/1979155131707920627][https://discord.com/channels/118339803660943369/178613137430282240/1429116297832304640]</ref>|| -|| -|| -|| - |
| − | |EquipConsume6-9=2*
| + | |- |
| − | |EquipConsume10=
| + | | colspan=2|[[Fighter-Bomber]]s<br>{{Dive Bomber}} |
| − | |Sun=R
| + | |rowspan=2| 0.25|| -|| -|| -|| - |
| − | |Mon=L
| + | |- |
| − | |Tue=L
| + | | colspan=2|{{EquipmentLink|Type 0 Fighter Model 64 (Two-seat w/ KMX)|text=Mod 64 Zero FB KMX}}<br>{{Dive Bomber}} |
| − | |Wed=L
| + | || -|| -||rowspan=4| 0.2|| - |
| − | |Thu=✓
| + | |- |
| − | |Fri=R
| + | | colspan=2|{{EquipmentLink|Type 0 Fighter Model 64 (Skilled Fighter-bomber)|text=Mod 64 Zero FB Sk}}<br>{{Dive Bomber}} |
| − | |Sat=R
| + | | 0.3<ref name="M64"/>|| -|| -|| - |
| − | |2ndShip=[[Littorio]]<br/>[[Roma]]
| + | |- |
| − | |Notes=★0~★9 uses [[10cm Twin High-angle Mount]] for improvement.
| + | | colspan=2|[[Dive Bomber]]s (ex. FB)<br>{{Dive Bomber}}{{Night Dive Bomber}} |
| − | }}
| + | | -|| 0.2|| -|| - |
| − | {{AkashiWorkshopLine | |
| − | |Name=12.7cm Twin High-angle Mount
| |
| − | |ItemType=GreenGunDP
| |
| − | |Fuel=10
| |
| − | |Ammo=40
| |
| − | |Steel=70
| |
| − | |Baux=20
| |
| − | |Mats0-5=2/3
| |
| − | |Mats6-9=3/4
| |
| − | |Mats10=5/8
| |
| − | |Screws0-5=2/3
| |
| − | |Screws6-9=3/4
| |
| − | |Screws10=6/10
| |
| − | |EquipConsume0-5=1
| |
| − | |EquipConsume6-9=1
| |
| − | |EquipConsume10=1*
| |
| − | |Sun=S<br/>K
| |
| − | |Mon=K
| |
| − | |Fri=S<br/>M
| |
| − | |Sat=✓
| |
| − | |2ndShip=[[Suzuya]]<br />[[Kumano]]<br />[[Maya|Maya Kai Ni]]
| |
| − | |Notes=★Max conversion uses 1 [[10cm Twin High-angle Mount]] to convert to a '''[[8cm High-angle Mount]]'''.
| |
| − | }} | |
| − | {{AkashiWorkshopLine
| |
| − | |Name=8cm High-angle Mount | |
| − | |ItemType=GreenGunDP
| |
| − | |Fuel=10
| |
| − | |Ammo=40 | |
| − | |Steel=80 | |
| − | |Baux=40
| |
| − | |Mats0-5=4/5
| |
| − | |Mats6-9=6/8 | |
| − | |Mats10=8/16 | |
| − | |Screws0-5=3/3 | |
| − | |Screws6-9=4/5 | |
| − | |Screws10=8/12 | |
| − | |EquipConsume0-5=1* | |
| − | |EquipConsume6-9=2* | |
| − | |EquipConsume10=2** | |
| − | |Sun=A<br/>N<br/>Y
| |
| − | |Mon=N<br/>Y<br/>K | |
| − | |Tue=Y<br/>S<br/>K
| |
| − | |Wed=<br/>S<br/>K
| |
| − | |Thu=A<br/>S
| |
| − | |Fri=A<br/>N
| |
| − | |Sat=A<br/>N
| |
| − | |2ndShip=[[Agano]]<br/>[[Noshiro]]<br/>[[Yahagi]]<br/>[[Suzuya|Suzuya Kai Ni]]<br/>[[Kumano|Kumano Kai Ni]]
| |
| − | |Notes=★0~★9 uses [[10cm Twin High-angle Mount]] for improvement.<br/>★Max conversion uses 1 [[25mm Single Autocannon Mount]] to convert to a '''[[8cm Twin High-angle Mount + Additional Machine Guns]]'''.
| |
| − | }} | |
| − | {{AkashiWorkshopLine | |
| − | |Name=8cm Twin High-angle Mount + Additional Machine Guns
| |
| − | |ItemType=GreenGunDP
| |
| − | |Fuel=10
| |
| − | |Ammo=70
| |
| − | |Steel=100
| |
| − | |Baux=80
| |
| − | |Mats0-5=6/8
| |
| − | |Mats6-9=8/15
| |
| − | |Mats10=-
| |
| − | |Screws0-5=
| |
| − | |Screws6-9=
| |
| − | |Screws10=-
| |
| − | |EquipConsume0-5=2*
| |
| − | |EquipConsume6-9=2**
| |
| − | |EquipConsume10=-
| |
| − | |Mon=K
| |
| − | |Tue=✓
| |
| − | |Wed=✓
| |
| − | |Thu=Y<br/>S<br/>Su
| |
| − | |2ndShip=[[Yahagi]]<br/>[[Sakawa]]<br/>[[Suzuya|Suzuya Kai]]<br/>[[Kumano|Kumano Kai Ni]]
| |
| − | |Notes=★0~★5 uses [[10cm Twin High-angle Mount]] for improvement.<br/>★6~★9 uses [[25mm Single Autocannon Mount]] for improvement.
| |
| − | }} | |
| − | {{AkashiWorkshopLine | |
| − | |Name=10cm Twin High-angle Gun Mount Kai + Additional Machine Guns
| |
| − | |ItemType=GreenGunDP
| |
| − | |Fuel=10
| |
| − | |Ammo=90
| |
| − | |Steel=170
| |
| − | |Baux=80
| |
| − | |Mats0-5=7/8
| |
| − | |Mats6-9=10/16
| |
| − | |Mats10=-
| |
| − | |Screws0-5=4/5
| |
| − | |Screws6-9=6/8
| |
| − | |Screws10=-
| |
| − | |EquipConsume0-5=2*
| |
| − | |EquipConsume6-9=2**
| |
| − | |EquipConsume10=-
| |
| − | |Sun=O
| |
| − | |Mon=O
| |
| − | |Thu=M
| |
| − | |Fri=✓
| |
| − | |Sat=✓
| |
| − | |2ndShip=[[Ooyodo|Ooyodo Kai]]<br/>[[Musashi|Musashi Kai Ni]]
| |
| − | |Notes=★0~★5 uses [[10cm Twin High-angle Mount]] for improvement.<br/>★6~★9 uses [[25mm Single Autocannon Mount]] for improvement.
| |
| − | }} | |
| − | {{AkashiWorkshopLine | |
| − | |Name=OTO 152mm Triple Rapid Gun Mount
| |
| − | |ItemType=YellowGun
| |
| − | |Fuel=10
| |
| − | |Ammo=90
| |
| − | |Steel=120
| |
| − | |Baux=0
| |
| − | |Mats0-5=2/3
| |
| − | |Mats6-9=3/4
| |
| − | |Mats10=-
| |
| − | |Screws0-5=2/3
| |
| − | |Screws6-9=3/5
| |
| − | |Screws10=-
| |
| − | |EquipConsume0-5=-
| |
| − | |EquipConsume6-9=1*
| |
| − | |EquipConsume10=-
| |
| − | |Sun=✓
| |
| − | |Mon=R
| |
| − | |Tue=L
| |
| − | |Wed=L
| |
| − | |Thu=R
| |
| − | |Fri=R
| |
| − | |Sat=L
| |
| − | |2ndShip=[[Littorio]]<br/>[[Roma]]
| |
| − | |Notes=★6~★9 uses [[15.5cm Triple Gun Mount (Main)]] for improvement.
| |
| − | }} | |
| − | {{AkashiWorkshopLine | |
| − | |Name=15.2cm Naval Gun
| |
| − | |ItemType=YellowGun
| |
| − | |Fuel=10
| |
| − | |Ammo=60
| |
| − | |Steel=90
| |
| − | |Baux=0
| |
| − | |Mats0-5=2/2
| |
| − | |Mats6-9=2/3
| |
| − | |Mats10=3/4
| |
| − | |Screws0-5=1/2
| |
| − | |Screws6-9=2/3
| |
| − | |Screws10=3/5
| |
| − | |EquipConsume0-5=-
| |
| − | |EquipConsume6-9=1
| |
| − | |EquipConsume10=2
| |
| − | |Sun=A<br/>K
| |
| − | |Mon=✓
| |
| − | |Tue=A<br/>Y
| |
| − | |Wed=Y
| |
| − | |Sat=K
| |
| − | |2ndShip=[[Agano]]<br />[[Kongou]]<br />[[Yamashiro]]
| |
| − | |Notes=★Max conversion uses 2 [[15.2cm Naval Gun]] to convert to a ''[[15.2cm Twin Gun Mount]]''.
| |
| − | }} | |
| − | {{AkashiWorkshopLine | |
| − | |Name=15.5cm Triple Gun Mount (Secondary) | |
| − | |ItemType=YellowGun | |
| − | |Fuel=10 | |
| − | |Ammo=90 | |
| − | |Steel=120
| |
| − | |Baux=0
| |
| − | |Mats0-5=2/2
| |
| − | |Mats6-9=2/3 | |
| − | |Mats10=8/12 | |
| − | |Screws0-5=2/3 | |
| − | |Screws6-9=2/4 | |
| − | |Screws10=4/8
| |
| − | |EquipConsume0-5=- | |
| − | |EquipConsume6-9=1 | |
| − | |EquipConsume10=2/1* | |
| − | |Fri=✓ | |
| − | |Sat=✓ | |
| − | |2ndShip=[[Yamato]]<br/>[[Musashi]] | |
| − | |Notes=★Max conversion uses 2 [[15.5cm Triple Gun Mount (Secondary)]] and 1 New Type Artillery Armament Materials to convert to a ''[[15.5cm Triple Gun Mount Kai (Secondary)]]''.
| |
| − | }} | |
| − | {{AkashiWorkshopLine
| |
| − | |Name=15.5cm Triple Gun Mount Kai (Secondary) | |
| − | |ItemType=YellowGun
| |
| − | |Fuel=15
| |
| − | |Ammo=120
| |
| − | |Steel=150
| |
| − | |Baux=30
| |
| − | |Mats0-5=6/7
| |
| − | |Mats6-9=8/9
| |
| − | |Mats10=9/10
| |
| − | |Screws0-5=4/5
| |
| − | |Screws6-9=5/7
| |
| − | |Screws10=2/3
| |
| − | |EquipConsume0-5=2*
| |
| − | |EquipConsume6-9=2**
| |
| − | |EquipConsume10=1**
| |
| − | |Sun=M
| |
| − | |Fri=Y
| |
| − | |Sat=Y
| |
| − | |2ndShip=[[Yamato]]<br/>[[Musashi]]
| |
| − | |Notes=★0~★5 uses [[15.5cm Triple Gun Mount (Secondary)]] for improvement.<br/>★6~★9 uses [[15.5cm Triple Gun Mount (Main)]] for improvement.<br/>★Max conversion uses 1 [[15.5cm Triple Gun Mount (Main)]] to convert to a ★7 '''[[15.5cm Triple Gun Mount Kai (Main)]]'''.
| |
| − | }}
| |
| − | {{AkashiWorkshopLine
| |
| − | |Name=15.2cm Triple Gun Mount
| |
| − | |ItemType=YellowGun
| |
| − | |Fuel=15
| |
| − | |Ammo=150
| |
| − | |Steel=150
| |
| − | |Baux=50
| |
| − | |Mats0-5=10/15
| |
| − | |Mats6-9=10/15
| |
| − | |Mats10=-
| |
| − | |Screws0-5=6/6
| |
| − | |Screws6-9=7/8
| |
| − | |Screws10=-
| |
| − | |EquipConsume0-5=1*
| |
| − | |EquipConsume6-9=2**
| |
| − | |EquipConsume10=-
| |
| − | |Mon=✓
| |
| − | |Tue=✓
| |
| − | |Wed=✓
| |
| − | |Thu=✓
| |
| − | |2ndShip=[[Richelieu]]
| |
| − | |Notes=★0~★5 uses [[15.5cm Triple Gun Mount (Secondary)]] for improvement.<br/>★6~★9 uses [[Type 22 Surface RADAR]] for improvement.
| |
| − | }}
| |
| − | |}
| |
| − | | |
| − | === AP Shells ===
| |
| − | {{AkashiWorkshop}}
| |
| − | {{AkashiWorkshopLine
| |
| − | |Name=Type 91 Armor-Piercing (AP) Shell
| |
| − | |ItemType=RedAmmo
| |
| − | |Fuel=30
| |
| − | |Ammo=150
| |
| − | |Steel=310
| |
| − | |Baux=10
| |
| − | |Mats0-5=2/3
| |
| − | |Mats6-9=3/5
| |
| − | |Mats10=6/9
| |
| − | |Screws0-5=1/1
| |
| − | |Screws6-9=1/2
| |
| − | |Screws10=4/9
| |
| − | |EquipConsume0-5=-
| |
| − | |EquipConsume6-9=1
| |
| − | |EquipConsume10=3
| |
| − | |Sun=K
| |
| − | |Mon=K
| |
| − | |Wed=H
| |
| − | |Thu=H
| |
| − | |Fri=✓
| |
| − | |Sat=✓
| |
| − | |2ndShip=[[Hiei]]<br />[[Kirishima]]
| |
| − | |Notes=★Max conversion uses 3 [[Type 91 Armor-Piercing (AP) Shell]] to convert to a '''[[Type 1 Armor-Piercing (AP) Shell|Type 1 AP Shell]]'''.
| |
| − | }}
| |
| − | {{AkashiWorkshopLine
| |
| − | |Name=Type 1 Armor-Piercing (AP) Shell|Type 1 AP Shell | |
| − | |ItemType=RedAmmo
| |
| − | |Fuel=30
| |
| − | |Ammo=170 | |
| − | |Steel=330 | |
| − | |Baux=20
| |
| − | |Mats0-5=3/5
| |
| − | |Mats6-9=4/6 | |
| − | |Mats10=- | |
| − | |Screws0-5=1/1 | |
| − | |Screws6-9=2/4 | |
| − | |Screws10=- | |
| − | |EquipConsume0-5=2* | |
| − | |EquipConsume6-9=1
| |
| − | |EquipConsume10=-
| |
| − | |Sun=K
| |
| − | |Mon=H
| |
| − | |Tue=H
| |
| − | |Wed=H | |
| − | |Fri=K
| |
| − | |Sat=K
| |
| − | |2ndShip=[[Kongou]]<br/>[[Haruna]]
| |
| − | |Notes=★0~★5 uses [[Type 91 Armor-Piercing (AP) Shell]] for improvement.
| |
| − | }}
| |
| − | |}
| |
| − | | |
| − | === Anti-Air Guns ===
| |
| − | {{AkashiWorkshop}} | |
| − | {{AkashiWorkshopLine
| |
| − | |Name=25mm Single Autocannon Mount | |
| − | |ItemType=GreenGunMG | |
| − | |Fuel=10
| |
| − | |Ammo=10
| |
| − | |Steel=10
| |
| − | |Baux=10
| |
| − | |Mats0-5=0/1
| |
| − | |Mats6-9=1/2
| |
| − | |Mats10=2/3 | |
| − | |Screws0-5=1/1
| |
| − | |Screws6-9=1/1 | |
| − | |Screws10=1/2
| |
| − | |EquipConsume0-5=- | |
| − | |EquipConsume6-9={{Tooltip|1|25mm Single Autocannon Mount}} | |
| − | |EquipConsume10={{Tooltip|1|25mm Single Autocannon Mount}}
| |
| − | |Sun=S
| |
| − | |Wed=F
| |
| − | |Thu=F<br/>K
| |
| − | |Fri=✓ | |
| − | |Sat=✓
| |
| − | |2ndShip=[[Satsuki]]<br />[[Fumizuki]]<br/>[[Kinu]] | |
| − | |Notes=★Max conversion uses 1 [[25mm Single Autocannon Mount]] to convert to a ★5 '''[[25mm Twin Autocannon Mount]]'''.
| |
| − | }}
| |
| − | {{AkashiWorkshopLine
| |
| − | |Name=25mm Twin Autocannon Mount
| |
| − | |ItemType=GreenGunMG
| |
| − | |Fuel=0
| |
| − | |Ammo=20
| |
| − | |Steel=10
| |
| − | |Baux=10
| |
| − | |Mats0-5=0/1
| |
| − | |Mats6-9=1/2 | |
| − | |Mats10=2/3 | |
| − | |Screws0-5=1/1
| |
| − | |Screws6-9=1/2 | |
| − | |Screws10=1/2 | |
| − | |EquipConsume0-5=- | |
| − | |EquipConsume6-9={{Tooltip|1|25mm Twin Autocannon Mount}}
| |
| − | |EquipConsume10={{Tooltip|1|25mm Twin Autocannon Mount}}
| |
| − | |Sun=F<br/>I
| |
| − | |Mon=S<br/>F
| |
| − | |Tue=S<br/>F
| |
| − | |Thu=K
| |
| − | |Sat=I
| |
| − | |2ndShip=[[Satsuki]]<br/>[[Fumizuki]]<br/>[[Isuzu|Isuzu Kai Ni]]<br/>[[Kinu]]
| |
| − | |Notes=★Max conversion uses 1 [[25mm Twin Autocannon Mount]] to convert to a ★3 '''[[25mm Triple Autocannon Mount]]'''.
| |
| − | }}
| |
| − | {{AkashiWorkshopLine
| |
| − | |Name=25mm Triple Autocannon Mount
| |
| − | |ItemType=GreenGunMG
| |
| − | |Fuel=0
| |
| − | |Ammo=30
| |
| − | |Steel=20
| |
| − | |Baux=10
| |
| − | |Mats0-5=1/2
| |
| − | |Mats6-9=1/3
| |
| − | |Mats10=5/9
| |
| − | |Screws0-5=1/1
| |
| − | |Screws6-9=1/2
| |
| − | |Screws10=3/7
| |
| − | |EquipConsume0-5=-
| |
| − | |EquipConsume6-9={{Tooltip|1|25mm Triple Autocannon Mount}}
| |
| − | |EquipConsume10={{Tooltip|5|25mm Triple Autocannon Mount}} | |
| − | |Sun=M+
| |
| − | |Mon=I<br>M+<br>K<br>
| |
| − | |Tue=I<br>Ma<br>M+<br>K
| |
| − | |Wed=S<br>I<br>Ma<br>M+<br>Mu
| |
| − | |Thu=S<br>Ma<br>Mu
| |
| − | |Fri=Mu
| |
| − | |sat=Mu
| |
| − | |2ndShip=[[Satsuki|Satsuki Kai Ni]]<br/>[[Isuzu|Isuzu Kai Ni]]<br/>[[Maya]]<br/>[[Maya|Maya Kai Ni]]<br/>[[Kinu|Kinu Kai Ni]]<br/>[[Murasame|Murasame Kai Ni]]
| |
| − | |Notes=★Max conversion uses 5 [[25mm Triple Autocannon Mount]] to convert to a '''[[25mm Triple Autocannon Mount (Concentrated Deployment)]]'''.
| |
| − | }}
| |
| − | {{AkashiWorkshopLine | |
| − | |Name=25mm Triple Autocannon Mount (Concentrated Deployment)
| |
| − | |ItemType=GreenGunMG
| |
| − | |Fuel=0
| |
| − | |Ammo=90
| |
| − | |Steel=90
| |
| − | |Baux=150
| |
| − | |Mats0-5=3/5
| |
| − | |Mats6-9=6/9
| |
| − | |Mats10=-
| |
| − | |Screws0-5=3/5
| |
| − | |Screws6-9=6/9
| |
| − | |Screws10=-
| |
| − | |EquipConsume0-5={{Tooltip|3|25mm Triple Autocannon Mount}}
| |
| − | |EquipConsume6-9={{Tooltip|5|25mm Triple Autocannon Mount}} | |
| − | |EquipConsume10=- | |
| − | |Sun=K | |
| − | |Tue=M | |
| − | |Wed=M | |
| − | |Thu=M
| |
| − | |Fri=K
| |
| − | |Sat=K
| |
| − | |2ndShip=[[Maya|Maya Kai Ni]]<br/>[[Kinu|Kinu Kai Ni]]
| |
| − | |Notes=★0-★9 uses [[25mm Triple Autocannon Mount]] for improvement.
| |
| − | }}
| |
| − | {{AkashiWorkshopLine
| |
| − | |Name=12cm 30-tube Rocket Launcher | |
| − | |ItemType=GreenGunMG
| |
| − | |Fuel=90 | |
| − | |Ammo=270
| |
| − | |Steel=50
| |
| − | |Baux=180
| |
| − | |Mats0-5=3/6
| |
| − | |Mats6-9=5/9 | |
| − | |Mats10=10/30
| |
| − | |Screws0-5=2/3 | |
| − | |Screws6-9=3/5
| |
| − | |Screws10=7/10
| |
| − | |EquipConsume0-5={{Tooltip|1|12cm 30-tube Rocket Launcher}} | |
| − | |EquipConsume6-9={{Tooltip|2|12cm 30-tube Rocket Launcher}} | |
| − | |EquipConsume10={{Tooltip|3/'''1'''|25mm Triple Autocannon Mount}}
| |
| − | |Sun=I | |
| − | |Mon=H
| |
| − | |Tue=H
| |
| − | |Fri=I
| |
| − | |Sat=I
| |
| − | |2ndShip=[[Ise|Ise Kai]]<br/>[[Hyuuga|Hyuuga Kai]]
| |
| − | |Notes=★Max conversion uses 3 [[25mm Triple Autocannon Mount]], 1 Action Report to convert to a '''[[12cm 30 Tube Rocket Launcher Kai 2]]'''. | |
| − | | |
| − | }}
| |
| − | {{AkashiWorkshopLine
| |
| − | |Name=12cm 30 Tube Rocket Launcher Kai 2
| |
| − | |ItemType=GreenGunMG
| |
| − | |Fuel=90
| |
| − | |Ammo=300
| |
| − | |Steel=90
| |
| − | |Baux=190
| |
| − | |Mats0-5=5/7
| |
| − | |Mats6-9=7/15 | |
| − | |Mats10=- | |
| − | |Screws0-5=4/5 | |
| − | |Screws6-9=5/7 | |
| − | |Screws10=- | |
| − | |EquipConsume0-5={{Tooltip|2|25mm Triple Autocannon Mount}} | |
| − | |EquipConsume6-9={{Tooltip|2|12cm 30-tube Rocket Launcher}}
| |
| − | |EquipConsume10=-
| |
| − | |Mon=I
| |
| − | |Tue=I
| |
| − | |Wed=H
| |
| − | |Thu=H
| |
| − | |2ndShip=[[Ise|Ise Kai]]<br/>[[Hyuuga|Hyuuga Kai]]
| |
| − | |Notes=★0~★5 uses [[25mm Triple Autocannon Mount]] for improvement.
| |
| − | }} | |
| − | |}
| |
| − | | |
| − | === Anti-Aircraft Fire Detectors ===
| |
| − | {{AkashiWorkshop}} | |
| − | {{AkashiWorkshopLine
| |
| − | |Name=Type 91 Anti-Aircraft Fire Director | |
| − | |ItemType=AntiAircraftFireDirector | |
| − | |Fuel=0 | |
| − | |Ammo=0
| |
| − | |Steel=60
| |
| − | |Baux=40
| |
| − | |Mats0-5=3/4
| |
| − | |Mats6-9=3/5
| |
| − | |Mats10=4/9
| |
| − | |Screws0-5=1/2
| |
| − | |Screws6-9=2/4 | |
| − | |Screws10=4/7
| |
| − | |EquipConsume0-5=-
| |
| − | |EquipConsume6-9=1* | |
| − | |EquipConsume10=2**
| |
| − | |Sun=✓
| |
| − | |Mon=M<br/>A | |
| − | |Thu=T | |
| − | |Fri=✓
| |
| − | |Sat=✓
| |
| − | |2ndShip=[[Maya]]<br/>[[Akizuki]]<br/>[[Teruzuki]]
| |
| − | |Notes=★6~★9 uses [[12.7cm Twin High-angle Mount]] for improvement.<br/>★Max conversion uses 2 [[10cm Twin High-angle Mount]] to convert to a '''[[Type 94 Anti-Aircraft Fire Director]]'''.
| |
| − | }}
| |
| | |- | | |- |
| − | | rowspan="6" |{{AntiAircraftFireDirector}} | + | | colspan=2|[[Torpedo Bomber]]s<br>{{Torpedo Bomber}}{{Night Torpedo Bomber}} |
| − | | rowspan="6" style="text-align:center;" |[[Type 94 Anti-Aircraft Fire Director]]
| + | | -|| -|| 0.2|| - |
| − | | 0
| |
| − | | rowspan="6" |0
| |
| − | | rowspan="6" |0
| |
| − | | rowspan="6" |80
| |
| − | | rowspan="6" |70
| |
| − | | 4/5
| |
| − | | 2/3
| |
| − | | -
| |
| − | | rowspan="3" style="background-color:rgb(170, 235, 170);" |✓
| |
| − | | rowspan="3" style="background-color:rgb(170, 235, 170);" |A<br/>T
| |
| − | | rowspan="3" style="background-color:rgb(170, 235, 170);" |A<br/>T | |
| − | | rowspan="3" style="background-color:rgb(170, 235, 170);" |A<br/>T | |
| − | | rowspan="3" style="background-color:rgb(170, 235, 170);" |A<br/>T<br/>F | |
| − | | rowspan="3" style="background-color:rgb(170, 235, 170);" |✓ | |
| − | | rowspan="3" style="background-color:rgb(170, 235, 170);" |✓
| |
| − | | rowspan="3" |[[Akizuki]]<br/>[[Teruzuki]]<br/>[[Hatsuzuki]]<br/>[[Fubuki|Fubuki Kai Ni]]
| |
| − | | rowspan="3" | ★6~★9 uses [[10cm Twin High-angle Mount]] for improvement.<br/>★Max conversion uses 2 [[10cm Twin High-angle Mount]] to convert to a '''[[10cm Twin High-angle Mount + Anti-Aircraft Fire Director]]'''.
| |
| | |- | | |- |
| − | | 6 | + | | colspan=2|[[Seaplane Bomber]]s<br>{{SPB}}{{Night SPB}} |
| − | | 3/5 | + | | -|| 0.2|| -|| -|| - |
| − | | 3/5 | |
| − | | 1* | |
| | |- | | |- |
| − | | 10 | + | | colspan=2|[[Rotorcraft]]<br>{{Autogyro}} |
| − | | 8/10 | + | | -|| -|| -||0.2 ({{ASW}}≤10)<br>0.3 ({{ASW}}≥11)|| - |
| − | | 5/10 | |
| − | | 2* | |
| | |- | | |- |
| − | | 0 | + | | colspan=2|[[Liaison Aircraft]]<br>{{Liaison}}<ref>[https://twitter.com/hedgehog_hasira/status/1522381044976013315][https://twitter.com/CC_jabberwock/status/1621947944596557824]</ref> |
| − | | 4/5 | + | | -|| -|| -|| 0.2 ({{ASW}}≤7)<br>0.3 ({{ASW}}≥8)|| - |
| − | | 2/3
| |
| − | | -
| |
| − | | rowspan="3" style="background-color:rgb(170, 235, 170);" |✓
| |
| − | | rowspan="3" style="background-color:rgb(255, 153, 153);" |X | |
| − | | rowspan="3" style="background-color:rgb(255, 153, 153);" |X | |
| − | | rowspan="3" style="background-color:rgb(255, 153, 153);" |X | |
| − | | rowspan="3" style="background-color:rgb(170, 235, 170);" |✓ | |
| − | | rowspan="3" style="background-color:rgb(170, 235, 170);" |✓
| |
| − | | rowspan="3" style="background-color:rgb(170, 235, 170);" |✓ | |
| − | | rowspan="3" |[[Maya|Maya Kai Ni]]
| |
| − | | rowspan="3" | ★6~★9 uses [[12.7cm Twin High-angle Mount]] for improvement.<br/>★Max conversion uses 2 [[12.7cm Twin High-angle Mount]] to convert to a '''[[12.7cm Twin High-angle Mount + Anti-Aircraft Fire Director]]'''.
| |
| | |- | | |- |
| − | | 6 | + | | rowspan=2|[[Extra Armor]]<br>{{Extra Armor}} |
| − | | 4/6 | + | | [[Medium Extra Armor|Medium]] |
| − | | 3/5 | + | | -|| -|| -|| -|| 0.2 |
| − | | 1* | |
| | |- | | |- |
| − | | 10 | + | | [[Large Extra Armor|Large]] |
| − | | 7/9 | + | | -|| -|| -|| -|| 0.3 |
| − | | 5/9 | |
| − | | 2* | |
| | |} | | |} |
| | + | <references/> |
| | + | {{Clear}} |
| | | | |
| − | === Torpedoes === | + | ==Averaged Bonus== |
| − | {{AkashiWorkshop}}
| + | The average is counted using all craft on the ship for anti-installation, and all "working" craft in the fleet for expeditions. |
| − | {{AkashiWorkshopLine
| + | |
| − | |Name=61cm Triple Torpedo Mount
| + | All the following bonuses are part of bigger formulas: |
| − | |ItemType=TorpedoWeapon
| + | *''See [[Anti-Installation]] for more details, |
| − | |Fuel=50
| + | *''See [[Expeditions#Expedition_Rewards|Expedition]] for more details. |
| − | |Ammo=70
| |
| − | |Steel=60
| |
| − | |Baux=20
| |
| − | |Mats0-5=1/2
| |
| − | |Mats6-9=2/3
| |
| − | |Mats10=3/5
| |
| − | |Screws0-5=1/1
| |
| − | |Screws6-9=1/2
| |
| − | |Screws10=2/4
| |
| − | |EquipConsume0-5=-
| |
| − | |EquipConsume6-9={{Tooltip|1|61cm Triple Torpedo Mount}}
| |
| − | |EquipConsume10={{Tooltip|2|61cm Triple Torpedo Mount}}
| |
| − | |Sun=M
| |
| − | |Mon=M
| |
| − | |Tue=M
| |
| − | |Thu=F
| |
| − | |Fri=F
| |
| − | |Sat=F
| |
| − | |2ndShip=[[Murakumo]]<br/>[[Fubuki]]*
| |
| − | |Notes='''*[[Fubuki|Fubuki Kai Ni]] cannot be used as a helper ship.'''<br/>★Max conversion uses 2 [[61cm Triple Torpedo Mount]] to convert to a '''[[61cm Triple (Oxygen) Torpedo Mount]]'''.
| |
| − | }}
| |
| − | {{AkashiWorkshopLine
| |
| − | |Name=61cm Triple (Oxygen) Torpedo Mount
| |
| − | |ItemType=TorpedoWeapon
| |
| − | |Fuel=60
| |
| − | |Ammo=90
| |
| − | |Steel=60
| |
| − | |Baux=20
| |
| − | |Mats0-5=1/2
| |
| − | |Mats6-9=3/5
| |
| − | |Mats10=4/8
| |
| − | |Screws0-5=1/1
| |
| − | |Screws6-9=1/3
| |
| − | |Screws10=3/6
| |
| − | |EquipConsume0-5=-
| |
| − | |EquipConsume6-9={{Tooltip|1|61cm Triple Torpedo Mount}}
| |
| − | |EquipConsume10={{Tooltip|2|61cm Triple Torpedo Mount}}
| |
| − | |Thu=✓
| |
| − | |Fri=✓
| |
| − | |Sat=✓
| |
| − | |2ndShip=[[Fubuki|Fubuki Kai Ni]]
| |
| − | |Notes=★6-★9 uses [[61cm Triple Torpedo Mount]] for improvement.<br/>★Max conversion uses 2 [[61cm Quad Torpedo Mount]] to convert to a ★5 '''[[61cm Quad (Oxygen) Torpedo Mount]]'''.
| |
| − | }}
| |
| − | {{AkashiWorkshopLine
| |
| − | |Name=61cm Quad Torpedo Mount
| |
| − | |ItemType=TorpedoWeapon
| |
| − | |Fuel=70
| |
| − | |Ammo=100
| |
| − | |Steel=70
| |
| − | |Baux=20
| |
| − | |Mats0-5=1/2
| |
| − | |Mats6-9=2/3
| |
| − | |Mats10=3/5
| |
| − | |Screws0-5=1/2
| |
| − | |Screws6-9=1/2
| |
| − | |Screws10=3/6
| |
| − | |EquipConsume0-5=-
| |
| − | |EquipConsume6-9={{Tooltip|1|61cm Quad Torpedo Mount}}
| |
| − | |EquipConsume10={{Tooltip|2|61cm Quad Torpedo Mount}}
| |
| − | |Sun=✓
| |
| − | |Mon=✓
| |
| − | |Tue=✓
| |
| − | |Fri=✓
| |
| − | |Sat=✓
| |
| − | |2ndShip=
| |
| − | |Notes=★Max conversion uses 2 [[61cm Quad Torpedo Mount]] to convert to a ★3 '''[[61cm Quad (Oxygen) Torpedo Mount]]'''.
| |
| − | }}
| |
| − | {{AkashiWorkshopLine
| |
| − | |Name=61cm Quad (Oxygen) Torpedo Mount
| |
| − | |ItemType=TorpedoWeapon
| |
| − | |Fuel=80
| |
| − | |Ammo=120
| |
| − | |Steel=80
| |
| − | |Baux=20
| |
| − | |Mats0-5=2/3
| |
| − | |Mats6-9=4/8
| |
| − | |Mats10=5/10
| |
| − | |Screws0-5=1/2
| |
| − | |Screws6-9=2/4
| |
| − | |Screws10=5/11
| |
| − | |EquipConsume0-5=-
| |
| − | |EquipConsume6-9={{Tooltip|1|61cm Quad (Oxygen) Torpedo Mount}}
| |
| − | |EquipConsume10={{Tooltip|3|61cm Quad (Oxygen) Torpedo Mount}}
| |
| − | |Sun=✓
| |
| − | |Mon=✓
| |
| − | |Tue=✓
| |
| − | |Wed=✓
| |
| − | |Thu=✓
| |
| − | |Fri=✓
| |
| − | |Sat=✓
| |
| − | |2ndShip=[[Kitakami]]<br/>[[Ooi]]
| |
| − | |Notes=★Max conversion uses 3 [[61cm Quad (Oxygen) Torpedo Mount]] to convert to a '''[[61cm Quint (Oxygen) Torpedo Mount]]'''.
| |
| − | }}
| |
| − | {{AkashiWorkshopLine
| |
| − | |Name=61cm Quint (Oxygen) Torpedo Mount
| |
| − | |ItemType=TorpedoWeapon
| |
| − | |Fuel=100
| |
| − | |Ammo=150
| |
| − | |Steel=90
| |
| − | |Baux=30
| |
| − | |Mats0-5=3/4
| |
| − | |Mats6-9=5/9
| |
| − | |Mats10=-
| |
| − | |Screws0-5=3/5
| |
| − | |Screws6-9=3/7
| |
| − | |Screws10=-
| |
| − | |EquipConsume0-5=-
| |
| − | |EquipConsume6-9={{Tooltip|1|61cm Quint (Oxygen) Torpedo Mount}}
| |
| − | |EquipConsume10=-
| |
| − | |Wed=✓
| |
| − | |Thu=✓
| |
| − | |2ndShip=[[Shimakaze]]
| |
| − | |Notes=
| |
| − | }}
| |
| − | {{AkashiWorkshopLine
| |
| − | |Name=Prototype 61cm Sextuple (Oxygen) Torpedo Mount
| |
| − | |ItemType=TorpedoWeapon
| |
| − | |Fuel=120
| |
| − | |Ammo=180
| |
| − | |Steel=120
| |
| − | |Baux=40
| |
| − | |Mats0-5=6/8
| |
| − | |Mats6-9=9/12
| |
| − | |Mats10=-
| |
| − | |Screws0-5=5/6
| |
| − | |Screws6-9=6/12
| |
| − | |Screws10=-
| |
| − | |EquipConsume0-5={{Tooltip|2|61cm Quad (Oxygen) Torpedo Mount}}
| |
| − | |EquipConsume6-9={{Tooltip|1|61cm Quint (Oxygen) Torpedo Mount}}
| |
| − | |EquipConsume10=-
| |
| − | |Sun=S
| |
| − | |Wed=H
| |
| − | |Thu=H
| |
| − | |Fri=H
| |
| − | |Sat=✓
| |
| − | |2ndShip=[[Shimakaze]]<br/>[[Hatsuzuki]]
| |
| − | |Notes=★0-★5 uses [[61cm Quad (Oxygen) Torpedo Mount]] for improvement.<br/>★6-★9 uses [[61cm Quint (Oxygen) Torpedo Mount]] for improvement.
| |
| − | }}
| |
| − | {{AkashiWorkshopLine
| |
| − | |Name=53cm Twin Torpedo Mount
| |
| − | |ItemType=TorpedoWeapon
| |
| − | |Fuel=40
| |
| − | |Ammo=60
| |
| − | |Steel=40
| |
| − | |Baux=20
| |
| − | |Mats0-5=1/2
| |
| − | |Mats6-9=2/4
| |
| − | |Mats10=-
| |
| − | |Screws0-5=1/1
| |
| − | |Screws6-9=2/3
| |
| − | |Screws10=-
| |
| − | |EquipConsume0-5={{Tooltip|1|61cm Triple Torpedo Mount}}
| |
| − | |EquipConsume6-9={{Tooltip|1|61cm Quad (Oxygen) Torpedo Mount}}
| |
| − | |EquipConsume10=-
| |
| − | |Sun=✓
| |
| − | |Mon={{Tooltip|T|Tatsuta Kai Ni}}
| |
| − | |Tue={{Tooltip|T|Tatsuta Kai Ni}}
| |
| − | |Wed=✓
| |
| − | |Thu=✓
| |
| − | |Fri=✓
| |
| − | |Sat=✓
| |
| − | |2ndShip=[[Kamikaze|Kamikaze Kai]]<br/>[[Tatsuta|Tatsuta Kai Ni]]
| |
| − | |Notes=★0-★5 uses [[61cm Triple Torpedo Mount]] for improvement.<br/>★6-★9 uses [[61cm Quad (Oxygen) Torpedo Mount]] for improvement.
| |
| − | }}
| |
| − | {{AkashiWorkshopLine
| |
| − | |Name=533mm Triple Torpedo Mount
| |
| − | |ItemType=TorpedoWeapon
| |
| − | |Fuel=60
| |
| − | |Ammo=90
| |
| − | |Steel=70
| |
| − | |Baux=30
| |
| − | |Mats0-5=3/4
| |
| − | |Mats6-9=6/8
| |
| − | |Mats10=-
| |
| − | |Screws0-5=2/3
| |
| − | |Screws6-9=3/4
| |
| − | |Screws10=-
| |
| − | |EquipConsume0-5={{Tooltip|1|61cm Triple Torpedo Mount}}
| |
| − | |EquipConsume6-9={{Tooltip|2|61cm Quad (Oxygen) Torpedo Mount}}
| |
| − | |EquipConsume10=-
| |
| − | |Sun=✓
| |
| − | |Mon=✓
| |
| − | |Tue=✓
| |
| − | |Wed=✓
| |
| − | |Thu=✓
| |
| − | |Fri=✓
| |
| − | |Sat=✓
| |
| − | |2ndShip=[[Tashkent]]
| |
| − | |Notes=★0-★5 uses [[61cm Triple Torpedo Mount]] for improvement.<br/>★6-★9 uses 2 [[61cm Quad (Oxygen) Torpedo Mount]] for improvement.
| |
| − | }}
| |
| − | |}
| |
| | | | |
| − | === Anti-Submarine Weapons === | + | {|class="wikitable" style="text-align:center" |
| − | {{AkashiWorkshop}}
| + | !colspan=2 rowspan=2|Equipment Type |
| | + | !colspan=2|Anti-Installation Bonuses<ref>The average stars are counted per ship on a per-category basis, with each 3 categories being counted separately.</ref><ref>https://bbs.nga.cn/read.php?tid=39595977&rand=587</ref> |
| | + | !rowspan=2|Expedition Bonus |
| | |- | | |- |
| − | | rowspan="6" |{{Sonar}}
| + | ! style="color:tomato"|A1 |
| − | | rowspan="6" style="text-align:center;" |[[Type 93 SONAR]]
| + | ! style="color:tomato"|C |
| − | | 0
| |
| − | | rowspan="3" |10
| |
| − | | rowspan="3" |0
| |
| − | | rowspan="3" |30
| |
| − | | rowspan="3" |30
| |
| − | | 2/2
| |
| − | | 1/2
| |
| − | | -
| |
| − | | rowspan="3" style="background-color:rgb(170, 235, 170);" |Y
| |
| − | | rowspan="3" style="background-color:rgb(170, 235, 170);" |I
| |
| − | | rowspan="3" style="background-color:rgb(255, 153, 153);" |X
| |
| − | | rowspan="3" style="background-color:rgb(255, 153, 153);" |X
| |
| − | | rowspan="3" style="background-color:rgb(255, 153, 153);" |X
| |
| − | | rowspan="3" style="background-color:rgb(170, 235, 170);" |Y
| |
| − | | rowspan="3" style="background-color:rgb(170, 235, 170);" |Y
| |
| − | | rowspan="3" |[[Isuzu|Isuzu Kai Ni]]<br/>[[Yuubari]]
| |
| − | | rowspan="3" | ★Max conversion uses 2 [[Type 93 SONAR]] to convert to a ★3 '''[[Type 3 SONAR]]'''.
| |
| | |- | | |- |
| − | | 6 | + | |colspan=2|[[Landing Craft]]<br>{{Landing Craft}} |
| − | | 3/4 | + | |1 + (Average {{Star}} /50) |
| − | | 2/3 | + | |[1 + (Average {{Star}} /50)]<sup>'''N'''</sup><ref name="N">N = 1 for any [[Landing Craft]]/[[Ka-Tsu]], +1 to N for each unique: |
| − | | 1 | + | *{{EquipmentLink|Daihatsu Landing Craft (Type 89 Medium Tank & Landing Force)|text=DLC + T89 tank}} OR {{EquipmentLink|Toku Daihatsu Landing Craft + Type 1 Gun Tank|text=Toku DLC + Ho-Ni}} |
| | + | *{{EquipmentLink|Daihatsu Landing Craft (Panzer II/North African Specification)|text=DLC + Panzer II}} |
| | + | *{{EquipmentLink|Toku Daihatsu Landing Craft + Panzer III (North African Specification)|text=Toku DLC + Panzer III}}</ref> |
| | + | |rowspan=3| 1 + (Average {{Star}} /100)<ref>Does not work for Type 3 [[Landing Tank]]s</ref> |
| | |- | | |- |
| − | | 10 | + | |rowspan=2|[[Amphibious Vehicle]]s<br>{{Amphibious Tank}} |
| − | | 6/9 | + | |{{Equipment/Link|Special Type 2 Amphibious Tank|text=Ka-Mi tank}} |
| − | | 3/5 | + | | 1 + (Average {{Star}} /30) |
| − | | 2 | + | | 1 + (Average {{Star}} /30) |
| | |- | | |- |
| − | | 0 | + | |{{Equipment/Link|Special Type 4 Amphibious Tank|Special Type 4 Amphibious Tank Kai|text=Ka-Tsu tanks|link=Ka-Tsu}} |
| − | | rowspan="3" |10
| + | | 1 + (Average {{Star}} /50) |
| − | | rowspan="3" |0
| + | |[1 + (Average {{Star}} /50)]<sup>'''N'''</sup><ref name="N"/> |
| − | | rowspan="3" |30
| |
| − | | rowspan="3" |30
| |
| − | | 2/2
| |
| − | | 1/2 | |
| − | | - | |
| − | | rowspan="3" style="background-color:rgb(170, 235, 170);" |K<br/>S | |
| − | | rowspan="3" style="background-color:rgb(255, 153, 153);" |X | |
| − | | rowspan="3" style="background-color:rgb(255, 153, 153);" |X | |
| − | | rowspan="3" style="background-color:rgb(255, 153, 153);" |X | |
| − | | rowspan="3" style="background-color:rgb(170, 235, 170);" |I<br/>S
| |
| − | | rowspan="3" style="background-color:rgb(170, 235, 170);" |✓
| |
| − | | rowspan="3" style="background-color:rgb(170, 235, 170);" |K<br/>S
| |
| − | | rowspan="3" |[[Isuzu|Isuzu Kai Ni]]<br/>[[Katori|Katori Kai]]<br/>[[Shigure|Shigure Kai Ni]]
| |
| − | | rowspan="3" | ★Max conversion uses 2 [[Type 3 SONAR]] to convert to a ★3 '''[[Type 4 SONAR]]'''.
| |
| | |- | | |- |
| − | | 6 | + | |colspan=2|[[Landing Force]]s<br>{{Landing Forces}} |
| − | | 3/4 | + | !colspan=3| - |
| − | | 2/3 | + | |} |
| − | | 1
| + | <references/> |
| | + | {{Clear}} |
| | + | |
| | + | ==Misc Bonuses== |
| | + | The following bonuses are part of bigger formulas. |
| | + | |
| | + | ''See [[Smoke Generator]]s for more details. |
| | + | {|class="wikitable" style="text-align:center" |
| | + | !colspan=2|Equipment |
| | + | ! Smoke<br>Trigger Rate |
| | + | ! Smoke Level |
| | |- | | |- |
| − | | 10 | + | |rowspan=2|[[Smoke]]s<br>{{Smoke}} |
| − | | 10/20 | + | |{{Equipment/Link|Smoke Generator (Smoke Screen)|text=Smoke Generator (base)}} |
| − | | 6/12 | + | | <math>\text{K} = +0.3 \times \bigstar</math> |
| − | | 2* | + | |rowspan=2| ''Increased''<br>2 smokes at {{MaxStar}} can trigger level 3 smoke<ref>https://twitter.com/Nanano88_/status/1777318858845749464</ref> |
| | |- | | |- |
| − | {{AkashiWorkshopLine | + | |{{Equipment/Link|Smoke Generator Kai (Smoke Screen)|text=Smoke Generator (Kai)}} |
| − | |Name=Type 3 SONAR
| + | | <math>\text{K} = +0.5 \times \bigstar</math> |
| − | |ItemType=Sonar
| |
| − | |Fuel=10
| |
| − | |Ammo=0
| |
| − | |Steel=30
| |
| − | |Baux=50
| |
| − | |Mats0-5=4/5
| |
| − | |Mats6-9=5/7
| |
| − | |Mats10=- | |
| − | |Screws0-5=2/3
| |
| − | |Screws6-9=3/5
| |
| − | |Screws10=-
| |
| − | |EquipConsume0-5=-
| |
| − | |EquipConsume6-9=1
| |
| − | |EquipConsume10=- | |
| − | |Sun=I
| |
| − | |Tue=✓
| |
| − | |Wed=✓
| |
| − | |2ndShip=[[Isuzu|Isuzu Kai Ni]]<br/>[[Yuubari]]
| |
| − | |Notes=
| |
| − | }} | |
| − | {{AkashiWorkshopLine
| |
| − | |Name=Type 4 SONAR
| |
| − | |ItemType=Sonar
| |
| − | |Fuel=10
| |
| − | |Ammo=0
| |
| − | |Steel=50
| |
| − | |Baux=60
| |
| − | |Mats0-5=5/7
| |
| − | |Mats6-9=6/10
| |
| − | |Mats10=-
| |
| − | |Screws0-5=3/5
| |
| − | |Screws6-9=4/6
| |
| − | |Screws10=-
| |
| − | |EquipConsume0-5=2*
| |
| − | |EquipConsume6-9=1
| |
| − | |EquipConsume10=-
| |
| − | |Sun=A
| |
| − | |Mon=K
| |
| − | |Tue=K
| |
| − | |Wed=T
| |
| − | |Thu=I
| |
| − | |Fri=I
| |
| − | |Sat=I | |
| − | |2ndShip=[[Akizuki]]<br/>[[Isuzu#2nd Upgrade|Isuzu Kai Ni]]<br />[[Katori|Katori Kai]]<br />[[Teruzuki]]
| |
| − | |Notes=★0~★5 uses [[Type 93 SONAR]] for improvement.
| |
| − | }}
| |
| − | {{AkashiWorkshopLine
| |
| − | |Name=Type 94 Depth Charge
| |
| − | |ItemType=DepthCharge
| |
| − | |Fuel=10
| |
| − | |Ammo=60
| |
| − | |Steel=20
| |
| − | |Baux=20
| |
| − | |Mats0-5=1/2
| |
| − | |Mats6-9=2/3
| |
| − | |Mats10=3/6
| |
| − | |Screws0-5=1/2
| |
| − | |Screws6-9=1/3
| |
| − | |Screws10=3/8
| |
| − | |EquipConsume0-5=-
| |
| − | |EquipConsume6-9=1
| |
| − | |EquipConsume10=2
| |
| − | |Wed=✓
| |
| − | |Thu=✓
| |
| − | |2ndShip=
| |
| − | |Notes=★Max conversion uses 2 [[Type 94 Depth Charge]] to convert to a ★3 '''[[Type 3 Depth Charge Launcher]]'''.
| |
| − | }}
| |
| − | {{AkashiWorkshopLine
| |
| − | |Name=Type 3 Depth Charge
| |
| − | |ItemType=DepthCharge
| |
| − | |Fuel=10
| |
| − | |Ammo=80
| |
| − | |Steel=20
| |
| − | |Baux=30
| |
| − | |Mats0-5=3/3
| |
| − | |Mats6-9=2/3
| |
| − | |Mats10=-
| |
| − | |Screws0-5=2/3
| |
| − | |Screws6-9=2/4
| |
| − | |Screws10=-
| |
| − | |EquipConsume0-5=-
| |
| − | |EquipConsume6-9=1
| |
| − | |EquipConsume10=-
| |
| − | |Wed=✓
| |
| − | |Thu=✓
| |
| − | |2ndShip=[[Isuzu|Isuzu Kai Ni]]
| |
| − | |Notes=
| |
| − | }}
| |
| − | {{AkashiWorkshopLine
| |
| − | |Name=Type 95 Depth Charge
| |
| − | |ItemType=DepthCharge
| |
| − | |Fuel=10
| |
| − | |Ammo=90
| |
| − | |Steel=10
| |
| − | |Baux=60
| |
| − | |Mats0-5=3/4
| |
| − | |Mats6-9=4/5
| |
| − | |Mats10=5/9
| |
| − | |Screws0-5=1/1
| |
| − | |Screws6-9=2/3
| |
| − | |Screws10=3/6
| |
| − | |EquipConsume0-5=-
| |
| − | |EquipConsume6-9=1
| |
| − | |EquipConsume10=2
| |
| − | |Wed=✓
| |
| − | |Thu=✓
| |
| − | |Fri=E
| |
| − | |2ndShip=[[Shimushu]]<br/>[[Etorofu]]
| |
| − | |Notes=★6-95 uses [[Type 95 Depth Charge]] for improvement.<br/>★Max conversion uses 2 [[Type 95 Depth Charge]] to convert to a '''[[Type 2 Depth Charge]]'''.
| |
| − | }}
| |
| | |} | | |} |
| | | | |
| − | === Searchlights ===
| + | ''See [[Support Expedition#Trigger Rate|Support Expeditions]] for more details. |
| − | {{AkashiWorkshop}}
| + | {|class="wikitable" style="text-align:center" |
| − | {{AkashiWorkshopLine | + | !Equipment |
| − | |Name=Searchlight | + | ![[Support Fleet]]<br>Trigger Rate |
| − | |ItemType=Searchlight
| + | |- |
| − | |Fuel=10
| + | |{{Equipment/Link|Fleet Communication Antenna|text=FCA}}<br>{{FCF}} |
| − | |Ammo=0
| + | | +2 %/{{Star}}<br>for the 2nd roll<ref>https://x.com/shiroos/status/1808545990217249165</ref> |
| − | |Steel=30
| |
| − | |Baux=20
| |
| − | |Mats0-5=3/3
| |
| − | |Mats6-9=3/5
| |
| − | |Mats10=5/10
| |
| − | |Screws0-5=2/3
| |
| − | |Screws6-9=2/4
| |
| − | |Screws10=3/7
| |
| − | |EquipConsume0-5=-
| |
| − | |EquipConsume6-9=1
| |
| − | |EquipConsume10=1*
| |
| − | |Sun=J
| |
| − | |Mon=Aob<br/>Aya
| |
| − | |Tue=Aob<br/>Aya | |
| − | |Wed=Aob<br/>Aya | |
| − | |Thu=Aks | |
| − | |Fri=Aks<br/>J | |
| − | |Sat=Aks<br/>J | |
| − | |2ndShip=[[Akatsuki]]<br/>[[Jintsuu]]<br/>[[Aoba]]<br/>[[Ayanami]]
| |
| − | |Notes=★Max conversion uses 1 [[Skilled Lookouts]] to convert to a '''[[Type 96 150cm Searchlight]]'''.
| |
| − | }}
| |
| − | {{AkashiWorkshopLine
| |
| − | |Name=Type 96 150cm Searchlight
| |
| − | |ItemType=Searchlight
| |
| − | |Fuel=20
| |
| − | |Ammo=0
| |
| − | |Steel=70
| |
| − | |Baux=30
| |
| − | |Mats0-5=4/5
| |
| − | |Mats6-9=5/10
| |
| − | |Mats10=-
| |
| − | |Screws0-5=3/4
| |
| − | |Screws6-9=3/7
| |
| − | |Screws10=-
| |
| − | |EquipConsume0-5=1*
| |
| − | |EquipConsume6-9=1*
| |
| − | |EquipConsume10=-
| |
| − | |Sun=H
| |
| − | |Mon=H
| |
| − | |Tue=K
| |
| − | |Wed=K
| |
| − | |Thu=K
| |
| − | |Fri=✓
| |
| − | |Sat=H
| |
| − | |2ndShip=[[Hiei]]<br/>[[Kirishima]]
| |
| − | |Notes=★0~★9 uses [[Searchlight]] for improvement.
| |
| − | }}
| |
| | |} | | |} |
| | | | |
| − | === RADAR ===
| + | ''See [[Improving Ship Speed]] for more details. |
| − | {{AkashiWorkshop}}
| + | {|class="wikitable" style="text-align:center" |
| − | {{AkashiWorkshopLine
| + | !Equipment |
| − | |Name=Type 13 Air RADAR
| + | ![[Speed]] |
| − | |ItemType=Radar
| + | |- |
| − | |Fuel=10
| + | |{{Equipment/Link|New Model High Temperature High Pressure Boiler|text=+13 Boiler}}<br>{{Engine}} |
| − | |Ammo=0
| + | |Fast A group: +1 {{Speed}} [[Fit Bonus]] at 7+ {{Star}} |
| − | |Steel=20
| + | Slow A group: +1 {{Speed}} [[Fit Bonus]] at 7+ {{Star}} (& a {{Equipment/Link|Improved Kanhon Type Turbine|text=Turbine}}) |
| − | |Baux=30
| |
| − | |Mats0-5=4/5
| |
| − | |Mats6-9=5/7
| |
| − | |Mats10=10/15
| |
| − | |Screws0-5=2/3
| |
| − | |Screws6-9=3/5
| |
| − | |Screws10=5/12
| |
| − | |EquipConsume0-5=-
| |
| − | |EquipConsume6-9=1
| |
| − | |EquipConsume10=1*
| |
| − | |Sun=S<br/>I
| |
| − | |Mon=I<br/>T
| |
| − | |Tue=A<br/>T
| |
| − | |Wed=A<br/>T
| |
| − | |Thu=S<br/>A
| |
| − | |Fri=S<br/>I
| |
| − | |Sat=S<br/>I
| |
| − | |2ndShip=[[Shigure|Shigure Kai Ni]]<br/>[[Isuzu|Isuzu Kai Ni]]<br/>[[Akizuki]]<br/>[[Teruzuki]]
| |
| − | |Notes=★Max conversion uses 1 [[Type 21 Air RADAR]] to convert to a '''[[Type 13 Air RADAR Kai]]'''.
| |
| − | }}
| |
| − | {{AkashiWorkshopLine | |
| − | |Name=Type 13 Air RADAR Kai
| |
| − | |ItemType=Radar
| |
| − | |Fuel=10
| |
| − | |Ammo=0
| |
| − | |Steel=30
| |
| − | |Baux=40
| |
| − | |Mats0-5=5/7
| |
| − | |Mats6-9=7/9 | |
| − | |Mats10=-
| |
| − | |Screws0-5=3/4
| |
| − | |Screws6-9=4/8
| |
| − | |Screws10=-
| |
| − | |EquipConsume0-5=1*
| |
| − | |EquipConsume6-9=2*
| |
| − | |EquipConsume10=-
| |
| − | |Sun=H<br/>Y
| |
| − | |Mon=Y
| |
| − | |Tue=Y
| |
| − | |Wed=Y
| |
| − | |Thu=I
| |
| − | |Fri=I<br/>H
| |
| − | |Sat=I<br/>H
| |
| − | |2ndShip=[[Isokaze]]<br/>[[Hatsushimo|Hatsushimo Kai Ni]]<br/>[[Yukikaze]]
| |
| − | |Notes=★0~★9 uses [[Type 13 Air RADAR]] for improvement. | |
| − | }}
| |
| − | {{AkashiWorkshopLine | |
| − | |Name=Type 21 Air RADAR
| |
| − | |ItemType=Radar
| |
| − | |Fuel=10
| |
| − | |Ammo=0
| |
| − | |Steel=40
| |
| − | |Baux=50
| |
| − | |Mats0-5=5/6
| |
| − | |Mats6-9=6/8
| |
| − | |Mats10=12/16
| |
| − | |Screws0-5=2/3
| |
| − | |Screws6-9=3/5 | |
| − | |Screws10=5/13 | |
| − | |EquipConsume0-5=-
| |
| − | |EquipConsume6-9=1
| |
| − | |EquipConsume10=2
| |
| − | |Sun=I
| |
| − | |Mon=I
| |
| − | |Wed=H
| |
| − | |Thu=H
| |
| − | |Fri=✓
| |
| − | |Sat=✓
| |
| − | |2ndShip=[[Ise]]<br/>[[Hyuuga]]
| |
| − | |Notes=★Max conversion uses 2 [[Type 21 Air RADAR]] to convert to a '''[[Type 21 Air RADAR Kai]]'''.
| |
| − | }} | |
| − | {{AkashiWorkshopLine | |
| − | |Name=Type 22 Surface RADAR
| |
| − | |ItemType=Radar
| |
| − | |Fuel=10
| |
| − | |Ammo=0
| |
| − | |Steel=30
| |
| − | |Baux=30
| |
| − | |Mats0-5=4/5
| |
| − | |Mats6-9=7/10
| |
| − | |Mats10=10/20
| |
| − | |Screws0-5=2/3
| |
| − | |Screws6-9=3/5
| |
| − | |Screws10=8/14
| |
| − | |EquipConsume0-5=1
| |
| − | |EquipConsume6-9=2
| |
| − | |EquipConsume10=3
| |
| − | |Sun=H
| |
| − | |Mon=H<br/>Y
| |
| − | |Tue=Y
| |
| − | |Thu=S
| |
| − | |Fri=✓
| |
| − | |Sat=✓
| |
| − | |2ndShip=[[Hyuuga]]<br/>[[Shimakaze]]<br/>[[Yuugumo]]
| |
| − | |Notes=★Max conversion uses 3 [[Type 22 Surface RADAR]] to convert to a '''[[Type 22 Surface RADAR Kai 4]]'''.
| |
| − | }} | |
| − | {{AkashiWorkshopLine | |
| − | |Name=Type 21 Air RADAR Kai
| |
| − | |ItemType=Radar
| |
| − | |Fuel=10
| |
| − | |Ammo=0
| |
| − | |Steel=60
| |
| − | |Baux=70
| |
| − | |Mats0-5=6/8
| |
| − | |Mats6-9=10/12
| |
| − | |Mats10=-
| |
| − | |Screws0-5=2/3
| |
| − | |Screws6-9=4/8
| |
| − | |Screws10=-
| |
| − | |EquipConsume0-5=1*
| |
| − | |EquipConsume6-9=2*
| |
| − | |EquipConsume10=-
| |
| − | |Sun=Y
| |
| − | |Tue=M
| |
| − | |Wed=M
| |
| − | |Thu=✓
| |
| − | |Fri=✓
| |
| − | |Sat=✓
| |
| − | |2ndShip=[[Yamato]]<br/>[[Musashi]]
| |
| − | |Notes=★0~★9 uses [[Type 21 Air RADAR]] for improvement.
| |
| − | }} | |
| − | {{AkashiWorkshopLine
| |
| − | |Name=Type 22 Surface RADAR Kai 4
| |
| − | |ItemType=Radar
| |
| − | |Fuel=10
| |
| − | |Ammo=0
| |
| − | |Steel=40
| |
| − | |Baux=40
| |
| − | |Mats0-5=5/8
| |
| − | |Mats6-9=8/10
| |
| − | |Mats10=-
| |
| − | |Screws0-5=3/4
| |
| − | |Screws6-9=4/8
| |
| − | |Screws10=-
| |
| − | |EquipConsume0-5=1*
| |
| − | |EquipConsume6-9=1
| |
| − | |EquipConsume10=-
| |
| − | |Sun=M
| |
| − | |Mon=M<br/>H
| |
| − | |Tue=K
| |
| − | |Wed=K
| |
| − | |Thu=M<br/>K
| |
| − | |Fri=✓
| |
| − | |Sat=M<br/>H
| |
| − | |2ndShip=[[Myoukou]]<br/>[[Haguro]]<br/>[[Kongou|Kongou Kai Ni]]
| |
| − | |Notes=★0~★5 uses [[Type 22 Surface RADAR]] for improvement.
| |
| − | }}
| |
| − | {{AkashiWorkshopLine | |
| − | |Name=Type 32 Surface RADAR
| |
| − | |ItemType=Radar
| |
| − | |Fuel=10
| |
| − | |Ammo=0
| |
| − | |Steel=60
| |
| − | |Baux=50
| |
| − | |Mats0-5=6/10
| |
| − | |Mats6-9=12/15
| |
| − | |Mats10=15/22
| |
| − | |Screws0-5=3/4
| |
| − | |Screws6-9=4/7
| |
| − | |Screws10=10/15
| |
| − | |EquipConsume0-5=1*
| |
| − | |EquipConsume6-9=2*
| |
| − | |EquipConsume10=1
| |
| − | |Sun=I
| |
| − | |Mon=I
| |
| − | |Tue=I
| |
| − | |Wed=H
| |
| − | |Thu=H
| |
| − | |Fri=H
| |
| − | |Sat=H
| |
| − | |2ndShip=[[Hyuuga]]<br/>[[Ise]]
| |
| − | |Notes=★0~★9 uses [[Type 22 Surface RADAR]] for improvement.
| |
| − | }} | |
| − | {{AkashiWorkshopLine | |
| − | |Name=Type 32 Surface RADAR Kai | |
| − | |ItemType=Radar
| |
| − | |Fuel=10
| |
| − | |Ammo=0
| |
| − | |Steel=100
| |
| − | |Baux=80
| |
| − | |Mats0-5=10/15
| |
| − | |Mats6-9=14/18
| |
| − | |Mats10=-
| |
| − | |Screws0-5=5/6
| |
| − | |Screws6-9=7/10
| |
| − | |Screws10=-
| |
| − | |EquipConsume0-5=3*
| |
| − | |EquipConsume6-9=1**
| |
| − | |EquipConsume10=-
| |
| − | |Sun=H
| |
| − | |Mon=H
| |
| − | |Tue=H
| |
| − | |Wed=I
| |
| − | |Thu=I
| |
| − | |Sat=I
| |
| − | |2ndShip=[[Hyuuga]]<br/>[[Ise]] | |
| − | |Notes=★0~★5 uses [[Type 22 Surface RADAR]] for improvement.<br/>★6~★9 uses [[Type 32 Surface RADAR]] for improvement.
| |
| − | }} | |
| | |} | | |} |
| | | | |
| − | === Fighter Planes ===
| + | ''See [[Saury#Fishing Equipment|Saury fishing]] for more details. |
| − | {{AkashiWorkshop}}
| + | {|class="wikitable" style="text-align:center" |
| − | {{AkashiWorkshopLine
| + | !Equipment |
| − | | Name = Type 96 Fighter
| + | ![[Saury#Drop Rate|Saury fishing]] |
| − | | ItemType = GreenPlane
| + | |- |
| − | | Fuel = 70
| + | |{{EquipmentLink|Type 96 150cm Searchlight}}<br>{{Searchlight}} |
| − | | Ammo = 50
| + | |''Increased'' at 8+ {{Star}} |
| − | | Steel = 0
| |
| − | | Baux = 170
| |
| − | |Mats0-5 = 1/3
| |
| − | |Mats6-9 = 2/4
| |
| − | |Mats10 = 3/6
| |
| − | |Screws0-5 = 1/2
| |
| − | |Screws6-9 = 1/3
| |
| − | |Screws10 = 2/4
| |
| − | |EquipConsume0-5 = 1*
| |
| − | |EquipConsume6-9 = 1**
| |
| − | |EquipConsume10 = 2*
| |
| − | | Sun = ✓
| |
| − | | Mon = ✓
| |
| − | | Tue = ✓
| |
| − | | Wed = ✓
| |
| − | | Thu = ✓
| |
| − | | Fri = ✓
| |
| − | | Sat = ✓
| |
| − | | 2ndShip = [[Houshou]]
| |
| − | | Notes =★0~★5 uses [[Type 96 Fighter]] for improvement.<br/>★6~★9 uses [[7.7mm Machine Gun]] for improvement.<br/>★Max conversion uses 2 [[Type 96 Fighter]] to convert to a ★3 '''[[Zero Fighter Type 21]]'''.
| |
| − | }}
| |
| − | {{AkashiWorkshopLine
| |
| − | | Name = Zero Fighter Type 21
| |
| − | | ItemType = GreenPlane
| |
| − | | Fuel = 100
| |
| − | | Ammo = 80
| |
| − | | Steel = 0
| |
| − | | Baux = 250
| |
| − | |Mats0-5 = 2/4
| |
| − | |Mats6-9 = 3/5
| |
| − | |Mats10 = 4/7
| |
| − | |Screws0-5 = 2/3
| |
| − | |Screws6-9 = 2/4
| |
| − | |Screws10 = 3/5
| |
| − | |EquipConsume0-5 = 1
| |
| − | |EquipConsume6-9 = 2
| |
| − | |EquipConsume10 = 2*
| |
| − | | Sun = K
| |
| − | | Mon = K
| |
| − | | Tue = K
| |
| − | | Thu = A
| |
| − | | Fri = A
| |
| − | | Sat = A
| |
| − | | 2ndShip = [[Akagi]]<br/>[[Kaga]]
| |
| − | | Notes =★Max conversion uses 2 [[7.7mm Machine Gun]] to convert to a ★3 '''[[Zero Fighter Type 32]]'''.
| |
| − | }}
| |
| − | {{AkashiWorkshopLine
| |
| − | | Name = Zero Fighter Type 21 (Skilled)
| |
| − | | ItemType = GreenPlane
| |
| − | | Fuel = 100
| |
| − | | Ammo = 80
| |
| − | | Steel = 0
| |
| − | | Baux = 250
| |
| − | |Mats0-5 = 2/4
| |
| − | |Mats6-9 = 3/5
| |
| − | |Mats10 = 4/7
| |
| − | |Screws0-5 = 2/3
| |
| − | |Screws6-9 = 2/4
| |
| − | |Screws10 = 3/5
| |
| − | |EquipConsume0-5 = 2*
| |
| − | |EquipConsume6-9 = 3*
| |
| − | |EquipConsume10 = 3**
| |
| − | | Sun = K
| |
| − | | Mon = K
| |
| − | | Tue = K
| |
| − | | Thu = A
| |
| − | | Fri = A
| |
| − | | Sat = A
| |
| − | | 2ndShip = [[Akagi]]<br/>[[Kaga]]
| |
| − | | Notes =★Max conversion uses 2 [[7.7mm Machine Gun]] to convert to a ★3 '''[[Zero Fighter Type 32 (Skilled)]]'''.<br/>Can be upgraded to [[Zero Fighter Type 52 (Skilled)]] via a [[Quests#F25|monthly quest]].
| |
| − | }}
| |
| − | {{AkashiWorkshopLine
| |
| − | | Name = Zero Fighter Type 32
| |
| − | | ItemType = GreenPlane
| |
| − | | Fuel = 90
| |
| − | | Ammo = 100
| |
| − | | Steel = 0
| |
| − | | Baux = 260
| |
| − | |Mats0-5 = 3/5
| |
| − | |Mats6-9 = 4/6
| |
| − | |Mats10 = 5/8
| |
| − | |Screws0-5 = 2/3
| |
| − | |Screws6-9 = 3/4
| |
| − | |Screws10 = 4/6
| |
| − | |EquipConsume0-5 = 1*
| |
| − | |EquipConsume6-9 = 2*
| |
| − | |EquipConsume10 = 1
| |
| − | | Sun = A | |
| − | | Mon = A
| |
| − | | Wed = K
| |
| − | | Thu = K
| |
| − | | 2ndShip = [[Akagi]]<br/>[[Kaga]]
| |
| − | | Notes = ★0~★9 uses [[Zero Fighter Type 21]] for improvement.<br/>★Max conversion uses 1 [[Zero Fighter Type 32]] to convert to a ★3 '''[[Zero Fighter Type 52]]'''.
| |
| − | }}
| |
| − | {{AkashiWorkshopLine
| |
| − | | Name = Zero Fighter Type 32 (Skilled)
| |
| − | | ItemType = GreenPlane
| |
| − | | Fuel = 90
| |
| − | | Ammo = 100
| |
| − | | Steel = 0
| |
| − | | Baux = 260 | |
| − | |Mats0-5 = 3/5
| |
| − | |Mats6-9 = 4/6
| |
| − | |Mats10 = 5/8
| |
| − | |Screws0-5 = 2/3
| |
| − | |Screws6-9 = 3/5
| |
| − | |Screws10 = 4/6
| |
| − | |EquipConsume0-5 = 2*
| |
| − | |EquipConsume6-9 = 3*
| |
| − | |EquipConsume10 = 2**
| |
| − | | Sun = A
| |
| − | | Mon = A
| |
| − | | Wed = K
| |
| − | | Thu = K
| |
| − | | 2ndShip = [[Akagi]]<br/>[[Kaga]]
| |
| − | | Notes =★0~★9 uses [[Zero Fighter Type 21]] for improvement.<br/>★Max conversion uses 2 [[Zero Fighter Type 32]] to convert to a ★3 '''[[Zero Fighter Type 52 (Skilled)]]'''. | |
| − | }}
| |
| − | {{AkashiWorkshopLine
| |
| − | | Name = Zero Fighter Type 52
| |
| − | | ItemType = GreenPlane
| |
| − | | Fuel = 120
| |
| − | | Ammo = 120
| |
| − | | Steel = 0
| |
| − | | Baux = 280
| |
| − | |Mats0-5 = 3/5
| |
| − | |Mats6-9 = 5/8
| |
| − | |Mats10 = -
| |
| − | |Screws0-5 = 3/4
| |
| − | |Screws6-9 = 3/5
| |
| − | |Screws10 = -
| |
| − | |EquipConsume0-5 = 1
| |
| − | |EquipConsume6-9 = 2 | |
| − | |EquipConsume10 = - | |
| − | | Sun = Z
| |
| − | | Mon = Z
| |
| − | | Wed = Z
| |
| − | | Thu = S
| |
| − | | Fri = S
| |
| − | | Sat = S
| |
| − | | 2ndShip = [[Shoukaku]]<br/>[[Zuikaku]]
| |
| − | | Notes =★0~★9 uses [[Zero Fighter Type 52]] for improvement.
| |
| − | }}
| |
| − | {{AkashiWorkshopLine | |
| − | | Name = Zero Fighter Type 52 (Skilled) | |
| − | | ItemType = GreenPlane
| |
| − | | Fuel = 120
| |
| − | | Ammo = 120
| |
| − | | Steel = 0
| |
| − | | Baux = 280
| |
| − | |Mats0-5 = 4/6
| |
| − | |Mats6-9 = 5/8
| |
| − | |Mats10 = -
| |
| − | |Screws0-5 = 3/5
| |
| − | |Screws6-9 = 3/5
| |
| − | |Screws10 = -
| |
| − | |EquipConsume0-5 = 2*
| |
| − | |EquipConsume6-9 = 3*
| |
| − | |EquipConsume10 = -
| |
| − | | Sun = Z
| |
| − | | Mon = Z
| |
| − | | Wed = Z
| |
| − | | Thu = S
| |
| − | | Fri = S
| |
| − | | Sat = S
| |
| − | | 2ndShip = [[Shoukaku]]<br/>[[Zuikaku]]
| |
| − | | Notes =★0~★9 uses [[Zero Fighter Type 52]] for improvement.
| |
| − | }} | |
| − | {{AkashiWorkshopLine
| |
| − | | Name = Zero Fighter Type 52 Model C (601 Air Group)
| |
| − | | ItemType = GreenPlane
| |
| − | | Fuel = 120
| |
| − | | Ammo = 120
| |
| − | | Steel = 0
| |
| − | | Baux = 280
| |
| − | |Mats0-5 = 4/6
| |
| − | |Mats6-9 = 5/9
| |
| − | |Mats10 = -
| |
| − | |Screws0-5 = 3/5
| |
| − | |Screws6-9 = 4/6
| |
| − | |Screws10 = -
| |
| − | |EquipConsume0-5 = 2*
| |
| − | |EquipConsume6-9 = 2*
| |
| − | |EquipConsume10 = -
| |
| − | | Sun = T
| |
| − | | Mon = T
| |
| − | | Tue = T
| |
| − | | Wed = T<br>U
| |
| − | | Thu = T<br>U
| |
| − | | Fri = T<br>U
| |
| − | | Sat = T<br>U
| |
| − | | 2ndShip = [[Taihou]]<br/>[[Unryuu]]
| |
| − | | Notes =★0~★5 uses [[Zero Fighter Type 52]] for improvement.<br/>★6~★9 uses [[Tenzan]] for improvement.
| |
| − | }}
| |
| − | {{AkashiWorkshopLine
| |
| − | | Name = Zero Fighter Type 52 Model A (Iwamoto Squadron)
| |
| − | | ItemType = GreenPlane
| |
| − | | Fuel = 120
| |
| − | | Ammo = 120
| |
| − | | Steel = 0
| |
| − | | Baux = 280
| |
| − | |Mats0-5 = 4/6
| |
| − | |Mats6-9 = 5/9
| |
| − | |Mats10 = -
| |
| − | |Screws0-5 = 3/5
| |
| − | |Screws6-9 = 4/6
| |
| − | |Screws10 = -
| |
| − | |EquipConsume0-5 = 2*
| |
| − | |EquipConsume6-9 = 3*
| |
| − | |EquipConsume10 = -
| |
| − | | Fri = Z
| |
| − | | Sat = Z
| |
| − | | 2ndShip = [[Zuikaku]]
| |
| − | | Notes =★0~★9 uses [[Zero Fighter Type 52]] for improvement.
| |
| − | }}
| |
| − | {{AkashiWorkshopLine
| |
| − | | Name = Zero Fighter Type 52 Model C (Iwai Squadron)
| |
| − | | ItemType = GreenPlane
| |
| − | | Fuel = 120
| |
| − | | Ammo = 120
| |
| − | | Steel = 0
| |
| − | | Baux = 280
| |
| − | |Mats0-5 = 4/6
| |
| − | |Mats6-9 = 5/9
| |
| − | |Mats10 = -
| |
| − | |Screws0-5 = 3/5
| |
| − | |Screws6-9 = 4/6
| |
| − | |Screws10 = -
| |
| − | |EquipConsume0-5 = 2*
| |
| − | |EquipConsume6-9 = 3*
| |
| − | |EquipConsume10 = -
| |
| − | | Tue = Z
| |
| − | | Thu = Z
| |
| − | | 2ndShip = [[Zuikaku]]
| |
| − | | Notes =★0~★9 uses [[Zero Fighter Type 52]] for improvement.
| |
| − | }}
| |
| − | {{AkashiWorkshopLine | |
| − | | Name = Zero Fighter Type 53 (Iwamoto Squadron)
| |
| − | | ItemType = GreenPlane
| |
| − | | Fuel = 120
| |
| − | | Ammo = 120
| |
| − | | Steel = 0
| |
| − | | Baux = 280
| |
| − | |Mats0-5 = 4/6
| |
| − | |Mats6-9 = 5/9
| |
| − | |Mats10 = -
| |
| − | |Screws0-5 = 3/5
| |
| − | |Screws6-9 = 4/6
| |
| − | |Screws10 = -
| |
| − | |EquipConsume0-5 = 2*
| |
| − | |EquipConsume6-9 = 3*
| |
| − | |EquipConsume10 = -
| |
| − | | Fri = Z
| |
| − | | Sat = Z
| |
| − | | 2ndShip = [[Zuikaku]]
| |
| − | | Notes =★0~★9 uses [[Zero Fighter Type 52]] for improvement.
| |
| − | }} | |
| − | {{AkashiWorkshopLine
| |
| − | | Name = F4F-3
| |
| − | | ItemType = GreenPlane
| |
| − | | Fuel = 90
| |
| − | | Ammo = 90
| |
| − | | Steel = 0
| |
| − | | Baux = 270
| |
| − | |Mats0-5 = 2/5
| |
| − | |Mats6-9 = 3/6
| |
| − | |Mats10 = 4/8
| |
| − | |Screws0-5 = 2/3
| |
| − | |Screws6-9 = 2/4
| |
| − | |Screws10 = 3/5
| |
| − | |EquipConsume0-5 = -
| |
| − | |EquipConsume6-9 = 1*
| |
| − | |EquipConsume10 = 2*
| |
| − | | Sun = S
| |
| − | | Tue = Mk2
| |
| − | | Wed = S<br/>Mk2
| |
| − | | Thu = S
| |
| − | | Fri = S<br>Kai
| |
| − | | Sat = S<br/>Kai
| |
| − | | 2ndShip = [[Saratoga]]<br/>[[Saratoga|Saratoga Kai]]<br/>[[Saratoga|Saratoga Mk.II]]
| |
| − | | Notes =★6~★9 uses [[Type 96 Fighter]] for improvement.<br/>★Max conversion uses 2 [[12.7mm Machine Gun]] to convert to a '''[[F4F-4]]'''.
| |
| − | }}
| |
| − | {{AkashiWorkshopLine
| |
| − | | Name = F4F-4
| |
| − | | ItemType = GreenPlane
| |
| − | | Fuel = 100
| |
| − | | Ammo = 120
| |
| − | | Steel = 0
| |
| − | | Baux = 300
| |
| − | |Mats0-5 = 3/6
| |
| − | |Mats6-9 = 4/8
| |
| − | |Mats10 = 8/16
| |
| − | |Screws0-5 = 3/4
| |
| − | |Screws6-9 = 3/6
| |
| − | |Screws10 = 6/9
| |
| − | |EquipConsume0-5 = 1*
| |
| − | |EquipConsume6-9 = 1*
| |
| − | |EquipConsume10 = 3*
| |
| − | | Mon = S<br>Kai
| |
| − | | Tue = S<br>Kai
| |
| − | | Wed = Kai
| |
| − | | Thu = Mk2
| |
| − | | 2ndShip = [[Saratoga]]<br/>[[Saratoga|Saratoga Kai]]<br/>[[Saratoga|Saratoga Mk.II]]
| |
| − | | Notes =★0~★5 uses [[Zero Fighter Type 21]] for improvement.<br/>★6~★9 uses [[Zero Fighter Type 32]] for improvement.<br/>★Max conversion uses 3 [[Zero Fighter Type 52]]] to convert to a '''[[F6F-3]]'''.
| |
| − | }}
| |
| − | {{AkashiWorkshopLine | |
| − | | Name = F6F-3
| |
| − | | ItemType = GreenPlane
| |
| − | | Fuel = 160
| |
| − | | Ammo = 180
| |
| − | | Steel = 0
| |
| − | | Baux = 380
| |
| − | |Mats0-5 = 3/7
| |
| − | |Mats6-9 = 8/10
| |
| − | |Mats10 = 12/18
| |
| − | |Screws0-5 = 4/6
| |
| − | |Screws6-9 = 6/8
| |
| − | |Screws10 = 8/16
| |
| − | |EquipConsume0-5 = 2*
| |
| − | |EquipConsume6-9 = 1*
| |
| − | |EquipConsume10 = 2*
| |
| − | | Tue = ✓
| |
| − | | Wed = ✓
| |
| − | | Thu = ✓
| |
| − | | 2ndShip = [[Saratoga|Saratoga Kai]]<br/>[[Saratoga|Saratoga Mk.II]]<br/>[[Saratoga|Saratoga Mk.II Mod.2]]
| |
| − | | Notes =★0~★5 uses [[Zero Fighter Type 52]] for improvement.<br/>★6~★9 uses [[Shiden Kai 2]] for improvement.<br/>★Max conversion uses 2 [[Shiden Kai 2]] to convert to a '''[[F6F-5]]'''.
| |
| − | }}
| |
| − | {{AkashiWorkshopLine
| |
| − | | Name = F6F-5
| |
| − | | ItemType = GreenPlane
| |
| − | | Fuel = 200
| |
| − | | Ammo = 250
| |
| − | | Steel = 0
| |
| − | | Baux = 450
| |
| − | |Mats0-5 = 8/9
| |
| − | |Mats6-9 = 12/16
| |
| − | |Mats10 = -
| |
| − | |Screws0-5 = 6/7
| |
| − | |Screws6-9 = 8/12
| |
| − | |Screws10 = -
| |
| − | |EquipConsume0-5 = 2*
| |
| − | |EquipConsume6-9 = 1*
| |
| − | |EquipConsume10 = -
| |
| − | | Tue = ✓
| |
| − | | Wed = ✓
| |
| − | | Thu = ✓
| |
| − | | 2ndShip = [[Saratoga|Saratoga Mk.II]]<br/>[[Saratoga|Saratoga Mk.II Mod.2]]
| |
| − | | Notes =★0~★5 uses [[Shiden Kai 2]] for improvement.<br/>★6~★9 uses [[Reppuu]] for improvement.
| |
| − | }} | |
| | |} | | |} |
| | | | |
| − | === Dive Bombers ===
| + | It is confirmed that none of the usual stats, probably nothing at all, is given to the following equipment types: |
| − | {{AkashiWorkshop}} | + | {|class="wikitable" style="text-align:center" |
| − | {{AkashiWorkshopLine
| + | !Equipment Type |
| − | |Name=Zero Fighter Type 62 (Fighter-bomber)
| + | ! Effect |
| − | |ItemType=RedPlane
| + | ! Notes |
| − | |Fuel=120
| + | |- |
| − | |Ammo=120 | + | |[[Combat Ration]]s<br>{{Rations}} |
| − | |Steel=0
| + | | "Nothing"<ref>[[Morale and Fatigue#Morale modifiers|Morale gains]] might be affected.</ref> |
| − | |Baux=280
| + | |style="text-align:left|So far, {{Rations}} {{EquipmentLink|Combat Ration|text=Onigiri}} improvement only serves to upgrade into {{EquipmentLink|Combat Ration (Special Onigiri)|text=Special Onigiri}}. |
| − | |Mats0-5=4/6
| + | * Since improving a {{EquipmentLink|Combat Ration}} up to +6★ cost '''0''' screw, it is possible to farm some screw by upgrading a ration once a day while doing quest {{Q|Fd6}}. |
| − | |Mats6-9=5/9
| |
| − | |Mats10=16/22
| |
| − | |Screws0-5=3/5
| |
| − | |Screws6-9=4/6 | |
| − | |Screws10=6/9
| |
| − | |EquipConsume0-5=2*
| |
| − | |EquipConsume6-9=2**
| |
| − | |EquipConsume10=1***
| |
| − | |Sun=✓
| |
| − | |Mon=Skk<br/>Suz | |
| − | |Fri=J
| |
| − | |Sat=J
| |
| − | |2ndShip=[[Junyou]]<br/>[[Shoukaku]]<br/>[[Suzuya|Suzuya-Kou Kai Ni]]
| |
| − | |Notes=★0~★5 uses [[Zero Fighter Type 52]] for improvement.<br/>★6~★9 uses [[Suisei]] for improvement.<br/>★Max conversion with [[Suzuya|Suzuya-Kou Kai Ni]] as a helper and uses 1 [[Reppuu]] to convert to a '''[[Type 0 Fighter Model 63 (Fighter-bomber)]]'''. | |
| − | }} | |
| − | {{AkashiWorkshopLine | |
| − | |Name=Zero Fighter Type 62 (Fighter-bomber/Iwai Squadron)
| |
| − | |ItemType=RedPlane
| |
| − | |Fuel=120
| |
| − | |Ammo=120
| |
| − | |Steel=0
| |
| − | |Baux=280
| |
| − | |Mats0-5=4/6
| |
| − | |Mats6-9=5/9
| |
| − | |Mats10=-
| |
| − | |Screws0-5=3/5
| |
| − | |Screws6-9=4/6
| |
| − | |Screws10=-
| |
| − | |EquipConsume0-5=2*
| |
| − | |EquipConsume6-9=2**
| |
| − | |EquipConsume10=- | |
| − | |Tue=✓ | |
| − | |Thu=✓
| |
| − | |2ndShip=[[Zuikaku]]
| |
| − | |Notes=★0~★5 uses [[Zero Fighter Type 52]] for improvement.<br/>★6~★9 uses [[Suisei]] for improvement.
| |
| − | }} | |
| − | {{AkashiWorkshopLine | |
| − | |Name=Type 0 Fighter Model 63 (Fighter-bomber) | |
| − | |ItemType=RedPlane | |
| − | |Fuel=130 | |
| − | |Ammo=140
| |
| − | |Steel=0
| |
| − | |Baux=290 | |
| − | |Mats0-5=5/6
| |
| − | |Mats6-9=6/9
| |
| − | |Mats10=-
| |
| − | |Screws0-5=4/6
| |
| − | |Screws6-9=5/7
| |
| − | |Screws10=-
| |
| − | |EquipConsume0-5=3*
| |
| − | |EquipConsume6-9=1**
| |
| − | |EquipConsume10=-
| |
| − | |Mon=S
| |
| − | |Tue=✓
| |
| − | |Wed=✓
| |
| − | |Thu=✓
| |
| − | |Fri=K
| |
| − | |2ndShip=[[Suzuya|Suzuya-Kou Kai Ni]]<br/>[[Kumano|Kumano-Kou Kai Ni]]
| |
| − | |Notes=★0~★5 uses [[Zero Fighter Type 52]] for improvement.<br/>★6~★9 uses [[Reppuu]] for improvement.
| |
| − | }} | |
| | |} | | |} |
| | | | |
| − | === Other Aircraft === | + | ===Myths=== |
| − | {{AkashiWorkshop}} | + | The following have been confirmed to be negative. |
| − | {{AkashiWorkshopLine | + | *{{Star}} on {{Searchlight}} [[Searchlights]] do NOT increase: |
| − | |Name=Prototype Keiun
| + | **[[Night Cut-In]] rate of neither fleets, |
| − | |ItemType=YellowPlane
| + | **[[Shooting Order and Targeting#Searchlights|Targeting]] rate. |
| − | |Fuel=250
| + | *{{Star}} on {{Lookout}} [[Lookout]]s do NOT increase [[Night Cut-In]] rate, |
| − | |Ammo=100
| + | *{{Star}} on {{Submarine Radar}} [[Submarine Equipment]]s do NOT increase [[Night Cut-In]] rate <ref>https://twitter.com/Divinity_123/status/1377666014834479104</ref>. |
| − | |Steel=700
| + | <references/> |
| − | |Baux=650
| + | {{Clear}} |
| − | |Mats0-5=8/10
| |
| − | |Mats6-9=10/15
| |
| − | |Mats10=20/30
| |
| − | |Screws0-5=6/8
| |
| − | |Screws6-9=7/10
| |
| − | |Screws10=10/13
| |
| − | |EquipConsume0-5=1*
| |
| − | |EquipConsume6-9=1**
| |
| − | |EquipConsume10=1***
| |
| − | |Sun=✓ | |
| − | |Mon=Z
| |
| − | |Tue=Z
| |
| − | |Fri=S
| |
| − | |Sat=S
| |
| − | |2ndShip=[[Shoukaku|Shoukaku Kai Ni A]]<br>[[Zuikaku|Zuikaku Kai Ni A]]
| |
| − | |Notes=★0~★5 uses [[Ryuusei]] for improvement.<br/>★6~★9 uses [[Reppuu]] for improvement.<br/>★Max conversion uses 1 Ne-Type Engine to convert to a '''[[Jet Keiun Kai]]'''.
| |
| − | }} | |
| − | |}
| |
| | | | |
| − | === Seaplanes === | + | ==Visible Fit Bonuses== |
| − | {{AkashiWorkshop}}
| + | The following equipment provide additional [[Visible Fit Bonuses]] to some ships when improved: |
| − | {{AkashiWorkshopLine
| |
| − | |Name=Type 0 Recon Seaplane
| |
| − | |ItemType=Seaplane
| |
| − | |Fuel=90
| |
| − | |Ammo=20
| |
| − | |Steel=0
| |
| − | |Baux=300
| |
| − | |Mats0-5=4/6
| |
| − | |Mats6-9=5/8
| |
| − | |Mats10=9/15
| |
| − | |Screws0-5=2/3
| |
| − | |Screws6-9=3/5
| |
| − | |Screws10=5/10
| |
| − | |EquipConsume0-5=1
| |
| − | |EquipConsume6-9=2
| |
| − | |EquipConsume10=3*
| |
| − | |Sun=A
| |
| − | |Mon=M
| |
| − | |Tue=M
| |
| − | |Wed=M<br/>Chiy
| |
| − | |Thu=Chiy<br/>A
| |
| − | |Fri=Chit<br/>A
| |
| − | |Sat=Chit<br/>A
| |
| − | |2ndShip=[[Akitsushima|Akitsushima Kai]]<br/>[[Chitose|Chitose A]]<br/>[[Chiyoda|Chiyoda A]]<br/>[[Mizuho]]
| |
| − | |Notes=★Max conversion uses 3 [[Zero Fighter Type 21]] to convert to a '''[[Type 2 Seaplane Fighter Kai]]'''.
| |
| − | }}
| |
| − | {{AkashiWorkshopLine
| |
| − | |Name=Type 0 Observation Seaplane
| |
| − | |ItemType=Seaplane
| |
| − | |Fuel=90
| |
| − | |Ammo=40
| |
| − | |Steel=0
| |
| − | |Baux=270
| |
| − | |Mats0-5=4/6
| |
| − | |Mats6-9=6/9
| |
| − | |Mats10=-
| |
| − | |Screws0-5=3/5
| |
| − | |Screws6-9=4/7
| |
| − | |Screws10=-
| |
| − | |EquipConsume0-5=1*
| |
| − | |EquipConsume6-9=1
| |
| − | |EquipConsume10=-
| |
| − | |Mon=Mi
| |
| − | |Tue=Mi
| |
| − | |Wed=Mi
| |
| − | |Thu=Mu
| |
| − | |Fri=Mu
| |
| − | |Sat=Mu
| |
| − | |2ndShip=[[Mizuho]]<br/>[[Musashi]]
| |
| − | |Notes=★0~★5 uses [[Zuiun]] for improvement.
| |
| − | }}
| |
| − | {{AkashiWorkshopLine
| |
| − | |Name=Type 98 Recon Seaplane (Night Scout)
| |
| − | |ItemType=Seaplane
| |
| − | |Fuel=100
| |
| − | |Ammo=30
| |
| − | |Steel=0
| |
| − | |Baux=480
| |
| − | |Mats0-5=4/7
| |
| − | |Mats6-9=5/9
| |
| − | |Mats10=-
| |
| − | |Screws0-5=3/4
| |
| − | |Screws6-9=4/8
| |
| − | |Screws10=-
| |
| − | |EquipConsume0-5=1*
| |
| − | |EquipConsume6-9=2*
| |
| − | |EquipConsume10=-
| |
| − | |Sun=✓
| |
| − | |Mon=✓
| |
| − | |Thu=✓
| |
| − | |Fri=✓
| |
| − | |Sat=✓
| |
| − | |2ndShip=[[Sendai|Sendai Kai Ni]]
| |
| − | |Notes=★0~★9 uses [[Type 0 Recon Seaplane]] for improvement.
| |
| − | }}
| |
| − | {{AkashiWorkshopLine
| |
| − | |Name=Ro.43 Recon Seaplane
| |
| − | |ItemType=Seaplane
| |
| − | |Fuel=60
| |
| − | |Ammo=30
| |
| − | |Steel=0
| |
| − | |Baux=180
| |
| − | |Mats0-5=3/5
| |
| − | |Mats6-9=4/6
| |
| − | |Mats10=5/10
| |
| − | |Screws0-5=1/2
| |
| − | |Screws6-9=2/4
| |
| − | |Screws10=3/5
| |
| − | |EquipConsume0-5=1*
| |
| − | |EquipConsume6-9=1**
| |
| − | |EquipConsume10=2*
| |
| − | |Sun=I
| |
| − | |Mon=Z
| |
| − | |Tue=Z<br/>R
| |
| − | |Wed=Z<br/>R
| |
| − | |Thu=Z<br/>Z+
| |
| − | |Fri=Z<br/>Z+
| |
| − | |Sat=I<br/>Z+
| |
| − | |2ndShip=[[Roma|Roma Kai]]<br/>[[Zara|Zara Kai]]<br/>[[Zara|Zara due]]<br/>[[Littorio|Italia]]
| |
| − | |Notes=★0~★5 uses [[Type 0 Recon Seaplane]] for improvement.<br/>★6~★9 uses [[Zuiun]] for improvement.<br/>★Max conversion uses 2 [[Type 0 Recon Seaplane]] to convert to a '''[[Ro.44 Seaplane Fighter]]'''.
| |
| − | }}
| |
| − | {{AkashiWorkshopLine
| |
| − | |Name=Zuiun (Auspicious Clouds)
| |
| − | |ItemType=Seaplane
| |
| − | |Fuel=160
| |
| − | |Ammo=160
| |
| − | |Steel=0
| |
| − | |Baux=360
| |
| − | |Mats0-5=5/7
| |
| − | |Mats6-9=6/9
| |
| − | |Mats10=16/24
| |
| − | |Screws0-5=3/4
| |
| − | |Screws6-9=5/7
| |
| − | |Screws10=7/10
| |
| − | |EquipConsume0-5=1
| |
| − | |EquipConsume6-9=1
| |
| − | |EquipConsume10=2/1*
| |
| − | |Sun=I<br/>H
| |
| − | |Mon=M
| |
| − | |Tue=M
| |
| − | |Wed=M
| |
| − | |Thu=M
| |
| − | |Fri=I<br/>H
| |
| − | |Sat=I<br/>H
| |
| − | |2ndShip=[[Ise|Ise Kai]]<br/>[[Hyuuga|Hyuuga Kai]]<br/>[[Mogami|Mogami Kai]]
| |
| − | |Notes=★Max conversion uses 2 [[Zuiun]] and a Skilled Pilot to convert to a '''[[Zuiun (634 Air Group)]]'''.
| |
| − | }}
| |
| − | {{AkashiWorkshopLine
| |
| − | |Name=Zuiun (634 Air Group)
| |
| − | |ItemType=Seaplane
| |
| − | |Fuel=180
| |
| − | |Ammo=180
| |
| − | |Steel=0
| |
| − | |Baux=480
| |
| − | |Mats0-5=6/8
| |
| − | |Mats6-9=7/10
| |
| − | |Mats10=-
| |
| − | |Screws0-5=5/6
| |
| − | |Screws6-9=6/8
| |
| − | |Screws10=-
| |
| − | |EquipConsume0-5=1*
| |
| − | |EquipConsume6-9=2*
| |
| − | |EquipConsume10=-
| |
| − | |Sun=✓
| |
| − | |Fri=✓
| |
| − | |Sat=✓
| |
| − | |2ndShip=[[Ise|Ise Kai]]<br/>[[Hyuuga|Hyuuga Kai]]
| |
| − | |Notes=★0~★9 uses [[Zuiun]] for improvement.
| |
| − | }}
| |
| − | {{AkashiWorkshopLine
| |
| − | |Name=Zuiun (634 Air Group/Skilled)
| |
| − | |ItemType=Seaplane
| |
| − | |Fuel=190
| |
| − | |Ammo=190
| |
| − | |Steel=0
| |
| − | |Baux=490
| |
| − | |Mats0-5=8/10
| |
| − | |Mats6-9=10/16
| |
| − | |Mats10=-
| |
| − | |Screws0-5=6/7
| |
| − | |Screws6-9=7/9
| |
| − | |Screws10=-
| |
| − | |EquipConsume0-5=2*
| |
| − | |EquipConsume6-9=3*
| |
| − | |EquipConsume10=-
| |
| − | |Sun=✓
| |
| − | |Fri=✓
| |
| − | |Sat=✓
| |
| − | |2ndShip=[[Ise]]<br/>[[Hyuuga]]
| |
| − | |Notes=★0~★9 uses [[Zuiun]] for improvement.
| |
| − | }}
| |
| − | {{AkashiWorkshopLine
| |
| − | |Name=Ro.44 Seaplane Fighter
| |
| − | |ItemType=SeaplaneFighter
| |
| − | |Fuel=70
| |
| − | |Ammo=50
| |
| − | |Steel=0
| |
| − | |Baux=220
| |
| − | |Mats0-5=6/9
| |
| − | |Mats6-9=9/14
| |
| − | |Mats10=24/40
| |
| − | |Screws0-5=3/4
| |
| − | |Screws6-9=5/6
| |
| − | |Screws10=8/12
| |
| − | |EquipConsume0-5=1*
| |
| − | |EquipConsume6-9=2*
| |
| − | |EquipConsume10=1
| |
| − | |Sun=✓
| |
| − | |Thu=✓
| |
| − | |Fri=✓
| |
| − | |Sat=✓
| |
| − | |2ndShip=[[Zara|Zara due]]
| |
| − | |Notes=★0~★9 uses [[Zuiun]] for improvement.<br/>★Max conversion uses 1 [[Ro.44 Seaplane Fighter]] to convert to a '''[[Ro.44 Seaplane Fighter Bis]]'''.
| |
| − | }}
| |
| − | {{AkashiWorkshopLine
| |
| − | |Name=Type 2 Seaplane Fighter Kai
| |
| − | |ItemType=SeaplaneFighter
| |
| − | |Fuel=110
| |
| − | |Ammo=80
| |
| − | |Steel=0
| |
| − | |Baux=360
| |
| − | |Mats0-5=3/4
| |
| − | |Mats6-9=4/6
| |
| − | |Mats10=8/12
| |
| − | |Screws0-5=5/6
| |
| − | |Screws6-9=7/8
| |
| − | |Screws10=9/16
| |
| − | |EquipConsume0-5=2*
| |
| − | |EquipConsume6-9=2**
| |
| − | |EquipConsume10=2***
| |
| − | |Sun=✓
| |
| − | |Fri=✓
| |
| − | |Sat=✓
| |
| − | |2ndShip=[[Mizuho]]
| |
| − | |Notes=★0~★5 uses [[Zero Fighter Type 21]] for improvement.<br/>★6~★9 uses [[Type 0 Recon Seaplane]] for improvement.<br/>★Max conversion uses 2 [[Zuiun]] to convert to a '''[[Kyoufuu Kai]]'''.
| |
| − | }}
| |
| − | {{AkashiWorkshopLine
| |
| − | |Name=Ro.44 Seaplane Fighter Bis
| |
| − | |ItemType=SeaplaneFighter
| |
| − | |Fuel=80
| |
| − | |Ammo=60
| |
| − | |Steel=0
| |
| − | |Baux=280
| |
| − | |Mats0-5=8/14
| |
| − | |Mats6-9=14/18
| |
| − | |Mats10=-
| |
| − | |Screws0-5=4/5
| |
| − | |Screws6-9=6/7
| |
| − | |Screws10=-
| |
| − | |EquipConsume0-5=2*
| |
| − | |EquipConsume6-9=1**
| |
| − | |EquipConsume10=-
| |
| − | |Fri=✓
| |
| − | |Sat=✓
| |
| − | |2ndShip=[[Zara|Zara due]]
| |
| − | |Notes=★0~★5 uses [[Zuiun]] for improvement.<br/>★6~★9 uses [[Ro.44 Seaplane Fighter]] for improvement.
| |
| − | }}
| |
| − | {{AkashiWorkshopLine
| |
| − | |Name=Type 2 Seaplane Fighter Kai (Skilled)
| |
| − | |ItemType=SeaplaneFighter
| |
| − | |Fuel=80
| |
| − | |Ammo=60
| |
| − | |Steel=0
| |
| − | |Baux=280
| |
| − | |Mats0-5=5/6
| |
| − | |Mats6-9=6/8
| |
| − | |Mats10=-
| |
| − | |Screws0-5=7/8
| |
| − | |Screws6-9=8/10
| |
| − | |Screws10=-
| |
| − | |EquipConsume0-5=2*
| |
| − | |EquipConsume6-9=3**
| |
| − | |EquipConsume10=-
| |
| − | |Sun=✓
| |
| − | |Fri=✓
| |
| − | |Sat=✓
| |
| − | |2ndShip=[[Mizuho]]
| |
| − | |Notes=★0~★5 uses [[Zero Fighter Type 32]] for improvement.<br>★0~★9 uses [[Zuiun]]s for improvement.
| |
| − | }}
| |
| − | {{AkashiWorkshopLine
| |
| − | |Name=Kyoufuu Kai
| |
| − | |ItemType=SeaplaneFighter
| |
| − | |Fuel=130
| |
| − | |Ammo=80
| |
| − | |Steel=0
| |
| − | |Baux=300
| |
| − | |Mats0-5=10/12
| |
| − | |Mats6-9=12/
| |
| − | |Mats10=-
| |
| − | |Screws0-5=6/8
| |
| − | |Screws6-9=7/11
| |
| − | |Screws10=-
| |
| − | |EquipConsume0-5=1*
| |
| − | |EquipConsume6-9=1*
| |
| − | |EquipConsume10=-
| |
| − | |Mon=S
| |
| − | |Tue=✓
| |
| − | |Wed=✓
| |
| − | |Thu=✓
| |
| − | |2ndShip=[[Mizuho]]<br/>[[Suzuya|Suzuya Kai Ni]]
| |
| − | |Notes=★0~★9 uses [[Shiden Kai 2]] for improvement.
| |
| − | }}
| |
| − | |}
| |
| | | | |
| − | === Landing Craft and Tanks === | + | {|class="wikitable mw-collapsible mw-collapsed" |
| − | {{AkashiWorkshop}} | + | !Type |
| | + | !Equipment |
| | + | !Notes |
| | + | |- |
| | + | !rowspan=11|{{Large Gun}} |
| | + | |{{EquipmentLink|38cm Twin Gun Mount Kai}} |
| | + | | |
| | + | |- |
| | + | |{{EquipmentLink|35.6cm Triple Gun Mount Kai (Dazzle Camouflage)}} |
| | + | | |
| | + | |- |
| | + | |{{EquipmentLink|16inch Triple Gun Mount Mk.6}} |
| | + | | |
| | + | |- |
| | + | |{{EquipmentLink|16inch Triple Gun Mount Mk.6 mod.2}} |
| | + | | |
| | |- | | |- |
| − | | rowspan="6" |{{LandingCraft}}
| + | |{{EquipmentLink|16inch Triple Gun Mount Mk.6 + GFCS}} |
| − | | rowspan="6" style="text-align:center;" |[[Daihatsu-class Landing Craft]] | + | |Not improvable |
| − | | 0
| |
| − | | rowspan="3" |50
| |
| − | | rowspan="3" |30
| |
| − | | rowspan="3" |30
| |
| − | | rowspan="3" |10
| |
| − | | 1/2
| |
| − | | 1/2
| |
| − | | {{Tooltip|1|Drum Canister}}
| |
| − | | rowspan="3" style="background-color:rgb(170, 235, 170);" |✓ | |
| − | | rowspan="3" style="background-color:rgb(170, 235, 170);" |✓
| |
| − | | rowspan="3" style="background-color:rgb(170, 235, 170);" |S
| |
| − | | rowspan="3" style="background-color:rgb(170, 235, 170);" |Ak<br/>S
| |
| − | | rowspan="3" style="background-color:rgb(170, 235, 170);" |Ak
| |
| − | | rowspan="3" style="background-color:rgb(170, 235, 170);" |Ak<br/>Ab
| |
| − | | rowspan="3" style="background-color:rgb(170, 235, 170);" |Ak<br/>Ab
| |
| − | | rowspan="3" | [[Akitsumaru]]<br>[[Satsuki|Satsuki Kai Ni]]<br>[[Abukuma|Abukuma Kai Ni]]
| |
| − | | rowspan="3" | ★0~★5 uses [[Drum Canister]] for improvement.<br/>★6~★9 uses [[7.7mm Machine Gun]] for improvement.<br/>★Max conversion uses 3 [[12.7mm Machine Gun]] to convert to a '''[[Daihatsu-class Landing Craft (Type 89 Medium Tanks & Marines)]]'''.
| |
| | |- | | |- |
| − | | style="text-align:center;" |6
| + | |{{EquipmentLink|38cm Quadruple Gun Mount Kai Deux}} |
| − | | style="text-align:center;" |1/4
| + | | |
| − | | style="text-align:center;" |2/3
| |
| − | | style="text-align:center;" |{{Tooltip|1|7.7mm Machine Gun}}
| |
| | |- | | |- |
| − | | style="text-align:center;" |10
| + | |{{EquipmentLink|35.6cm Twin Gun Mount Kai 3 (Dazzle Camouflage)}} |
| − | | style="text-align:center;" |4/8
| + | | |
| − | | style="text-align:center;" |3/7
| |
| − | | style="text-align:center;" |{{Tooltip|3|12.7mm Machine Gun}}
| |
| | |- | | |- |
| − | | 0
| + | |{{EquipmentLink|35.6cm Twin Gun Mount Kai 4}} |
| − | | rowspan="3" |50
| + | |Not improvable |
| − | | rowspan="3" |30
| |
| − | | rowspan="3" |30
| |
| − | | rowspan="3" |10
| |
| − | | 1/2
| |
| − | | 1/2
| |
| − | | {{Tooltip|1|Drum Canister}} | |
| − | | rowspan="3" style="background-color:rgb(170, 235, 170);" |K | |
| − | | rowspan="3" style="background-color:rgb(170, 235, 170);" |T
| |
| − | | rowspan="3" style="background-color:rgb(170, 235, 170);" |T
| |
| − | | rowspan="3" style="background-color:rgb(170, 235, 170);" |T
| |
| − | | rowspan="3" style="background-color:rgb(170, 235, 170);" |✓
| |
| − | | rowspan="3" style="background-color:rgb(170, 235, 170);" |K
| |
| − | | rowspan="3" style="background-color:rgb(170, 235, 170);" |K
| |
| − | | rowspan="3" | [[Kinu#Second_Upgrade|Kinu Kai Ni]]<br/>[[Tatsuta|Tatsuta Kai Ni]]
| |
| − | | rowspan="3" | ★0~★5 uses [[Drum Canister]] for improvement.<br/>★6~★9 uses [[7.7mm Machine Gun]] for improvement.<br/>★Max conversion uses 4 [[Daihatsu-class Landing Craft]] to convert to a '''[[Toku Daihatsu-class Landing Craft]]'''.
| |
| | |- | | |- |
| − | | style="text-align:center;" |6
| + | |{{EquipmentLink|14inch/45 Twin Gun Mount}} |
| − | | style="text-align:center;" |1/4
| + | | |
| − | | style="text-align:center;" |2/3
| |
| − | | style="text-align:center;" |{{Tooltip|1|7.7mm Machine Gun}}
| |
| | |- | | |- |
| − | | style="text-align:center;" |10
| + | |{{EquipmentLink|14inch/45 Triple Gun Mount}} |
| − | | style="text-align:center;" |8/16
| + | | |
| − | | style="text-align:center;" |6/12
| |
| − | | style="text-align:center;" |{{Tooltip|4|Daihatsu-class Landing Craft}}
| |
| | |- | | |- |
| − | {{AkashiWorkshopLine
| + | |{{EquipmentLink|35.6cm Twin Gun Mount Kai 3 C}} |
| − | |Name=Daihatsu-class Landing Craft (Type 89 Medium Tanks & Marines)
| + | | |
| − | |ItemType=LandingCraft
| + | |- |
| − | |Fuel=70
| + | !rowspan=11|{{Med Gun}} |
| − | |Ammo=80
| + | |{{EquipmentLink|SKC34 20.3cm Twin Gun Mount}} |
| − | |Steel=120
| + | | |
| − | |Baux=30
| + | |- |
| − | |Mats0-5=3/5
| + | |{{EquipmentLink|14cm Twin Gun Mount Kai}} |
| − | |Mats6-9=4/8
| + | | |
| − | |Mats10=10/18
| + | |- |
| − | |Screws0-5=2/3
| + | |{{EquipmentLink|6inch Triple Rapid Fire Gun Mount Mk.16}} |
| − | |Screws6-9=3/5
| + | | |
| − | |Screws10=5/9 | + | |- |
| − | |EquipConsume0-5={{Tooltip|1|25mm Autocannon}}
| + | |{{EquipmentLink|6inch Triple Rapid Fire Gun Mount Mk.16 mod.2}} |
| − | |EquipConsume6-9={{Tooltip|2|12cm 30-tube Rocket Launcher}}
| + | | |
| − | |EquipConsume10={{Tooltip|3|7.7mm Machine Gun}}
| + | |- |
| − | |Sun=Ak
| + | |{{EquipmentLink|6inch Mk.XXIII Triple Gun Mount}} |
| − | |Tue=Ab
| + | | |
| − | |Wed=Ab
| |
| − | |Thu=Ak<br/>S<br/>Ab
| |
| − | |Fri=Ak<br/>S
| |
| − | |Sat=Ak<br/>S
| |
| − | |2ndShip=[[Akitsumaru]]<br/>[[Satsuki|Satsuki Kai Ni]]<br/>[[Abukuma|Abukuma Kai Ni]]
| |
| − | |Notes=★0~★5 uses [[25mm Autocannon]] for improvement.<br/>★6~★9 uses [[12cm 30-tube Rocket Launcher]] for improvement.<br/>★Max conversion uses 3 [[7.7mm Machine Gun]] to convert to a '''[[Type 2 Ka-Mi Tank]]'''.
| |
| − | }} | |
| − | {{AkashiWorkshopLine
| |
| − | |Name=Toku Daihatsu-class Landing Craft
| |
| − | |ItemType=LandingCraft
| |
| − | |Fuel=70
| |
| − | |Ammo=80
| |
| − | |Steel=120 | |
| − | |Baux=30 | |
| − | |Mats0-5=3/5
| |
| − | |Mats6-9=4/8
| |
| − | |Mats10=-
| |
| − | |Screws0-5=2/3 | |
| − | |Screws6-9=4/6
| |
| − | |Screws10=-
| |
| − | |EquipConsume0-5={{Tooltip|2|Drum Canister}}
| |
| − | |EquipConsume6-9={{Tooltip|1|[Daihatsu-class Landing Craft}} | |
| − | |EquipConsume10=-
| |
| − | |Sun=K
| |
| − | |Mon=K
| |
| − | |Tue=Ak
| |
| − | |Wed=Ak
| |
| − | |Thu=Ak
| |
| − | |Fri=K
| |
| − | |Sat=K
| |
| − | |2ndShip=[[Akitsumaru]]<br/>[[Kinu|Kinu Kai Ni]]
| |
| − | |Notes=★0~★5 uses [[Drum Canister]] for improvement.<br/>★6~★9 uses [[Daihatsu-class Landing Craft]] for improvement.
| |
| − | }} | |
| − | {{AkashiWorkshopLine
| |
| − | |Name=Type 2 Ka-Mi Tank
| |
| − | |ItemType=Amphibious Tank
| |
| − | |Fuel=80
| |
| − | |Ammo=90
| |
| − | |Steel=100
| |
| − | |Baux=70
| |
| − | |Mats0-5=5/8
| |
| − | |Mats6-9=8/12
| |
| − | |Mats10=-
| |
| − | |Screws0-5=3/4
| |
| − | |Screws6-9=4/6 | |
| − | |Screws10=- | |
| − | |EquipConsume0-5={{Tooltip|2|7.7mm Machine Gun}} | |
| − | |EquipConsume6-9={{Tooltip|3|12.7mm Machine Gun}} | |
| − | |EquipConsume10=-
| |
| − | |Sun=58
| |
| − | |Mon=58<br/>401
| |
| − | |Tue=401
| |
| − | |Wed=8<br/>401
| |
| − | |Thu=8<br/>401
| |
| − | |Fri=58<br/>8
| |
| − | |Sat=58<br/>8
| |
| − | |2ndShip=[[I-58]]<br/>[[I-8]]<br/>[[I-401]] | |
| − | |Notes=★0~★5 uses [[7.7mm Machine Gun]] for improvement.<br/>★6~★9 uses [[12.7mm Machine Gun]] for improvement. | |
| − | }}
| |
| − | |}
| |
| − | | |
| − | === Boilers ===
| |
| − | {{AkashiWorkshop}}
| |
| − | {{AkashiWorkshopLine | |
| − | |Name=Enhanced Steam Boiler | |
| − | |ItemType=Turbine
| |
| − | |Fuel=240
| |
| − | |Ammo=0
| |
| − | |Steel=600
| |
| − | |Baux=80
| |
| − | |Mats0-5=10/20
| |
| − | |Mats6-9=14/28
| |
| − | |Mats10=20/40
| |
| − | |Screws0-5=5/8
| |
| − | |Screws6-9=7/9
| |
| − | |Screws10=8/12
| |
| − | |EquipConsume0-5=1*
| |
| − | |EquipConsume6-9=1
| |
| − | |EquipConsume10=2
| |
| − | |Sun=A
| |
| − | |Mon=A
| |
| − | |Tue=✓
| |
| − | |Wed=✓
| |
| − | |Thu=A
| |
| − | |Fri=A
| |
| − | |Sat=A
| |
| − | |2ndShip=[[Shimakaze]]<br/>[[Amatsukaze]]
| |
| − | |Notes=★0~★5 uses [[Improved Steam Turbine]] for improvement.<br/>★Max conversion uses 2 [[Enhanced Steam Boiler]] to convert to a '''[[New High Pressure-Temperature Steam Boiler]]'''.
| |
| − | }}
| |
| − | {{AkashiWorkshopLine
| |
| − | |Name=New High Pressure-Temperature Steam Boiler
| |
| − | |ItemType=Turbine
| |
| − | |Fuel=300
| |
| − | |Ammo=0
| |
| − | |Steel=750
| |
| − | |Baux=100
| |
| − | |Mats0-5=15/30
| |
| − | |Mats6-9=16/32
| |
| − | |Mats10=-
| |
| − | |Screws0-5=8/10
| |
| − | |Screws6-9=9/12
| |
| − | |Screws10=-
| |
| − | |EquipConsume0-5=2*
| |
| − | |EquipConsume6-9=2**
| |
| − | |EquipConsume10=-
| |
| − | |Mon=S
| |
| − | |Tue=✓
| |
| − | |Wed=A
| |
| − | |Thu=A
| |
| − | |Fri=S
| |
| − | |2ndShip=[[Shimakaze]]<br/>[[Amatsukaze]]
| |
| − | |Notes=★0~★5 [[Improved Steam Turbine]] for improvement.<br/>★6~★9 [[Enhanced Steam Boiler]] for improvement.
| |
| − | }} | |
| − | |} | |
| − | | |
| − | === Armor Bulges ===
| |
| − | {{AkashiWorkshop}}
| |
| − | {{AkashiWorkshopLine
| |
| − | |Name=Anti-torpedo Bulge (Medium)
| |
| − | |ItemType=ArmorEquipment
| |
| − | |Fuel=70
| |
| − | |Ammo=0
| |
| − | |Steel=770
| |
| − | |Baux=0
| |
| − | |Mats0-5=7/9
| |
| − | |Mats6-9=18/24
| |
| − | |Mats10=28/35 | |
| − | |Screws0-5=4/5
| |
| − | |Screws6-9=6/9 | |
| − | |Screws10=8/12
| |
| − | |EquipConsume0-5=1
| |
| − | |EquipConsume6-9=2
| |
| − | |EquipConsume10=3
| |
| − | |Sun=V
| |
| − | |Mon=✓
| |
| − | |Tue=✓
| |
| − | |Wed=✓
| |
| − | |Thu=S
| |
| − | |2ndShip=[[Hibiki|Verniy]]<br/>[[Sakawa]]<br/>[[Zara|Zara due]]
| |
| − | |Notes=★Max conversion uses 3 [[Anti-torpedo Bulge (Medium)]] to convert to a '''[[New Design Anti-Torpedo Bulge (Medium)]]'''.
| |
| − | }}
| |
| − | {{AkashiWorkshopLine | |
| − | |Name=Anti-torpedo Bulge (Large) | |
| − | |ItemType=ArmorEquipment
| |
| − | |Fuel=80
| |
| − | |Ammo=0
| |
| − | |Steel=880
| |
| − | |Baux=0
| |
| − | |Mats0-5=8/10
| |
| − | |Mats6-9=20/30
| |
| − | |Mats10=32/48
| |
| − | |Screws0-5=4/5
| |
| − | |Screws6-9=6/9
| |
| − | |Screws10=8/12
| |
| − | |EquipConsume0-5=2*
| |
| − | |EquipConsume6-9=1
| |
| − | |EquipConsume10=2
| |
| − | |Wed=M<br/>Y
| |
| − | |Thu=✓
| |
| − | |Fri=✓
| |
| − | |Sat=N<br/>M
| |
| − | |2ndShip=[[Nagato]]<br/>[[Mutsu]]<br/>[[Yamato]]<br/>[[Musashi]]
| |
| − | |Notes=★0~★5 uses [[Anti-torpedo Bulge (Medium)]] for improvement.
| |
| − | }}
| |
| − | {{AkashiWorkshopLine
| |
| − | |Name=New Design Anti-Torpedo Bulge (Medium)
| |
| − | |ItemType=ArmorEquipment
| |
| − | |Fuel=170
| |
| − | |Ammo=0
| |
| − | |Steel=870
| |
| − | |Baux=70
| |
| − | |Mats0-5=16/24
| |
| − | |Mats6-9=28/35
| |
| − | |Mats10=-
| |
| − | |Screws0-5=6/9
| |
| − | |Screws6-9=8/12
| |
| − | |Screws10=-
| |
| − | |EquipConsume0-5=2*
| |
| − | |EquipConsume6-9=3*
| |
| − | |EquipConsume10=-
| |
| − | |Tue=✓
| |
| − | |Wed=✓
| |
| − | |Thu=✓
| |
| − | |2ndShip=[[Zara|Zara due]]
| |
| − | |Notes=★0~★9 uses [[Anti-torpedo Bulge (Medium)]] for improvement.
| |
| − | }}
| |
| − | {{AkashiWorkshopLine
| |
| − | |Name=New Design Anti-Torpedo Bulge (Large)
| |
| − | |ItemType=ArmorEquipment
| |
| − | |Fuel=180
| |
| − | |Ammo=0
| |
| − | |Steel=980
| |
| − | |Baux=80
| |
| − | |Mats0-5=20/30
| |
| − | |Mats6-9=32/48
| |
| − | |Mats10=-
| |
| − | |Screws0-5=6/9
| |
| − | |Screws6-9=8/12
| |
| − | |Screws10=-
| |
| − | |EquipConsume0-5=1*
| |
| − | |EquipConsume6-9=2*
| |
| − | |EquipConsume10=-
| |
| − | |Sun=✓
| |
| − | |Tue=M
| |
| − | |Sat=Y
| |
| − | |2ndShip=[[Yamato]]<br/>[[Musashi]]
| |
| − | |Notes=★0~★9 uses [[Anti-torpedo Bulge (Large)]] for improvement.
| |
| − | }}
| |
| − | |}
| |
| − | | |
| − | === Submarine Radars ===
| |
| − | {{AkashiWorkshop}}
| |
| − | {{AkashiWorkshopLine
| |
| − | |Name=Submarine Radar and Waterproof Periscope
| |
| − | |ItemType=SubmarineRadar
| |
| − | |Fuel=80
| |
| − | |Ammo=90
| |
| − | |Steel=100
| |
| − | |Baux=70
| |
| − | |Mats0-5=20/24
| |
| − | |Mats6-9=30/40
| |
| − | |Mats10=-
| |
| − | |Screws0-5=7/9
| |
| − | |Screws6-9=8/10
| |
| − | |Screws10=-
| |
| − | |EquipConsume0-5=2*
| |
| − | |EquipConsume6-9=1**
| |
| − | |EquipConsume10=-
| |
| − | |Mon=✓
| |
| − | |Tue=✓
| |
| − | |Wed=✓
| |
| − | |Thu=✓
| |
| − | |2ndShip=[[I-401]]
| |
| − | |Notes=★0~★5 uses [[Type 22 Surface RADAR]] for improvement.<br>★6~★9 uses [[Skilled Lookouts]] for improvement.
| |
| − | }}
| |
| − | |}
| |
| − | | |
| − | === Battle Ration ===
| |
| − | {{AkashiWorkshop}}
| |
| − | {{AkashiWorkshopLine
| |
| − | |Name=Battle Rations
| |
| − | |ItemType=Rations
| |
| − | |Fuel=10
| |
| − | |Ammo=0
| |
| − | |Steel=0
| |
| − | |Baux=5
| |
| − | |Mats0-5=1/2
| |
| − | |Mats6-9=1/2
| |
| − | |Mats10=1/3
| |
| − | |Screws0-5=0/0
| |
| − | |Screws6-9=1/1
| |
| − | |Screws10=0/1
| |
| − | |EquipConsume0-5=1
| |
| − | |EquipConsume6-9=0
| |
| − | |EquipConsume10=3
| |
| − | |Sun=✓
| |
| − | |Mon=N
| |
| − | |Tue=N
| |
| − | |Wed=N
| |
| − | |Thu=N
| |
| − | |Fri=✓
| |
| − | |Sat=✓
| |
| − | |2ndShip=[[Naganami]]<br/>[[Agano]]
| |
| − | |Notes=★Max conversion uses 3 [[Battle Rations]] to convert to a [[Battle Ration (Special Onigiri)]]
| |
| − | }} | |
| − | |} | |
| − | | |
| − | === Land Base Planes ===
| |
| − | {{AkashiWorkshop}}
| |
| − | {{AkashiWorkshopLine
| |
| − | |Name=Shiden Type 11
| |
| − | |ItemType=Interceptor Fighter
| |
| − | |Fuel=160
| |
| − | |Ammo=180
| |
| − | |Steel=0
| |
| − | |Baux=360
| |
| − | |Mats0-5=8/9
| |
| − | |Mats6-9=10/12 | |
| − | |Mats10=12/18
| |
| − | |Screws0-5=4/5
| |
| − | |Screws6-9=6/8
| |
| − | |Screws10=7/12
| |
| − | |EquipConsume0-5=2*
| |
| − | |EquipConsume6-9=2**
| |
| − | |EquipConsume10=2***
| |
| − | |Mon=✓
| |
| − | |Tue=✓
| |
| − | |Wed=✓
| |
| − | |2ndShip=[[Akagi|Akagi Kai]]<br/>[[Kaga|Kaga Kai]] | |
| − | |Notes=★0-★5 uses [[Zero Fighter Type 52]] for improvement.<br/> ★0-★5 uses [[Zuiun]] for improvement.<br/> ★Max conversion uses 2 [[Shiden Kai 2]] to convert to a [[Shiden Model 21 Shiden Kai]]
| |
| − | }}
| |
| − | {{AkashiWorkshopLine | |
| − | |Name=Type 1 Fighter Hayabusa Model II
| |
| − | |ItemType=Interceptor Fighter2
| |
| − | |Fuel=90
| |
| − | |Ammo=120
| |
| − | |Steel=10
| |
| − | |Baux=270 | |
| − | |Mats0-5=3/4
| |
| − | |Mats6-9=5/6
| |
| − | |Mats10=10/15
| |
| − | |Screws0-5=2/3
| |
| − | |Screws6-9=3/5
| |
| − | |Screws10=6/9
| |
| − | |EquipConsume0-5=1*
| |
| − | |EquipConsume6-9=2**
| |
| − | |EquipConsume10=3***/(1)
| |
| − | |Mon=K<br/>A
| |
| − | |Tue=K<br/>A
| |
| − | |Wed=K<br/>A
| |
| − | |Thu=✓
| |
| − | |Fri=Ka
| |
| − | |2ndShip=[[Kasuga Maru]]<br/>[[Akitsu Maru]]<br/>[[Kamoi]]
| |
| − | |Notes=★0-★5 uses [[Type 96 Fighter]] for improvement.<br/> ★0-★5 uses [[Zero Fighter Type 21]] for improvement.<br/> ★Max conversion uses 3 [[12.7mm Machine Gun]] and 1 New Model Aviation Weapon Material to convert to a [[Type 1 Fighter Hayabusa Model III A]]
| |
| − | }} | |
| − | {{AkashiWorkshopLine
| |
| − | |Name=Type 1 Fighter Hayabusa Model III A
| |
| − | |ItemType=Interceptor Fighter2
| |
| − | |Fuel=130
| |
| − | |Ammo=200
| |
| − | |Steel=20 | |
| − | |Baux=330
| |
| − | |Mats0-5=5/6
| |
| − | |Mats6-9=6/9
| |
| − | |Mats10=-
| |
| − | |Screws0-5=4/5
| |
| − | |Screws6-9=6/7
| |
| − | |Screws10=-
| |
| − | |EquipConsume0-5=3*
| |
| − | |EquipConsume6-9=2**
| |
| − | |EquipConsume10=-
| |
| − | |Mon=K<br/>A
| |
| − | |Tue=K<br/>A
| |
| − | |Wed=K
| |
| − | |Thu=Ka
| |
| − | |Fri=Ka
| |
| − | |2ndShip=[[Kasuga Maru]]<br/>[[Akitsu Maru]]
| |
| − | |Notes=★0-★5 uses [[Zero Fighter Type 52]] for improvement.<br/> ★0-★5 uses [[Reppuu]] for improvement.
| |
| − | }}
| |
| − | |}
| |
| − | | |
| − | == Possible Upgrades ==
| |
| − | {| class="wikitable"
| |
| | |- | | |- |
| − | !Type
| + | |{{EquipmentLink|14cm Twin Gun Mount Kai 2}} |
| − | !Starting Equipment
| + | | |
| − | !Upgraded Equipment
| |
| | |- | | |- |
| − | | rowspan="3"|{{RedGunLight}} / {{GreenGunDP}} Light Gun
| + | |{{EquipmentLink|Prototype 20.3cm (No.4) Twin Gun Mount}} |
| − | |style="text-align:center;"|[[12.7cm Twin Gun Mount]] | + | | |
| − | |style="text-align:center;"|[[12.7cm Twin Mount Type-B Kai 2]] | |
| | |- | | |- |
| − | |style="text-align:center;"|[[12.7cm Twin Mount Type-B Kai 2]] | + | |{{EquipmentLink|15.2cm Triple Main Gun Mount}} |
| − | |style="text-align:center;"|'''''Impossible to upgrade''''' | + | | |
| | |- | | |- |
| − | |style="text-align:center;"|[[10cm Twin High-angle Mount + Anti-Aircraft Fire Director]] | + | |{{EquipmentLink|15.2cm Triple Main Gun Mount Kai}} |
| − | |style="text-align:center;"|'''''Impossible to upgrade''''' | + | | |
| | |- | | |- |
| − | | rowspan="9"|{{RedGunMedium}} Medium Gun
| + | |{{EquipmentLink|18cm/57 Triple Main Gun Mount}} |
| − | |style="text-align:center;"|[[14cm Naval Gun]]
| + | | |
| − | |style="text-align:center;"|[[14cm Twin Gun Mount]] | |
| | |- | | |- |
| − | |style="text-align:center;"|[[14cm Twin Gun Mount]] | + | |{{EquipmentLink|21cm Single Main Gun Mount}} |
| − | |style="text-align:center;"|'''''Impossible to upgrade''''' | + | | |
| | |- | | |- |
| − | |style="text-align:center;"|[[15.2cm Twin Gun Mount]]
| + | !rowspan=9|{{Light Gun}} |
| − | |style="text-align:center;"|[[15.2cm Twin Gun Mount Kai]] | + | |{{EquipmentLink|12.7cm Single Gun Mount}} |
| | + | | |
| | |- | | |- |
| − | |style="text-align:center;"|[[15.2cm Twin Gun Mount Kai]] | + | |{{EquipmentLink|12.7cm Twin Gun Mount Model D Kai 2}} |
| − | |style="text-align:center;"|'''''Impossible to upgrade''''' | + | | |
| | |- | | |- |
| − | |style="text-align:center;"|[[15.5cm Triple Gun Mount (Main)]] | + | |{{EquipmentLink|12.7cm Twin Gun Mount Model A Kai 2}} |
| − | |style="text-align:center;"|[[15.5cm Triple Gun Mount Kai (Main)]] | + | | |
| | |- | | |- |
| | + | |{{EquipmentLink|12.7cm Twin Gun Mount Model D Kai 3}} |
| | + | |Not improvable |
| | |- | | |- |
| − | |style="text-align:center;"|[[15.5cm Triple Gun Mount Kai (Main)]] | + | |{{EquipmentLink|120mm/50 Twin Gun Mount Kai A.mod.1937}} |
| − | |style="text-align:center;"|'''''Impossible to upgrade''''' | + | | |
| | |- | | |- |
| − | |style="text-align:center;"|[[20.3cm Twin Gun Mount]] | + | |{{EquipmentLink|12.7cm Twin Gun Mount Model C Kai 3}} |
| − | |style="text-align:center;"|[[20.3cm(no.2) Twin Gun Mount ]] | + | | |
| | |- | | |- |
| − | |style="text-align:center;"|[[20.3cm(no.2) Twin Gun Mount]] | + | |{{EquipmentLink|12.7cm Twin Gun Mount Model C Kai 3 H}} |
| − | |style="text-align:center;"|[[20.3cm(no.3) Twin Gun Mount]] | + | | |
| | |- | | |- |
| − | |style="text-align:center;"|[[20.3cm(no.3) Twin Gun Mount]] | + | |{{EquipmentLink|13.8cm Twin Gun Mount}} |
| − | |style="text-align:center;"|'''''Impossible to upgrade''''' | + | | |
| | |- | | |- |
| − | | rowspan="15"|{{RedGunHeavy}} Heavy Gun
| + | |{{EquipmentLink|13.8cm Twin Gun Mount Kai}} |
| − | |style="text-align:center;"|[[35.6cm Twin Gun Mount]]
| + | | |
| − | |style="text-align:center;"|[[Prototype 35.6cm Triple Gun Mount]] | |
| | |- | | |- |
| − | |style="text-align:center;"|[[35.6cm Twin Gun Mount (Dazzle Camouflage)]] | + | !rowspan=5|{{Small HA Gun}} |
| − | |style="text-align:center;"|'''''Impossible to upgrade''''' | + | |{{EquipmentLink|10cm Twin High-angle Gun Mount + Anti-Aircraft Fire Director}} |
| | + | | |
| | |- | | |- |
| − | |style="text-align:center;"|[[Prototype 35.6cm Triple Gun Mount]] | + | |{{EquipmentLink|12.7cm Single High-angle Gun Mount (Late Model)}} |
| − | |style="text-align:center;"|'''''Impossible to upgrade''''' | + | | |
| | |- | | |- |
| − | |style="text-align:center;"|[[38cm Twin Gun Mount]] | + | |{{EquipmentLink|Locally Modified 12.7cm Twin High-angle Gun Mount}} |
| − | |style="text-align:center;"|[[38cm Twin Gun Mount Kai]] ★+3 | + | |Not improvable |
| | |- | | |- |
| − | |style="text-align:center;"|[[38cm Twin Gun Mount Kai]] | + | |{{EquipmentLink|Locally Modified 10cm Twin High-angle Gun Mount}} |
| − | |style="text-align:center;"|'''''Impossible to upgrade''''' | + | |Not improvable |
| | |- | | |- |
| − | |style="text-align:center;"|[[381mm / 50 Triple Gun Mount]] | + | |{{EquipmentLink|12cm Single High-angle Gun Mount Model E Kai}} |
| − | |style="text-align:center;"|[[381mm / 50 Triple Gun Mount Kai]] ★+3 | + | | |
| | |- | | |- |
| − | |style="text-align:center;"|[[381mm / 50 Triple Gun Mount Kai]] | + | !rowspan=3|{{Sec Gun}} |
| − | |style="text-align:center;"|'''''Impossible to upgrade''''' | + | |{{EquipmentLink|15.2cm Triple Gun Mount}} |
| | + | | |
| | |- | | |- |
| − | |style="text-align:center;"|[[41cm Twin Gun Mount]] | + | |{{EquipmentLink|15cm Single Secondary Gun Mount}} |
| − | |style="text-align:center;"|'''''Impossible to upgrade''''' | + | | |
| | |- | | |- |
| − | |style="text-align:center;"|[[Prototype 41cm Triple Gun Mount]] | + | |{{EquipmentLink|10.2cm Triple Secondary Gun Mount}} |
| − | |style="text-align:center;"|'''''Impossible to upgrade''''' | + | |Not improvable |
| | |- | | |- |
| − | |style="text-align:center;"|[[46cm Twin Gun Mount Prototype]]
| + | !rowspan=6|{{Sec HA Gun}} |
| − | |style="text-align:center;"|[[46cm Triple Gun Mount]] ★+5 | + | |{{EquipmentLink|12.7cm High-angle Gun + Anti-Aircraft Fire Director}} |
| | + | | |
| | |- | | |- |
| − | |style="text-align:center;"|[[46cm Triple Gun Mount]] | + | |{{EquipmentLink|8cm High-angle Gun Kai + Additional Machine Guns}} |
| − | |style="text-align:center;"|'''''Impossible to upgrade''''' | + | | |
| | |- | | |- |
| − | |style="text-align:center;"|[[Prototype 51cm Twin Cannon]] | + | |{{EquipmentLink|10cm Twin High-angle Gun Mount Kai + Additional Machine Guns}} |
| − | |style="text-align:center;"|'''''Impossible to upgrade''''' | + | | |
| | |- | | |- |
| − | |style="text-align:center;"|[[16in Triple Gun Mount Mk.7]] | + | |{{EquipmentLink|65mm/64 Single Rapid Fire Gun Mount Kai}} |
| − | |style="text-align:center;"|[[16in Triple Gun Mount Mk.7 + GFCS]] | + | |Not improvable |
| | |- | | |- |
| − | |style="text-align:center;"|[[16in Triple Gun Mount Mk.7 + GFCS]] | + | |{{EquipmentLink|12cm Single High-angle Gun Mount + 25mm Machine Guns Additions}} |
| − | |style="text-align:center;"|'''''Impossible to upgrade''''' | + | | |
| | |- | | |- |
| − | |style="text-align:center;"|[[38.1cm Mk.I Twin Gun Mount]] | + | |{{EquipmentLink|5inch Twin Gun Mount Mk.28 mod.2}} |
| − | |style="text-align:center;"|'''''Impossible to upgrade''''' | + | | |
| | |- | | |- |
| − | | rowspan="3"|{{GreenGunDP}} / {{YellowGun}} Auxiliary Gun
| + | !rowspan=6|{{AA Gun}} |
| − | |style="text-align:center;"|[[90mm Single High Angled Gun]] | + | |{{EquipmentLink|25mm Twin Autocannon Mount}} |
| − | |style="text-align:center;"|'''''Impossible to upgrade'''''
| + | | |
| | |- | | |- |
| − | |style="text-align:center;"|[[OTO 152mm triple extended machine gun]] | + | |{{EquipmentLink|25mm Triple Autocannon Mount}} |
| − | |style="text-align:center;"|'''''Impossible to upgrade''''' | + | | |
| | |- | | |- |
| − | |style="text-align:center;"|[[15.2cm Naval Gun]] | + | |{{EquipmentLink|25mm Single Autocannon Mount}} |
| − | |style="text-align:center;"|[[15.2cm Twin Gun Mount]] | + | | |
| | |- | | |- |
| − | | rowspan="2"|{{RedAmmo}} AP Shell
| + | |{{EquipmentLink|25mm Triple Autocannon Mount (Concentrated Deployment)}} |
| − | |style="text-align:center;"|[[Type 91 Armor-Piercing (AP) Shell]]
| + | | |
| − | |style="text-align:center;"|[[Type 1 Armor-Piercing (AP) Shell]] | |
| | |- | | |- |
| − | |style="text-align:center;"|[[Type 1 Armor-Piercing (AP) Shell]] | + | |{{EquipmentLink|2cm Flakvierling 38}} |
| − | |style="text-align:center;"|'''''Impossible to upgrade''''' | + | | |
| | |- | | |- |
| − | | rowspan="3"|{{GreenGunMG}} Anti-Air Gun
| + | |{{EquipmentLink|3.7cm FlaK M42}} |
| − | |style="text-align:center;"|[[25mm Single Autocannon Mount]]
| + | |Not improvable |
| − | |style="text-align:center;"|[[25mm Twin Autocannon Mount]] ★+5 | |
| | |- | | |- |
| − | |style="text-align:center;"|[[25mm Twin Autocannon Mount]] | + | !rowspan=5|{{Torpedo Weapon}} |
| − | |style="text-align:center;"|[[25mm Triple Autocannon Mount]] ★+3 | + | |{{EquipmentLink|53cm Twin Torpedo Mount}} |
| | + | |Only as synergy |
| | |- | | |- |
| − | |style="text-align:center;"|[[25mm Triple Autocannon Mount]]* | + | |{{EquipmentLink|53cm Twin Torpedo Mount Kai (Oxygen Torpedoes)}} |
| − | |style="text-align:center;"|[[25mm Triple Autocannon Mount (Concentrated Deployment)]] | + | | |
| | |- | | |- |
| − | | rowspan="3"| {{AntiAircraftFireDirector}} Anti-Aircraft Fire Director
| + | |{{EquipmentLink|61cm Triple (Oxygen) Torpedo Mount Late Model}} |
| − | |style="text-align:center;"|[[Type 91 Anti-Aircraft Fire Director]]
| + | | |
| − | |style="text-align:center;"|[[Type 94 Anti-Aircraft Fire Director]] | |
| | |- | | |- |
| − | | rowspan="2" style="text-align:center;"|[[Type 94 Anti-Aircraft Fire Director]]'''*''' | + | |{{EquipmentLink|61cm Quadruple (Oxygen) Torpedo Mount Late Model}} |
| − | |style="text-align:center;"|[[10cm Twin High-angle Mount + Anti-Aircraft Fire Director]] | + | | |
| | |- | | |- |
| − | |style="text-align:center;"|[[12.7cm Twin High-angle Mount + Anti-Aircraft Fire Director]] | + | |{{EquipmentLink|533mm Triple Torpedo Mount (Model 53-39)}} |
| | + | | |
| | |- | | |- |
| − | | rowspan="6"|{{TorpedoWeapon}}Torpedo
| + | !rowspan=2|{{Sub Torpedo}} |
| − | |style="text-align:center;"|[[61cm Triple Torpedo Mount]] | + | |{{EquipmentLink|Late Model 53cm Bow Torpedo Mount (8 tubes)}} |
| − | |style="text-align:center;"|[[61cm Triple (Oxygen) Torpedo Mount|61cm Triple O<sub>2</sub> Torpedo Mount]]
| + | | |
| | |- | | |- |
| − | |style="text-align:center;"|[[61cm Triple (Oxygen) Torpedo Mount|61cm Triple O<sub>2</sub> Torpedo Mount]] | + | |{{EquipmentLink|Skilled Sonar Personnel + Late Model Bow Torpedo Mount (4 tubes)}} |
| − | |style="text-align:center;"|[[61cm Quad O2 Torpedo Mount|61cm Quad O<sub>2</sub> Torpedo Mount]] ★+5 | + | |Not improvable |
| | |- | | |- |
| − | |style="text-align:center;"|[[61cm Quad Torpedo Mount]] | + | !{{Minisub}} |
| − | |style="text-align:center;"|[[61cm Quad O2 Torpedo Mount|61cm Quad O<sub>2</sub> Torpedo Mount]] ★+3 | + | |{{EquipmentLink|Type C Kouhyouteki |
| | + | }} |
| | + | | |
| | |- | | |- |
| − | |style="text-align:center;"|[[61cm Quad O2 Torpedo Mount|61cm Quad O<sub>2</sub> Torpedo Mount]]
| + | !rowspan=7|{{Fighter}} |
| − | |style="text-align:center;"|[[61cm Quint O2 Torpedo Mount|61cm Quint O<sub>2</sub> Torpedo Mount]] | + | |{{EquipmentLink|Reppuu Model 11}} |
| | + | | |
| | |- | | |- |
| − | |style="text-align:center;"|[[61cm Quint O2 Torpedo Mount|61cm Quint O<sub>2</sub> Torpedo Mount]] | + | |{{EquipmentLink|Seafire Mk.III Kai}} |
| − | |style="text-align:center;"|'''''Impossible to upgrade''''' | + | | |
| | |- | | |- |
| − | |style="text-align:center;"|[[Prototype 61cm Sextuple (Oxygen) Torpedo Mount|Prototype 61cm Sextuple O<sub>2</sub> Torpedo Mount]] | + | |{{EquipmentLink|Sea Gladiator}} |
| − | |style="text-align:center;"|'''''Impossible to upgrade''''' | + | |Not improvable |
| | |- | | |- |
| − | | rowspan="4"|{{Sonar}}Sonar
| + | |{{EquipmentLink|Shiden Kai 4}} |
| − | | rowspan="2" style="text-align:center;"|[[Type 93 SONAR]]
| + | | |
| − | |style="text-align:center;"|[[Type 3 SONAR]] ★+3 | |
| | |- | | |- |
| − | |style="text-align:center;"|[[Type 4 SONAR]] | + | |{{EquipmentLink|Type 0 Fighter Model 64 (Air Superiority Fighter Specification)}} |
| | + | | |
| | |- | | |- |
| − | |style="text-align:center;"|[[Type 3 SONAR]] | + | |{{EquipmentLink|FR-1 Fireball}} |
| − | |style="text-align:center;"|'''''Impossible to upgrade''''' | + | | |
| | |- | | |- |
| − | |style="text-align:center;"|[[Type 4 SONAR]] | + | |{{EquipmentLink|Shinden Kai 2 (Carrier-based Fighter Model Kai 2)}} |
| − | |style="text-align:center;"|'''''Impossible to upgrade''''' | + | | |
| | |- | | |- |
| − | | rowspan="2"|{{DepthCharge}}DepthCharge
| + | !{{Jet Shinden}} |
| − | |style="text-align:center;"|[[Type 94 Depth Charge]] | + | |{{EquipmentLink|Shinden Kai 3 (Prototype Jet Shinden)}} |
| − | |style="text-align:center;"|[[Type 3 Depth Charge]] ★+3 | + | |Not improvable |
| | |- | | |- |
| − | |style="text-align:center;"|[[Type 3 Depth Charge]]
| + | !rowspan=11|{{Dive Bomber}} |
| − | |style="text-align:center;"|'''''Impossible to upgrade''''' | + | |{{EquipmentLink|SBD-5}} |
| | + | | |
| | |- | | |- |
| − | | rowspan="2"|{{Searchlight}}Searchlights
| + | |{{EquipmentLink|SB2C-3}} |
| − | |style="text-align:center;"|[[Searchlight]] | + | | |
| − | |style="text-align:center;"|[[Type 96 150cm Searchlight]]
| |
| | |- | | |- |
| − | |style="text-align:center;"|[[Type 96 150cm Searchlight]] | + | |{{EquipmentLink|SB2C-5}} |
| − | |style="text-align:center;"|'''''Impossible to upgrade''''' | + | | |
| | |- | | |- |
| − | | rowspan="8"|{{Radar}}Radars
| + | |{{EquipmentLink|F4U-4}} |
| − | |style="text-align:center;"|[[Type 13 Air RADAR]] | + | | |
| − | |style="text-align:center;"|[[Type 13 Air RADAR Kai]]
| |
| | |- | | |- |
| − | |style="text-align:center;"|[[Type 13 Air RADAR Kai]] | + | |{{EquipmentLink|Type 0 Fighter Model 64 (Two-seat w/ KMX)}} |
| − | |style="text-align:center;"|'''''Impossible to upgrade''''' | + | | |
| | |- | | |- |
| − | |style="text-align:center;"|[[Type 21 Air RADAR]] | + | |{{EquipmentLink|Type 0 Fighter Model 64 (Skilled Fighter-bomber)}} |
| − | |style="text-align:center;"|[[Type 21 Air RADAR Kai]] | + | | |
| | |- | | |- |
| − | |style="text-align:center;"|[[Type 21 Air RADAR Kai]] | + | |{{EquipmentLink|SBD (Yellow Wings)}} |
| − | |style="text-align:center;"|'''''Impossible to upgrade''''' | + | | |
| | |- | | |- |
| − | |style="text-align:center;"|[[Type 22 Surface RADAR]] | + | |{{EquipmentLink|SBD VB-2 (Bomber Squadron)}} |
| − | |style="text-align:center;"|[[Type 22 Surface RADAR Kai 4]] | + | | |
| | |- | | |- |
| − | |style="text-align:center;"|[[Type 22 Surface RADAR Kai 4]] | + | |{{EquipmentLink|Prototype Myoujou (Additional Trial Model)}} |
| − | |style="text-align:center;"|'''''Impossible to upgrade''''' | + | | |
| | |- | | |- |
| − | |style="text-align:center;"|[[Type 32 Surface RADAR]] | + | |{{EquipmentLink|Myoujou Kai}} |
| − | |style="text-align:center;"|[[Type 32 Surface RADAR Kai]] | + | | |
| | |- | | |- |
| − | |style="text-align:center;"|[[Type 32 Surface RADAR Kai]] | + | |{{EquipmentLink|Ju 87C Kai}} |
| − | |style="text-align:center;"|'''''Impossible to upgrade''''' | + | | |
| | |- | | |- |
| − | | rowspan="4"|{{Seaplane}}Seaplane
| + | !rowspan=3|{{Night Dive Bomber}} |
| − | |style="text-align:center;"|[[Type 0 Recon Seaplane]] | + | |{{EquipmentLink|Type 99 Training Bomber Model 22 Kai (Experimental w/ Night Equipment)}} |
| − | |style="text-align:center;"|[[Type 2 Seaplane Fighter Kai]] | + | | |
| | |- | | |- |
| − | |style="text-align:center;"|[[Type 0 Observation Seaplane]] | + | |{{EquipmentLink|Type 0 Fighter Model 62 Kai (Night Fighter-bomber)}} |
| − | |style="text-align:center;"|'''''Impossible to upgrade''''' | + | |Not improvable |
| | |- | | |- |
| − | |style="text-align:center;"|[[Type 98 Recon Seaplane (Night Scout)]] | + | |{{EquipmentLink|Type 0 Fighter Model 62 Kai (Skilled/Night Fighter-bomber)}} |
| − | |style="text-align:center;"|'''''Impossible to upgrade''''' | + | |Not improvable |
| | |- | | |- |
| − | |style="text-align:center;"|[[Ro.43 Recon Seaplane]]
| + | !rowspan=6|{{Torpedo Bomber}} |
| − | |style="text-align:center;"|[[Ro.44 Seaplane Fighter]] | + | |{{EquipmentLink|Barracuda Mk.II}} |
| | + | | |
| | |- | | |- |
| − | | rowspan="2"|{{LandingCraft}}Landing Craft
| + | |{{EquipmentLink|Barracuda Mk.III}} |
| − | |style="text-align:center;"|[[Daihatsu-class Landing Craft]]
| + | | |
| − | |style="text-align:center;"|[[Daihatsu-class Landing Craft (Type 89 Medium Tanks & Marines)]] | |
| | |- | | |- |
| − | |style="text-align:center;"|[[Daihatsu-class Landing Craft (Type 89 Medium Tanks & Marines)]] | + | |{{EquipmentLink|TBD (Yellow Wings)}} |
| − | |style="text-align:center;"|[[Type 2 Ka-Mi Tank]] | + | | |
| | |- | | |- |
| − | | rowspan="8"|{{GreenPlane}}Fighters
| + | |{{EquipmentLink|Type 97 Torpedo Bomber Kai (Northeastern Air Group)}} |
| − | |style="text-align:center;"|[[Type 96 Fighter]] | + | |Not improvable |
| − | |style="text-align:center;"|[[Zero Fighter Type 21]] ★+3
| |
| | |- | | |- |
| − | |style="text-align:center;"|[[Zero Fighter Type 21]] | + | |{{EquipmentLink|Bf 109T Kai}} |
| − | |style="text-align:center;"|[[Zero Fighter Type 32]] ★+3 | + | | |
| | |- | | |- |
| − | |style="text-align:center;"|[[Zero Fighter Type 32]] | + | |{{EquipmentLink|Ryuusei Kai (Tomonaga Squadron)}} |
| − | |style="text-align:center;"|[[Zero Fighter Type 52]] ★+3 | + | | |
| | |- | | |- |
| − | |style="text-align:center;"|[[Zero Fighter Type 52]]
| + | !rowspan=6|{{Carrier Recon}} |
| − | |style="text-align:center;"|'''''Impossible to upgrade''''' | + | |{{EquipmentLink|Saiun}} |
| | + | |Not improvable |
| | |- | | |- |
| − | |style="text-align:center;"|[[Zero Fighter Type 21 (Skilled)]] | + | |{{EquipmentLink|Type 2 Reconnaissance Aircraft}} |
| − | |style="text-align:center;"|[[Zero Fighter Type 32 (Skilled)]] ★+3<br>Can also be upgraded directly to [[Zero Fighter Type 52 (Skilled)]] via a [[Quests#F25|monthly quest]].<br>Any improvements (★) will be carried over to the new model after the quest is completed. | + | | |
| | |- | | |- |
| − | |style="text-align:center;"|[[F4F-3]] | + | |{{EquipmentLink|Saiun (Eastern Caroline Air Group)}} |
| − | |style="text-align:center;"|[[F4F-4]] | + | |Not improvable |
| | |- | | |- |
| − | |style="text-align:center;"|[[F4F-4]] | + | |{{EquipmentLink|Saiun (4th Recon Squad)}} |
| − | |style="text-align:center;"|[[F6F-3]] | + | |Not improvable |
| | |- | | |- |
| − | |style="text-align:center;"|[[F6F-3]] | + | |{{EquipmentLink|Fulmar (Reconnaissance Fighter/Skilled)}} |
| − | |style="text-align:center;"|'''''Impossible to upgrade''''' | + | | |
| | |- | | |- |
| − | |{{YellowPlane}}Reconnaisance Aircraft | + | |{{EquipmentLink|SBD VS-2 (Reconnaissance Squadron)}} |
| − | |style="text-align:center;"|[[Prototype Keiun]]
| + | | |
| − | |style="text-align:center;"|[[Jet Keiun Kai]] | |
| | |- | | |- |
| − | |}
| + | !{{Large Recon}} |
| − | | + | |{{EquipmentLink|Prototype Keiun (Carrier-based Reconnaissance Model)}} |
| − | ==Improvement Material ([[Quests|Quest]] Rewards)==
| + | | |
| − | | |
| − | {| class="wikitable" | |
| − | !Quest Type
| |
| − | !Quest ID
| |
| − | !Quest Name (JP)
| |
| − | !Description
| |
| − | ![[File:Improvement_Materials.png|35x35px]]
| |
| − | !Note
| |
| | |- | | |- |
| − | | rowspan="16" style="text-align:center;" |'''Once'''
| + | !rowspan=9|{{SPR}} |
| − | | style="text-align:center; background-color: rgb(152, 217, 142);" |'''[[Quests#A45|A45]]'''
| + | |{{EquipmentLink|Ar196 Kai}} |
| − | | {{lang|ja|改修工廠を準備せよ!}} | |
| − | |Have [[Akashi]] as flagship in your main fleet.
| |
| − | | style="text-align:center;" |'''5'''
| |
| | | | | | |
| | |- | | |- |
| − | | style="text-align:center; background-color: rgb(179, 149, 123);" |'''[[Quests#F17|F17]]'''
| + | |{{EquipmentLink|Shiun}} |
| − | | {{lang|ja|はじめての「装備改修」!}} | + | | |
| − | |Do equipment modernization 1 time | |
| − | | style="text-align:center;" |'''7'''
| |
| − | |Consumes [[File:Improvement_Materials.png|25x25px]].
| |
| | |- | | |- |
| − | | style="text-align:center; background-color: rgb(152, 217, 142);" |'''[[Quests#A44|A44]]'''
| + | |{{EquipmentLink|OS2U}} |
| − | | {{lang|ja|「西村艦隊」を再編成せよ!}} | |
| − | |Organize the Nishimura Fleet
| |
| − | | style="text-align:center;" |'''3'''
| |
| | | | | | |
| | |- | | |- |
| − | | style="text-align:center; background-color: rgb(152, 217, 142);" |'''[[Quests#A49|A49]]'''
| + | |{{EquipmentLink|SOC Seagull}} |
| − | | {{lang|ja|「第二二駆逐隊」を編成せよ!}} | |
| − | |Compose the 22nd DesDiv
| |
| − | | style="text-align:center;" |'''3'''
| |
| | | | | | |
| | |- | | |- |
| − | | style="text-align:center; background-color: rgb(152, 217, 142);" |'''[[Quests#A64|A64]]'''
| + | |{{EquipmentLink|SOC Seagull Late Model (Skilled)}} |
| − | | {{lang|ja|「新編成航空戦隊」を編成せよ!}} | |
| − | | Have 2 (BBV and/or CAV), 2 DDs, and 2 CV(L)s in your fleet.
| |
| − | | style="text-align:center;" |'''2'''
| |
| | | | | | |
| | |- | | |- |
| − | | style="text-align:center; background-color: rgb(255, 153, 153);" |'''[[Quests#B33|B33]]''' | + | |{{EquipmentLink|SO3C Seamew Kai}} |
| − | | {{lang|ja|「西村艦隊」南方海域へ進出せよ!}} | + | |Not improvable |
| − | |Deploy the Nishimura Fleet to [[World 5#5-1|5-1]] and obtain an S-victory at the boss node. | + | |- |
| − | | style="text-align:center;" |'''5''' | + | |{{EquipmentLink|Shiun (Skilled)}} |
| | + | |Not improvable |
| | + | |- |
| | + | |{{EquipmentLink|Type 0 Small Reconnaissance Seaplane}} |
| | | | | | |
| | |- | | |- |
| − | | style="text-align:center; background-color: rgb(255, 153, 153);" |'''[[Quests#B38|B38]]''' | + | |{{EquipmentLink|Type 0 Small Reconnaissance Seaplane (Skilled)}} |
| − | | {{lang|ja| 「那智戦隊」抜錨せよ!}} | + | |Not improvable |
| − | |Deploy the Nachi Squadron to [[World 2#2-2|2-2]] and obtain an S-victory at the boss node. | + | |- |
| − | | style="text-align:center;" |'''2''' | + | !rowspan=2|{{Night Recon}} |
| | + | |{{EquipmentLink|Loire 130M}} |
| | + | |- |
| | + | |{{EquipmentLink|Loire 130M Kai (Skilled)}} |
| | + | |Not improvable |
| | + | |- |
| | + | !{{SPF}} |
| | + | |{{EquipmentLink|Kyoufuu Kai 2}} |
| | | | | | |
| | |- | | |- |
| − | | style="text-align:center; background-color: rgb(255, 153, 153);" |'''[[Quests#B41|B41]]'''
| + | !rowspan=4|{{Liaison}} |
| − | | {{lang|ja| 新編「三川艦隊」ソロモン方面へ!}} | + | |{{EquipmentLink|Type 3 Command Liaison Aircraft Kai}} |
| − | |Deploy the Mikawa Fleet to [[World 5#5-1|5-1]] and obtain an S-victory at the boss node. | |
| − | | style="text-align:center;" |'''3''' | |
| | | | | | |
| | |- | | |- |
| − | | style="text-align:center; background-color: rgb(255, 153, 153);" |'''[[Quests#B44|B44]]'''
| + | |{{EquipmentLink|Type 1 Fighter Hayabusa Model II Kai (20th Squadron)}} |
| − | | {{lang|ja| 海上突入部隊、進発せよ!}} | |
| − | |Deploy the Maritime Assault Fleet to [[World 5#5-1|5-1]] and obtain an S-victory at the boss node.
| |
| − | | style="text-align:center;" |'''2'''
| |
| | | | | | |
| | |- | | |- |
| − | | style="text-align:center; background-color: rgb(255, 153, 153);" |'''[[Quests#B45|B45]]'''
| + | |{{EquipmentLink|Type 1 Fighter Hayabusa Model III Kai (Skilled/20th Squadron)}} |
| − | | {{lang|ja| 「第六駆逐隊」対潜哨戒を徹底なのです!}} | + | |Not improvable |
| − | |Deploy the 6th DesDiv to [[World 1#1-5|1-5]] and obtain an A-victory or higher at the boss node. | + | |- |
| − | | style="text-align:center;" |'''2''' | + | |{{EquipmentLink|Type 3 Command Liaison Aircraft Kai 2}} |
| | | | | | |
| | |- | | |- |
| − | | style="text-align:center; background-color: rgb(255, 153, 153);" |'''[[Quests#B47|B47]]'''
| + | !rowspan=3|{{Depth Charge}} |
| − | | {{lang|ja| 「第一水雷戦隊」北方ケ号作戦、再突入!}} | + | |{{EquipmentLink|Type 2 Depth Charge}} |
| − | |Deploy the First Torpedo Squadron to [[World 3#3-2|3-2]] and obtain an S-victory at the boss node. | |
| − | | style="text-align:center;" |'''4'''
| |
| | | | | | |
| | |- | | |- |
| − | | style="text-align:center; background-color: rgb(255, 153, 153);" |'''[[Quests#B49|B49]]'''
| + | |{{EquipmentLink|Type 2 Depth Charge Kai 2}} |
| − | | {{lang|ja| 「空母機動部隊」北方海域に進出せよ!}} | |
| − | |Deploy the Mobile Carrier Fleet to [[World 3#3-5|3-5]] and obtain an S-victory at the boss node.
| |
| − | | style="text-align:center;" |'''3'''
| |
| | | | | | |
| | |- | | |- |
| − | | style="text-align:center; background-color: rgb(255, 153, 153);" |'''[[Quests#B56|B56]]''' | + | |{{EquipmentLink|Type 3 Depth Charge Projector Kai}} |
| − | | {{lang|ja| 新編成航空戦隊、北方へ進出せよ!}} | + | |Not improvable |
| − | |Deploy the New Carrier Division to [[World 3#3-3|3-3]] and obtain an S-victory at the boss node. | + | |- |
| − | | style="text-align:center;" |'''2'''
| + | !{{Small Sonar}} |
| | + | |{{EquipmentLink|Type 3 Active Sonar Kai}} |
| | | | | | |
| | |- | | |- |
| − | | style="text-align:center; background-color: rgb(255, 153, 153);" |'''[[Quests#B57|B57]]'''
| + | !{{Large Sonar}} |
| − | | {{lang|ja| 「礼号作戦」実施せよ!}} | + | |{{EquipmentLink|Type 0 Passive Sonar}} |
| − | |Deploy the Surface Counterattack Fleet to [[World 2#2-5|2-5]] and obtain an S-victory at the boss node.
| |
| − | | style="text-align:center;" |'''3'''
| |
| | | | | | |
| | |- | | |- |
| − | | style="text-align:center; background-color: rgb(255, 153, 153);" |'''[[Quests#B59|B59]]'''
| + | !rowspan=6|{{Small Radar}} |
| − | | {{lang|ja| 旗艦「霞」出撃!敵艦隊を撃滅せよ!}} | + | |{{EquipmentLink|Type 22 Surface Radar}} |
| − | |Sortie [[Kasumi|Kasumi Kai Ni]] (Kai Ni Type B is also acceptable) as flagship along with 2 other DDs and 3 other ships to [[World 2#2-5|2-5]] and obtain an S-victory at the boss node. | |
| − | | style="text-align:center;" |'''3'''
| |
| | | | | | |
| | |- | | |- |
| − | | style="text-align:center; background-color: rgb(255, 153, 153);" |'''[[Quests#B60|B60]]'''
| + | |{{EquipmentLink|Type 22 Surface Radar Kai 4}} |
| − | | {{lang|ja| 「第三十一戦隊」出撃せよ!}} | |
| − | | Sortie [[Isuzu|Isuzu Kai Ni]], [[Satsuki|Satsuki Kai Ni]], [[Uzuki|Uzuki Kai]] and up to 3 additional ships to [[World 1#1-6|1-6]] and reach the end node.
| |
| − | | style="text-align:center;" |'''3'''
| |
| | | | | | |
| | |- | | |- |
| − | | style="text-align:center;" |'''Daily''' | + | |{{EquipmentLink|Type 22 Surface Radar Kai 4 (Calibrated Late Model)}} |
| − | | style="text-align:center; background-color: rgb(179, 149, 123);" |'''[[Quests#F18|F18]]'''
| + | | |
| − | | {{lang|ja|装備の改修強化}}
| |
| − | |Do equipment modernization 1 time (failure OK) | |
| − | | style="text-align:center;" |'''1'''
| |
| − | |Consumes [[File:Improvement_Materials.png|25x25px]]; net gain impossible.
| |
| | |- | | |- |
| − | | rowspan="7" style="text-align:center;" |'''Weekly''' | + | |{{EquipmentLink|Type 13 Air Radar Kai (Late Model)}} |
| − | | style="text-align:center; background-color: rgb(255, 153, 153);" |'''[[Quests#Bw5|Bw5]]''' | |
| − | |{{lang|ja|海上護衛戦}}
| |
| − | |Sink 15 submarines.
| |
| − | | style="text-align:center;" |'''1'''
| |
| | | | | | |
| | |- | | |- |
| − | | style="text-align:center; background-color: rgb(255, 153, 153);" |'''[[Quests#Bw7|Bw7]]''' | + | |{{EquipmentLink|Radar Equipment Mast (Type 13 Kai + Type 22 Radar Kai 4)}} |
| − | |{{lang|ja|敵北方艦隊主力を撃滅せよ!}} | + | |Not improvable |
| − | |Defeat 5 bosses in the Northern Sea (3-3, 3-4, or 3-5).
| + | |- |
| − | | style="text-align:center;" |'''3'''
| + | |{{EquipmentLink|Passive Radiolocator (E27) + Type 22 Surface Radar Kai 4 (Calibrated Late Model)}} |
| | | | | | |
| | |- | | |- |
| − | | style="text-align:center; background-color: rgb(255, 153, 153);" |'''[[Quests#Bw9|Bw9]]'''
| + | !rowspan=5|{{Large Radar}} |
| − | |{{lang|ja|南方海域珊瑚諸島沖の制空権を握れ!}} | + | |{{EquipmentLink|FuMO25 Radar}} |
| − | |2 S-rank victories at the boss node of [[World 5#5-2|5-2]].
| |
| − | | style="text-align:center;" |'''2'''
| |
| | | | | | |
| | |- | | |- |
| − | | style="text-align:center; background-color: rgb(255, 153, 153);" |'''[[Quests#Bw10|Bw10]]'''
| + | |{{EquipmentLink|Type 21 Air Radar Kai 2}} |
| − | |{{lang|ja|海上輸送路の安全確保に努めよ!}} | |
| − | |3 A-rank or better victories at boss node of [[World 1#1-5|1-5]].
| |
| − | | style="text-align:center;" |'''3'''
| |
| | | | | | |
| | |- | | |- |
| − | | style="text-align:center; background-color: rgb(152, 217, 142);" |'''[[Quests#C4|C4]]'''
| + | |{{EquipmentLink|Type 42 Air Radar Kai 2}} |
| − | |{{lang|ja|大規模演習}} | |
| − | |Get 20 victories in [[Exercises (PvP)]] within the same week.
| |
| − | | style="text-align:center;" |'''1'''
| |
| | | | | | |
| | |- | | |- |
| − | | style="text-align:center; background-color: rgb(160, 216, 239);" |'''[[Quests#D11|D11]]''' | + | |{{EquipmentLink|Type 281 Radar}} |
| − | |{{lang|ja|南方への鼠輸送を継続実施せよ!}} | + | |Not improvable |
| − | |Complete Expedition 37 or 38 a total of 7 times in a week. | + | |- |
| − | | style="text-align:center;" |'''1''' | + | |{{EquipmentLink|Type 274 Fire Control Radar}} |
| | + | |Not improvable |
| | + | |- |
| | + | !{{Submarine Radar}} |
| | + | |{{EquipmentLink|Late Model Radar & Passive Radiolocator + Snorkel Equipment}} |
| | + | |Not improvable |
| | + | |- |
| | + | !rowspan=2|{{AA Shell}} |
| | + | |{{EquipmentLink|Type 3 Shell Kai}} |
| | | | | | |
| | |- | | |- |
| − | | style="text-align:center; background-color: rgb(179, 149, 123);" |'''[[Quests#F34|F34]]'''
| + | |{{EquipmentLink|Type 3 Shell Kai 2}} |
| − | |{{lang|ja|対空機銃量産}} | |
| − | |Scrap 6 Anti-Air Guns.
| |
| − | | style="text-align:center;" |'''1'''
| |
| | | | | | |
| | |- | | |- |
| − | | rowspan="5" style="text-align:center;" |'''Monthly'''
| + | !rowspan=2|{{Lookout}} |
| − | | style="text-align:center; background-color: rgb(255, 153, 153);" |'''[[Quests#Bm3|Bm3]]'''
| + | |{{EquipmentLink|Skilled Lookouts}} |
| − | |{{lang|ja|「水雷戦隊」南西へ!}} | |
| − | |S-rank victory at boss node of [[World 1#1-4|1-4]] with a fleet consisting of 1~3 CLs (1 of which is flagship) and rest DDs.
| |
| − | | style="text-align:center;" |'''3'''
| |
| | | | | | |
| | |- | | |- |
| − | | style="text-align:center; background-color: rgb(255, 153, 153);" |'''[[Quests#Bm4|Bm4]]'''
| + | |{{EquipmentLink|Torpedo Squadron Skilled Lookouts}} |
| − | |{{lang|ja|「水上打撃部隊」南方へ!}} | + | |Not improvable |
| − | |S-rank victory at boss node of [[World 5#5-1|5-1]] with a fleet consisting of 3 slow BB, 1 CL, and up to 2 other ships. | |
| − | | style="text-align:center;" |'''4'''
| |
| − | | BBV counts as slow BB for this.
| |
| | |- | | |- |
| − | | style="text-align:center; background-color: rgb(255, 153, 153);" |'''[[Quests#Bm5|Bm5]]'''
| + | !{{Turbine}} |
| − | |{{lang|ja|海上護衛強化月間}} | + | |{{EquipmentLink|New Model High Temperature High Pressure Boiler}} |
| − | |10 A-rank or better victories at boss node of [[World 1#1-5|1-5]].
| |
| − | | style="text-align:center;" |'''3'''
| |
| | | | | | |
| | |- | | |- |
| − | | style="text-align:center; background-color: rgb(255, 153, 153);" |'''[[Quests#Bm6|Bm6]]'''
| + | !rowspan=3|{{Extra Armor}} |
| − | |{{lang|ja|「空母機動部隊」西へ!}} | + | |{{EquipmentLink|Pugliese Underwater Protection Bulkhead}} |
| − | |S-rank victory at boss node of [[World 4#4-2|4-2]] with a fleet consisting of 2 CV, 2 DD, and up to 2 other ships.
| |
| − | | style="text-align:center;" |'''2'''
| |
| | | | | | |
| | |- | | |- |
| − | | style="text-align:center; background-color: rgb(255, 153, 153);" |'''[[Quests#Bm7|Bm7]]''' | + | |{{EquipmentLink|New Kanhon Design Anti-torpedo Bulge (Large)}} |
| − | |{{lang|ja|「水上反撃部隊」突入せよ!}} | + | | |
| − | |S-rank victory at boss node of [[World 2#2-5|2-5]] with 4 DD (1 of which is flagship), 1 CL, and 1 CA. | + | |- |
| − | | style="text-align:center;" |'''2''' | + | |{{EquipmentLink|Arctic Camouflage (+ Arctic Equipment)}} |
| | + | |Not improvable |
| | + | |- |
| | + | !rowspan=2|{{Aviation Personnel}} |
| | + | |{{EquipmentLink|Night Operation Aviation Personnel}} |
| | + | |Not improvable |
| | + | |- |
| | + | |{{EquipmentLink|Skilled Deck Personnel + Aviation Maintenance Hands}} |
| | | | | | |
| | + | |- |
| | + | !{{FCF}} |
| | + | |{{EquipmentLink|Fleet Communication Antenna}} |
| | + | | |
| | + | |- |
| | + | !rowspan=2|{{Amphibious Tank}} |
| | + | |{{EquipmentLink|Special Type 4 Amphibious Tank}} |
| | + | |Not improvable |
| | + | |- |
| | + | |{{EquipmentLink|Special Type 4 Amphibious Tank Kai}} |
| | + | |Not improvable |
| | |} | | |} |
| | + | |
| | + | ==Equipability== |
| | + | The following equipment have enhanced [[Equipment/Equipability|equipability]] when improved: |
| | + | |
| | + | {|class="wikitable" |
| | + | ! Type |
| | + | ! Equipment |
| | + | ! Minimum Level |
| | + | ! [[RE]] Equipability |
| | + | |- |
| | + | !{{Small Radar}} |
| | + | |{{EquipmentLink|Passive Radiolocator (E27) + Type 22 Surface Radar Kai 4 (Calibrated Late Model)}} |
| | + | |{{Star}}+4 |
| | + | |FBB: {{Class|Kongou|Kai Ni B/C}}<br>DD: {{Class|Kagerou}}, {{Class|Yuugumo}}, {{Class|Matsu}}, [[Shimakaze Kai]], [[Shigure Kai San]], [[Harusame Kai Ni]] |
| | + | |- |
| | + | !{{Large Radar}} |
| | + | | {{EquipmentLink|FuMO25 Radar}} |
| | + | |{{Star}}+7 |
| | + | |FBB: {{Class|Bismarck}}<br>CA: {{Class|Admiral Hipper}} |
| | + | |- |
| | + | !{{Medium Armor}} |
| | + | |{{EquipmentLink|Arctic Camouflage (+ Arctic Equipment)}} |
| | + | |{{Star}}+7 |
| | + | |FBB: {{Class|Gangut}}<br>CL/T: [[Tama]], [[Kiso]], [[Abukuma]], [[Gotland]], {{Class|Kirov}}<br>DD: [[Tashkent]]<br>AO: [[Ootomari]] |
| | + | |- |
| | + | !{{Small HA Gun}} |
| | + | |{{EquipmentLink|12.7cm Single High-angle Gun Mount Kai 2}} |
| | + | |{{Star}}+7 |
| | + | |DD: [[Fubuki Kai Ni]]+, [[Ayanami Kai Ni]], [[Ushio Kai Ni]], [[Akatsuki Kai Ni]], [[Hatsushimo Kai Ni]], [[Shigure Kai Ni]]+, [[Yuudachi Kai Ni]], [[Isokaze B Kai]], [[Yukikaze Kai Ni]] |
| | + | |} |
| | + | |
| | + | ==Resource Node Bonus== |
| | + | Uniquely on the [[Resource Node]]s of [[1-6]] and [[3-5]], improvements {{Star}} slightly increase resource gains. |
| | + | {{Gain Modifier Sp2}} |
| | + | |
| | + | ==Expeditions Bonus== |
| | + | For expedition stats requirements, improvements {{Star}} are globally simplified, overwriting the above-mentioned improvements. |
| | + | *''See [[Expeditions#Adjusted Improvement|here]] for more details |
| | + | |
| | + | =See Also= |
| | + | *[[Akashi's Improvement Arsenal]] |
| | + | *[[Improvement/Categories]] |
| | + | *[[Improvement/Helper]] |
| | + | *[[Help:Akashi Upgrades]] |
| | + | *https://akashi-list.me/ |
| | + | {{Mechanics}} |
 +1 to
+1 to  (+10).
 , Suisei (Egusa Squadron)
 & Reppuu (601 Air Group)
 (through F13-14-15 respectively, unimprovable otherwise).
 & OTO
& OTO

 & T2/K2 DC
 improvement only serves to upgrade into Special Onigiri
 .
.
 Searchlights do NOT increase:
 Lookouts do NOT increase Night Cut-In rate,
 Submarine Equipments do NOT increase Night Cut-In rate [4].


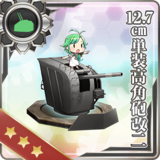
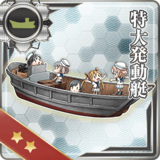
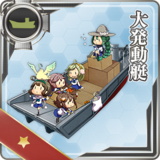
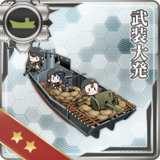
 [3]
[3]