Fall 2025 Event/E-2
 
| |||||||||
|---|---|---|---|---|---|---|---|---|---|
 
The 2nd FF wave is there !!
Time remaining until the Event's end (as well as the Saury Festival)
| |||||||||
ナルヴィク防衛戦
![]()
![]()


| Information | ||||
|---|---|---|---|---|
| Event Tag | ||||
| Boss Gauges | Hard (甲): 1755 HP + 920 TP + 4620 HP | |||
| Medium (乙): 1755 HP + 800 TP + 3520 HP | ||||
| Easy (丙): 1575 HP + 600 TP + 3520 HP | ||||
| Casual (丁): 1575 HP + 500 TP + 2420 HP | ||||
| Map Bosses | Heavy Cruiser Princess
| |||
Light Cruiser Mu-Class
| ||||
Solitary Fjord Princess
| ||||
| Rewards[edit] | ||||
|---|---|---|---|---|
| Choice | 丁 Casual |
丙 Easy |
乙 Medium |
甲 Hard |
Equipment Slots |
2 | 3 | 4 | 5 |
| OR | ||||
Development Material |
10 | 12 | 16 | 20 |
| THEN | ||||
Fuel |
1600 | 2400 | 3600 | 4800 |
| OR | ||||
Emergency Repair Goddess |
1 | 1 | 2 | 2 |
| THEN | ||||
 Communication Equipment & Personnel |
1 | 1 | ||
| OR | ||||
 Arctic Camouflage (+ Arctic Equipment) |
1 (★6) | 1 (★8) | ||
| THEN | ||||
Latest Overseas Warship Technology |
2 | |||
| OR | ||||
 Toku Daihatsu Landing Craft + Panzer III Ausf. J |
1 | |||
| Reward | 丁 Casual |
丙 Easy |
乙 Medium |
甲 Hard |
|---|---|---|---|---|
Food Supply Ship Mamiya |
1 | 1 | 2 | 3 |
Medal |
2 | |||
 Sea Gladiator |
1 (★3) | 1 (★7) | 1 (★8) | |
 Ju 87D-4 (Fliegerass) |
1 | 1 (★1) | 1 (★2) |

The event guides are to be constructed through the respective Event map page guide sandbox and reviewed by editors before being approved here.
- Do not update the guides through this page unless it is a minor fix. Please only update guides through their respective sandbox pages.
Branching Table
| E-2 Branching Rules (Start Points) ▼/▲ | ||
|---|---|---|
| Nodes | Rules | |
| Start | 1 |
|
2 |
| |
| E-2 Branching Rules (Start Point 1) ▼/▲ | ||
|---|---|---|
| Nodes | Rules | |
A |
B |
|
F | ||
B |
C |
|
D |
| |
D |
E |
|
K |
| |
F |
G |
|
I |
| |
G |
H |
|
I |
| |
K |
E |
|
L |
| |
L |
M |
|
| E-2 Branching Rules (Start Point 2) ▼/▲ | ||
|---|---|---|
| Nodes | Rules | |
2 |
K |
|
N |
| |
K |
L |
|
O |
| |
P |
| |
L |
O |
|
T |
U |
|
V |
| |
V |
W |
|
Y |
| |
* = Rule under review
? = Ship type/amount under review
Branching compositions are reported over the course of the event.
- Please refer to KCNav for up to date map content (fleets used, LoS/speed requirements/drops/LBAS ranges, ...)
Historical Bonuses
DISCLAIMER: This information is based on user-submitted data and is subject to revisions as more data is gathered. Any version of the ship receives the bonus regardless of remodel unless otherwise specified.
| Ships [1] [Toggle Names] |
Map-wide | Node E Stacks with Map-wide |
Node V Stacks with Map-wide |
Node S/X Stacks with Map-wide |
Node Y Stacks with Map-wide | |||||||||||
|---|---|---|---|---|---|---|---|---|---|---|---|---|---|---|---|---|
| Damage | Damage | Damage | Damage | Damage | ||||||||||||
| Coastal Defense Ships (DE) | 1.12x | - | ||||||||||||||
| Destroyers (DD) | 1.03x | |||||||||||||||
| Light Cruisers (CL) NOT CLT |
1.05x | |||||||||||||||
| Seaplane Tenders (AV) Submarine Tenders (AS) |
1.08x | |||||||||||||||
| Light Aircraft Carriers (CVL) | 1.04x | |||||||||||||||
Warspite |
1.15x | 1.06x | 1.07x | - | 1.09x | |||||||||||
Valiant |
1.09x | - | 1.06x | |||||||||||||
|
1.15x | - | 1.06x | |||||||||||||
|
1.13x | |||||||||||||||
|
1.04x | - | ||||||||||||||
|
1.05x | |||||||||||||||
|
1.09x | |||||||||||||||
|
1.03x | |||||||||||||||
|
1.26x | |||||||||||||||
Against the European Water Princess only: ![]()
| Ships [Toggle Names] |
Damage bonus |
|---|---|
Ark Royal Kai Bismarck Drei Nelson Kai Prinz Eugen Kai Gotland Andra |
1.15x |
| Equipment | Damage Bonus |
|---|---|
|
1.15x |
| 1.1x | |
|
1 = 1.2x 2 = ?x |
Foreign Plane Bonuses have returned and should be examined when planning equipment setups. The following bonuses are applied:
- Ships using planes get bonuses based on the different categories of bonuses A, B, and C.
- A# groups are the general foreign plane bonuses, being divided into three "levels" (A1<A2<A3) and being both map-wide and node-specific
- B# bonuses are primarily for Seaplanes, being divided into three "levels" (B1<B2<B3<B4)
- B1 is the French bonus
- B2 is the swordfish bonus
- B3 is the British recon bonus
- B4 is the German bonus
- C# bonuses are primarily for LBAS (with ship-based & land-based planes), and are divided into three "levels" (C1<C2<C3).
- C3 appears to be reserved for
 Heavy Bombers
 - Unlike the previous event, the C# bonuses do not apply to ships
- C3 appears to be reserved for
- Notes
- These bonuses work for all ships and for all attack types, including: LBAS, jet assault, airstrikes, air/surface shelling, and night attacks.
- Bonuses from a same line or column do not stack.
- Map-wide bonuses and node-specific bonuses always stack.
- Bonuses do not work for planes equipped in 0-slot for ships.
- Bonuses do not work on 0-slot for LBAS.
| Historical Plane Damage Bonuses | |||||
|---|---|---|---|---|---|
| Group | Multipliers | ||||
| Mapwide | Node S/X | Node Y | |||
| A | 1 | 1.03x | 1.02x | 1.03x | |
| 2 | 1.04x | 1.03x | 1.04x | ||
| 3 | 1.05x | 1.04x | 1.05x | ||
| B | 1 | - | 1.02x | 1.02x | |
| 2 | 1.04x | 1.04x | |||
| 3 | 1.04x | 1.05x | |||
| 4 | 1.06x | 1.07x | |||
| C | 1 | 1.03x | 1.03x | ||
| 2 | 1.05x | 1.05x | |||
| 3 | 1.2x(?) | ?? | |||
| Ship Effects Carrier Planes [Toggle Names] | |||
|---|---|---|---|
| A1 | A2 | A3 | |
| 0 |
 F4F-3  F4F-4  F6F-3  F6F-3N  F6F-5  F6F-5N  FR-1 Fireball  XF5U  Bf 109T Kai  Bf 109 T-3(G)  Fw 190T Kai  Fw 190 A-5 Kai (Skilled)  TBD  TBD (Yellow Wings)  TBF  TBM-3D  TBM-3W+3S  FM-2  F4U-1D  SBD  SBD (Yellow Wings)  SBD-5  SB2C-3  SB2C-5 |
 F4U-2 Night Corsair  Fulmar  Sea Gladiator  Re.2001 OR Kai  Re.2001 G Kai  SBD VB-2 (Bomber Squadron)  F4U-4  AU-1  Skua  Ju 87C Kai  Ju 87C Kai 2 (w/ KMX)  Ju 87C Kai 2 (w/ KMX/Skilled)  Re.2001 CB Kai  SBD VS-2 (Reconnaissance Squadron) |
 Seafire Mk.III Kai  Corsair Mk.II  Corsair Mk.II (Ace)  Re.2005 Kai  Barracuda Mk.II  Barracuda Mk.III  Mosquito TR Mk.33  Ju 87D-4 (Fliegerass)  F4U-7 |
| B2 |
 Swordfish |
 Swordfish Mk.II (Skilled) |
 Swordfish Mk.III (Skilled) |
| B3 | - | - |
 Fulmar (Reconnaissance Fighter/Skilled) |
| Ship Effects Seaplanes [Toggle Names] | |||
|---|---|---|---|
| A1 | A2 | A3 | |
| 0 |
 OS2U  SOC Seagull  SOC Seagull Late Model (Skilled)  SO3C Seamew Kai  Ro.43 Reconnaissance Seaplane  Ro.44 Seaplane Fighter  Ro.44 Seaplane Fighter bis  S9 Osprey  Fairey Seafox Kai |
- | - |
| B1 | - |  Laté 298B |
 Loire 130M  Loire 130M Kai (Skilled) |
| B2 |
 Swordfish (Seaplane Model)  Swordfish Mk.II Kai (Reconnaissance Seaplane Model)  Swordfish Mk.III Kai (Seaplane Model/Skilled)  Swordfish Mk.III Kai (Seaplane Model) |
- | - |
| B3 | - |  Walrus |
 Sea Otter |
| B4 | - |
 Ar196 Kai |
- |
| Land-Based Effects [Toggle Names] | |||||||||||
|---|---|---|---|---|---|---|---|---|---|---|---|
| Group | LB Bombers | LB Fighters/Recons | Carrier Bombers | Carrier Fighters | Misc | ||||||
| 0 |
|
|
| ||||||||
| C1 |
 B-25  SM.79  SM.79 bis  Do 17 Z-2  Do 217 E-5 + Hs293 Initial Model  Do 217 K-2 + Fritz-X  Do 217 E-5 + TV-guided Hs293D |
 Fw 190 D-9  PBY-5A Catalina |
Bf 109T Kai Fw 190T Kai Fw 190 A-5 Kai (Skilled) Re.2001 OR Kai Re.2005 Kai Fulmar |
Walrus | |||||||
| C2 |
 SM.79 bis (Skilled)  Mosquito FB Mk.VI  Ho 229 |
 Spitfire Mk.I  Spitfire Mk.V  Spitfire Mk.IX (Skilled)  Me 262 A-1a/R1  Mosquito PR Mk.IV |
F4U-4 AU-1 F4U-7 Mosquito TR Mk.33 |
Seafire Mk.III Kai Corsair Mk.II Corsair Mk.II (Ace) F4U-2 Night Corsair |
Fulmar (Reconnaissance Fighter/Skilled) Loire 130M Sea Otter | ||||||
| C3 |
 Shinzan  Shinzan Kai |
||||||||||
- source: [2]
- Unlike the previous event, the C# bonuses do not apply to ships.
- Tips
- Carriers:
- Try to equip one plane from each column and row
- For example: A3/B2 + A2 + A1
- This also applies to ships that carry multiple plane types in normal setups.
- Other Ship Types:
- As only one seaplane is generally equipped on a ship, pick A3>A2>A1 and then the highest bonus among B groups.
- For Group 1, Group 2, and Group 3 bonuses, having one equipment from the group is enough to have the bonus.
- Equipping a second gear from the same group will not provide any additional bonus.
- The bonus groups stack with each other.
- Do not confuse the balloon mechanic fleet-wide buff with this event bonus that only buffs the individual ship equipped with it.
| Equipment | Node S/X | ||
|---|---|---|---|
Group 1
|
Barrage Balloon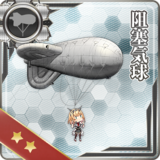 Toku DLC + 11th 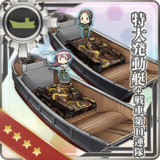 DLC + Panzer II  Toku DLC + Chi-Ha 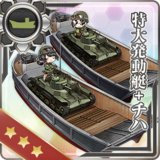 Toku DLC + Chi-Ha Kai 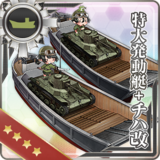 Ka-Mi tank 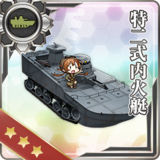 Ka-Tsu 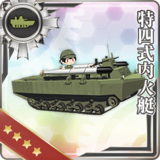 14inch/45 Twin Gun 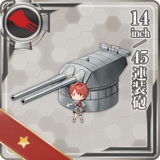 14inch/45 Triple Gun 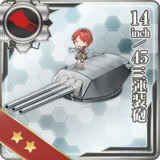
|
1.04x | |
Group 2
|
Toku DLC + Ho-Ni tank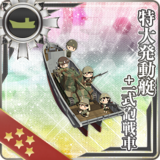 Toku DLC + Panzer III 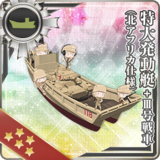 M4A1 DD 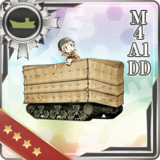 Ka-Tsu Kai 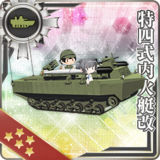
|
1.08x | |
Group 3
|
Toku DLC + Panzer III J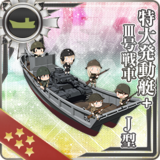
|
1.12x | |
Map Overview
E2 is a single fleet, two-phase map consisting of one transport and one boss phase.
- 2 LBAS are available to sortie on this map.
- This map uses 2 locks:
 Narvik Advance Force, Starting point 1 (reused in E-3)
 Narvik Main Defense Force, Starting point 2 (reused in E-3)
 Barrage Balloons can be deployed on node S X Y
The use of ![]() AGDP AGDP
AGDP AGDP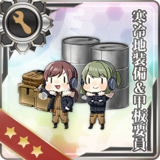 is not required for carriers despite being an Arctic map.
Phase 1 - Boss
| Boss | |||||||||||||||||||||||||||||||||||||||||||||
|---|---|---|---|---|---|---|---|---|---|---|---|---|---|---|---|---|---|---|---|---|---|---|---|---|---|---|---|---|---|---|---|---|---|---|---|---|---|---|---|---|---|---|---|---|---|
|
| ||||||||||||||||||||||||||||||||||||||||||||
| Fleet Notes | |||||||||||||||||||||||||||||||||||||||||||||
| Bringing an AACI is recommended, and some ASW can help pass node D. | |||||||||||||||||||||||||||||||||||||||||||||
| LBAS Notes | |||||||||||||||||||||||||||||||||||||||||||||
| All LBAS should be sent on the boss. | |||||||||||||||||||||||||||||||||||||||||||||
Once on LD, the CG will change to the following:
| Heavy Cruiser Princess |
|---|
|


Gimmick 1 - Unlock
To unlock the next part of the map, the following steps have to be performed:
| J | |
|---|---|
| Hard | S? |
| Medium | ? |
| Easy | - |
| Casual | - |
| Node J | |||||||||||||||||||||||||||||||||||||||||||||
|---|---|---|---|---|---|---|---|---|---|---|---|---|---|---|---|---|---|---|---|---|---|---|---|---|---|---|---|---|---|---|---|---|---|---|---|---|---|---|---|---|---|---|---|---|---|
|
| ||||||||||||||||||||||||||||||||||||||||||||
| Fleet Notes | |||||||||||||||||||||||||||||||||||||||||||||
| Bringing some AACI and ASW is recomanded. | |||||||||||||||||||||||||||||||||||||||||||||
Gimmick 2 - Unlock
To unlock the next part of the map, the following steps have to be performed:
| R | E | Q | LBAS | |
|---|---|---|---|---|
| Hard | S? | S? | S? x2 | AS x2 |
| Medium | S? | S? | ? | ? |
| Easy | S? | S? | S? | AS x1 |
| Casual | ? | ? | ? | ? |
| Node R | |||||||||||||||||||||||||||||||||||||||||||||
|---|---|---|---|---|---|---|---|---|---|---|---|---|---|---|---|---|---|---|---|---|---|---|---|---|---|---|---|---|---|---|---|---|---|---|---|---|---|---|---|---|---|---|---|---|---|
|
| ||||||||||||||||||||||||||||||||||||||||||||
| Fleet Notes | |||||||||||||||||||||||||||||||||||||||||||||
| Node E | |||||||||||||||||||||||||||||||||||||||||||||
|---|---|---|---|---|---|---|---|---|---|---|---|---|---|---|---|---|---|---|---|---|---|---|---|---|---|---|---|---|---|---|---|---|---|---|---|---|---|---|---|---|---|---|---|---|---|
|
| ||||||||||||||||||||||||||||||||||||||||||||
| Fleet Notes | |||||||||||||||||||||||||||||||||||||||||||||
| Node Q | |||||||||||||||||||||||||||||||||||||||||||||||||
|---|---|---|---|---|---|---|---|---|---|---|---|---|---|---|---|---|---|---|---|---|---|---|---|---|---|---|---|---|---|---|---|---|---|---|---|---|---|---|---|---|---|---|---|---|---|---|---|---|---|
|
| ||||||||||||||||||||||||||||||||||||||||||||||||
| Fleet Notes | |||||||||||||||||||||||||||||||||||||||||||||||||
| LBAS Notes | |||||||||||||||||||||||||||||||||||||||||||||||||
| All LBAS should be sent on the boss. | |||||||||||||||||||||||||||||||||||||||||||||||||
Phase 2 - TP
Phase 2 is a Landing Operation, where "tanks" do work better.
- Please, look at the "Flight II-A mode graph to see and use the better equipment setups.
- [math]\displaystyle{ \text{Mod}_\text{map} = 0.75 }[/math]
| Landing Operation [4] | |||
|---|---|---|---|
| Type | Equipment | [math]\displaystyle{ \text{TP}_\text{tank} }[/math] | TP total |
Daihatsu Landing Craft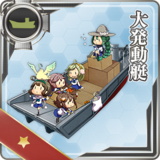 |
0 | 6 | |
DLC + T89 Tank |
8 | 14 | |
Toku Daihatsu Landing Craft |
0 | 6 | |
| Toku DLC + 11th Reg |
13 | 19 | |
| M4A1 DD |
14 | 20 | |
Armed Daihatsu |
0 | 6 | |
Soukoutei |
0 | 6 | |
| DLC + Panzer II |
10 | 16 | |
| Toku DLC + Ho-Ni Tank |
15 | 21 | |
| Toku DLC + Panzer III |
13 | 19 | |
| Toku DLC + Chi-Ha |
11 | 17 | |
| Toku DLC + Chi-Ha Kai |
13 | 19 | |
| Toku DLC + Panzer III J |
17 | 23 | |
| Ka-Mi tank |
10 | 12.5 | |
| Ka-Tsu tank |
9 | 11.5 | |
| Ka-Tsu tank Kai |
11 | 13.5 | |
Army Infantry Corps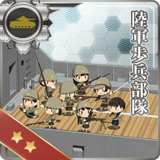 |
5 | 5 | |
Chi-Ha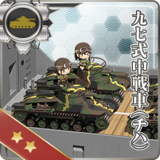 |
7 | 7 | |
Chi-Ha Kai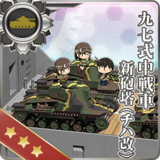 |
9 | 9 | |
Infantry + Chi-Ha Kai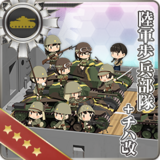 |
14 | 14 | |
Drum Canisters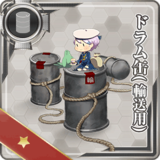 |
0 | 3.75 | |
Rations 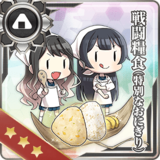 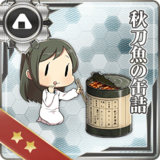 |
0 | 0.75 | |
| Short Route | |||||||||||||||||||||||||||||||||||||||||||||||||
|---|---|---|---|---|---|---|---|---|---|---|---|---|---|---|---|---|---|---|---|---|---|---|---|---|---|---|---|---|---|---|---|---|---|---|---|---|---|---|---|---|---|---|---|---|---|---|---|---|---|
|
| ||||||||||||||||||||||||||||||||||||||||||||||||
| Fleet Notes | |||||||||||||||||||||||||||||||||||||||||||||||||
Bringing AACI and some ASW is remanded to reach the boss.
| |||||||||||||||||||||||||||||||||||||||||||||||||
| LBAS Notes | |||||||||||||||||||||||||||||||||||||||||||||||||
| All LBAS should be sent on the boss. | |||||||||||||||||||||||||||||||||||||||||||||||||
Gimmick 3 - Unlock
To unlock the next part of the map, the following steps have to be performed:
| S | |
|---|---|
| Hard | S? |
| Medium | ? |
| Easy | ? |
| Casual | ? |
| Node S | |||||||||||||||||||||||||||||||||||||||||||||
|---|---|---|---|---|---|---|---|---|---|---|---|---|---|---|---|---|---|---|---|---|---|---|---|---|---|---|---|---|---|---|---|---|---|---|---|---|---|---|---|---|---|---|---|---|---|
|
| ||||||||||||||||||||||||||||||||||||||||||||
| Fleet Notes | |||||||||||||||||||||||||||||||||||||||||||||
Is an Installation node. The flagship is a hard skin installation (pillbox) with other installations present, notably an SDH, requireing a nuke setup.
| |||||||||||||||||||||||||||||||||||||||||||||
Phase 3 - Boss
| CTF Short Route | |||||||||||||||||||||||||||||||||||||||||||||||||
|---|---|---|---|---|---|---|---|---|---|---|---|---|---|---|---|---|---|---|---|---|---|---|---|---|---|---|---|---|---|---|---|---|---|---|---|---|---|---|---|---|---|---|---|---|---|---|---|---|---|
|
| ||||||||||||||||||||||||||||||||||||||||||||||||
| Fleet Notes | |||||||||||||||||||||||||||||||||||||||||||||||||
| Using 1 SS(V) is advised for subtanking. | |||||||||||||||||||||||||||||||||||||||||||||||||
| LBAS Notes | |||||||||||||||||||||||||||||||||||||||||||||||||
| All LBAS should be sent on the boss. | |||||||||||||||||||||||||||||||||||||||||||||||||
| CTF Medium Route | |||||||||||||||||||||||||||||||||||||||||||||||||
|---|---|---|---|---|---|---|---|---|---|---|---|---|---|---|---|---|---|---|---|---|---|---|---|---|---|---|---|---|---|---|---|---|---|---|---|---|---|---|---|---|---|---|---|---|---|---|---|---|---|
|
| ||||||||||||||||||||||||||||||||||||||||||||||||
| Fleet Notes | |||||||||||||||||||||||||||||||||||||||||||||||||
| A stronger fleet that hit 1 extra node. | |||||||||||||||||||||||||||||||||||||||||||||||||
| LBAS Notes | |||||||||||||||||||||||||||||||||||||||||||||||||
| All LBAS should be sent on the boss. | |||||||||||||||||||||||||||||||||||||||||||||||||
Gimmick 4 - Debuff
Once LD has been reached, the following steps have to be performed to debuff the boss.
| M | R | S | X | LBAS | |
|---|---|---|---|---|---|
| Hard | A+ | A+ | A+ x2 | S? x2 | AS x2 |
| Medium | ? | ? | ? | ? | ? |
| Easy | ? | ? | ? | ? | ? |
| Casual | ? | ? | ? | ? | ? |
Refer to #Phase 1 - Boss's fleets for composition and routing.
Refer to #Gimmick 1 - Unlock's fleets for composition and routing.
Refer to #Gimmick 3 - Unlock's fleets for composition and routing.
| LBAS | AS |
|---|---|
| Hard | 660 |
| Medium | ? |
| Easy | 461 |
| Casual | 366 |
Once on LD, the CG will change to the following:
| Solitary Fjord Princess |
|---|
|


Trivia
- The Airbase is in the area of Bardufoss Airport. Bardafuss is Norway's oldest airport. Prior to WW2, it was expanded by the Norwegian Army Air Service and later was captured by the Germans. The Germans then expanded it, and it was used by the Luftwaffe. They also added a second runway but never used it. The RNoAF reclaimed the airport in 1945, and it was extended and modernized in the 1950's by NATO. Bardufoss is still an active airport that is used for both civilian and military purposes.